![]() You don't need to be an 'investor' to invest in Singletrack: 6 days left: 95% of target - Find out more
You don't need to be an 'investor' to invest in Singletrack: 6 days left: 95% of target - Find out more
Floor
The floor is pretty straightforward.
I fancied 25mm celotex (I haven't used celotex on the rest of the van because I don't like the dust, but on the floor it's all straight cuts that I can do very cleanly with a knife and by folding to break).
Unfortunately, 25mm timber is pretty hard to find, as it's usually planed down to 21mm. The cheapest option is to buy roof battens. usually either red or blue tanalised (but don't seem to be heavily pressure treated compared to tanalised 2x4s).
As I already know where the furniture is going from the layouts above, I judged where the battens should go. Mid-point of the walkways, just behind the front edge of the kitchen and side-bunk. Then split them into roughly 40mm centres) definitely not exact - much better to position them usefully.

I stuck all this down with Sikaflex EBT+
Then filled in the gaps with 25mm Celotex
Then foil taped over all the joints. For some reason I haven't got a pic of this, but you can see the rearmost batten taped over in this shot. It was all sealed over.
Beware - some foil tapes aren't actually foil, but silvered plastic.

We fancied a step behind the front seats. 1. To create more storage and 2. to give somewhere for your feet to go when the front seats are swivelled. To give enough room to get onboard from the side door, this had to taper.

Just made with pocket joints and 21mm planed timber. Height matches the height of the back edge of the grey plastic trim. The top will be scribed to go around the seat legs.
Then we started to lay the flooring. We decided on outdoor cladding ply in 12mm thickness after doing a test with some 9mm. Could have got away with 9mm, but decided the weight difference wasn't worth it. It's pretty heavy stuff though 🙁
This is screwed with countersunk screws into the wooden battens. Plan is to put some tough vinyl down over the top.


This pic shows where we've left a service channel behind the rear seats. This will take all the electrics and gas pipes from one side of the van to the other. I can't see how you'd do it well otherwise. We'll leave access to this as long as possible.
You can see some of the conduit sticking out where it's going to connect the main leisure battery location to the kitchen side of the van.

This shows the markings on the floor where the rear seats are going to go, but I'll do the seats in another post.
Awesome stuff keep it coming 👍👍
Enjoying your updates...keep em coming.
Cheers! I'll try!
Gas tank pt.1
Before finally attaching the floor above, we made sure we'd drilled as many of the holes through the floor as we could.
We're not going to bother with underfloor water tanks, but we are going to have LPG under there.
GasIt do some nice (if expensive) kits and I ummed and ahhhed for ages about diesel heaters vs gas, etc, etc.
Anyway - in the end we decided to go the Propex route and run that and the cooker from the same underslung LPG tank.
To keep the warranty you have to spray the tank with anti-chip paint which is pretty horrible stuff. It says sticky for ages (maybe even still). So we masked off the important bits and got spraying outside with a cardboard booth.


I think we gave it a few coats.
Once dried, we fitted the brackets and measured everything to work out where it might go.

Got drilling (with paint protection as usual)
As you can see, it's pretty roomy under the van

This kit comes with long standoffs to keep access to the nuts easy.

One change from normal.
Because we have the rear seats, we decided to keep them apart a bit one floor rib towards the sliding door.
Unfortunately this decision made it so that some of the pipes supplied with the kit weren't long enough 🙁
I'll have to fix that sometime, but for now we've got the tank where we want it and can continue with the floor.
If you haven't already sited your regulator, amkensure you can easily reach it. ours is a bit of a stretch and it's a bit of a pain when turning up for the tunnel and they insist on it being turned off for travel.
I spent ages trying to find a direct bolt on 'drivesafe' regulator to remove the 'weak link' of high pressure pigtail under the van and that also has a crash sensor shut off. After I fitted it they changed the regs so you are meant to fit a remote regulator with a pigtail...so I could have just bought any old one!
Thanks - no I haven't positioned anything yet.
Obviously , my notes above don't fully reflect the weeks and weeks of agonising over all these decisions - bonded vs caravan windows, celotex vs thermoliner vs wool vs pet bottle insulation, gas vs diesel heater, etc, etc, etc
The more you research, the more confused you get in some cases!
Amen to that! Spent 6 months thinking and planning and was still making decisions on the hoof sometimes, mostly good but some I would have revised with hindsight.
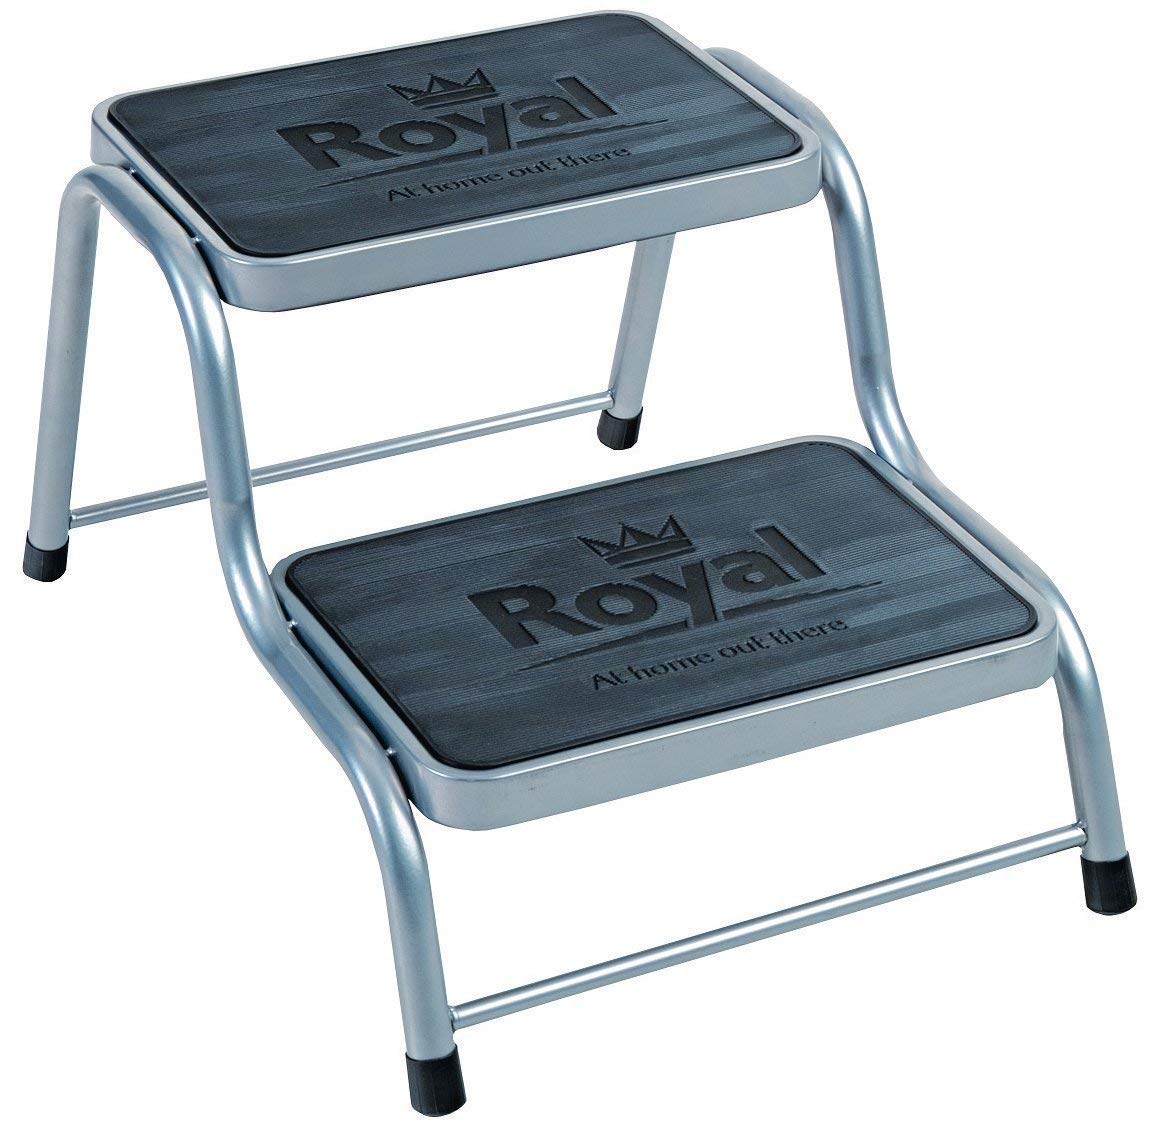
Does anyone want a step for their van? We've got one we no longer need.
It's like the one below, hardly used and free to a good home. Must collect from West Yorkshire (HX4)
I'm looking to do a similar conversion on an L2H2 Relay (without the garage) and am debating between diesel, probably Planar 2kW, or gas heating. I'd be interested to know what made you go for gas in the end? Is it because the gas heater is quieter? This is my main concern about choosing a diesel heater, as we prefer to stay on more tent orientated campsites than caravan sites. If we did go for diesel though, then as we'd only need gas for cooking we were thinking we could get away with a much smaller gas cylinder, so it probably wouldn't be worth the expense of fitting an underslung gas tank. Any thoughts on the subject appreciated!
I've had both. I have had several Ebers, granted they did not have the optional exhaust silencer fitted, but they were noisy, often come with a 1 hour max timer, and they use a glowplug whilst running (I think it stays on all the time) so uses a fair few amps as well as diesel.
The propex in comparison is fairly quiet without needing a silencer, peizo ignition so it only really uses power for the fan, and the control is designed to stay on 24/7 if required, it can cycle on and off at will to maintain the set temperature.
Underslung gas tank is expensive but the main reason I chose it is the space saving, mine is around 30 litres and it lasts ages, I probably squeeze a 10-15 litre top up into it twice a year.
Thanks Spooky. I hadn't thought about the electrical power requirements, but yes, if the Propex takes a lower current that would also be a benefit.
Ebers do use a fair bit of power to get started but not once running, the glow plug is only used for start up. They keep burning very low and ramp up as requested by the control. Diesel use is negligible tbh. Buying new the 1hr limit won’t be a problem and buying second hand you can replace the controller.
It sounds like a jet engine on startup but quietens right down, not as quiet as gas though.
Personally I chose to use a diesel heater and a spirit cooker to avoid having to fit gas.
Yes, noise was definitely a consideration, but it also came down to ease of install of tank under the floor, the fact I'd tried a diesel cooker and didn't think it would suit a family of 4. Once I'd made the gas cooker decision it was easier to pick gas heating too.
I made the decision when the Chinese diesel heaters were still a bit of an unknown (and around £200) compared to the current situation.
Also, if I was doing a 2-berth or 1-berth, I'd definitely consider the diesel cooker option - expensive, but much safer than gas and all other options end up expensive anyway.
I’ve got an Eber for heating and an underslung LPG tank running the hob, oven, water heater and bbq points.
I chose them as I wanted to keep the heating and the other stuff separate. Now, choosing again I might have ditched the Eber and run a Truma combo system, but at the time they were just released and very expensive, they also nicked a fair bit of space I couldn’t afford to give up.
My Eber is under a false floor so takes up no space in the van, and works very well when needed.
I’d always use an underslung LPG system as I’m very happy with it and once paid for it’s only the refill’s that are cheap and again, it takes up no valuable space inside the van.
I need to get a post written about insulation and then one about the seats.
I thought I would have loads of time over Christmas, but nope!
Awesome work! Surprised this almost passed me by, but I'm glad I spotted it.
And timely, too...
Need to sell my T5 LWB as I've out grown it. Too many compromises regarding storage, cooking, sleeping, parking up with the roof up and obviously the bikes.
Currently looking at Ducatos. Across the border in Italy they are about 5-6K cheaper than here in Germany. 21k€ would get me a new L3H2 in silver with cruise control, reversing camera and fancy radio. In Germany the same motor in white would be around 27k€.
Looking at what you'Re doing and thinking whether the GF and I need a L3, but then again, why not...? Bikes, fixed bed, decent cooking area (possibly a stove unit that is removable so we can cook outside), plus slouchy lounge seating. Shit and shower outside or at amenities.
I've got a Gasit tank fitted to my T5 purely to save space. Never got round to fitting a heater.
Maybe fitting one on the new van might make sense (cost of refills and space saving), but I want to be able to cook outside.
Anyways... enough of my rambling.
Top work!
Yep, L3 is a pretty easy-to-live-with size. If it's just the two of you, that's what I'd go for. Personally, having bikes inside is the only way to go.
List price for these vans is silly money, but there always seem to be pre-registered ones around the £15000+VAT mark here in the UK.
Updates?
Sorry - been super-busy.
Still need to catch this thread up with:
- Insulation
- Ply lining
- Rear seats
Insulation
(BTW, before doing this, make sure you know where wires are running and what the ply lining is fixing to - I'll cover that in the ply lining post)
Right - here goes.
There are lots of arguments about insulation. Not just the best way to do it, but some people will argue that your way of doing it will disintegrate your van in mere minutes 🙂
So I'm not going to give out advice. I'm just going to describe my reasoning.
-
-
I did it in 3 layers:
- 1. Thin foam against the van skin
- 2. Thick dacron/plastic loft insulation in the middle
- 3. Vapour barrier on the inside - under the ply
-
-
1. Thin foam against the van skin
I fancied something right up against the van skin, to stop condensation forming against the metal.
I wanted this thermoliner (you can buy it from a few places). But on my van it was going to cost about £300 I think.
https://magnummotorhomes.co.uk/shop/insulation/thermoliner-campervan-insulation-soundproofing/
So I chose this XPEMP alternative as it worked out at about £108.
https://www.ebay.co.uk/itm/112035190454
It's fine as a product, but the adhesive isn't as good, so after watching it unpeel, I faced up to the fact I had to buy some high-temp spray adhesive to fix it in place. It's annoying, because on some places it sticks really well, but unless you can hold it firmly in place for ages, it never really gets a grip, so everywhere there was a radius, it didn't really work. By all accounts, the genuine thermoliner is better, so I kind of regret it.
Anyway - once spray-adhesived, it's all good and strong. It took a couple of cans at £5 a can, so it didn't impact the costs too much - just time.
I also thought this would be useful in some areas where I didn't really want the thickness of the full 3 layers. I could double-up and it would still only 10mm thick.
This is what it looks like next to the window frames (you can see the blind attached to the frame here too.

-
This is the ceiling - this is after I'd thought through the ply lining attachment blocks and a bit of electrical routing.

-
-
2. Thick dacron/plastic loft insulation in the middle
After hearing horror stories about fibreglass and not really wanting to do lots of cutting of kingspan/celotex stuff due to asthma/dust, I decided to use a mixture of 35mm Dacron and B&Q Recycled PET bottle insulation.
I needed 2 rolls of each.
This was one of the most satisfying parts of the build as it really quetened it down, smooths everything out and gave a nice homely look 🙂
It's also pretty quick and is doable for one person.

-

Again, I used the high-temp spray adhesive. 4 cans for this job.

-

-
-
3. Vapour barrier on the inside - under the ply
This covers a lot of things up, so take some photos like this with tape measures in place and also draw on the surface any batons, blocks, hazzards, etc.

-
For this job, I chose to use the silver bubble insulation stuff. I don't think it adds much insulation, but it is easy to work with, seems pretty puncture-proof and gives a bit of padding between the ply and van studs, etc and the whole lot was available from toolstation for about £70.
https://www.toolstation.com/ybs-airtec-double-insulation/p65994
To make installation easier, I put double-sided carpet tape on the wider bits of van ribs. It also helped to have an extra pair of hands.

-

Foil tape over all the seams. Make sure it's genuine foil as there are some silvered plastic tapes masquerading!
-
I haven't really finished the over-the-cab area yet, but that can wait.
I also haven't done beyond stage 2 on the sliding door and rear doors. Still deciding on those.
Forgot to mention. I did the floor insulation after the walls, and the celotex was surprisingly clean to cut with a kife/snap method. It's pretty cheap too.
If I were to do it again, I'd consider doing the walls like this maybe.
Also - I haven't really tested the insulation so can't make any claims about its effectiveness, but to be honest when I was in 30-degrees last week of last August, it was pretty bloody scorching in the van. Who knows what it was like for others 🙂
Main problem seemed to be that there is such a large front area of glass. When we bought some thermal screens to put on the inside during the day when parked, it seemed make an absolutely massive difference.
Ply lining next!
Busy working on the step behind the front seats and I think if I were to do it again, I'd change style completely to something like this.
Higher, open backed (for just stuffing things under) and a continuous floor. Fixed top.

Ah well.
Mine's become a right time-suck
A lot of MPVs have lidded cubby holes in the in front of the middle row of seats. Could that be an option for storage in the step? Though probably means faffing with hinges etc.
What do you mean about doing the floor insulation after the walls? From what I can work out in the photos you've already done the floor some posts earlier?
Also Celotex being the rigid board insulation stuff?
@AnyExcuseToRide
"What do you mean about doing the floor insulation after the walls? "
I'd done the plastic insulation in the walls before I put the celotex in the floor and saw what it was like to work with. So I kind of wish I'd used celotex throughout. Especially as I found trade prices at Travis Perkins were so cheap for the stuff. Although maybe not. Just thought I'd mention it.
Even though you can see the floor in earlier posts, you can also see the insulation was done.
Post order doesn't really reflect much other than perhaps my recommended order to do things 🙂
The reason for waiting for doing the floor was because all sorts of decisions about the rear seats were being made and also gas/battery location, etc. So I cracked on with the walls in spare moments.
Yes - celotex is just a brand - Kingspan, etc. I think the generic name is PIR
@FB-ATB - yes, I've put hinged hatches in now, but we decided to insulate it and line it, so it's proving a bit of a complex project. I should have planned better, but with all things van-related it's very tricky to weigh up the pros and cons before you actually get stuck in!
Ply lining
After many ditherings it was finally time to commit to a cladding style.
I was determined to have a nice radius curve at the top corners, but I knew it was going to be tricky and my wife thinks I'm mad for not just getting the van ready quicker. Ah well.
Another decision was what to do with the window surrounds. Lots of options - you can clad to the window and then attach the blinds on the inside of the cladding which is pretty neat but sticks out into the room a bit. I decided to take the less-easy approach (never!) and make a frame that snugly fits around the blind, then clad up to it. Any gap will be covered with some ply edging later.
It was a bit of a faff - trying to keep it lightweight meant 6mm ply, but you can't screw that together in that, so I got these brackets and drilled holes in them that let the blind sandwich them with the window. Shortest screws ever!


Did the vapour barrier up to the frames and tucked and taped them

Then carefully measured the walls so we could poke these frames through the cladding.


We decided not to attached the cladding directly to any metal. Choosing instead to sikaflex batons and blocks all over the van at key points to allow woodscrews to attach the 6mm Birch Ply panels. (pics from before the vapour barrier).


This all went really well. There are some bits of van rib still showing. At some point I'll make a box to go over these.

Now - for the ceiling!
---------
I'll admit - this nearly broke me. My determination to get the curves meant a lot of work and it's mostly unnecessary
During this process we had some failures which wasted whole panels (they'll get use for bits and bobs instead).
The plan was to kerf-cut the ply, so that it fitted the curves of the van. Lots of track-saw cuts along the back, leaving just the single face ply on the visible side.
56 cuts per side per piece! Thank goodness for my track saw.

First try was to get a single sheet to go all the way from one wall to the other.
But manoeuvring it into position was just too hard. We snapped the delicate ply as we were trying to get it into position. Nearly gave up on this as our Summer holiday was looming.
Broken piece

After discussing with a couple of friends (who agree with my wife about the madness of this plan), we decided to do the van in two halves with a split line down the middle of the ceiling. Easier to manoeuvre, and less to sacrifice if it goes wrong. We also sponged warm water onto the ply just before fitting to help the fibres swell and become more flexible.
It worked!


Not shown was the fact we left the panels too long down the sides deliberately as it was impossible to measure. Then we had the most stressful track saw cut ever while it was on the wall to trim it to meet the lower panel!
5 panels in total (it's not a curve above the sliding door)

Oh poo - it went wrong on the last one and we decided to leave that one until another time as we needed a garage to be able to go on holiday.
What happened was the track saw stop must have slipped as I was doing the 56 cuts and it cut too deep on the last few - you could see light through it 🙂
We tried to fit it anyway and failed miserably. Kept it as a template for doing the replacement. (still not done btw but is the next thing on my list).
Garage next...
That's mental.
Top effort
Great. Love that you persisted with the curved panels.
Just a quick comment to say love this thread 👍
Keep it coming
@towpathman Thanks! Me too - although today I'm meant to be fitting the last panel and I'm feeling very apprehensive. Not least because of all the noise for my long-suffering neighbours as I cut those damn 56 slots!
Front seats
Somewhere in all of this, I swapped out the double bench seat for a single and fitted CTA swivels (seem sturdy and good, but raise the seats by 40mm which I find a little uncomfortable and another reason why I wish I'd made the step behind them higher).
Easiest job on the van so far! 2 bolts to take the seats out. 2 bolts back in. 16 bolts for the swivels.
Only slightly tricky part was that the seat belt didn't fit in the clip, so I used the angle-grinder to make it match the drivers one and then it fitted no problem.
Unlike Mike_D, my bench seat didn't have seatbelt pretensioners, so when I tried to connect my new one the light came on the dash, but I couldn't just fix it by adding a resistor like Mike did. So I just left it unconnected.
Price of seats has shot up over the last couple of years. When I first started looking, they were £250 new, but now £400+. Second hand ones go for silly money. I was lucky and after having a saved search on ebay for 6 months, I got one about 40 miles away for £100 on a 'Buy It Now'. It doesn't match, but I don't care. I can always buy some covers. Felt like I'd won the Lottery that day!
If I were doing it again, I'd either modify a driver's seat (a few examples have popped up since), or I'd get some seats from another vehicle and adjust them to fit. Galaxy seats seem popular and have built-in swivels. At the time, I hadn't really worked in metal or welded, so I was nervous, but since making the rear seats, I'm a bit more confident and have a mate who knows what he's doing.
Old

New


(don't know why the one sock)
Impressive build. In one of the window photos taken directly on, I wondered for a while why there was an oversized pair of grungy red y-fronts hanging outside....!
For me, swivels were a huge part of the design. I've always felt like they would really open up the interior and provide a more flexible seating space for us.
Even though they cost a lot more than I think they should, I'm really happy with them and when we went on holiday, we used them all the time. As our driver's side rear seat can be made into a sofa, sometimes we didn't need to have any other seating. We didn't have a table on our holiday, so that might change things.
Garage
The garage was pretty straightforward. The framing was a nice quick win for a change!
Obviously when we clad it, we took ages trying to get the fit accurate 🙂
Lots of that lightweight roofing slat timber (only thing I could find that was 25mm thick to match the celotex).

We put the verticals where we thought it would be good go have garage shelf supports.
Mostly we just pocket-holed into the ply and floor, but at the middle sides you can see two places we thought it would be good to put some stronger fixings, so we self-tapped (self-drilling actually) two big screws into metal here. Eventually it will be supported by lots of bed structures, so no need to overdo it.
We left a hatch at wheel-arch width so that we can extend the garage under the rear breadthwise bed. As well as bikes, we'll need storage for an inflatable canoe and other chunky items.

Filled with 25mm Celotex

Then began the labourious job of scribing, templating and adjusting the cladding to fit as well as we could. It's pretty good. Within 2mm all around. It's all 6mm Birch ply again.


Then we got some cheap twin-slot shelf thingies from Toolstation to place the shelf and did a bit of experimentation with bike placement.


Phew - I found a way to fit them all. Non-dropper seat posts are a pain! My garage is 600mm deep and it's plenty for 4 bikes and pedals and even a mudguard to stay on my Bird.
Yes, it's a real shame to block off all that lovely light and views from the rest of the van. No, I couldn't find another way to do it 🙁
All you 2-berthers will not have to do this and I envy you 🙂
We'll just have to park so that the sliding door faces all the good views.
-
Next (and it might be a while) is the rear seats...
BTW - I didn't try, but I reckon I can get 6 bikes in at a push. 5 is the actual goal, so I can take an MTB for each of us and my CX bike as well.
Love it! Keep up the good work old chap.
Top work.
👌
Thanks for the support! Good opportunity for some progress at the moment!
Loving your work. cant help but marvel at your work ethic. I'd have given up ages ago.
If you're ever looking for cheap swivel seats then Eurovan 2s (Cit C8, Pug 807, Fiat Ulysse) go for about £250 non running and anything that isn't base spec has them. If I ever scrap mine I'll bear that fact in mind.
On the seat, have you considered a car based seat, perhaps maybe something out of a 2 door coupe/convertible?
I have fitted some Z4 seats to the front of my van on swivel bases. They ended up being a bargain.
I picked them up for £80, cream leather with a few marks but tied them up and made a profit on selling the original transit seats (which were to be fair in mint condition). I didn't get on with the originals as they gave me back ache on anything over an hour. The new seats are way better.
@squirrelking - interesting! There are soooo many posts on facebook about different options. I guess they are only ever going to need a simple plate with 8 holes in to adapt - worst case!
@alanf - I have to say, I was a little nervous of adapting seats, but probably needn't have been. Also - I find the stardard seats really comfy. No problem with a 8 hour drive last summer.
Anyway - I was lucky with my £100 find, but anyone planning on doing the same will probably have to either fork out or get creative as you suggest!
Rear seats. Part 1
Let's see if I can remember all the steps!
If you remember, on the original plan we had 2 seats, against the side walls with a corridor down the middle.
Then there is a separate 'infill' piece which lives on one of the single beds.

When the seats pull forward, they make 2 benches and the infill can be used as a sofa back.

Or put in the middle to make a bed.

We had a few designs on the go, but eventually settled on one that was strong enough to take the seat belt points at the sides and use the c-pillar mounts for the top reel.

The split you can see on the seat back, is so that it can separate and the kitchen can be extended if required (haven't designed the kitchen yet).
This has (we discovered after making them) the added benefit of making a 2/3 length bench in front of the sliding door, allowing 2 people to sit and access in and out of the van simultaneously. Win! Also, the removed part of the back sits nicely behind as a seat back for one person. Double-win!
Those stubby legs out front slide forward and sit on top of the step.
We decided to bolt the frame to the van floor and lay wood around it. I think if I were to do it again, I'd be a bit more confident of putting the seat frame on top of the floor and bolting through. It would be been a lot more convenient and less of a cold bridge. Doesn't matter too much though I don't think.
So we did everything in CAD as best we could. Obviously it takes a bit of faffing to work out bed width, height for sitting, angle of back, seat/infill width proportions, whether you can get drawer slides strong enough, etc, etc. Even after we thought we sorted all this out there were still a few gotchas which had to be worked around - more later...
Then I took the plunge and ordered some metal!
This is my first metal work project since the days of education and I don't have many tools for it, so I ordered it all cut-to-length.
£160 for the steel (including stainless for the spreader plates)
£110 for a double mattress from ikea
£71 for the 120kg 700mm full extension drawer slides.
£54 for 1 sheet of 12mm birch ply.
£66 for the seat belts
£84 for the main fabric
£15 for velcro
£6.75 for zips
Plus lots of stainless bolts, door mechanisms, bits and bobs
Total came to £654 + powder coating
A friend has a MIG welder he uses on car bodies, so I decided to give it a crack!
The hardest part is holding things in place and avoiding warping. I should have bought some magnetic right-angles, but didn't.
Then you try and weld opposite sides, so that the warping goes one way and then hopefully back the other.
Makeshift setup. The angle-grinding to clean the weld points is very messy and noisy. Glad I was on a farm in the middle of nowhere!

My welding wasn't the best, but with all 4 sides of every box welded I felt confident of overall strength.
In retrospect, I think the extension cable we were using wasn't quite up to the job. When I went back to finish a couple of bits, we plugged it straight into the wall and it went a bit better.

After 3 mornings, I had one base done!

Another 2 mornings and the other one was done and we placed in van to get a feel

Another 2 mornings and they had some top frames and some extra bits to fit the door catches!

Took everything home to do all the drilling.
Took some effort. Not all drill locations made it easy to apply force. I bought some cutting oil to help things along. The 4mm angle really took some effort.
Fitted the drawer slides.
We decided to try and make 2 seating positions - one reclined, so I cut two holes in that stainless bit with the slope on it (only one shown in the photo).

Dry fitted in the van and marked out the floor positions so I could make cutouts.

Then tested so I could chop the front legs to the right height.

Part 2 coming soon...
Forgot to mention, in that photo up there...
You can see the welding trolley my eldest and I made to say thank you for lending the welder (and workshop space and advice).
Did it on my newly self-built CNC router, so was pretty pleased with it. It's still going strong (a year later), but needs modifying to take a larger gas bottle.
Alex
Really cracking on. I’m 3 months into mine (Boxer, but still L4H2). I like your design, I went for the bed across the back over the garage, really pleased with it TBf as the garage is massive (maybe a bit to massive), I’d probably take a bit off it if I do it again. I was after getting 4 bikes in and I can easily do that.
Your seat construction is very impressive, I cheated and when for the Ford Tourneo seas option. It’s a lot easier to do, but comes with its own restrictions on where you can fit it and how much room they take up raised the height with box section to meet the swivel front seats.
It’s a bit of a god send in the current lockdown. Gives me something to slip away and do. Although the first planned trip to Norway in July is now unlikely I guess and I have a few road blocks with parts (I’d be well stuffed without Amazon) and a bit of help with bits, but plenty to do.
I’d offer to race you to the finish, but I don’t think you every completely finish them.
Enjoy.
Yes, exactly - where would you draw the finish line!
We've had a holiday at least 🙂 This lockdown has definitely taken the pressure off - we were going to go away this second Easter week to Wales, but it's nice to be able to assume that it's not getting used so I can take it apart a bit to complete some of the jobs.
Is yours 4 berth? If so I'd be interested to see how you got the other 2 berths in - massive challenge!
Getting 2 extra beds in kept me awake at night for weeks, literally. I was always thinking something in the cab for my daughter, I’d seen a few designs in that area and something around their seats for the lad. She’s 12 and about 5’2, he’s 15, currently 5’10 and probably heading close to 6’.
In the end I realised that the van isnt going to be used too much for long (over a weekend) breaks (apart from this summer), so I’ve just gone for a cabbunk (goes on your swivel seats, if you've not seen them) for her (hoping she doesn’t get above 5’6) and I‘ve fitted their seat back far enough and stopped the kitchen, so I could get an airbed length ways in front of them. Not the elegant solution I had tried to envisage, but looks like it’s going to work surprisingly well.
Sounds like a good way to do it without all the hassle I've been through 🙂
I'm trying to see it as more of a hobby than just needing the end result. Some of it is fun at least and I'm really learning a lot.
My sons are already 6'2 and 5'7 (still growing), and I also want to be able to use it as a bike holiday van for myself and 2 friends, so I decided on full-length beds.
I'm not sure I trust my mates to look after it in the way I would though lol.
Without wanting to piss on your chips how confident are you that those welds would hold in an impact? It's all well and good having an anchor point for a seat belt but if the seat itself falls to bits it's useless. I'm no welder myself but I've seen professional welds rejected at the radiography stage.
On the other hand, probably better to bolt directly to the floor for the same reasons, if it was floating on wood and the floor shifted then the bolt has room to bend and flex.
It’s all well and good having an anchor point for a seat belt but if the seat itself falls to bits it’s useless.
Well, the only really important point is the 3 seat belt mount points. As I mentioned above (or I think I did), putting the seat belt points through the floor would have probably been a more conservative way to do it.
I've inspected the Wildax and Autosleeper seats in person and looked a pictures of loads more and decided that this meets or exceeds those in terms of design at least.
In terms of welds - yes, that is another story and I tested a couple of bits to make sure I feel they are strong enough. At the end of the day, you have to decide this for yourself and I'm comfortable with it. ymmv.
I’m trying to see it as more of a hobby than just needing the end result. Some of it is fun at least and I’m really learning a lot.
Same for me really, Ive wanted to build one for years, but Mrs hasn't fancies it. But the last year or so the children have started doing Tri’s and cyclocross (as well as all the other stuff) and every event you go to there are loads of campervans. One day we where sitting in another muddy field for 8 hours and she asked what I wanted for my 50th, I said campervan and she said “sounds like a good idea”, happy days.
I’m loving building it and like you learning new skills all the time. I’m “okay” at DIY, played with cars a lot in my youth and an electrical engineer by trade (we’ll I was about 30 years ago). But this is so much more. YouTube has been invaluable, but it’s a rabbit hole you disappear down for days on end.
Starting the kitchen units this week. Gone for a track saw to try and get my cuts straighter.
Are you going for DVLA re classification?
Are you going for DVLA re classification?
Probably wont bother as I don't want stickers and wasn't planning on an awning. I'm fine with the speed limits and my insurance is £320 anyway, so I don't think there's a lot to gain.
I was going to originally, before all the changes.
Gone for a track saw to try and get my cuts straighter.
Mine has been invaluable. As soon you get it, you wish you'd had it years ago. That and a good shop vac.
played with cars a lot in my youth
That's one thing completely missing from my experience and something that does terrify me slightly when I know how much work I've put into the innards. Thankfully I've got a couple of good mechanics that I trust locally.
Somebody asked what I would do if someone nicked it. I nearly cried imagining it 🙁
Just realised, I've completely missed out electrics. I'll try and gather photos together.
Rear seats. Part 2
Time to start building these metal bases into actual seats!
We were in a mad rush to go on holiday, so not as many photos as some bits.
We had all the seat sizes in the CAD, so I cut them all out of 12mm Birch ply.
They weighed a lot and would probably stop our mattresses breathing, so I cut millions of holes in them.
I made a paper template of the pattern (from CAD) and bradawled all the points in and cut them all with a Wickes holesaw.

The odd pattern on the left is because that's the seat back that separates into 2 sections to leave room to extend the kitchen.
We placed them roughly into the van to measure how long the seat belt clip straps needed to be and started planning what model of seat belt to go for.


One annoying discovery was that even though there are seat belt mounts in the c-pillar at the top, there isn't really a specific place for the reel at the bottom. So I had to decide whether to mount the reel at the top, or put some kind of spreader plate and custom mount at the bottom.
After umming and ahhing for a while we decided to buy:
Securon 254 top which has a top retractor and a floppy strap for the buckle (some have a more rigid wire, but the lengths just didn't seem to match and I wasn't sure if they would get out of the way of the bed as easily.

Meanwhile, my wife set to work on the upholstery. We got some fabric from a local fent shop (after much deliberation natch) and my eldest wrote a programme (he's a bit bonkers like that) to determine the least amount of fabric we needed and the fewest cuts! £84 - you could buy some nice wood for that!


The mattress is a brand new double from Ikea that we chopped up and wrapped in wadding:

Meanwhile 2: The seats came back from the powder coaters. We couldn't decide on colour, so when they said they had some cheap matt grey left over, I went for that. Total cost for soda blasting and coating was £80.
So I did a final fit of all the rails, catches, etc. I also made the supports for the infill section of the bed. This uses the same fixing holes as the drawer runner and has a bit that sticks out beyond the seat and is slightly higher than it. Very rounded corners so that we don't hurt ourselves on this. The seat belt clip strap neatly fits through this and flops over the side. Phew!

Our living room was temporarily unavailable!

Seat belt strapping (actually cut from the double seat from the van before we chucked it) is stapled to the back and base with just the right amount of gap to leave room for the mattress

And velcro is stapled to the bases and sewn onto the cushions


Et voila!


Infill used as a sofa back.

We 3D printed some inserts into the bottom of the legs with a captive nut so that we could screw some ebay feet into it to make it adjustable.
And quickly slapped some card into the middle to make some under-seat storage!
We also 3D printed a door knob to release the seat catch and some end caps for the box section.

This pic shows the way the two back panels slide together.

For our first trip we secured a wooden structure between the c-pillars to support the backs.
As a lucky accident, we realised that the top section of the passenger seat back slotted down between the sliding door and the seat to proved a seat back there too! (I'll try and get a pic of this sometime)
A photo or two of the the unforseen goodness (was quite useful on our first couple of trips):


We quickly framed up the rear transverse bunk, added slats and placed a mattress below that (in the final position but on the floor)
 "
"
(son #2 didn't want this photo posted)
Then we went on holiday! For a week on the Northumberland Coast
 "
"
 "
"
 "
"
 "
"
It was ace!
Things we learnt:
- Transverse bed is only just long enough for me to be comfortable.I preferred to be diagonal. Oops - I'll have to get used to that.
- Van drives great, although noisy with windows down in 30-degree heat.
- Also in 30-degree heat the Air Con was a bit pants - just not enough for an open bulkhead maybe. Not sure. It was fine when I bought the van with the bulkhead in.
- Also in 30-degree heat and sun, the front windows are the main problem, with silver screens in place whenever stationary, it was pretty good. Especially with the rooflights open. Driving was a bit hot though.
- Rear seats were really comfy for the boys - phew!
- Silver screens were fine for the front windows at night - no need for £500 reimo blinds!
- Managed to level the van with rocks/planks, etc but some levelling ramps might be nice.
- Mattresses were comfy (it's what the boys sleep on at home anyway).
- Plenty of room for us to sit including multiple options - need a table though - trays on laps was a bit of a pain.
- Atmos was really nice - cosy.
- Height difference between the front and rear seats was liveable with.
- Shoe storage and coat storage in wet weather was something we were going to have to carefully consider.
- Parking the L4 can be a bit of a pain when in town centres - Supermarkets win, as does parking a bit out of town and having a walk. Not a major deal, but does need thinking about.
- Being limited to 50 on A-roads and 60 on dial carriageways didn't really bother me. I was driving in a chilled manor anyway. So perhaps I'm not bothered about getting it classed as a motor caravan.
We didn't have much interior storage, so most things were in the boot, which was a pain, but hopefully overcome on the completed van.
I know I'm talking to myself, but I promise I'll get around to the electrics - I've just drawn out the circuit diagram!
Excellent work!
👍
Electrics
First job is to plan everything.
We decided on a service channel to go between the c-pillars (just behind so that the entry points were in the kitchen and under the side bunk). See previous posts for that in the floor.
Most electrical equipment is going under the driver's side rear seat.
Kit:
-Garage lights and a 12v socket.
-Kitchen lights above worktop
-Ceiling lights on 2 circuits (living room and bed area).
-Light and turnoffable USB socket next to each bed head.
Might also need ignition for cooker and feed for water pump, but as these are accessible from the service channel, I didn't need to route anything behind ply lining.
So, during insulating, I routed conduit through all the areas I could reach through pillars and sills.

Here you can see how I routed the conduit to the light points

Then threaded the wires though. There are a couple of pinch points on the passenger side c-pillar, but just about possible to cram it all in.
I used 2.5mmsq for everything low ampage (lights, USB, 12v, etc)
Here are the wires going to the top of the double bed and the lockers above
And this shows where the hub is going to go at the back of the rear seat.
The solar wires come down from the roof and out here too.
Then after our first holiday I tackled wiring it all up.
Even though I don't have a smart alternator (and so in theory could just do a standard split charge), I decided on a Ring RSCDC30 to combine Battery to Battery charging and solar controller. It can cope with my solar panel's large voltage and people seem to report that it looks after batteries pretty well.
I'm not bothering with 240v hookup as it's not our intention to stay on large campsites, so this is the wiring diagram

First job was to buy a leisure battery, fuse box and cable to wire up
I decided on a 180Ah flooded battery from Varta as they have an excellent reputation for not emitting gas and for reliability and also because it fills the allocated area really well (2 normal batteries would have to go in a different section of seat)

We strapped it down using M8 threaded rod and angle iron through the floor with large washer/spreader plates under.
I wish we'd used M6, because the M8 was a bit rigid and one of the holes was pretty near a chassis rail, so it needed angling slightly. They are actually putting a bit of force on the battery, so we needed to protect the corners with plastic angle.
Since this photo, I've also put battens screwed to the floor all around the bottom edge. "It's going nowhere" lol.

Then we started routing the cables...
There's a channel across the width of the van under the front seats, but to get to it you have to come out from the battery bay into the footwell. So the route goes:
Battery box > 40A inline fuse > Passenger footwell > through to driver footwell (via the fuel tank hatch which offers a useful mid-point to pull through from) > Along the drivers b-pillar > into my step > Through the wall opposite the sliding door > out into battery area near c-pillar.
It actually only took an hour and the 16mmsq cable is surprisingly flexy and easy to route.
According to the specs of the Ring unit, I only needed 10mmsq, but I fancied more just in case I used a higher amp charger in future.
From battery bay, along the footwell and into the widthways channel:

Showing my method of pulling through in the centre hatch for fuel tank access:

Looking towards the rear showing the routing through the b-pillar:

Then I made a (probably temporary) board to mount all the electrics on:

And spent a peaceful afternoon on my own connecting everything up.
ALl fuses are out at this point BTW.


You can just see the earth point I created behind the battery on that first photo - It's an M6 nut and blot through a wire brushed part of the chassis. Then all the copper tube terminals are threaded on and a wing nut tightens it all down.
And tidied:

I didn't really like the way the cables entered the Ring unit unsupported, so I made a wooden board to put against it and zip-tied everything tightly to it.
From left-to-right it's
- Temp sensor to leisure batt
-- Solar
--- Starter batt
---- Leisure batt
Then I threw in a few switches and attached some lights so I could test.
Then placed all fuses in to make it all live.


Woohoo!
I found this great way to protect the battery terminals from accidental shorting.
There's this amazing plastic stuff (called Polymorph) that comes in tiny balls, that when you put it in near-boiling water, it becomes mouldable and stays mouldable for a few minutes even after cooling.
So I made some custom covers that clip over the terminals for a couple of quid's worth of the stuff!
Still transparent and mouldable:

Set:

More electrics to come...
BTW - the polymorph stuff was the higher temperature version - about 90-degrees
🙂
So good! So inspiring! Commenting so I can find again as we may be about to do something similar although not so ambitious...
julioflo - good to know it's inspiring! When I saw Mike D's thread it was the start of my plans too!
There's also a favourite button at the top of the page. Then it goes into your favourites page that you can access later. I use it all the time.
More electric thoughts:
When I was buying the Ring B2B/Solar charger was fairly unique.
Now there are a few alternatives, just be careful that the voltage range on them can cope with your preferred solar panel.
These cheap domestic panels (like mine) usually have higher voltages than the vehicle-specific panels so you need to make sure that your controller can cope. The Ring can do up to 50V, but some of the competitors only do 25V for example.
I would have bought the Ctek unit, but it could only do 23V without another expensive add-on.
(although the add-on also makes for faster charging from alternator).
@alexsimon Great thread! and a small favour to ask....
I have those ceiling lights for my LWB T6. I have it insulated, carpeted and electrics are ready to be connected once my kitchen units arrive etc and can be fixed permanently. Here is a mock up to test and before dismantling for later fitting:
[img]  [/img]
Question I have is do you have a wiring diagram for the ceiling lights?????
No worries.
Just put them in parallel.
That little 12v socket set you've got on the far right of your photo shows the wiring perfectly (although you don't need the negative if the switch doesn't have an led). I can't stand leds everywhere so I bought ones without).
Everywhere you want a switch, put a new circuit. Calculate the wire thickness based on total number of lights in that one circuit.
If the length of wire from fusebox to light is absolutely massive, you could consider putting an earth point near the light instead of coming back to the fuse box - that reduces the voltage drop and therefore the gauge of the wire.
If the parallel thing and the switches is still confusing you, let me know and I'll draw a diagram.
Whether you go with separate wires from the switch to each light, or daisy chain them from each other (in parallel) doesn't matter. I've done the former for now, but it's all temporary until I get top cupboards in.
A diagram would be easier, but I'm not at my main computer at the moment!
Thanks @alexsimon appreciate that. Share your dislike of LED's find them irritating during the night.
I'll link to the switches I bought tomorrow
I bought some of these:
https://www.12voltplanet.co.uk/onoff-round-mini-rocker-switch-12v.html
(which need the 4.8mm female blade terminals if you're crimping - that might be the red-size insulated ones, but I haven't tried)
And some of these
https://www.ebay.co.uk/itm/263456312957
(which take the blue-size insulated female blade terminals)
I really like the toggle-style ones, but there are a few places where they'd get in the way.
More electrics
Finally - some finishing touches!
Finally - a chance to use my cnc router!
Decided to make my own 12v panels.
After a while of deliberating (seems to be common with the van!), I decided on just using standard 12v sockets everywhere, then I can use USB sockets within those, and hopefully keep up-to-date with USB-C, etc and higher charging speeds.
I also decided not to mount permanent reading lights anyway - again using plug-in USB things. So far (16 nights in the van) I'm happy with my decision.
I fancied easy-access to the back of the sockets, so I designed my own socket panels. Everything is switched to prevent any unwanted battery drain.


The intended use is reading lights when in bed, mobile devices for the rear seat passenger and then an extra one for laptop charging or other electrical devices (like a vacuum, etc)
As these are next to the seats (at about hip level) and next to the head of the bed, I decided to keep everything as flush as possible, so the nice toggle switches were replaced with those plastic round things that I don't really like, but look ok with a small rebate.
With these, I'm limited to 16A though, so may have to be careful with what I plug into it.

Currently, I just undersized the hole I drilled in the back board and screwed the M4 bolts straight in - seems sturdy enough, but I can always glue a nut to the rear if needed.

There are a a couple of other places I'll be having something similar - end of kitchen for rear bunk, and end of overhead locker for side bunk use.
Very nice surrounds, I like that & I would love a CNC router, I assume it's your work?
We're just starting a L3H2 Relay build, so a bit shorter than you. I'll have another read through of your thread looking for tips 🙂
Also I think I'm going to do the same as you and fit sockets for plug in adapters, the chinese ones I used before were always OK but seemed a bit dubious quality.
It's a hobby-level CNC that I built. It uses 3D printed parts (I bought the 3D printer with it in mind).
It's great, but the 500x700mm work area means I can't use it much in the van.
So far I've used it for those channels you can see in the step-locker in the photo above,
I've used it to create a cubby-hole next to the rear bunk (I'll cover that later).
And I'm thinking I might use it for the overhead lockers.

Wow that’s awesome. 500 x 700 would definitely be handy for a few bits.
I need a new router, the chuck has gone on mine. What one is that and how do you rate it? (Not the whole rig, just the router).
The router is probably not good enough for general routing (although you can buy a plunge base for it). It's a Katsu (only £40).
But I've just bought a new proper router and as I wanted to mount it in a table, by far and away the best option seemed to be the Triton MOF001 for my needs. Only used it a couple of times, but seems great. The other one I was considering was the Rutlands's own brand one.