![]() You don't need to be an 'investor' to invest in Singletrack: 6 days left: 95% of target - Find out more
You don't need to be an 'investor' to invest in Singletrack: 6 days left: 95% of target - Find out more
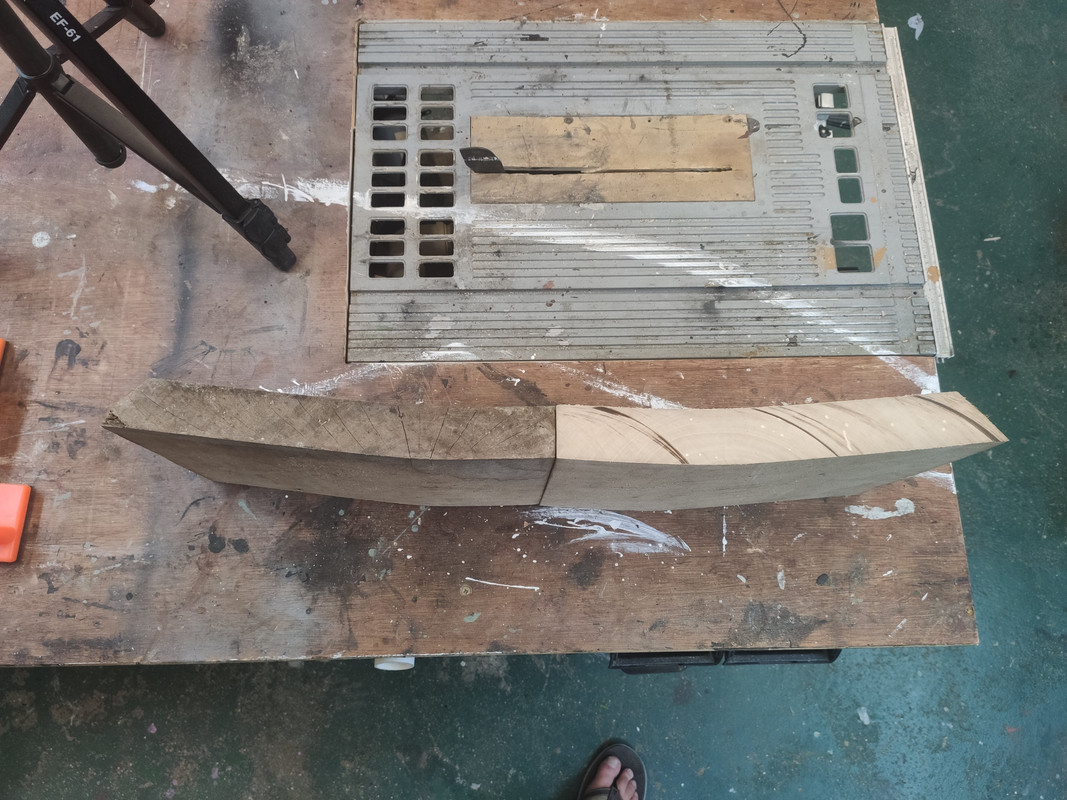
I want to make a seat out of these two warped pieces of wood. The idea is that the warp will form a slight bowl to sit in while the edges are raised.
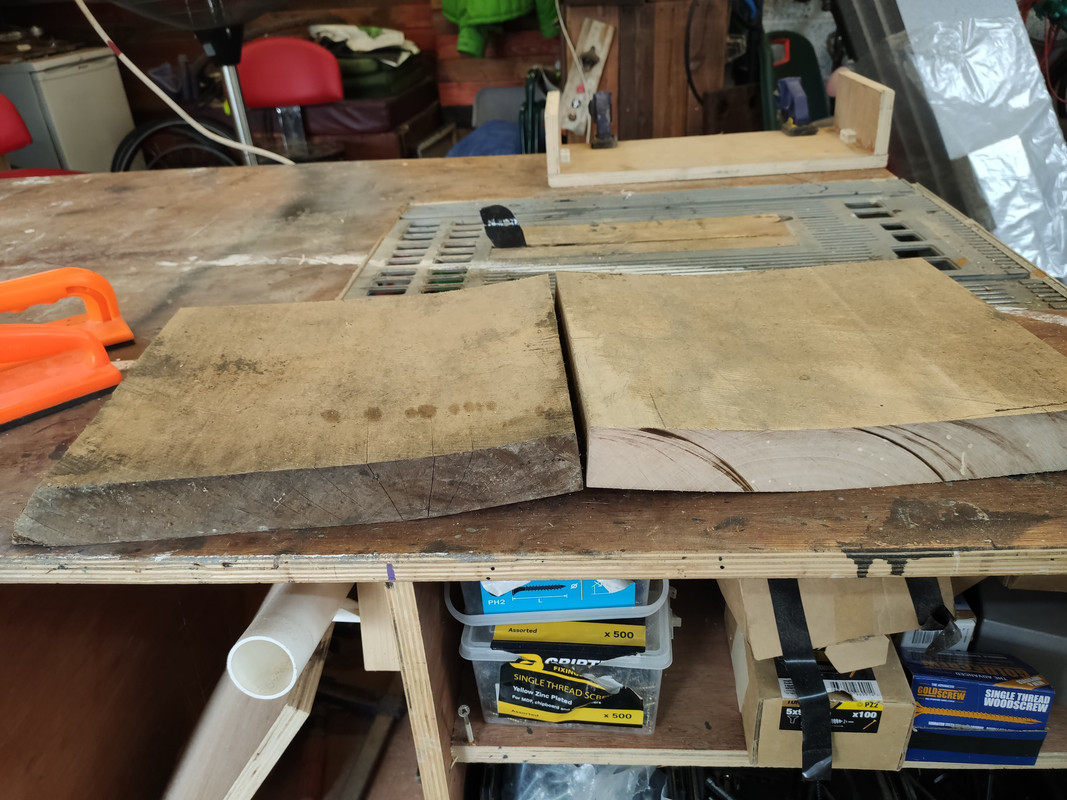
My first thought was to drill some holes and stick some dowels between the two and then glue it all together. I am concerned that it won't hold if someone puts their hands on each raised edge to lift themselves on or off the seat.
Any suggestions - metal rods instead of wooden dowels perhaps?
Also, how the hell do I clamp two warped pieces of wood together when their outside edges are not square, parallel or even vaguely smooth?
For the clamping part, I would put several pocket hole screws on the convex underside, and a couple of sash clamps over the concave top. Screw in most of the way, then tighten the clamps a bit, then the screws again, then the clamps etc. till both are nice and tight and the surfaces flat together.
For the strong join, that's tricky; because you don't have a square edge to work off, any kind of biscuit/dowel/metal rod will be a bugger to line up perfectly 🙁
[i]be a bugger to line up perfectly [/i]
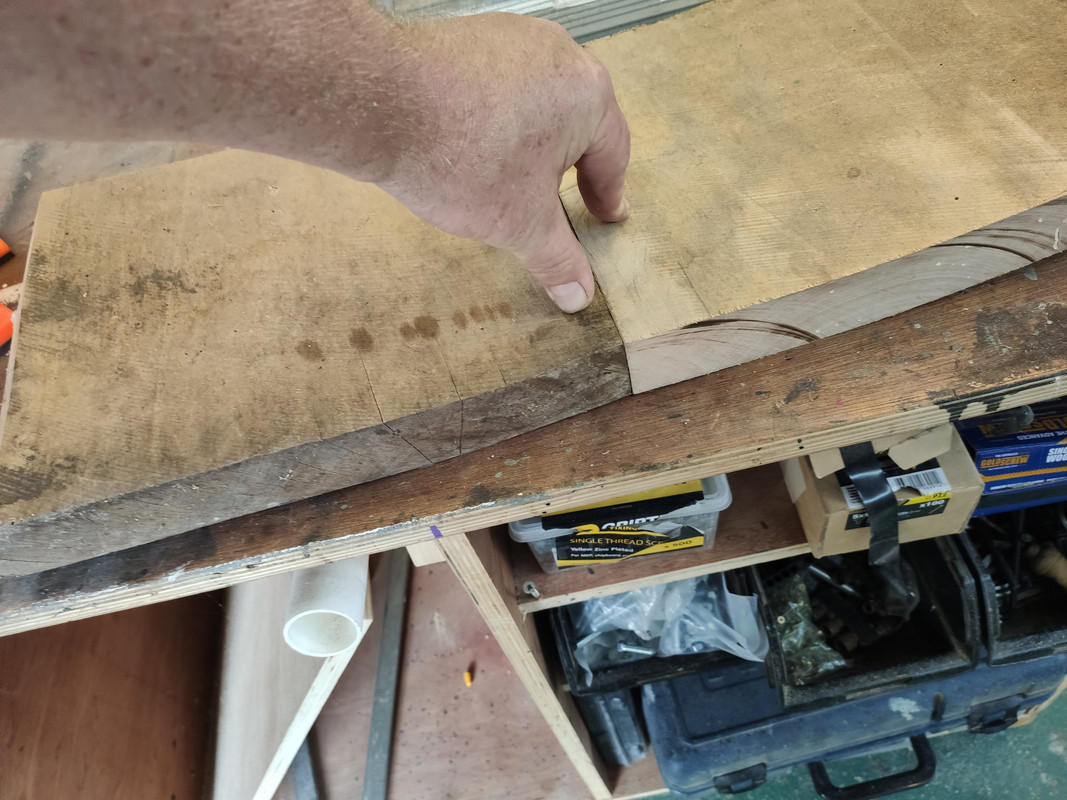
That was my worry. My plan is to use the router to flatten (joint?) the two edges that will be touching.
I have a pocket screw jig somewhere, I will see if I can dig it out.
Thanks
I think I've seen a tablesaw in that garage on some video?
Plane it both sides flatfish...
Glue it to make a joint at correct angles
Run that joint through the table saw to get 2 nice edges
Biscuit / Glue / Clamp
I would skim the edges on your table saw or plane them if you're any good with a plane.
Dowels should be ok but can be quite hard to align. Biscuits ok too.
You need to get a good squish onto tight faces for the glue to do it's job.
Don't know what equipment you have, but if you didn't want to pocket hole it, you would need several sash cramps to get a good pull. There are ways of making 'ghetto' sash cramps but you have less control, especially with wonky boards.
It's all about getting the pressure centrally along the joint. Imagine taking a right angle from the centre of the thickness of the board outwards. That's where you want to be putting the force. Obviously you can't always do that so sometimes it's a case of making custom clamping blocks, clamping them on or even temporary gluing them on where you need them.
Yeah, I should just pocket hole and clamp it... 😅
No plane unfortunately, or rather a 20 year old very short plane with (now) a serrated blade.
I might get away with dowel alignment as I just need to measure down from the top surface. I plane to trim the edges of the seat so can lose any lateral misalignment there.
I have some sash clamps that might fit but want to preserve some of the living edge where I haven't had to trim to for lateral mis-alignment
Here is what I need to clamp
Pinch dogs would probably pretty effective in this situation.
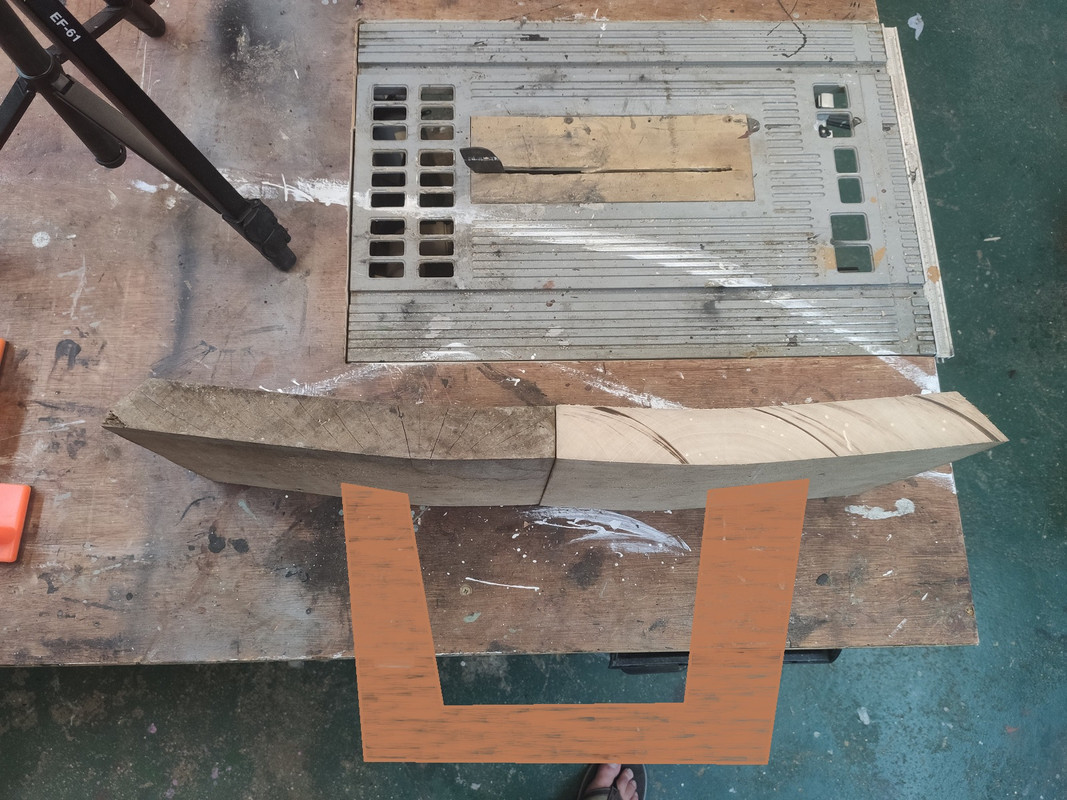
The frame underneath should provide the support to stop it snapping.
I like the way there is a slight indent for each buttock.
Tiger - There is the table saw but I don't know what you mean by this : [i]Plane it both sides flatfish…[/i]
The top (i.e. the bit you sit on) will be in tension, so this ideally needs to have something to counter this. Maybe one of those bowtie joints that are so popular. (Don't like them personally but this maybe a good application).
I meant plane the two faces to get a joint. Just good enough to glue. Any small imperfections won’t matter as long as they are less than the kerf.
Wait 24 hours and the run the rough joint though the saw.
The kerf will take out any difference and you can then get a good joint.
Remember you don’t need loads of clamping pressure.
Timely thread and a
<thread hijack>
I've got a length of floorboard somewhere between a foot and half a metre in length, very similar to one of WCA's boards, which has split longitudinally (along the grain). It's not completely two separate pieces but is hanging together with fibres.
I came up with the great idea, whilst lying in bed thinking about it, of gluing it and then driving screws in from one edge for strength. So I've now glued it back together with judicious clampage in a Workmate but there's no way the screw idea is going to fly. Is there anything else I can use to add structural integrity?
</thread hijack>
OP, can you not cut a vertical board to sit under the seat base to provide support? Then that's the load-bearing bit rather than the boards.
Tiger - I understand and make sense. Clean and joint the join and then use the screws as required.
Watch the "Ar you Bored Enough" video to see how it works
I’ve got a length of floorboard somewhere between a foot and half a metre in length,
Liking the use of imperial and metric 😅
there’s no way the screw idea is going to fly
Why so? You not got enough meat to screw into?
Is there anything else I can use to add structural integrity?
You COULD fill any voids with epoxy resin such as Araldite.
WCA - I had to do something similar and ended up using pocket screws to hold it in place and then used 1mm thick steel strip with holes every 50mm that I then glued on using epoxy and screwed into while glue was wet using a slightly oversize screw. I kept the strip under tension while doing this by placing the piece over an mdf former. Not the prettiest but it was hidden and has held up for a few years without noticeable flex or damage.
I can't repember what the strip was but it was some kind of fixing strip from a builders merchant.
Edit - something like this. Seems to be lots of options.
There seems to be alot of assumptions that structural integrity os required.
It won't be the glue that fails it will be the wood. Edge joining is really strong look at all the shelves in ikea they aren't all dowelled/biscuited together. So aslong as the wood is strong enough you will probably be fine
As cougar says the structure of the chair is whats makes it rigid. Although they are meaty boards.
I'll re echo pinch dogs WCA you can rustle some up with you angle grinder.
You could use a router to cut a 6mm groove in the centre of both edges being joined and cut a loose tongue, ideally from hardwood but 1/4” ply would do. This would form a tongue and groove joint along the whole edge which would add strength. Leave the groove short at both ends so the joint is hidden.
I have had another look at my detailed design (see are you bored enough) and realised that I have already designed a long term solution to the load bearing. I will have the loopy hook of wood stuck underneath which will provide the support so all I need to do now is what Tiger said about temporary glueing and then cutting through that to give clean edges for the final glue. Pocket screws to hold that. The initial clamping can be with some home made pinch dogs as it doesn't need to be perfect.
Thanks All
To get the pressure through the joint while glueing, clamp the edges just enough to stop the piece spreading, have the dome facing upwards and then place weights on it. The more weight, the stronger the clamping force.
BigJohn - I was out all day so just went down to the garage to do what you suggested but it is impossible to get the two edges on the underside of the dome to line up perfectly at the moment as the wood is different thicknesses and the glue lets stuff slide a bit and the edges that rest against the clamp are not smooth or parallel.
Ended up resting it on its side and used cloth tape to hold it together. This is just the first fit join which I will be sawing through to get the final edges smooth and parallel for final fixing so it should be oky.
If you get a nice joint as pointed out above the glue will be strong enough. On the long grain it will be stronger than the wood!
Screws might help with holding while the glue dries if you can’t clamp but once the glue is set providing the joint is good the screws are pointless.
Agree about the screws. I will probably use them to get a tight fit while the glue dries and ensure everything stays aligned and then remove them.
My next challenge, if you want to start thinking about it, is to make the loopy down bit
I was thinking that I would router out a couple of holes part way through the seat base that it slotted into and then glue it again.
The joint needs to take the strain as people lean forwards, backwards and side to side. SO basically you have 50cm of wood hanging down from the seat with 18 stone fat man wobbling it from side to side. I am sure a push fit joint and some Evostick wood glue will be fine but if you have any different thoughts....
Tenons all the way through the seat and wedge them. Like a milking stool.
If it was me i think johns idea is a goer but if clamps won't work.
I would super glue or hot glue a few dots to join it temporarily.
Once set place it upside down. Screw battons right up against the edges touching the bench. Then wack it with a hammer to seperate. Clean the glue off and glue properly and drop the pieces together between the battons and then add the weights.