![]() You don't need to be an 'investor' to invest in Singletrack: 6 days left: 95% of target - Find out more
You don't need to be an 'investor' to invest in Singletrack: 6 days left: 95% of target - Find out more
OK, so we've bought this house. It's got a wood burning fire in the front room which is great but the flue looks a bit ugly. We're not keen on it.
So I wondered what other people do with the fire? Build bricks around it, build a chimney around it? Decorate it with tinsel? What? Any suggestions appreciated.
This is what it looks like now although the current owners have removed the 60's chairs and tiled behind it.
[img] 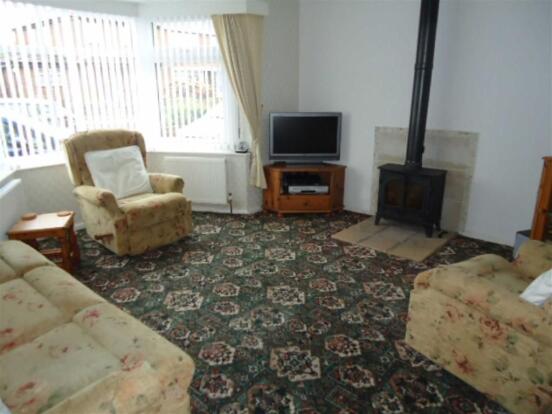 [/img]
can the flue go through the wall outside then buid a half around it?
Leave it, and decorate/furnish with it.
Here's ours:
[IMG] 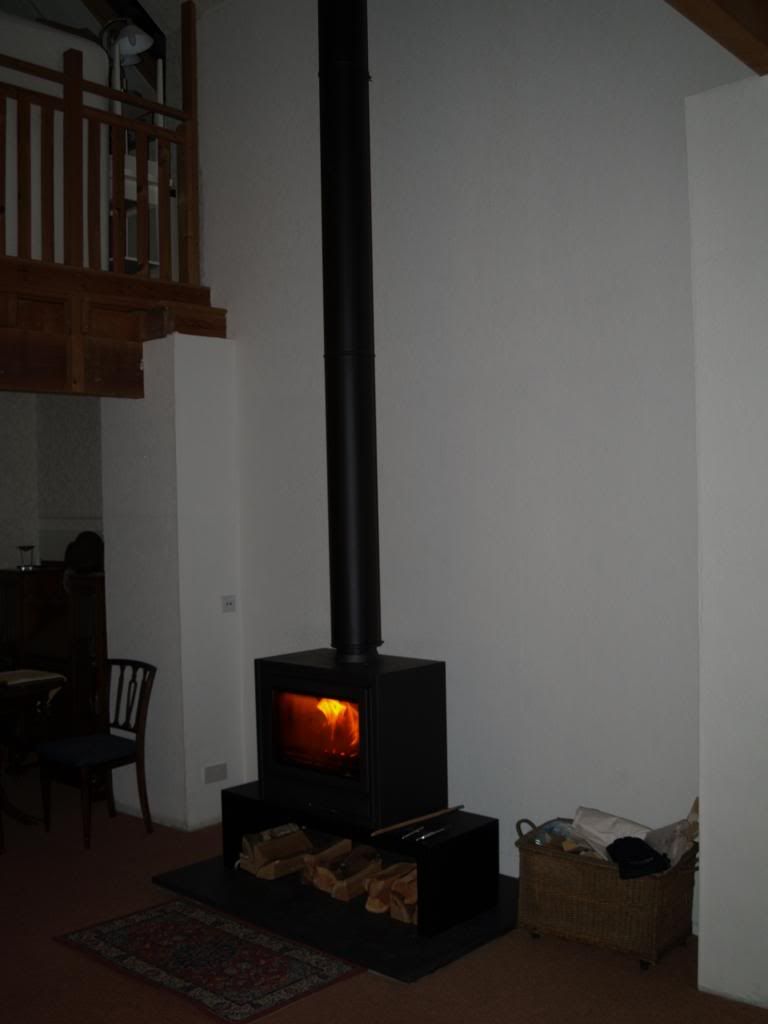 [/IMG]
How does the flue go through the ceiling/roof etc, is it a bungalow?
Also with ours I'd rather have the heat in the house, than warm the outside.
It's a normal house. The flue goes through the ceiling which has this insulating shield just showing. From there I believe it enters the same space the chimney occupied and pops out of the roof as a flue.
I like the idea of lifting it up a little like yours though, that looks much better.
We built a fake chimney round ours, then had it tiled with split face mosaic slate tiles.
Fur balls seem to like it. Taken just now....
[img]  [/img]
lots of heat comes from the flue so I would live with it or do the pretend chimney if you must
Yep sticking flue outside would loose a fair bit of heat for you.
There is something funny about that stove though samuri . Looks a bit aukward, lost or out of place - bit of an add on.
Shame really, it the old fire place was there behind it id come out the back of the stove and line the chinney and put it up the old chimney and a mantle over it
First thin I would do would be to get the installation checked. Looks odd to me, like someone just stood it there and took a pipe into a ceiling?
I really like organics fire. That's exactly what we want.
Do you think you lose much heat or does the whole thing get nice and warm?
Mine.
[IMG] 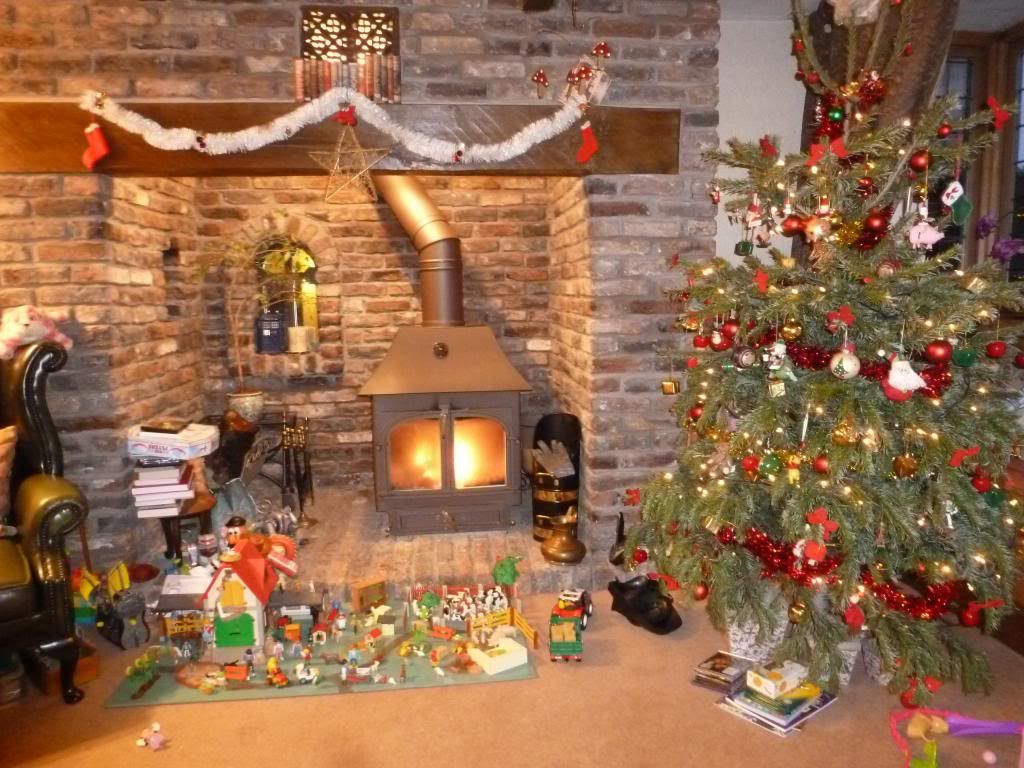 [/IMG]
Geting a bit bored of the Christmas tree now TBH.
Can I suggest the first thing you burn in it is the carpet, then sand and varnish the floor.
Get that carpet up and a couple of nice book cases either side and it'll be reet. I'm in a similar sort of property and we're doing it the other way round (we have the book cases)
Id check that hearth as well doesnt look like it would meet regs im that photo and as bear says the roof looks dodgy
Id be getting it looked at before you go smoking yer self or yer neighbours out
Dont think we loose any heat, but I wouldnt know any different, the flue is still inside the house ubtil about celing height where it offsets 45 degrees and goes out through the wall. Any heat from the flue behind the fake chimney will probably go up through the floor into our bedroom.
Yeah, there will be book cases going in either side.
Not sure about a wooden floor, I quite like carpet in my living room (but obviously not that one). The couple who own the house are very methodical and precise people, I'm confident they'll have made sure it met regulations. They knew the exact measurements that the tiling on the floor had to be and as I say, they've tiled behind it now as well.
The roof isn't shown but where the pipe goes through the ceiling there's this mesh shield which the guy tells us runs all the way to the roof of the house. They reckon you can't even feel the warmth of the pipe in the bedroom upstairs.
There's a big, massive stone outhouse in the back garden which is going to be my bike/brewing/man shed. We were looking for a house with a garage for my bikes but this one has a garage AND a big shed. The shed is packed to the roof with wood at the moment, not sure where we'll put all that. Some can go in the garage.
Fake chimney breast in fireline plasterboard/metal studding here. Twinwall flue
[img][url= http://farm9.staticflickr.com/8190/8445872900_3ca643ee8e.jp g" target="_blank">
[url= http://www.flickr.com/photos/60407271@N04/8445872900/ ]Untitled[/url] by [url= http://www.flickr.com/people/60407271@N04/ ]LOVATSTOVES[/url], on Flickr[/img]
If you do put some kinda false chimney breast in, you need to follow the fireproof rules.
Okey dokey. I recently did this for a customer....
From this:
[img] 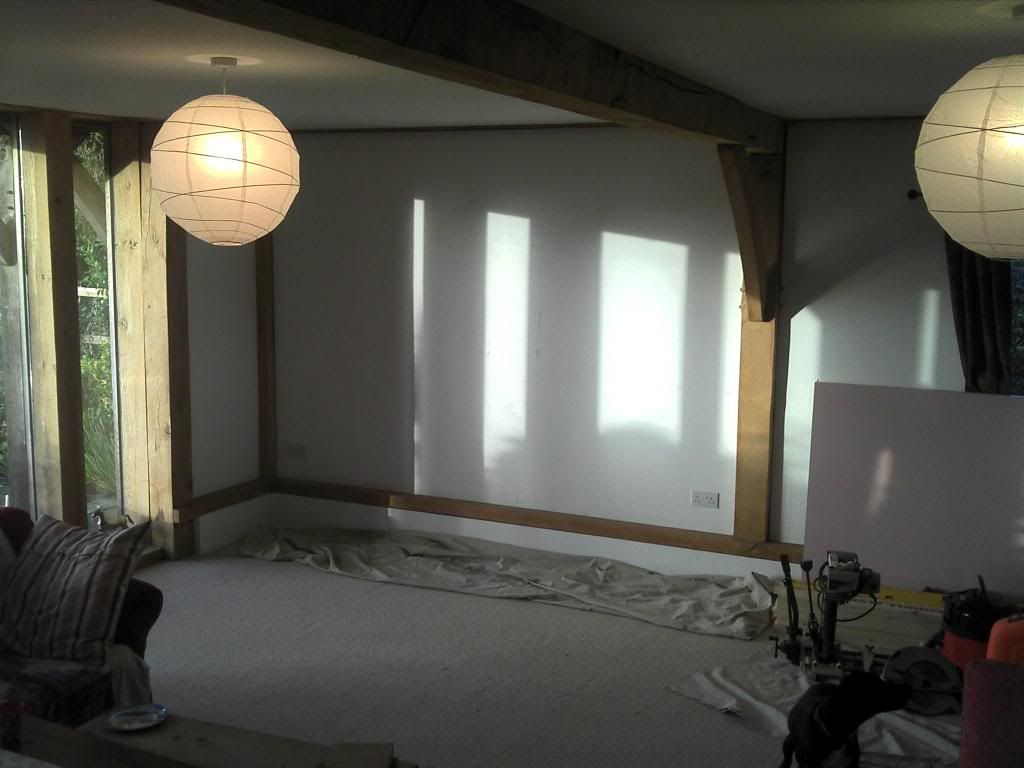 [/img]
To this:
[img] 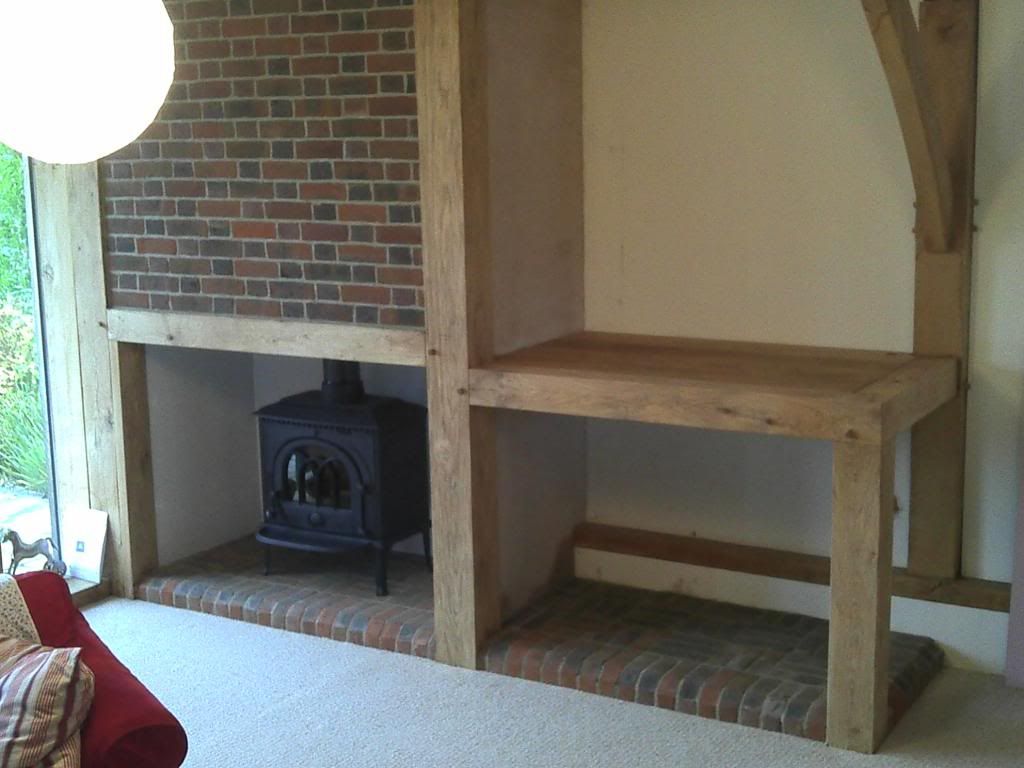 [/img]
I like exposed flues.
This is the current one,
[img]  [/img]
And this summer I shall install one in the driftway to help keep the office warm. But because it needs to flue straight up it will be "in-the-room" a bit more, so Im thinking a cylindrical stove with a centre flue straight up.
slackalice, I presume the face above the fire is not real brick?
Real brick of course 🙂 As is the hearth and base for their log store. The rest is 7" x 7" steady oak, mortice and tenoned.
It was fun to do!
blimey, that must be a well put together frame. 😉
It is. Thank you. 😉
Crikey, a little tenon holds up all that brickwork!? You have gotta love wood. Impressive - and very nice.
slackalice - good workmanship, but it looks... 🙄
[img]  [/img]
real chimney breast.
stove was there when i moved in , just redid the hearth (which is on a floating reinforced concrete floor) and put up the beam.
Nice. I like that too.
All these stoves look very close to the wall at the back, are there any regulations about how close you can go to the wall?
30mm spacing for mine ISTR
(edit) It's in the stove manual, could vary with makes?
The rest is 7" x 7" steady oak, mortice and tenoned.
it wiould be interesting to see what it looks like after a couple of winters. My money is on the oak and joints opening up like a good 'un in the, fairly extreme, heat - this is based on the amount of movement there has been in the 3 year old oak framed extension on the house my sister has just bought.
In places the oak [big pieces more than 14" thick} has split open so much you can put your fingers inside. I used to like the idea of an oak framed building but now I'm not so sure.
b r - Member
slackalice - good workmanship, but it looks...
Completely agree, looks awful! Perhaps if the stove were more centred on the wall, instead of up against the window?
The workmanship looks good, but the design/look is presumably down to the customers wishes? As long as they are happy...!
It's in the stove manual, could vary with makes?
Clearview also state a clearance of about 30mm I think. One thing to remember is that the more exposed the stove is the more heat will be released into the room rather than being soaked up by the surrounding structure.
This may not sound great (and generally I'm not sure it is) but one of our stoves is an inset and a fair bit of heat goes into the substantial brick chimney breast. It therefore takes longer to heat the room compared to a similar sized stove that is exposed - on the plus side the chimney breast acts as a storage heater and radiates heat into the room for about 2 days after stove has gone out.
Distance to surfaces should be a minimum of 3x flue diameter for single wall and 2 inches for twin wall.
thats D to combustables though stoner.
It's evolved a bit since this picture was taken (the area around it has been cleaned up, and the bellows have melted), but...
[img] 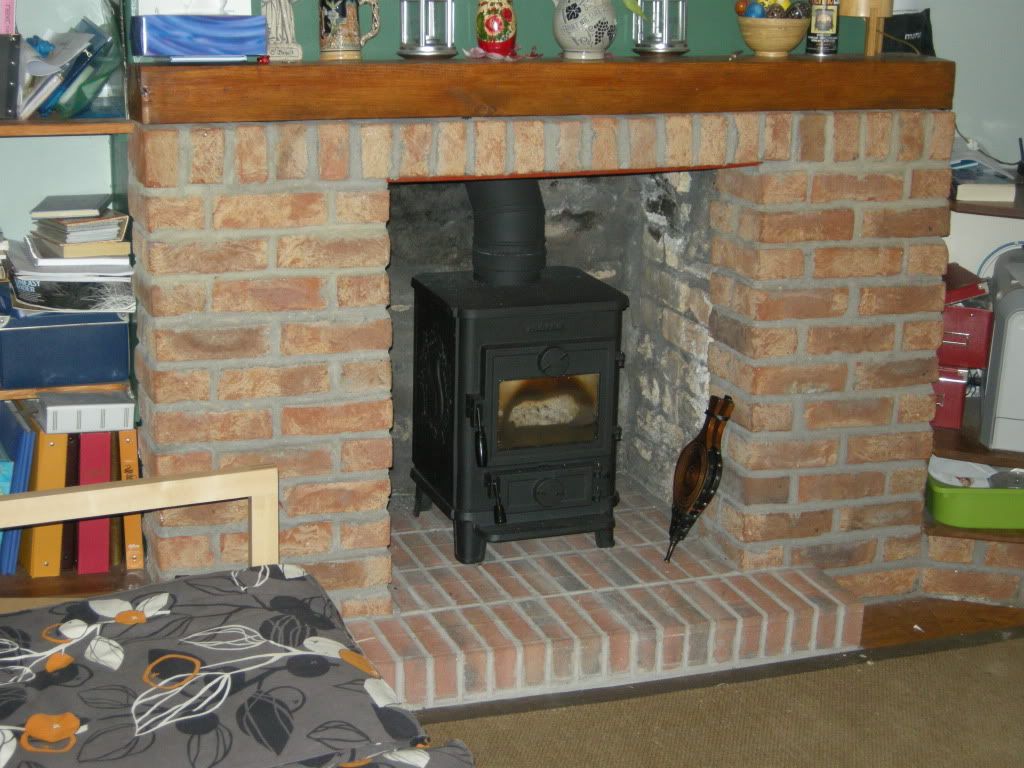 [/img]
[img]  [/img]
the design/look is presumably down to the customers wishes? As long as they are happy...!
It was. They are.
it wiould be interesting to see what it looks like after a couple of winters. My money is on the oak and joints opening up like a good 'un in the, fairly extreme, heat - this is based on the amount of movement there has been in the 3 year old oak framed extension on the house my sister has just bought.
In places the oak [big pieces more than 14" thick} has split open so much you can put your fingers inside. I used to like the idea of an oak framed building but now I'm not so sure.
Oak framing is what I do - among other stuff. yes, there will be shrinkage, strength or integrity will not be compromised so long as the structure is properly designed and built. The strength is in the joints. I can guarantee that the oak framed buildings I have done (so long as they're maintained) will still be standing in the centuries to come 😀 . I like that kinda legacy.
And, have you ever tried to drill into a piece of oak that is 200+ years old with lots of splits? 😉
[img] 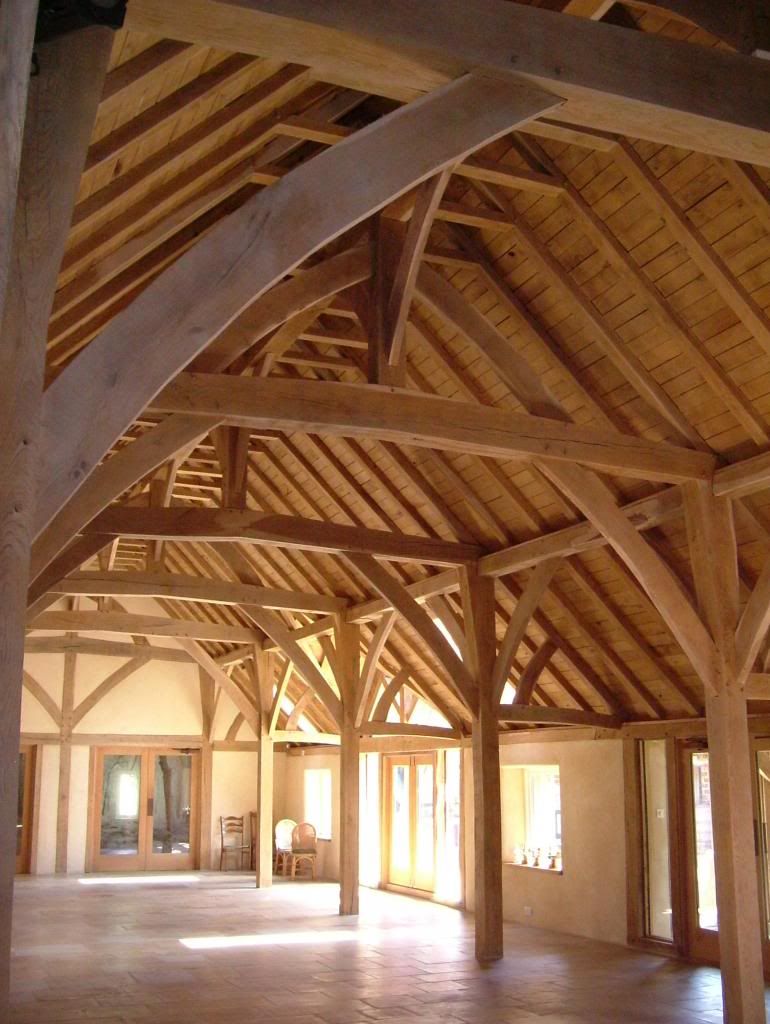 [/img]
That's quite a gift you have there Slackalice.
indeedy trail_rat
Diagram 30 for non-combustible surface distances and thicknesses
The strength is in the joints
Not disputing that at all.... it's the visual thing that surprised me.
Interestingly my sister has moved into the house that we used to live in 45 years ago. It used to be 3 small half timbered cottages originally built in the 17th century that my dad (an architect) converted into one house back in the late '50s - now Grade 2 listed.
[img]
 [/img]
There is a lot of the original oak framing on show with very little splitting compared to the new extension - I presume this may be because the cottages where originally built with 'old' oak rather than the green oak used in the extension.
Taking your point on board shark bait, and apologies for thread hijack!
In a sense, you are correct, the original frame was built and raised in days when central heating did not exist. the build process took longer and the frame dried out at a much slower rate than those of today. This is essentially the key factor. A frame nowadays is built and raised and in very short order, it is closed up and the underfloor heating or radiators are installed and fired up to help the plaster dry quicker so the place can be occupied as soon as possible. This rapid heating causes the oak to dry at a rate that never used to happen.
As I said, it loses no structural integrity as a result of this, just a different aesthetic. If you would prefer an oak framed house not to have splits and 1/4" shoulder joint gaps, then either leave it open to the elements for a few years or if you insist on central heating, don't wind it up to the max for the first 5 years or so and wear extra clothing!!
Interesting stuff. Their extension has underfloor heating, an Aga and is basically just oak and glass with little wall so the solar gain is pretty high. I guess splits are to be expected!
Back on track - the oak around your client's stove is going to split then?
OI SAMURI you not talking to us anymore?
Ooh so tempting to set up a burner in our house but i know bugger all about this stuff.
I rather liked [url=  ]this[/url], very warming it was too. Crap pic but best google can find.
sharkbait - probably. Although in this instance, all the interior oak has been treated with Danish oil. Whilst Danish oil is not the best for slowing down the rate of drying out, it will help, especially if the owner makes a point of re-applying each year. But there is a lot of exposed oak in their place and quite frankly, the temperature they run the heating at it's going to make little difference.
One of the better oils to use to slow drying out is a mix of boiled linseed oil and white spirit on a 75:25 mix ratio. Works well with weatherboarding.
And back on this subject.
We've decided on a wooden floor which means we have to get the hearth sorted before we can get that put down (I think).
The hearth we've decided on will be something like this.
[url= http://farm8.staticflickr.com/7389/8717200846_13973df8db.jp g" target="_blank">
[url= http://www.flickr.com/photos/53067724@N00/8717200846/ ]fireplace[/url] by [url= http://www.flickr.com/people/53067724@N00/ ]Jon Wyatt[/url], on Flickr
Now the floor is wooden floor boards with about 2 foot of space underneath. my question is, will we need to build up from the real floor of the house or can this sort of arrangement be built onto the floorboards? I'm assuming the former.
That brickwork behind the stove looks a bit saggy, which might happen to yours if it's standing on the floorboards.