![]() You don't need to be an 'investor' to invest in Singletrack: 6 days left: 95% of target - Find out more
You don't need to be an 'investor' to invest in Singletrack: 6 days left: 95% of target - Find out more
(or similar builds)
This is middle OAB's first effort, all his own handiwork.
[url= http://farm8.staticflickr.com/7393/11629424496_a33f20f6f3_b.jp g" target="_blank">
[url= http://www.flickr.com/photos/matt_outandabout/11629424496/ ]Airfix[/url] by [url= http://www.flickr.com/people/matt_outandabout/ ]matt_outandabout[/url], on Flickr
[url= http://farm4.staticflickr.com/3757/11628901033_0e07e34ed0_b.jp g" target="_blank">
[url= http://www.flickr.com/photos/matt_outandabout/11628901033/ ]Airfix[/url] by [url= http://www.flickr.com/people/matt_outandabout/ ]matt_outandabout[/url], on Flickr
Cue Harry the Spider....
[url= http://farm8.staticflickr.com/7344/10578818516_542d3d0e14_b.jp g" target="_blank">
[url= http://www.flickr.com/photos/58162507@N07/10578818516/ ]Me109 & Spitfire Model[/url] by [url= http://www.flickr.com/people/58162507@N07/ ]SGMTB[/url], on Flickr
[url= http://s1176.photobucket.com/user/crankboy1965/media-full/Mobile%20Uploads/IMAG2641_zpsa1ef20d4.jp g" target="_blank"> http://s1176.photobucket.com/user/crankboy1965/media-full/Mobile%20Uploads/IMAG2641_zpsa1ef20d4.jp g"/> .html[/url]
oh, hello.
Work in progress.
[IMG] 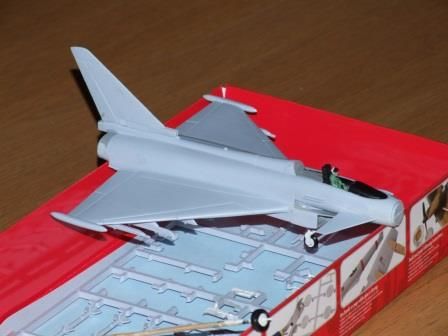 [/IMG]
Got these too.
[img]  [/img]
[img] 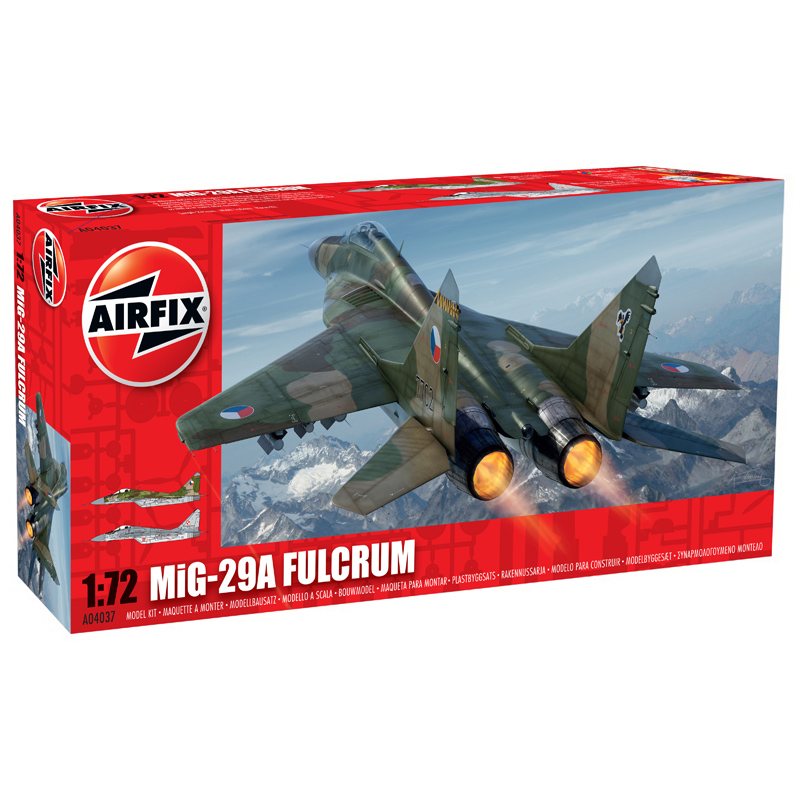 [/img]
Ok how do I post pics from photobucket ?
Use the bottom link of the four that you are offered.
Right click over the image > Select 'copy image location' > navigate to here to post > Click IMG box > press 'ctrl' and 'v' at the same time to paste > Click 'Send post' as usual
[img]  [/img]
[URL= http://i1176.photobucket.com/albums/x323/crankboy1965/Mobile%20Uploads/IMAG1676_zps9a6cee23.jp g" target="_blank"> http://i1176.photobucket.com/albums/x323/crankboy1965/Mobile%20Uploads/IMAG1676_zps9a6cee23.jp g"/> [/IMG][/URL]
Yay thanks . And thanks harry for the scalextrics / scx tips two months ago harry had a fab Xmas thanks to them .
Oooh, pics of the Mig 29 when done!
And thanks harry for the scalextrics / scx tips two months ago harry had a fab Xmas thanks to them .
No problem. 😀
Scalextric Party at mine in a couple of days. 100ft track, 50 cars and boys aged from 6 to 74. We're doing Top Gear style Power Laps then having a head to head knock out tournament. Last year it was won by a 5 year old called Alex
...we're not having him back.
Just started this today:
[img] 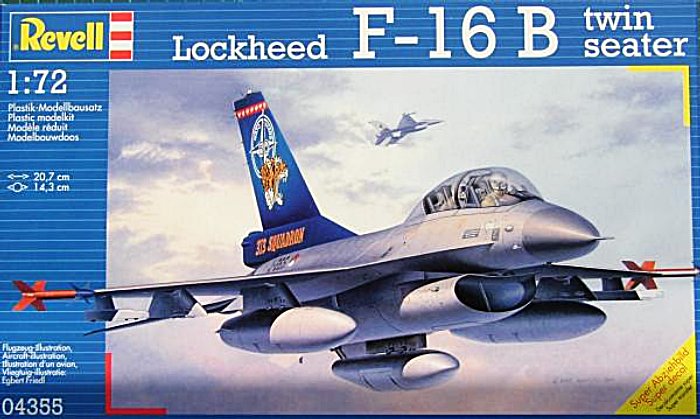 [/img]
Thanks sis-in-law, you know what I like!
Middle OAB and I are in awe of some of the skillz on this thread.
The cub and I are mid way through a Mitsubishi A6M2b Zero. Once that's done and hanging next to the Curtiss P40 Tomahawk we can start on the Red Arrows Hawk. Sorted? Oh yes.
currently working on Guy Gibson's Lancaster B.III in 1/72 scale
but here are some I did earlier...
[img]  [/img]
[img]  [/img]
[img]  [/img]
[img]  [/img]
The Sherman, Panther & M10 are Tamiya; the M18 Hellcat is Academy. Sherman in 1:48, the rest 1:35
[URL= http://i1176.photobucket.com/albums/x323/crankboy1965/Mobile%20Uploads/IMAG1506_zpse8a07509.jp g" target="_blank"> http://i1176.photobucket.com/albums/x323/crankboy1965/Mobile%20Uploads/IMAG1506_zpse8a07509.jp g"/> [/IMG][/URL]
Can you buy these things ready painted,or do they all need to be painted separately?
Quite like the idea of building something,but the painting really doesn't appeal to me.
The painting is a big part of it but despite the photos I have posted hand painting with limited talent does look good to the eye if not the camera . The really stunning ones you see are done with spray guns thin washes and infinite time and skill.
I have not seen any pre painted kits.
No, they come unpainted. My Panther tank was airbrushed with a wash of dark yellow, then the camo pattern was sprayed freehand with dark green on a very fine needle. The US tanks are simply dark green overall or in the case of the M18, pale olive drab.
it can be done with a paintbrush but you need a big brush and very thin paint
Can you buy these things ready painted,or do they all need to be painted separately?
http://www.airfix.com/shop/quick-build/
No Glue...No Paint...Just BUILD!
Not quite the same though.
That's it, I have to go and buy one today 😀
A word of advice... some of the older Airfix kits are woeful. Better try something from Revell, Tamiya, Academy, Hasegawa, Trumpeter
...however, Airfix kits of more recent subjects (e.g. harrythespider's Typhoon & Mig29) should be ok. Just stay away from their WWII and earlier offerings, and their 1:32 "vintage" cars, especially those in a "Haynes Manual" box.
Some of Revell's offerings are reboxed Mathbox kits from the late 70s / early 80s and have raised rather than recessed panel lines - e.g the 1:32 Spitfire, Beaufighter and Mustang.
1:72 is the 'traditional' scale for aircraft & tanks but I prefer 1:48 for aircraft & 1:35 for tanks, 1:24 for cars & 1:12 for motorcycles
That "quick build" stuff looks like all the worst bits of lego*, combined with the worst bits of airfix** into one horendous product.
*The worst bit about lego being the "bespoke" pannels that can't be used in other self-build models
**The worst bit about Airfix being that once they are done, that is it, the end of the fun.
This thread has sealed it for me! I woke up the other day to reclaim my childhood and build some models and have been looking on the airfix site and I'm going to have to buy a Vulcan and a Lancaster (new tooling) to build. I built a Lancaster nigh on 20 years ago and can't wait now!
[img] 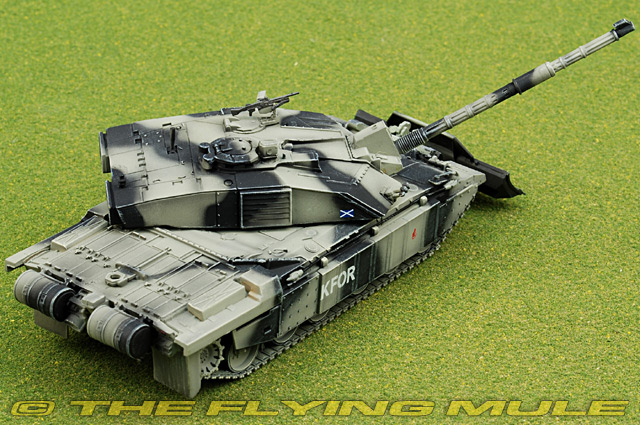 [/img]
I got one of these, though I think they were taking the pee, out of my tank obsession (I just think there great). I'll have a go, but it won't get painted to the standards of John D's work
I apologize for bringing a Dragon kit, into airfix thread BTW
This thread has sealed it for me! I woke up the other day to reclaim my childhood and build some models and have been looking on the airfix site and I'm going to have to buy a Vulcan and a Lancaster (new tooling) to build. I built a Lancaster nigh on 20 years ago and can't wait now!
I'd start on a £5.00 Spitfire first! I picked one up for the first time in 30 years a couple of months back and made a right mess of it. 😀
I'd start on a £5.00 Spitfire first! I picked one up for the first time in 30 years a couple of months back and made a right mess of it.
silk purse, sow's ear & all that 😉
but it won't get painted to the standards of John D's work
TBH the allied tanks are an all-over green you could do with a spray can if you leave the tracks off until the end. Mine are pretty much "out of the box" and I haven't even started on 'weathering'...
silk purse, sow's ear & all that
True... but for getting your "eye in" practice they are better than a big expensive jobby.
Here is the BF109 that I abandoned after experimenting with my poor painting technique. I may try and rescue it.
[IMG] 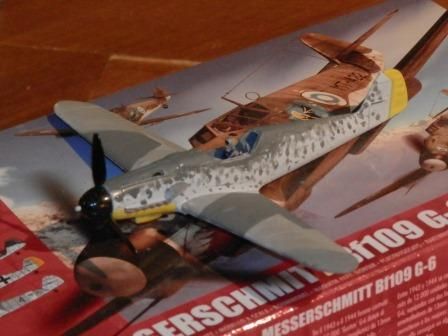 [/IMG]
Typhoon is coming along. Thanks for the "big brush" tip.
[IMG] 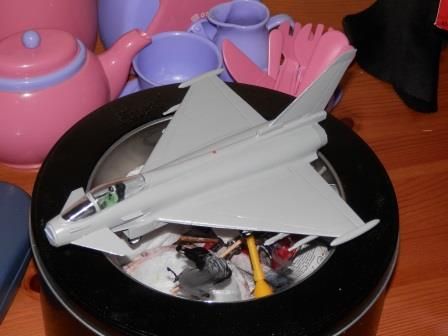 [/IMG]
Airfix Mosquito NF Mk2. Four 20mm cannon, four .303 machine guns, top speed of 370mph and onboard radar. You didn't want to be a nazi pilot over the UK with these about at night. Built whilst watching 633 sqn the other day. Brush painted with Tamiya Acrylics.
[URL= http://i107.photobucket.com/albums/m286/KJA78/1483308_782254071788401_1017687692_n1_zpsbe97c3ab.jp g" target="_blank"> http://i107.photobucket.com/albums/m286/KJA78/1483308_782254071788401_1017687692_n1_zpsbe97c3ab.jp g"/> [/IMG][/URL]
Also got given a Revell USS Voyager by the wifey, which is going to be huge when built up.
Regards the quality/buildability of Airfix kits - the newly tooled stuff is superb, if you fancy a Spit then model no A02010 is great. Or there's a new Mustang, Tomahawk, ME109, Typhoon etc etc. If using one of the starter kits stir the paint really really well and dilute with about 30% water.
I like that! It has a certain "don't **** with us" quality about it.
that 109 is looking good, get it finished! tip for WWII German fighter wing upper camo schemes - paint the upper surface in the paler shade of green & leave it 24 hours. Then use Tamiya masking tape (not the stuff from B&Q!) to mark out the straight lines, then paint the darker green bits in between the tape. Leave 24 hours & then remove the tape. perfect camo!
the fuselage looks bob on to me
give it all a thin wash of GLOSS varnish (Revell Acrylic #01) before you do the decals, and allow to dry. apply the decals, then another coat of gloss. Then a coat of matt (Revell Acrylic #02)
Acrylic paints are water soluble, much easier to manage
[img]  [/img]
go up a scale too! 1:48 has fewer [i]really[/i] small parts, and yet the opportunity for more detail...
The french chateau that the mosquito's bomb at the end of the film is actually Minley Manor, where the Torq 12:12 enduro is held in August. (and not many people know that...........)whilst watching 633 sqn
Bloody hell, I thought at least some of you was sort of normalish.
*meant with affection.
**you model nerds 🙂
Also got given a Revell USS Voyager by the wifey, which is going to be huge when built up.
I've got their Battlestar Galactica to go at when the Lanc's finished
[img]  &w=300&h=177[/img]
She wouldn't buy me the galactica as she didn't like the series!
they do two different Vipers* as well. Shame they don't do a "toaster" or a Cylon attack fighter thingy
* I think they're rebranded Mobius kits, I have a MkII Viper from Mobius, not yet got the Mk VII
I got the Revell 1/32 Lynx for Christmas last year, working on it this year.
[img]  [/img]
[img]  [/img]
[img]  [/img]
Still a good way to go yet...
wiring looms?!?! 😯
and how much photoetch?
I bet that's not just OOB. Niiiice work
wiring looms?!?!
Fictional, but exactly to scale. 😉 Couldn't find references and there's a big gap that needs some details in. Not very visible, but gives the right impression.
and how much photoetch?
Very lots!
Impressive stuff! Way out of my league.
Anyway... sod the toy planes and helicopters, tomorrow at my house is all about toy cars.
[IMG] 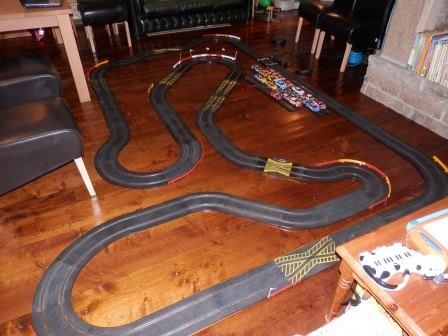 [/IMG]
[IMG] 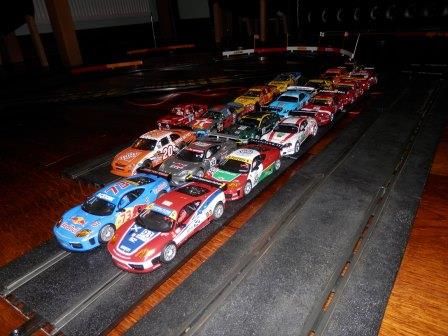 [/IMG]
[IMG] 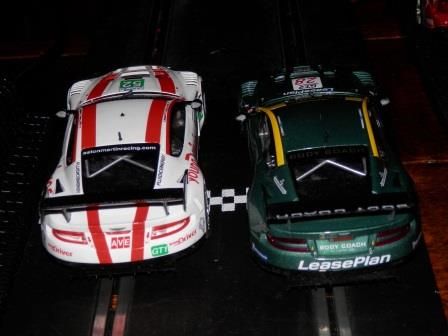 [/IMG]
[img] 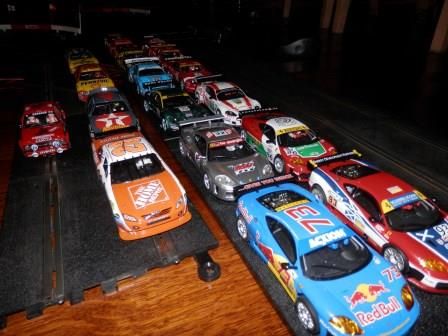 [/img]
Can you buy these things ready painted,or do they all need to be painted separately?
Quite like the idea of building something,but the painting really doesn't appeal to me.
This got me thinking actually, as personally I prefer assembly to painting. (I'm still learning how to use an airbrush). Why not try almost any modern Nato jet - They're often painted in different shades of grey. Most kits are moulded in grey, so once the decals are on, it wouldn't look [i]too[/i] far out.
Urgh. The decals are as tiny and fiddly as ****. I haven't got the eyes or the skill for this.
Matt, are you able to show us your son's finished effort yet?
Harry use a fine paint brush to transfer the decals, if you are talking about the me109 I am sure airfix used a graphics program to shrink a set from a larger scale . I jacked it in when I got to the individual fuselage panel numbers.
The Typhoon. There are billions of the buggers!
Will try with a fine brush.
You can wet the model with a brush where the decal is to go then sort of float it in to position useing a wet brush tip . Then remove moisture with a bit of tissue. Or alternatively get a life . 👿
[URL= http://i1176.photobucket.com/albums/x323/crankboy1965/IMAG0233FIGHTER.jp g" target="_blank"> http://i1176.photobucket.com/albums/x323/crankboy1965/IMAG0233FIGHTER.jp g"/> [/IMG][/URL]
Me109 minus 25% of supplied decals .
Still working on my Airfix "Dogfight Double" Harrier and Skyhawk that I got for my birthday in October - thanks Mum!
Definitely worth getting a cheaper kit first - these are the first planes I've built for over 25 years, and I'm making a bit of a mess of them 😳 A bigger scale model would help, lots.
Next stop: a Tamiya RC car.
How would I go about weathering the Typhoon with a brush?
I've got various Humbrol paints along with satin clear coat. Do I just mix the clear with a bit of black and streak it on or is there a better method? I don't want it to look like it has crashed in a field, just a bit less like a flat grey painted kit.
Fig 1. Blurred picture of Typhoon in flat grey with 2% of decals.
Also, is there some sort of decal fixer as they are coming off on my fingers ages after they have been appiled?
Fig 1.
[IMG] 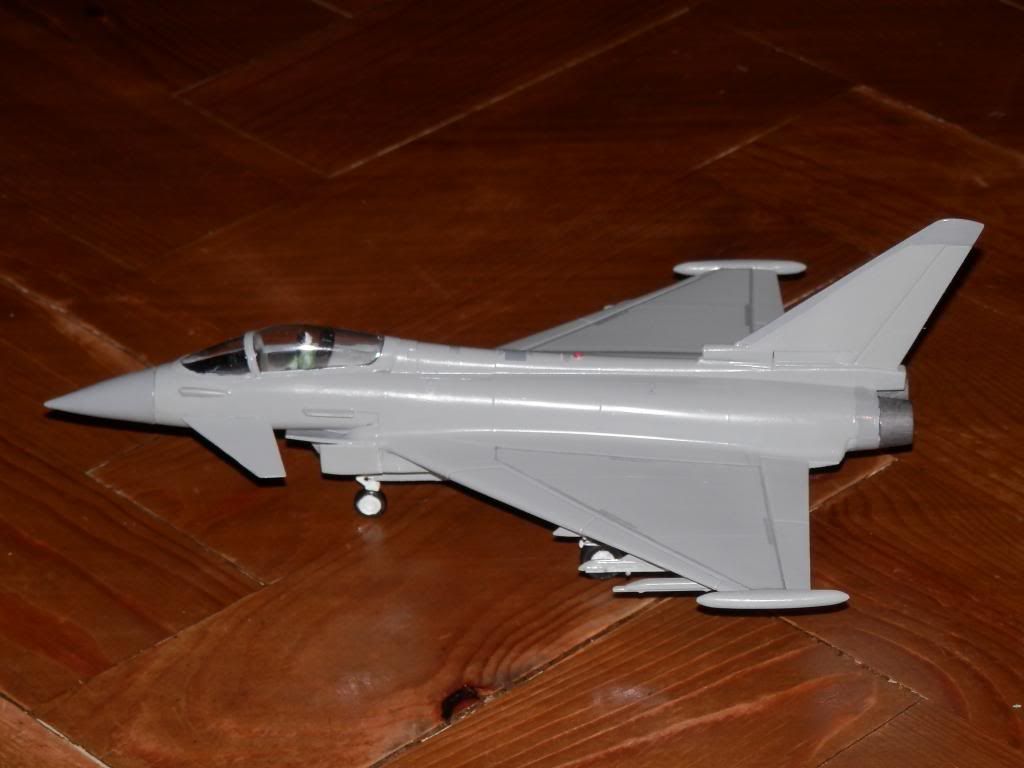 [/IMG]
You could seal the paint job with diluted floor polish, then weather with a wash of very diluted black paint. Apply this liberally, and then wipe off before it starts to dry. You want the wash to remain just in the engraved lines. Takes some trial and error.
But make sure you don't remove the original paint! That's why you want to seal it first. You can matt it down again with the satin varnish.
Try dry brushing. Get an old brush cut it to stubbly stiff bristles dip in thick white paint wipe all the paint out onto a cloth . Now brush over the model lightly . The residue in the brush will catch edges and raised detail nicely giving depth and light . I also used thinned to nothing black to run into details. These are techniques from figure painting but transfer to vehicles . Try on something other than your current work first.
Humbrol do something called "Decalfix", but this method works for me:
first of all, mask off the cockpit canopy with either Tamiya masking tape (and a scalpel/craft knife. Do NOT be tempted to use a Stanley knife, if you want to keep your fingertips**...) OR Humbrol Maskol. This is a purple rubber solution - like thinned down rubber glue - but beware, it eats brushes. I use a cotton bud.
Then give it all a thin wash of GLOSS varnish (Revell Acrylic #01) before you do the decals, and allow to dry. apply the decals, then another coat of gloss. Then a coat of matt (Revell Acrylic #02) for military types, not for civil types.
If you don't have access to an airbrush, you can get aerosol cans of the gloss and matt varnishes, but be careful not to mix brands, as some of them have been known to bubble & blister. If you know you're going to be doing a number of modern jets, try get the Tamiya Aerosol colours (TS32 Haze Grey or TS48 Gun Grey); same if you're going to be doing a lot of WWII types, Dark Green, Dark Earth, Slate Grey, "Sky" for British types; Olive Drab or aluminium for US types, and so on...
If you have undercarriage & undercarriage doors, leave them off until the very end. Same with underwing pylons & weapons
** ask me how I know...
[URL= http://i1176.photobucket.com/albums/x323/crankboy1965/Mobile%20Uploads/IMAG0340_zps65895277.jp g" target="_blank"> http://i1176.photobucket.com/albums/x323/crankboy1965/Mobile%20Uploads/IMAG0340_zps65895277.jp g"/> [/IMG][/URL]
Just found out the hard way that Humbrol clear coat is not particularly clear. 😕
Typhoon looks is looking a bit "filth streaked".
Harry_the_Spider - Member
Urgh. The decals are as tiny and fiddly as ****. I haven't got the eyes or the skill for this.
Get yourself some cheap reading glasses from Boots or wherever, in the highest magnification you can find, say around 3.00, but you can find 4.00, and use those for working on kits. That's what I use, although I find 2.50 mag ones do pretty well for close-up work.
Get yourself some cheap reading glasses from Boots or wherever
I've got expensive reading glasses from an optician!
Given up on the tiniest of decals as they look like specs of dirt on the paint surface.
Harry, I'd suggest that your brush was not spotlessly clean and that the thinners in the clearcoat picked up some dried paint. I prefer to use the Games Workshop Acrylic varnish as it seems to behave itself a bit better.
New brush. I think it is just a bit rubbish. It has a definite yellow tinge to it.
Whatever, I'm only messing about with the kit and I'm nowhere near as good or dedicated as some of the other posters on here.
Great thread! I must have about 70 kits waiting to be built, when time & space allows. I haven't built anything for about 12 years so no photo's. I've a few things in boxes ready to resume...a Tamiya Mk1 Merkava, a Hasegawa 1/72 P3C Orion, a Monogram 1/48 A1 Skyraider & a Hasegawa 1/72 EF111.
Been to a couple of IPMS shows & the standard of show stuff is just astonishing.
Have a look at this site....
http://www.britmodeller.com/forums/index.php?/topic/234952602-italeri-tornado-f3-148/
not quite finished, but...
[img]  [/img]
[img]  [/img]
Tamiya 1:24 Aston Martin DBS
Well, I had a go....
[img]  [/img]
Not from this year but it was my airfix project last year.
http://www.warlordgames.com/forum/viewtopic.php?f=51&t=8590
Really wish I hadn't opened this thread,used to love the old airfix kits when I was younger,this could get expensive.
Just had a quick look for a model making forum and the skills/attention to detail are amazing - someone's getting a bollocking because a haversack on the back of his Polish tank looks American 😆
MORE PICS !!
does anyone know if the taillights should be red on a DBS ? no instructions for that in the Tamiya instructions, but it doesn't look right to me
<edit> never mind, just googled it. Definitely not red
Sure I saw one in a flood on the BBC website last week, taillights were definitely red but that could've been because it was dark-ish
Well, I had a go....
Pictures or it didn't happen.
[url= 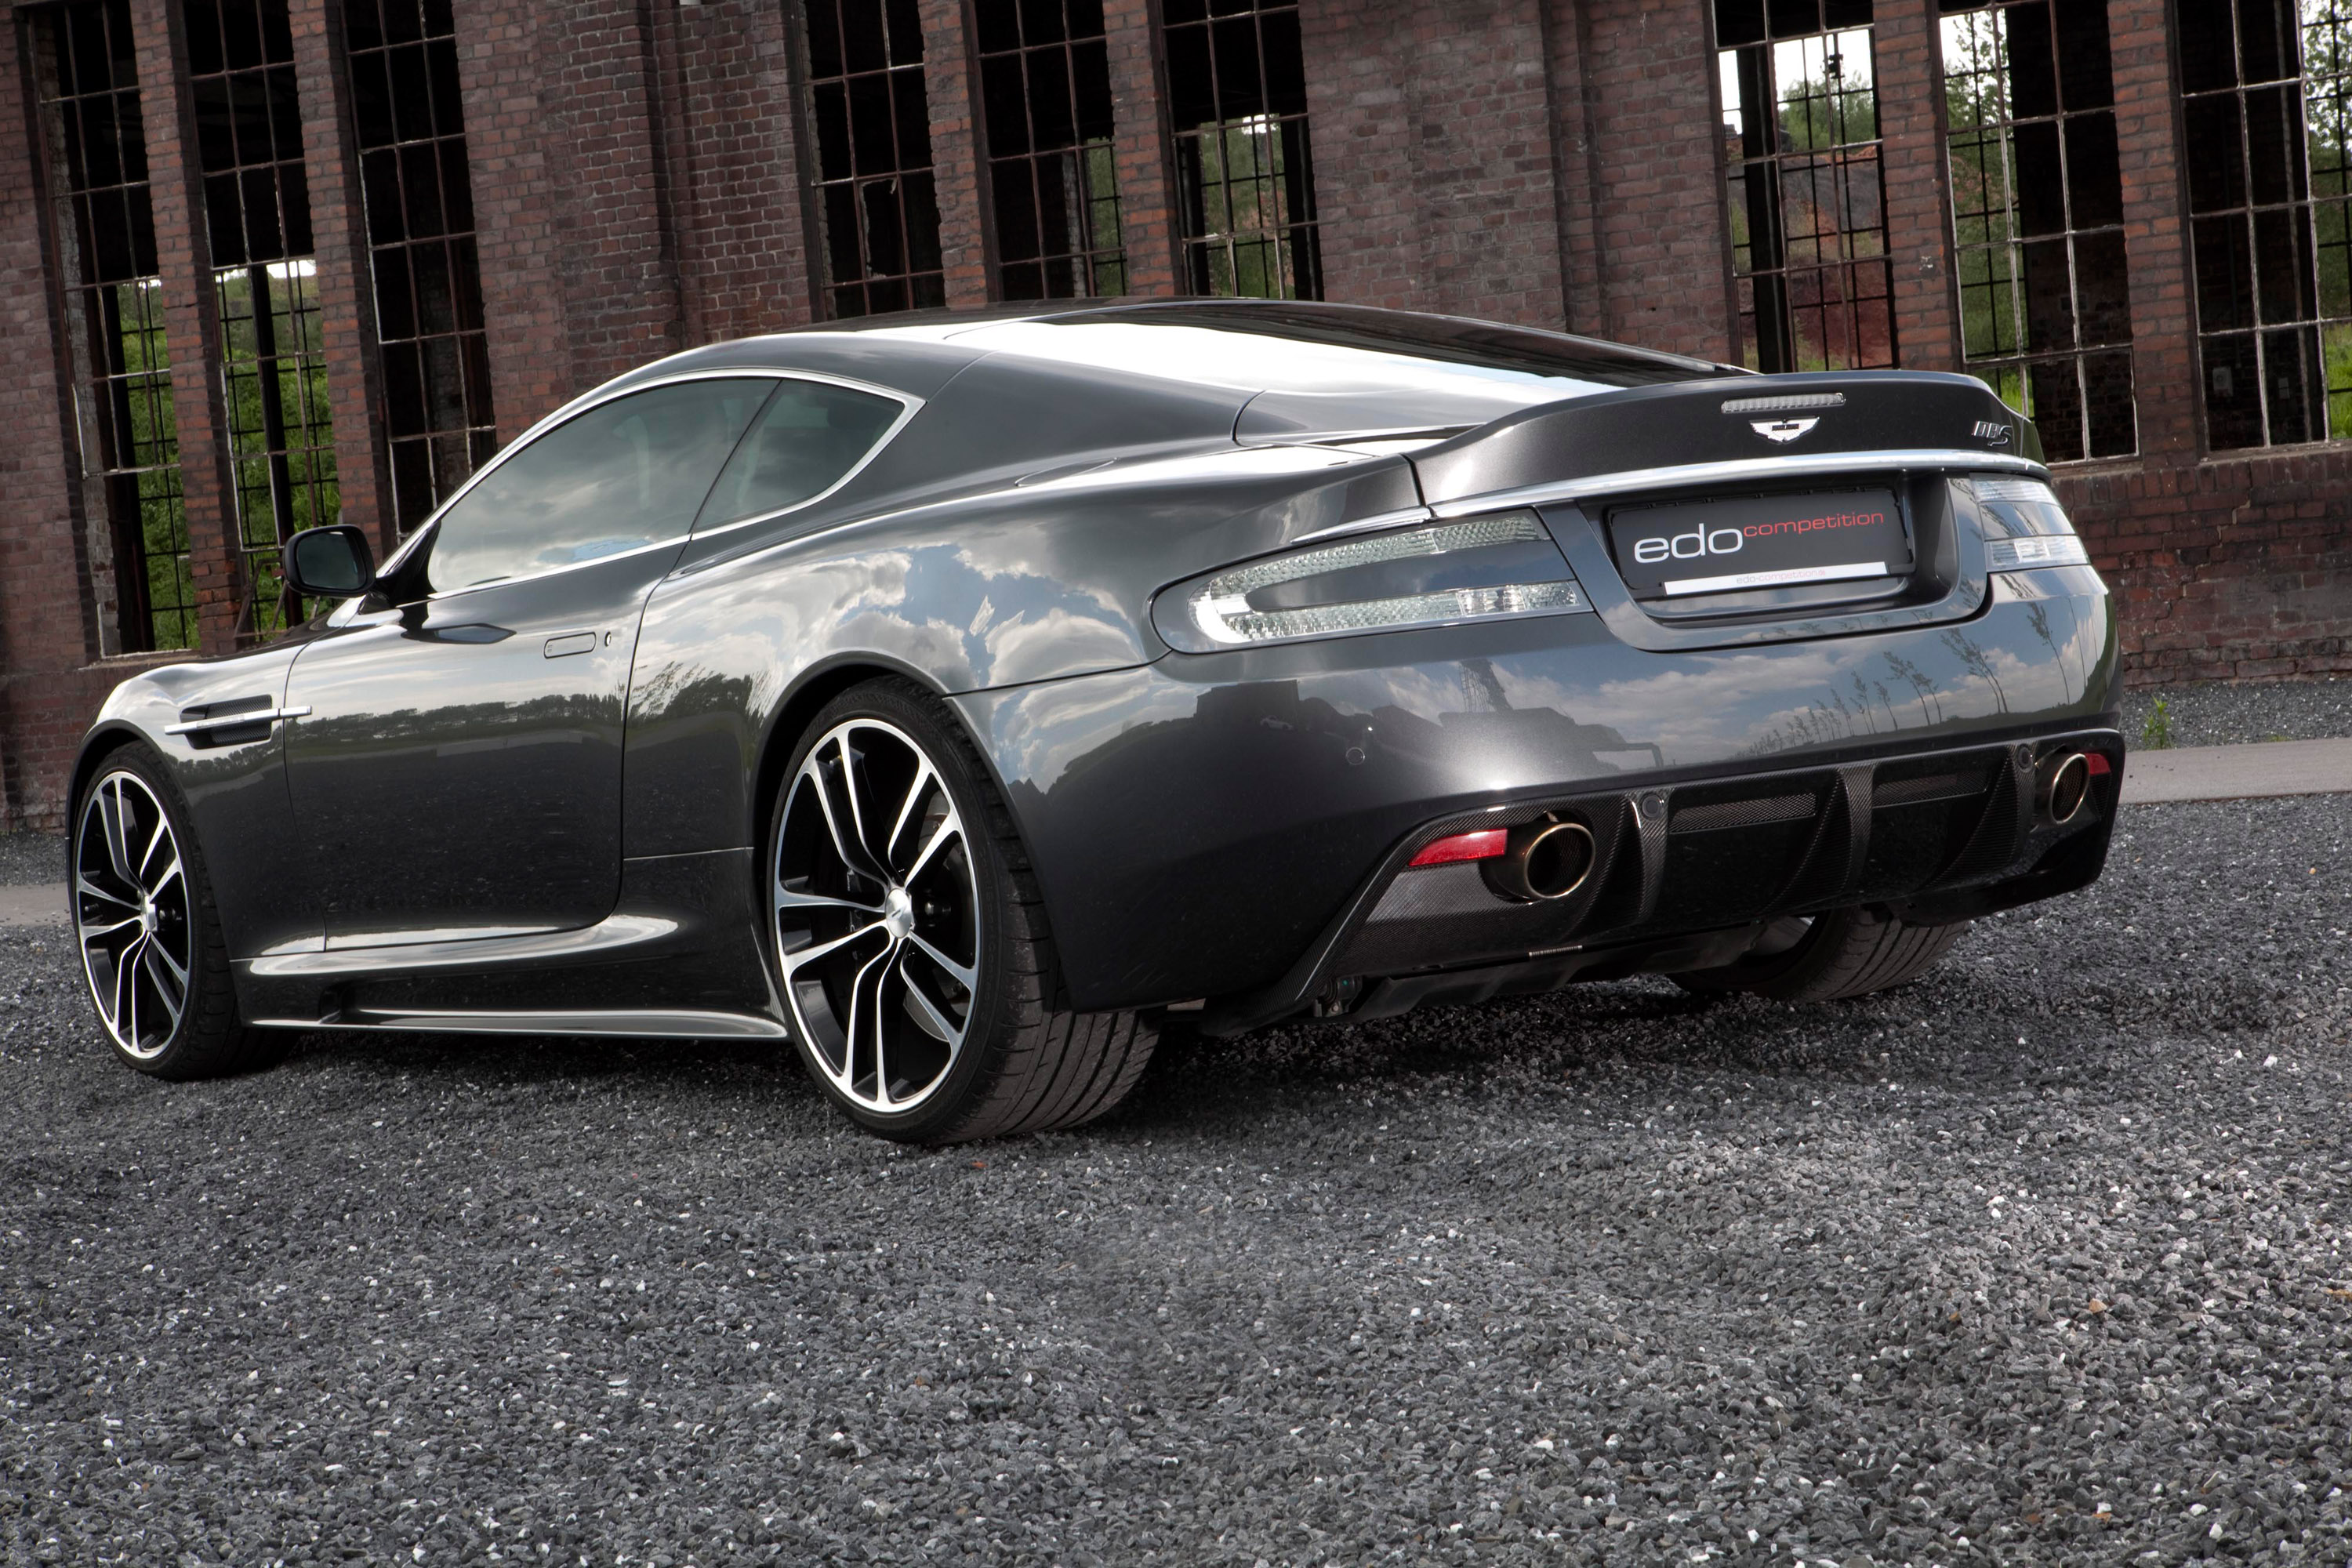 ]Aston[/url]
yep. def not red
the reflectors next to the exhausts are red, but I haven't put them on yet. Nor the door mirrors or the wheel centre boss things. or number plates
RAF Tornado on it's way 🙂
Now to google how to un-glue my eye lids - forewarned is forearmed and all that
you have all had 3 weeks to get these sorted.
Lets see them!
Still a work in progress. As for some reason the decals aren't very adhesive I have to do a panel at a time then seal them with clear coat.
[IMG] 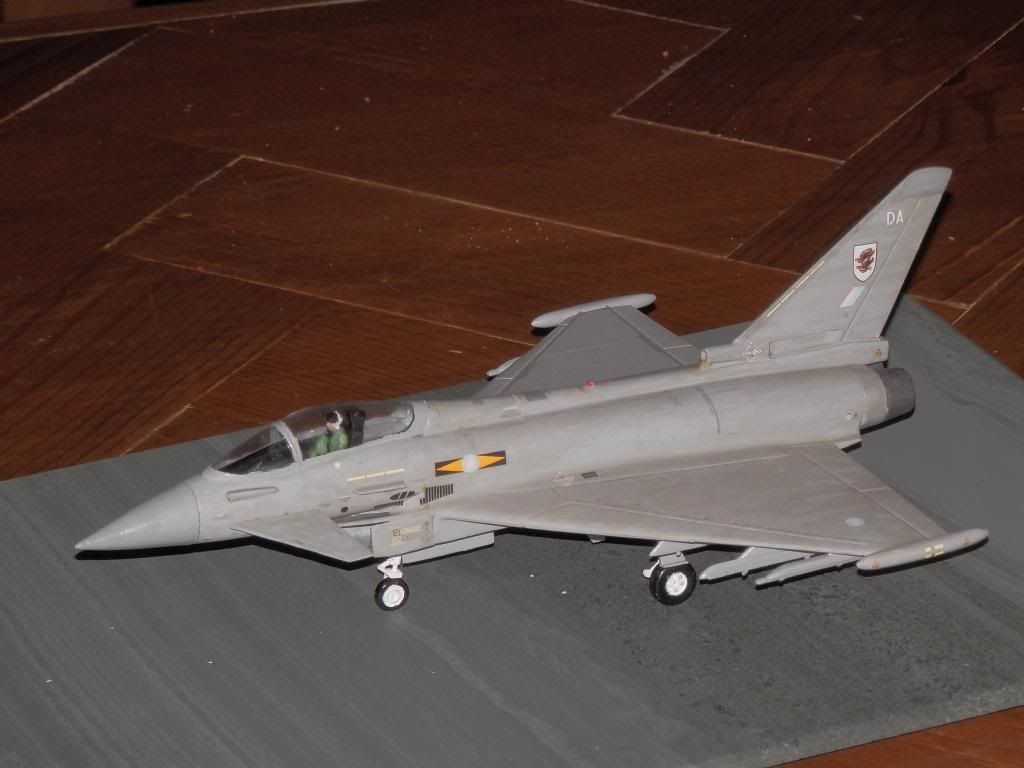 [/IMG]
looking good Harry
Ta. Unintentional weathering makes it look like it has seen some action. 😀
Will add some scorching round the weapons pylons and general filth near various vents and exhausts.
[img] 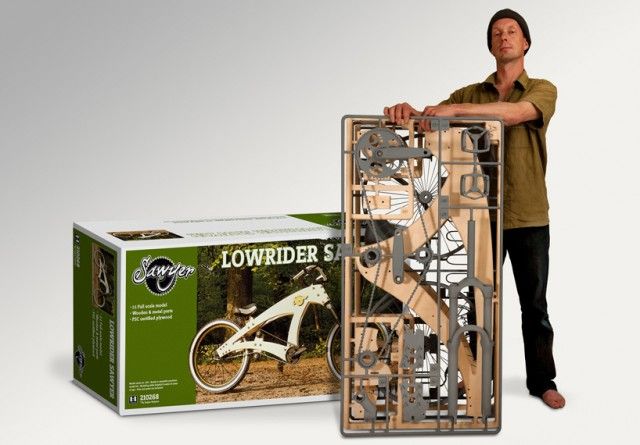 [/img]
[img] 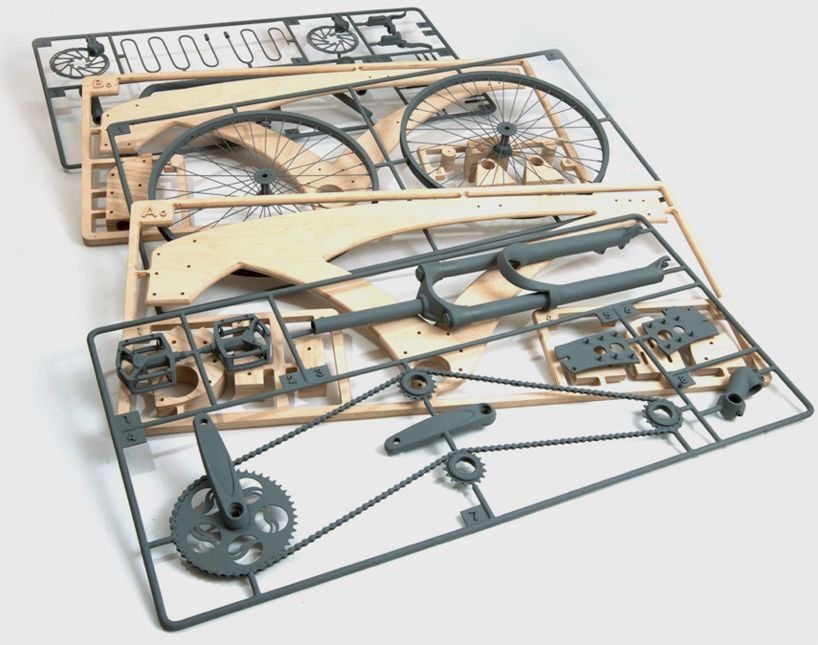 [/img]
[url= http://www.fubiz.net/en/2013/03/29/diy-bike/diy-bike4/ ]I did not get this for Christmas :([/url]
Slogo - Member
you have all had 3 weeks to get these sorted.
Lets see them!
Massive elephant balls!Where in the instructions does it say 'DO NOT DRY PAINT WITH RED HOT BLOW LAMP '
[URL= http://i335.photobucket.com/albums/m453/mickylall/IMG_0281.jp g" target="_blank"> http://i335.photobucket.com/albums/m453/mickylall/IMG_0281.jp g"/> [/IMG][/URL]
It was all going so well 😥
you know they have "special instructions" and "general instructions"?
well that bit comes under the "Common sense instructions" section that they generally leave out...
[img]  ?_subject_uid=248761980&w=AAB1eGTu1DVMFKK4tZXymWDctM6JOt3ba3B3bFr9fUJ-AA[/img]
[img]  ?_subject_uid=248761980&w=AAB_eeRvq5_LaQuMQHgrkirWUHt0UEPxiiMoO3qiKXB7-g[/img]
[img]  ?_subject_uid=248761980&w=AACqk8igvVIOJ_7I3hsbbnOQKlwgv-tiHJOuTH0t73VQyQ[/img]
[img]  ?_subject_uid=248761980&w=AAArTq3gB-KwRBXQWTE5IL9K2Rwfzs93JISLWX0Q8TMPMg[/img]
Avro Lancaster & P38 Lightning also just visible behind the Aston
oh aye, the camouflage pattern does not extend to the undersurface of a Tornado - it's usually just a paler shade of grey
oh aye, the camouflage pattern does not extend to the undersurface of a Tornado
Plenty of Tornadoes wore a wrap around camo of RAF Dark Green and Extra Dark Sea Grey in the GR.1 days. Harry's is correct. Not quite the right shape any more admittedly, but the paint is right.
My mistake, sorry.
goon, as an ex Fleet Air Arm helicopter mechanic, can i just say that Lynx is incredibly well detailed. Right down to the remnants of anti skid paint on the floor of the cab. Love the sheep skins as well. But as your Lynx is far from serviceable the seat ones should be turned over lest the maintainers get them dirty with there overalls!
Hey! I'm no Tornado Melter!Harry's is correct.
You could always do this with it.
[img]  [/img]
😆 that's pretty much what it looked like when it hit the bin.
Had another crack,went waaay too far with the weathering but at least I finished this one
[URL= http://i335.photobucket.com/albums/m453/mickylall/DSCN2010.jp g" target="_blank"> http://i335.photobucket.com/albums/m453/mickylall/DSCN2010.jp g"/> [/IMG][/URL]
[URL= http://i335.photobucket.com/albums/m453/mickylall/DSCN2008.jp g" target="_blank"> http://i335.photobucket.com/albums/m453/mickylall/DSCN2008.jp g"/> [/IMG][/URL]
Ace.