![]() You don't need to be an 'investor' to invest in Singletrack: 6 days left: 95% of target - Find out more
You don't need to be an 'investor' to invest in Singletrack: 6 days left: 95% of target - Find out more
I've got a shelf fastened to plasterboard and it is starting to come away from the wall. It can't be removed (for various tedious reasons that I'm not going to go into) so I can't put plugs or fittings in.
What are the best screws for pining it back to the wall? Dry lining screws? Was going to put a load of glue down the back of it too, so it won't be held on by the screws alone.
Can you just put some London brackets underneath to add support?
Can't.
The thing is wooden and came with the house (I wish it hadn't, but hey-ho). It has a section like an inverted "L". I need to pin the back portion back to the wall. Other fittings mean that it has to go in the same place. A radiator means that it can't come off.
Pics might help? Can you drill a new fixing or 2 in the back board?
If it it as I think then you may aswell bite the bullet and remove the rad.
Is there something solid behind the plasterboard? [url= http://www.screwfix.com/c/screws-nails-fixings/masonry-screws/cat840054 ]Masonry screws[/url] might reach the substrate
Here we go.
[IMG] 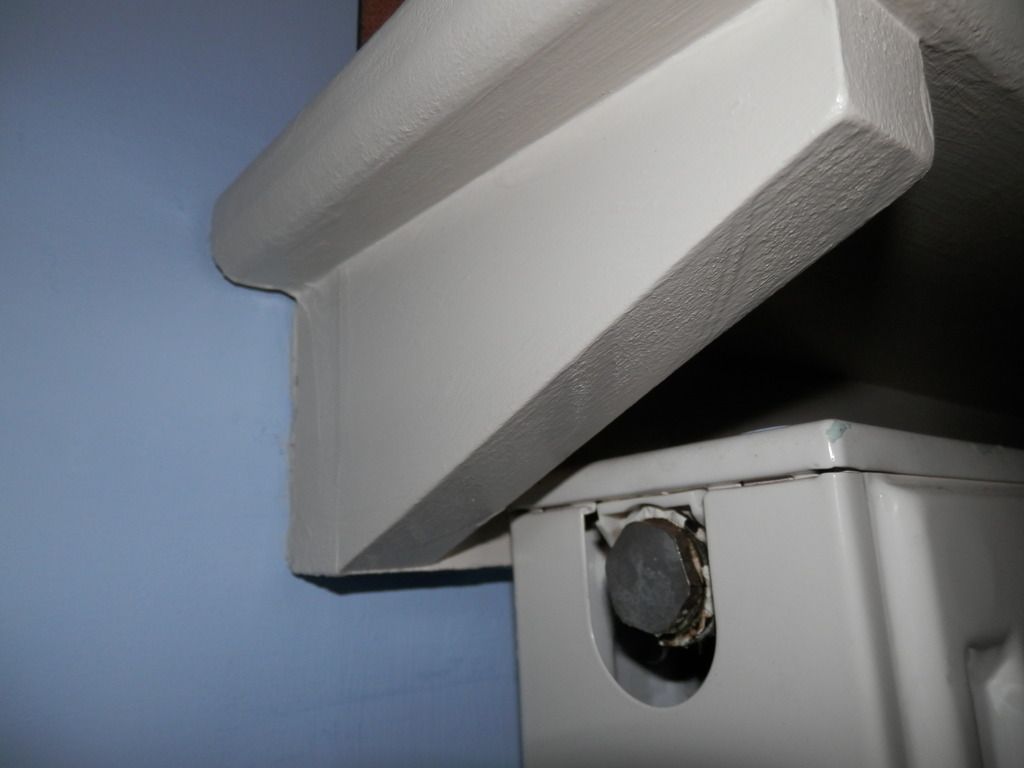 [/IMG]
The damn thing is about 9ft long, so replacing it will cost a wedge. Putting brackets behind the radiator will mean taking the rad off and it can't go any higher up the wall. Like I said it has to stay in the same position and can't come off the wall.
It is basically trapped.
Nothing solid behind the wall. I've stuck some big screws in and they aren't biting.
Long masonary bit and get some new plugs and screw in there,job done.
Can you get plasterboard plugs in there?
http://www.doorfurnituredirect.co.uk/heavy-duty-plasterboard-fixings-pack-of-10.html?gclid=CjwKEAiA5Ji0BRC5huTCyOTR3wISJACH4Bx4JXHba9-L6-36efU6APukFcrgbvyJZkG4ZeuBJ7IKhRoCwtDw_wcB
Without taking the shelf off?
I need to go through the back surface on the underside of the shelf straight into the wall.
The guy who put it in trapped it behind the rad below and other immovable fittings above. I'd really rather avoid pulling the house apart.
Removing the radiator is a 10 minute job max. The time you'll spend guddling about trying to bodge it you could have had it off and done properly.
If you can't remove the shelf, I would pump some gap filling adhesive (no nails/ grip fill) behind it and the cut some timber props which you could wedge back of an opposite wall until the glue has cured. Just hope you never need to remove the shelf as you might have a bit of plastering to repair.
You want to do a good job or bodge it some more? The rad needs to come off and it's not a difficult job for someone who knows what they are doing.
You're trying to shortcut and you already know it's going to end up a crappy repair doing it the way you are suggesting.
If you can't remove the shelf, I would pump some gap filling adhesive (no nails/ grip fill) behind it and the cut some timber props which you could wedge back of an opposite wall until the glue has cured.
Already tried that. It fell away after a couple of weeks pulling big chunks of plasterboard with ot. The thing weighs a lot!
Yes just drill straight through, insert plug in to the batten,start suitable length screw a couple of turns in to the plug,tap the screw/plug combo in with hammer to get plug in to wall then tighten screw up as normal.
I'd just take the radiator off. But, you could just drill through wood and plasterboard and put new plugs in, then either use a screw with an oversize head, or stick a penny washer on a regular screw to make sure it doesn't pull through the wood.
There's got to be a stud in that wall somewhere, borrow a stud finder, drill a pilot hole and whack the biggest wood screws you can in there
Good call. I think that the BiL has one. The thing is so ling that it must span a few of them.
[Edit]
A bit of tapping and looking for the joins in the plasterboard and I think I've found four of them. All of which have been missed by the original screws that hold it up.
The previous owner managed to fasten it to the wall by magic.
[/Edit]
Sorry crossed wires,I thought it was dry lined not studwork,although if tis is coming off the wall it cant have been fixed to the studs in the first place.
[img] http://tse2.mm.bing.net/th?id=OIP.M55886b95a3f7ec20d0f04c5d60671562o0&pid=15.1 [/img]
I had these from my previous owner..... they were held to the wall with no more nails.
the best thing I did was tear them down.
I think it was an 80s thing to put shelves above your rads so the heat took a slightly more convoluted path up to the roof.....
Just drill a pilot hole, countersink it and whammo!
toggle fixings,
Before wacking screws in check whats other side of wall, pipes ,cables etc.
There's nothing on the other side.
The more I think about it the more I want to take it down, take the back face off it, and put it back on proper brackets in a slightly different position.
Drill oversized hole through wood to put rawl/expanding plug then us a penny washer over the hole.
Removing rad is easy though.
If it is staying where it is just screw it to the 4 studs.
If you can't get underneath the shelf to drill/screw, you could pre drill from the top at 45 degrees in line with studs in the wall. Start a good 50mm out then countersink the screw heads, fill them after and paint over. Secure fixing without removing anything.
why not simply stick a pair of legs up to the front corners to support it. Painted the same as the shelve it should look fine, especially if you get them nice and symmetrical to the corners of the rad.