![]() You don't need to be an 'investor' to invest in Singletrack: 6 days left: 95% of target - Find out more
You don't need to be an 'investor' to invest in Singletrack: 6 days left: 95% of target - Find out more
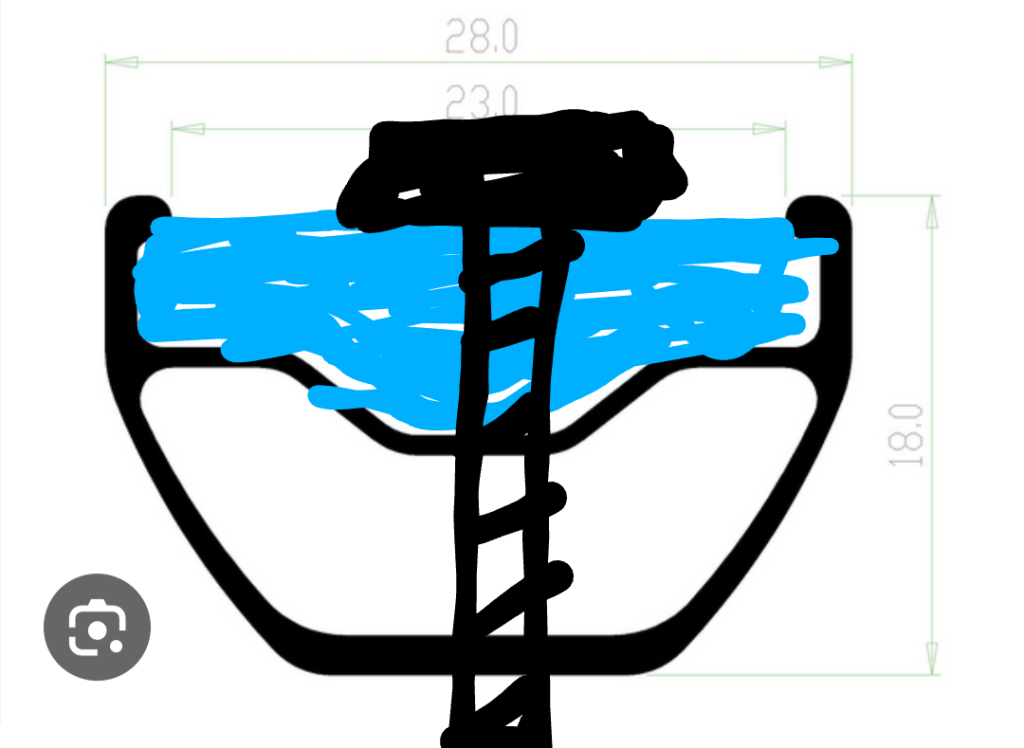
I've a plan to cut up an old rim to make part of a bike rack. I will be drilling out a spoke hole to either accommodate an M8 or M10 bolt passing through (It's a 40mm internal rim so lots of material either side). I'm wonder about using something like JB Weld or some other liquid 'weld' to pack into the space between the two rim walls as reinforcement to stop the two sides being crushed together as the bolt is tightened. Would a product like this work as I think it might and any recommendations for a product to use (alloy rim).
One other option is to shim with washers internally however I suspect it'll be find finding washers that fit.
Don't see why that wouldn't work.
Perhaps build a temporary wall with gaffa tape either side in the rim well to contain the filler to the area you need only.
Something like Milliput (epoxy putty) could work too.
Rough up the surface, press in well and you should be good.
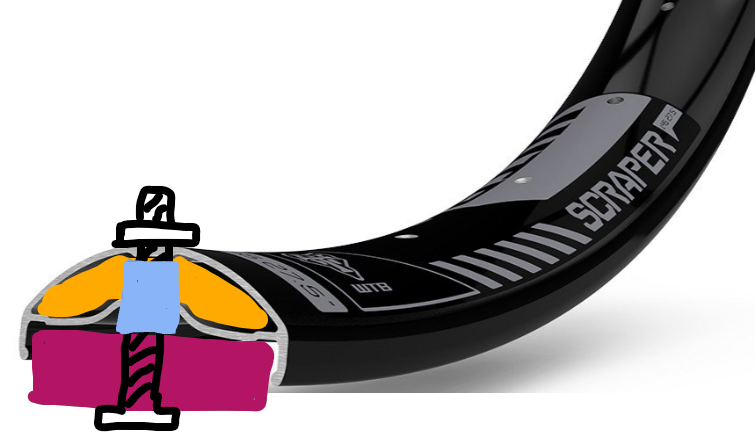
You mean like this?
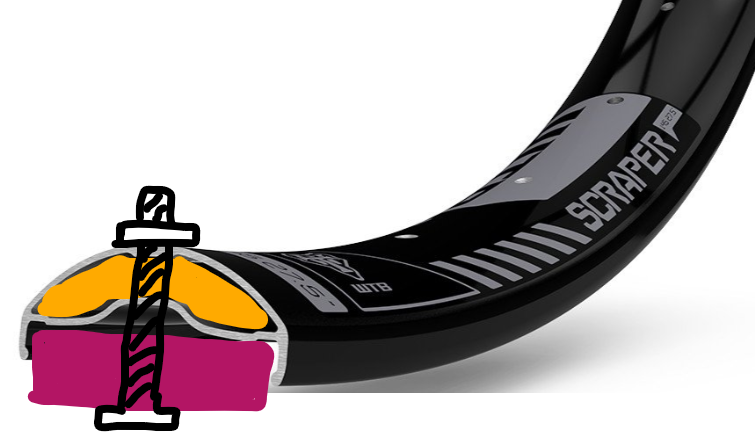
It's a WTB scraper i40 rim so like this. Orange is filler, purple is what I'm attaching too.
How about drilling one of the walls big enough for the bolt head to pass through, then your not clamping two walls together?
I think that I need to clamp both walls for rigidity.
I think I have some milliput somewhere already (assuming it hasn't gone off).
Use 2 nuts.
FIx one as you have shown but do not over tighten it so the wall is not crushed. Stick a blob of epoxy glue to the thread as you tighten it so the nut cannot move. Then use a second nut to clamp anything tight as you like against the first nut with washers between as you see fit.
Rather than using a normal round washer on the inside of the rim just get a rectangular strip of metal that fits inside the rim and drill the hole for the bolt in the middle. This way, the rectangle will run maybe an inch either side of the hole inside the rim to spread the load but be narrow enough to fit and sit on the part of the inside of the rim designed to take more load.
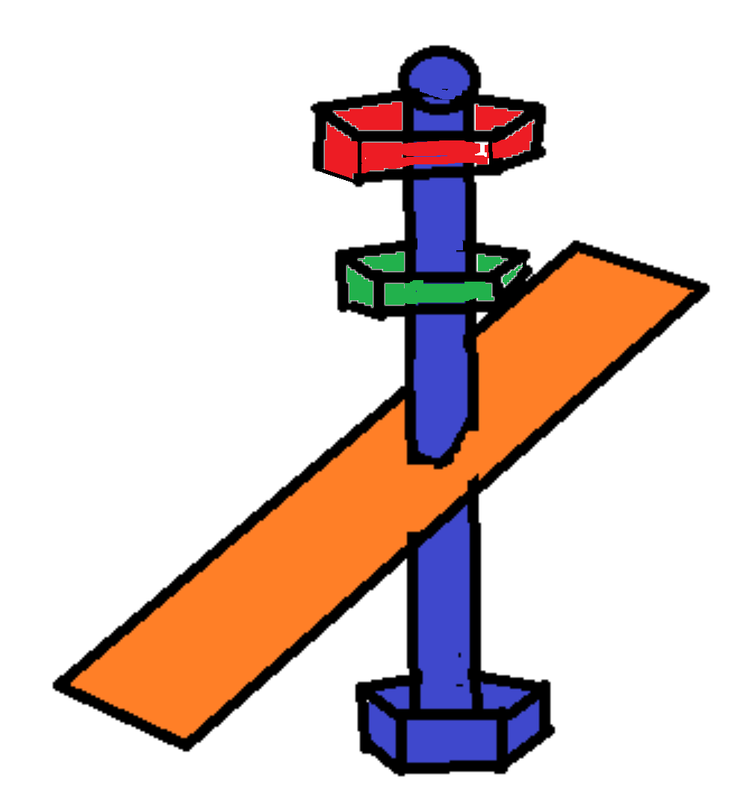
This CAD diagram might help to explain.
The orange bit is just a strip of metal cut to size with a hole big enough to get the purple bolt through. This can be bent to a curve to match the inside of the rim.
The rim sits clamped between this and the green bolt which is glued into place when fitted.
The red nut the fixes whatever you want to clamp and only puts pressure between the red and green nuts so doesn't damage the rims.
Make sense?
It does yes, I think a version of that will work. The bit being fixed is going in the rim bed. On the spoke/inside it'll be a nut securing the rim part to the superclamp. I cut the rim at lunch time and the gap between rim walls is not massive, I think its the sort of width where it would be possible to run a thin strip of aluminium bar a short way around the rim (i.e. the bar would deform as pushed in). I've mocked up the attachment using shorter bolts, will grab a picture later on as that will show what I'm trying to achieve.
Thank you.
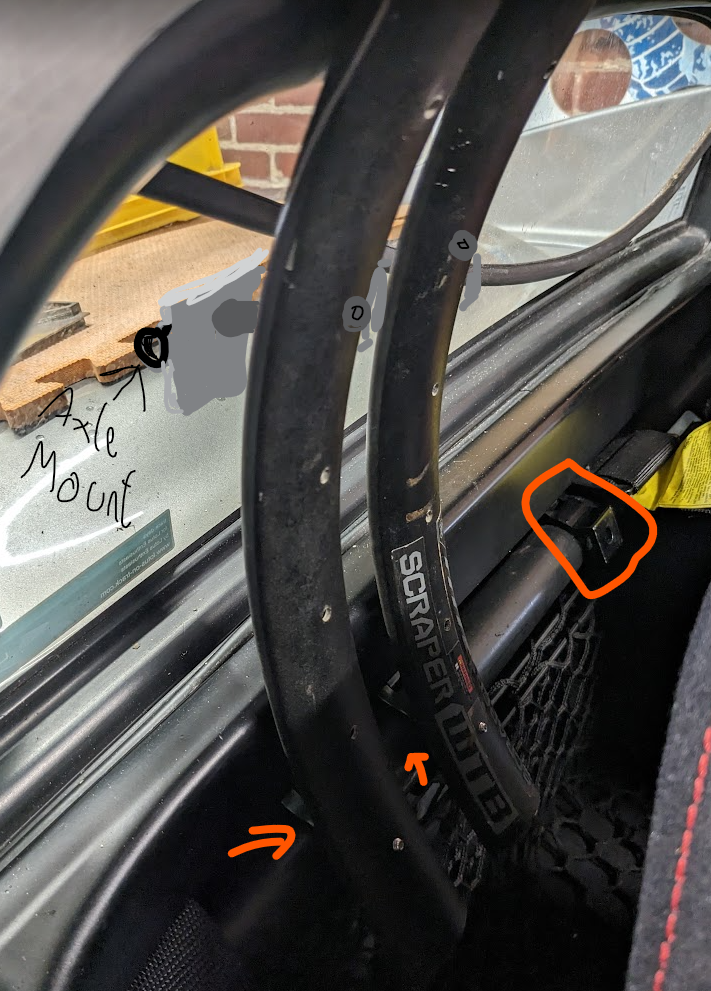
This is the plan. Two 100kg rated rigging lighting clamps (same as in orange box), two rim sections bolted onto them and braced on the rollbar. Fork axle mount bolted on (through the rear window which will be replaced with polycarbonate).
I have concerns for your liability with the potential catastrophic failure of a diy bike rack.
I can't see that would be any different than liability for a badly strapped on 'proper' rack. This will be attached onto the harness bar and roll hoop, both which are fixed to the chassis. At the back the bikes are also going to be strapped onto the two underbody towing eyes that attach to the strongest part of the rear sub frame. I'm making it to carry CX bikes and XC race bikes, not e-bikes.
My concern is for the strength of the rims. I don't think they'll be strong enough.
I'm a wheelbuilder, not an auto engineer, but I do know how rims respond to loading and spoke tension and bending / twisting forces. They're stiff but they rely heavily on the spoke tensions to hold the structure strong. The rigging clamps may be rated to 100Kg, there's no way I'd hang that off an [u]un-built[/u] rim. (of course, you can do way more impressive things to them when they're part of a fully-built wheel).
Also a wheel builder here. I think an unbuilt rim would easily take 100kg (rim hanging on a hook with weight on it). I'd even hang myself from the damaged kom light I have without worrying. However in compression I think it would fail.
You may have a point though as this is now only a section of rim. It's metal fatigue that I'm concerned would be the main issue, hence using chunky bolts and spreading the load. I will be connecting the 4 sections together to resist twisting. Also have some load tests planned, like pulling the car around by a single piece.
They original plan was 20x30x1.5mm steel box section. I may go back to this plan but using otherwise scrap bike parts appeals. That and as I don't weld connecting the parts together if more difficult.
What about that expanding foam stuff, would that work?
Or, drill the inner part of the rim slightly bigger, and use metal pipe/tubing to act as a spacer around the bolt