![]() You don't need to be an 'investor' to invest in Singletrack: 6 days left: 95% of target - Find out more
You don't need to be an 'investor' to invest in Singletrack: 6 days left: 95% of target - Find out more
[img] 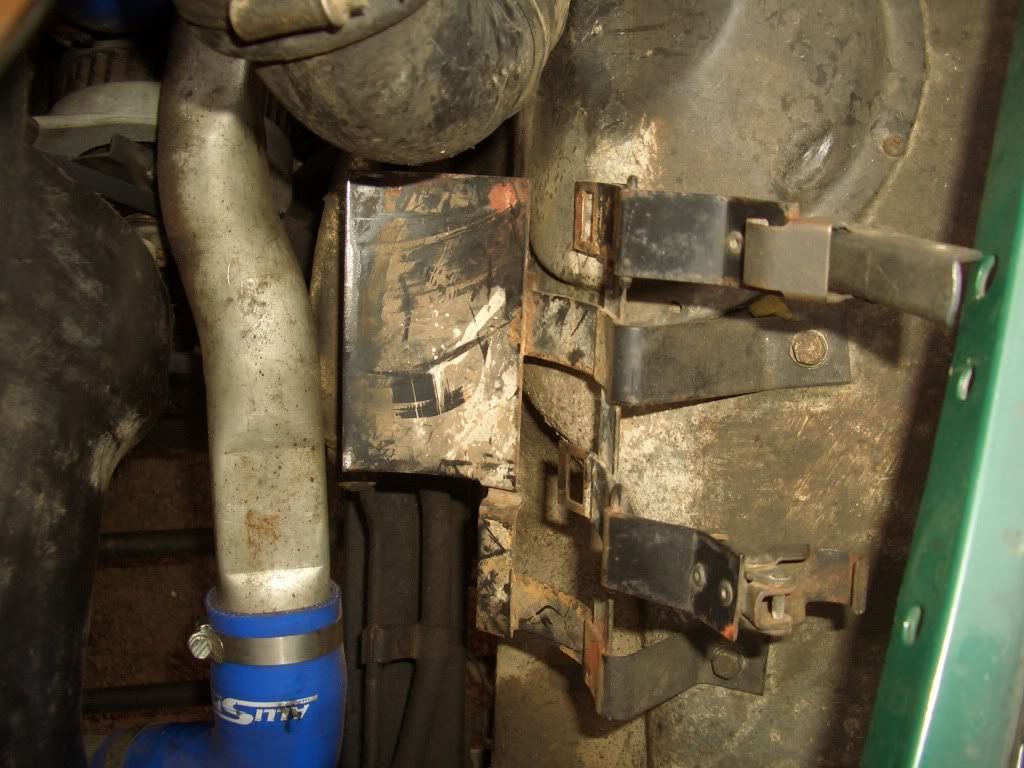 [/img]
found that today - with the airbox in hand - that photo , my pressbreak and various V8 airbox componants i have lying about
i should be able to copy that without too much dificulty.
its hardly elegant or complex.
do be aware i might hassle you for some measurements further along the line stoner. but it will be some way down the line when my wings are there to attach it to.... although IIRC my washer bottle lives there..... i do have a whole V8 donor though - ill see what it has for a washer bottle and maybe rob+relocate.
one of my jobs next year is to replace all the hydraulic pipes and hoses before they explode
I have a 200TDI GenLR Pump to Box Pipe sat in my garage if you want it?
I ripped out the washer bottle etc. It takes up a load of space and fills the whole wing void forward of the tower cap. I replaced it with a small wipac unit that's far easy to site and fill.
Do you have an original filter box or are you using an aftermarket thing?
As you say, not the most complicated thing to make. My measurements might be a bit out though as mine was bent to **** and it's still not square, although it works 🙂
EDIT: Oooooo tiger you spoil me! That would be very handy indeed. Let me check the part no. back in a tick...
original box.
i thought i had the bracket too - ill have a good look about tonight as i was in a rush last night but it wasnt in or around the box of ancillaries :s
[img] 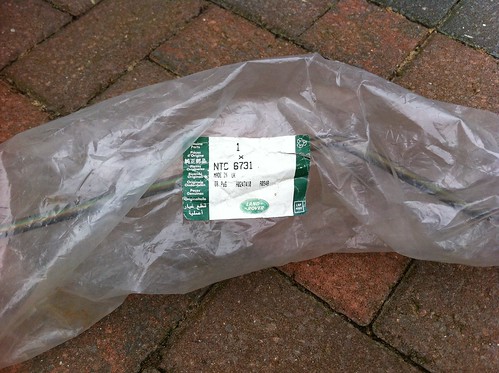 [/img]
[img] 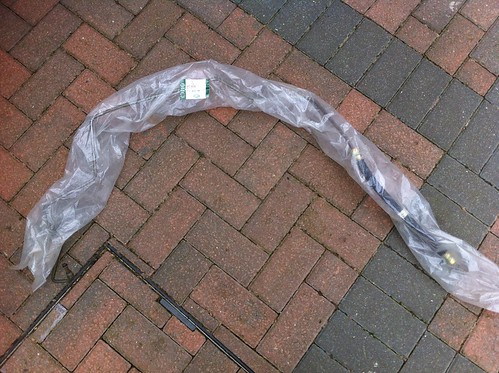 [/img]
Never fit it before I sold my old 110
Found it! Page 466.
TBH I wasnt planning on doing the steering hydraulics. Do they degrade like the brake lines?
That NTC6731 isnt cheap, you should put it on eBay really!
http://www.brit-car.co.uk/product.php/88986/0/hose_pas_pump_to_box_90_def_fa389__
they tend to rot out on the steel pipework under the radiator stoner.
yep a genuine LR one isnt cheap.
mines will get a 29.99 shitpart when the time comes.
Well you can have it for the cost of postage if you want?
I wont look a gift horse in the nostrils, so yes please Tiger, v generous of you. Will PM.
[IMG]  [/IMG]
[IMG]  [/IMG]
[IMG]  [/IMG]
Stopped raining long enough for that to happen today.
Its now living under a car cover with weights on.
Back to finishing off the bulkhead now that i can move in my garage again - engine and box took up an unsurprising amount of room.
hey, trail_rat, how's that lump of rust of yours coming along?
Get a move on, we have to do some practising 🙂 :
Land Rovers near salt water. Wow that's brave. Can almost hear the fizzing.
Been painting .
Slow work.
Bulkheads blue.
Oh and i had to go to work for 3 weeks.....
Turkmenistan for a while then the north sea for a week over new year.
Made some pocket money then to splash on the blue beast?
INdeed, eyeing up splandrovers series door comversion as the bits to make my pushbuttons not fall apart will be about the same price 🙁
I'm not sure I'm allowed in this thread, but took delivery of a new Defender on Monday. Appreciate it's not old and rusty and needing work, so perhaps I need to give it 6 months before I formally request access to the thread?? 😆 Mid-life crisis and always wanted one...
good un
I bought a new one couple of years ago 18000 miles in and love it, no probs
I saw the one landy i would buy new.....
The heritage edition innthe mint green with the retro series grill , looks amaizing.
So disappointed they didn't draw a massive cock and balls on that beach
Tomorrows entertainment is a new rad and Intercooler for mine. Well if the wind holds off anyway
With the petrol lower its got to be time to shop for what I always wanted , series v8
trail_rat - have you seen this thread on the SP kits?
http://www.landyzone.co.uk/lz/f7/sp-land-rovers-door-kits-273821.html
PS I agree that the heritage edition looks nice, but it would look even better if it didnt have the "puma" bulge in the bonnet 🙁
[img]  [/img]
Agree with you on the bulge.
I have seen that thread
Id love to pair sp lowers th rocky mountain door tops but alas- 300 quid for a pair of door tops is a bit rich in these times of oil austerity 🙁
I don't know if anyone here read about it, but it seems that rumours of the Defender's demise has been somewhat exaggerated, as Landrover/Jaguar have announced that production will cease in the EU, but will continue in the Far-East and Africa, as there are continuing and new markets there.
I'm sure that fans of these wonderful old vehicles will be very pleased about this. 😀
Which is great for parts but itll end up being like emerica for importing new defenders...
Windscreen cut out , seatbox prepped for paint and stone chip.
Bulkhead flaps ready to paint and hinge mounts in position to be spot welded in the morning.
Been busy installing the compressor i got for xmas into the garage propperly - that is putting it in a shed in the back garden so i dont hear it ....plumbed the old and new ones together . Twin hoses coming into shed. One into an oiler and regulater /water fillter and the other just into a regulator/filter. And on separate fused spurs so they dont have to both be on if i dont want much much much better than just the 24l . 7.5cfm , spraying has to be better it could only do about 30 seconds spraying before. Added a 100l 14cfm.
that's more like it you lazy bastard! 😉
what's the compressor for, really?
I've always seen them as nice but not necc.
Spraying of many things mostly.
I got given a little 24l job and found my self using it more and more for jobs hear and there , then i got a big one from the parents for xmas.
[img]  [/img]
Bulkheads back in.....another milestone ticked off.
lotta lotta prep work for spraying when someones hand painted the damn thing in the past.
slow progress but thats the rear of the cab blue again. - twas brush painted limestone - seals an all .....
really easy job to pull the glass out - 16 philips screws , and a flatty to pull prize the filler out of the curved glass seal - then push from the rear the glass pushes out of the seal - pull seal out of window - to reveal the still blue window reveal under neath.
sanded the lot down till it were smooth - except the fist sized dent under the slider - it can stay **** it - its not a concourse truck.
its also marine blue now - as is the windscreen surround - not looking forward to fitting that again - cut the old perished seal out with a stanley.
[img]  [/img]
Space is tight ...... so far ive avoided getting overspray on anything but the floor.... - i can live with a blue floor :d
Need to pick up a new drill bit so i can finish the repairs to the front of the tub - my ti ni has worn off and i cant get the remaining "HSS" to hold an edge for more than a couple of holes - despite being careful not to heat it too much..... irwin aint dormer - my few dormer bits hold a ground edge beautifully - dont have the right size in dormer - yet - its on its way.
[img]  [/img]
[img]  [/img]
doing - (stolen from YRM)
[img]  [/img]
[img]  [/img]
[img]  [/img]
- and industrial quantities of seam sealer.....
once i get the tube done and bolted down i could have a rough approximation of a "weather resistant" structure.
nice - have you seen the threads/guides on refitting windscreen using string/wire and naval words?
I got close to managing it but broke the screen near the end - not unexpected given the big chip in it.
nice tidy and clean paintshop work space you;ve got there t_r 😉
i like to call it versatile.
its a garage of many jobs.
oh and its significantly better than it used to be !
[IMG]  [/IMG]
Test fitting the bodywork.
[IMG] 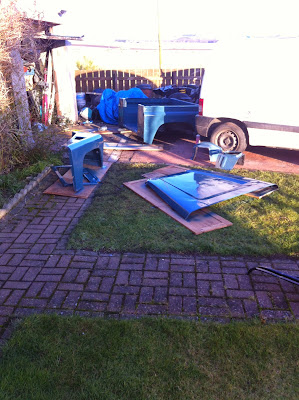 [/IMG]
Stripped it all back off to paint it. Pulled the steel frame out the bonnet , cleaned it up and painted it before reassembly and fitting the new galvanised and painted cappings all on the rear end.
[IMG]  [/IMG]
Rear tub floors pretty grim - pressure washing blew holes in the alu where it contacts/rests against the steel. Due to time contraints and the fact that they wont be an MOT failure they will be repaired at a later date - Same thing with the rear most quarter panels - I have 5 months now to get it road worthy - and im currently sat in perth australia for the next month with work.
[IMG]  [/IMG]
Reassembled properly now. all bolted up- all looks pretty good on the alignment front which given how much ive chopped and welded up this chassis and firewall has made me pretty happy , the proof will be in the door fitting i guess - which i will be ordering in a couple of weeks , brand new series conversion items from SP4x4 back in the uk. Still undecided about splashing out on rocky mountain ALU door tops but i guess at 49 quid for a glazed door top from SP i can order them for now and decide if i really need rocky mountains,folks say the RMs being stiffer create a better seal with the door frame and thus you stay drier- given my LR its due even in the pishing rain i NEVER got wet - i think its a rare beast that...
[IMG]  [/IMG]
Need to do something with that chequer resh - chequer rash is for places you might stand ..... you cant stand on a vertical surface. How ever close inspection shows its holding that tailgate together. I might see if i can unrivet it and turn it over to the smooth side and rerivet- then spray it blue- or i may just spray it blue Till i can find another tailgate.
[IMG]  [/IMG]
How she stands now in the scottish winter. hopefully not pissing the neighbours off too much since its progressed significantly in the last week from a heap on the floor to an actual car 😀 dear lord it is tall though , its only a 2 inch lift. I hope it settles a little as its still rolling on 205/16s and it will be 750x16s on the lime stone rims that are leaning against it once im done which will be another 1.5 inches height i believe !
PS the engine(a newer 200 tdi in place of the 2.5TD so needed to do some loom chopping) even turns over now - after i wasted friday looking for a black earth wire from the starter relay which goes into the wrapped loom as a black and according to my multimetre probing it comes out as a black with green trace. this is the "starter inhibit" wire according to my wiring diagram - not exactly an obvious one is it ! - it earths on the gear box not the bulkhead as my diagram says it should. I have not run the rest of the cables nor finished the fuel system so it wont run - and i deliberately kept it that way while im away and it looks like easy pickings - i also left the steering disconected in many places for the same reason - front wheels pointing at each other for a reason 😀
Grrrr. My 1997 300TDi with a Toad immobiliser isn't starting. When I touch the fob to the immobiliser the LED goes from flashing to solid as normal, the usual ignition and pre-heater lights come on but the engine isn't turning over at all. I can hear a relay clicking behind the dash but having dismantled the dash I can't find any obvious problems. Any thoughts about what to do next or know a good Landy sparks near Burnley?
Is the starter and engine turning but not firing or is there just a relay click and no turning?
Relay will be the starter/timer relay.
Check with multi meter for power at starter solenoid when ignition in start position if its not turning over.
If you got power there and its not turning over then solenoids dead, if your not grtting power there your wiring meeds more investigatiom or look at your immobiliser.
I find it highly unlikely a toad immobilisers packed in before landie componants !
Progress hasnt stopped , theres just stopped being sexy photos....alot of what ive done you cant see , props/bulkhead brackets , clutch and brake plumbing/exhaust etc etc.
[IMG]  [/IMG]
[IMG]  [/IMG]
check my wooden windscreen.
[IMG]  [/IMG]
plain old sealed beam units + wipac LED side and indicators.
[IMG]  [/IMG]
[img]  [/img]
i ended up aquiring a "newer" loom from a 200tdi to save me needing 3 diagrams to match up what i had/ get rid of the glass fuses PLUS trying to extract a badly installed non working alarm system that had been grafted on by blind pew and a hatchet. Plus all the melted bits from the eejit before me having big spotters on without relays.
Fitted a boomslang direct feed relay controlled headlight job - what a difference -well worth 25 quid - also fitted wipac LED sides/indicators/stop/tail lights in the hope of stopping land rovers famous "bulb dropping"
Oh an she starts as land rover intended. Turn key - wait for glow timer relay light to go out and turn it over.
I did get it going on the old loom but a series of wire shorts meant i had croc clips and wires all over the engine bay by passing shit.
looking good.
those sealed beam wipac cans are more than good enough. They outshine my T4.
Those lamp surrounds could have done with a paint though! You'll just have to drench them in oil/silicon instead to get them back to black...
You need to hang some lights off that cow pusher dont you or else it's illegal isnt it?
Saw a 15 plate 90 today. Bastard.
Yeah i need to do something about them esp as the grills shiny black.....im thinking new surrounds might be the best option.
My spats have the same issue..... Thinking kiwi boot polish....
Cow pusher..... Who has one of them then , i just see my winch bumper....from whereupon the winch will hang
Stock on standard non relayed wiring seals beams suck..... On relays with direct feed from alternator they are the bomb.
Simoniz tough black paint goes on the black plastic pretty well I found. Available in Matt and gloss.
ah good spy , as anything else will likely fail to cover up the overspray primer from previous repairs to rear quarter.
i expect there will be a set of CREE leds hanging from the A bar before it goes on the road - jesus they are cheap now.
Its looking good, a Land Rover sized garage is so at the top of the list for the next house. When will it hit the roads of Aberdeenshire? I'll keep my eyes open.
may or june at a guess ... works about to go mental.
Don't do the simoniz at less than 20 degrees temp. Multiple coats but let each coat get wet enough to cover wet fully. Needs little more keying than a scrub with a green pan scourer.
20degrees. ..... best take it to oz with me ....
The only room in my house that gets above 20 is the living room when the mrs is stoking the fire and im outside.... and i wont get to spray in there !
well you were right stoner.
window sporting a nice shiny crack.
to be fair i was warned before we started and suspected it would crack- there was a slight chip in the edge of the laminate - soon as the string came past it that was the end for it .
screen wass buggered anyway - when i cleaned it up it was clear that water had got between the layers at the bottom.
finished fitting it to keep it water tight but i suspect a heated screen will be the answer just prior to MOT need to find a freindly fitter :d
1991 ex-MOD winterised 110 with a 2.5NA. Originally bought because I wanted a basic no frills easy to repair Defender.
As bought off Ebay unseen on a cheeky lunch time bid!
In good mechanical condition but with pretty much every panel dented.
[url= http://s30.postimg.org/sad40yu8x/Lanny2_7.jp g" target="_blank">http://s30.postimg.org/sad40yu8x/Lanny2_7.jp g"/> [/img][/url]
[url= http://postimage.org/ ]20mb image hosting[/url]
Drove for a few years whilst generally sorting it mechanically including fitting a gas flowed head to the original 2.5NA and experimenting with general 2.5NA 'tuning' as chronicled on LR4x4. Pretty much all panels replaced and repainted The overlanding bug bit after working in Morocco for a few years which led to a roof tent, awning and general other overland-y bits.
[url= http://s23.postimg.org/xysg8qvez/DSC01495.jp g" target="_blank">http://s23.postimg.org/xysg8qvez/DSC01495.jp g"/> [/img][/url]
[url= http://postimage.org/ ]image upload without registration[/url]
Fast forward to now and rebuild time, the cross member is starting to rot and has a small hole despite slatherings of waxoyl so the decision has been made to rebuild it onto a galvanised chassis. The bulkhead and any other steel/brackets are to be galved, and everything else re-painted, re-zinc plated and re-powder coated
The engine is to be removed and replaced with a rebuilt Defender 200tdi that is currently stripped ready for Turners to do some work on the block. the gearbox is already a new Ashcrofts D suffix H Lt77 that I bought a year or two ago along with a new LT230 1.4 transfer box.
[url= http://s28.postimg.org/gcp8h0fv1/WP_20150403_007.jp g" target="_blank">http://s28.postimg.org/gcp8h0fv1/WP_20150403_007.jp g"/> [/img][/url]
[url= http://postimage.org/ ]post images[/url]
Its been a while but.
A new loom was fitted, all my led lights were fitted ,all the trim was sprayed vinyl black , the panels were all lined up as best possible , lots of persuasion needed for some. All suspension done up propper.
Last week my front axle swivel colapsed so i rebuilt both swivels and hubs inside out new seals, bearings , cv joints and drive members , all the slack in the drive train seems to have ****ed off.
A test drive reveals it to be spritely..... For a lumbering beast.
Mot is on the 16th and insurance was 213 quid fully comp agreed value on all mods declared with heritage . The only thing they had an issue with was e changing the engine my self with no "engineer " sign off.... As i have done in the past - asked what constitutes an engineer...... - she said a mechanic or an engineer - to which i replied well i have a degree in mechanical engineering and i am employed as an engineer. She was happy with that - as was adrian flux last time round.
[img]  [/img]
[img]  [/img]
Nice work. Looks good. Like the wolf rims and split door look. I'd be looking at raising the bumper are lower in air intake though 😉
Yeah i want air intake mushroom level with the roof.its just beging to snag trees there. Wont take long but not high on priority atm .
Bumpers not moving any time soon , thats a fair effort. If it starts to hinder me ill get it moved,
nice one trail_rat. That's turned out reet nice.
just done the annual filters & oil change on mine. Such an easy and cheap job to do.
And did the rocker clearances for the first time last week. Just as well as you could fit your finger between them 😉 Cant hear a single tap now.
Did the timing belt , water pump , crank seal , inlet/outlet /turbomanifold gasket , tappets (removed rocker shaft to check push rods) checked glow plugs out out of curiousity - see if any were oily.
Rebuilt the brake master cylinder ( was slowely sinking to floor with engine on and brake held on)
And tried to set up the head lights.
Yesterday was a productive day,
Previous owner had done timing with paint marks qnd got the cam out by 2 teeth and the ip out by 1 so was well worth doing , even less smoke and doesnt need glow plugs or to turn over , it starts like most other healthy 200tdis without even turning over.
I
[img]  [/img]
Last week i rebuilt both front swivels on acount of funny steering. Turned out passengers lower bearing had colapsed and was letting the wheel move about 1/2 inch on the swivel pins..... And i was thinking i was just gonna adjust the wheel bearing 🙂
[img]  [/img]
That leaves the gear box as the only original untouched bit....
got to think about doing my timing belt sometime.
Ive kindly been given some new pulleys. Did you use a torque bar on yours? Is it an easy job (not forgetting I have no fan or cowl to remove anyway)?
How easy it is depends how competent you previpus owners mechanic was.
If he knew where copper slip was
And if he knew where the blow torch was
For me it wasnt bad- but no anti sieze found an i snapped 1 in the water pump. Previous owner broke 1 in the tkming case.
Once your into the timing chest its easy. You do need a torque wrench to set tension. If you go too tight youll burst the ip bearings . Too loose ittl flap and jump
Draper do a 12.99 beam one . I bought a park one.
You asked me before why i needed a big compressor. This job is one.
The main crank dog nut is bastard tight- 340nm and loctited ( or should be) My big compressor and impact driver laughed at it.
The timing kit is worth while for the puller for harmonic damper if nothng else . Pump timing can be done with a drill bit and you can visual the crank with a torch through the flywheel.
Lastly there is a snapped belt to timed engine tut on youtube. Watch that, its all about bein methodical you manage it easy,
ta, will consider a crack at it this year
A little impromptu maintainance today.
Spotted my Farmer neighbour had his sheep out the field today into his trailer so i asked him if i could use his field to take the landy for a good spin get it up to temp and put it under load.
Revealed a nasty tendancy to smoke under load, labouring up hill etc.
Started stripping and got to here...finding lots of loose and missing bolts.....the hidden ones you dont see till the exhaust manifolds off.....
[img]  [/img]
[img]  [/img]
Inlets 1 and 4 were split across the top and the whole,manifold was only being held by the two top nuts "barely" torqued.
Rebuilt the manifolds with a new elring gasket and torqued it evenly and sequentially to 25nm before putting the turbo back and hooking up the oil feed and return.
Took it back and laboured it .....no smoke. Infact the only time it gives a wee puff of reek is when you let off after giving it the beans.
Whole thing feels tight , couldnt be much futher from when i took it off the road as a shonky rattly bouncy bag of bolts.
the exhaust gasket was the very first thing I did at the the start of the thread. I was going to have another look at it as Im sure the tapping noise is the exhaust. There may be nothing that can be done, unless I can find some kind of sound deadener to put on the manifold.
Why is your block gold coloured?
Did you use a brit part or elring gasket ?
Elring has metal stiffeners round the ports. Brit part doesnt.
My blocks gold because its an 11l defender block with the high turbo
just plain paper one IIRC.
I guess mine must be a 12 or 13L then as mine is still a 200tdi high turbo, but it most certainly is not gold coloured 🙁
Block codes on the left hand side on the block next to the rocker cover
Could be a disco block with a defender manifold.....dont break that its rare as rocking horse poo and unicorn tears.
Went for mot today"....after taking it down a day early.
It failed.
- dim headlights. - boomslang light relay has a really strange colour convention - once i noticed that blue is the earth and black is the main beam it was all good.... I had it as red was main beam , blue was dip and earh was black.....no wonder they were dim.
- rear fog ligt didnt work (it did on sunday ....the terminals on the switch were corroded - light rub with emery cloth and some contact cleaner and its good as new)
-one brake clip on the front offside brake line. - clip fitted
Retest first thing in the morning.
All in all ill regard that as a win considering it has all at one point or another been stored on the shelves of my garage over the last year and sat for 4 years before that.
Brakes were really hacking me off... Was locking the back and trying to turn the car. - when you plumb the g valve up the right way it turns out that well set up drums and newely refurbed defender brakes can stand the thing on its nose and anyone that tells you defender brakes are crap just has poorly maintained brakes.
The problem is that a 90 is so short that weight transfer is dramatic and makes the car unstable under heavy braking and easy to lock the rear wheels.
oh forgot - i found a resolve to that and anyone that says the above about 90 brakes is wrong and needs to get their brakes fixed - or at least check they do not havea G valve.
the common sense/logical way to plumb the g valve in is "obvious" but plumbed in right - it looks wrong. - it should enter the rear and exit the front - then the pipe is curved 180 degrees to the rear wheels. - and it will pass a tapley test with the brakes plumbed either way for mot - doesnt make it right.
my brakes will turn you inside out now and i can stamp on the brakes hard and the car stays stable and locks the front first now.
how ever i have fitted all new pistons and seals - new master cylinder , new servo hoses , new wheel cylinders , new drums/shoes and disks/pads and new wheel bearings.
the brakes are the best part about the car.
we have test/tax and insurance.
thunderbirds are go.
*till i got to work today and it didnt start after i parked up..... ****ing main earth vibrated loose and is corroded internally.... the joys of knowing your motor inside out is that it was started again within 30 seconds 😀 - will need to get a new one of them eventually....