![]() You don't need to be an 'investor' to invest in Singletrack: 6 days left: 95% of target - Find out more
You don't need to be an 'investor' to invest in Singletrack: 6 days left: 95% of target - Find out more
Some came out like at.
Others had to see my friend mr meddings the drill.
[IMG]  [/IMG]
Then i tapped the hole and fitted a bolt. They came loose eventually. For the most part it was the metal seal ring had corroded to the piston.
[IMG] 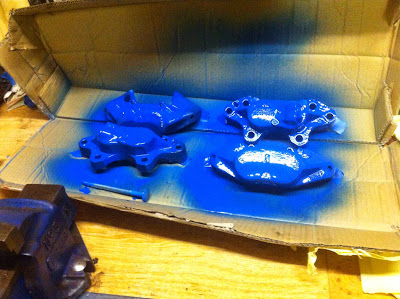 [/IMG]
Masked off the feed and bleed nipple threads and painted the outside.....
Easiest way to mask off the bores? ....heavy grease in the bore enough or should i put the piston back in the bore ? Obviosuly this would work better if the top seal was stil in but i could clean that up with a stanley and some sand paper after , so long as the bore was clean.
Got all my polygushes fitted tonight as well , that just leaves the chassis ones to do when i fit the arms. Feels good assembling stufd instead of dismantling. Its like a giant jigsaw from here on in nearly. Only some of it doesnt have instructions......
Hopefully my paddocks order arrives tomorrow. Yrm won the courier race , they really have been top notch with the parts , you pay enough for delivery but you get your moneys worth, and when they sent me the wrong bit in one order they sorted it asap. And as long as i get gwyns delivery by the weekend.....i might be working towards a rolling chassis by sunday night if i can rope in some help this weekend
polybushes
did you go with those hard plastic ones?
Everyone I know who's used them found them tight and rattly, and breaky compared to OEM style rubber ones.
I did mine last few weeks (with rubber) Just got to fit the trailing arms this week. It rides so much better.
I though it was my bushes that were the cause of my wheel wobble, since the tyres were new. So I did all the bushes, and the steering damper, and got new swivels etc etc
Turns out it was none of that. Changing the bushes took the slop out, but the front still went light at 50mph.
Took the wheels in this morning to a guy I trust and he found them 300g out of balance! 😯
A lot of lead later and she's driving like a Bentley! Sweeeeeeettttttt!!!!!
If it they dont work ill change em back to metalastics.... But i got a set of superpros free still sealed up so it seemed rude not to use them.
I reckon just qbout anything including blobs of chewing gum or cut up bits of tioga tire would have been a significant improvement over the old bushes ill be honest.
Probably acounts for why it drove like an ikea wardrobe- i just hope that isnt why i liked driving it....the surprise of not knowing if you were going to make it in one bit.....although that said - for it being so shonky it only let me down once i. 8 months and that was a front prop uj dumping its guts on the road......a more versed mechanic than the young me at the time would have noticed it months before it happened......how ever i just grabbed a 9/16 out the back removed the front prop , stuck it in 4h and carried on 🙂
ah, well free is excellent value for money 😉
Not all polybushes are created equal. Superpro are the ones to have, we use them on the racers. Some of the cheap nasty polybushes can be as Stoner describes, especially the hard orange ones.
mrs T-r would love these to be out the spare room so guess where they are going......sans harness as i cannot get them mounted safely without a cage - and in a truck cab its a PITA to get them through the cab without losing the back window. they have cleaned up well just the drivers side upper bolster needs a patch as you can see.
she also said she wishes id told her these were going in before she picked her wedding dress....
Is that a blue trailing arm? Why is it bent?
Just fitted mine today and took the anti roll bar off to refurb
And are those spring locators?
Cranked trailing arms. If it wasnt bent my suspension would be limited by the trailing arm angle.
I said at thw start im building a different beast to you 🙂 ,.... Mines a truck cab rtv possibly stretching to ccv motor.
So yeh thats gwyn lewis front towers , turrets , spring locators and bottom spring retainers
Got dropped pin by pin shock mounts for the rear , +5 shocks all round with a 2 inch lift on the softest springs i could get my hands on ( without paying silly money) rear dislocation cones with hooks and full circumferance spring retainers out back. Extended brake lines and a high articulation 45 degree a frame ball joint- standard one tops out at 30 degrees.
Yer grass is in need of some TLC ratty
Come round on your many days off then and sort it out.....
For free of course .....your gold plated public sector pension should be more than enough to cover it 😉
We had leather gaiters on our MOD 90 and after 255,000 miles the swivels were holding their EP nicely - although of course the axle may have been newer since the MOD change parts for fun.
did your mod 90 sit static for 4 years not gettting its swivels coated in nice ep90 a few times a day ...... thats probably had more to do with it than some bits of leather ill be honest as they were perfect when it was parked up - my bad for not mothballing them with grease - although i didnt anticipate 4 years of waiting to build.
you cut your rear arch and spat - any reason ? you dont have particularly aggressive or large tires on - but i like the look.
aiming to poke my straight through single silencer exhaust out just above where you have simex sticker.
I really need to sort out a cage 🙁 postage to where i live i nearly as much as buyign the cage - might wait till its on the road - then go on a road trip have it fitted and drive it back via some lanes in north englandshire.
Arches done by previous owner who ran 35-37" tyres. I bought it pretty stripped out mechanically and rebuilt. Those tyres did look a bit lost in there. Never got round to putting standard spats on as the bodyword was also trimmed back making it tricky. Never got round to painting the doors/tailgate either before I sold it 😕
Exhaust on that one comes out the rear crossmember, you can just make it out on the pic. Kept it nicely tucked up out of the way. Full stainless system with two little boxes. The 4.2 sounded lovely through it. I miss that truck 🙁
Shaun at North Off Road for the cage?
north is a probable source as he is close -but the wrong side for the lanes id like to try 😀
there are a couple of places up here(well the central belt) that will do such as LCS engineering but ive yet to see a price.
as a whole the club im with seem to like whitbred offroad for cages after one of the lads got a thug - its some awesome work of welding art/porn.
Most of the Whitbred stuff I've seen I'd describe are workman like rather than sexy. Nothing wrong with it, solid and functional. Although they no doubt have a number of different people welding them up. They are a long way from you, unless its the mid Wales lanes you fancy, of which there are plenty and some bloody good ones.
Also 'up north' is Dave Billings at Tornado. He does nice work from what I have seen.
One other consideration is tube material. I think both North Off Road and Tornado use CDS for their cages and unless it's changed Whitbred use blue band pipe. Pros and cons to both. But for CCVT where rolls can be routine rather than the exception the ticker walls of blue (or even red) band pipe can take the knocks a bit better than CDS which can dent more easily. Just a thought, which you may have already considered.
i believe you can pay a bit more and spec what you need with north at least.
Im kind of hoping Lenny can accomodate my needs but im a long way off needing a cage.
"I'd describe are workman like rather than sexy"
is exactly how i would describe my Gwyn lewis kit - except the trailing arms a good powder coat hides a multitude of sins .... given mikes thug is dipped thats probably why it looks so good.
New stainless pistons went in a dream very easy job even the metal outer rings went in not bad. I did practice with an old one i salvaged first though.
[IMG]  [/IMG]
[IMG]  [/IMG]
Rough afternoon making headway into front axle. Got it all welded on in the end though.
And my good deed for the day, cut and fitted my neighbours door handles for her.
Now i only have 1 1mm disk left 🙁
Ill also revise my rolling chassis dead line from tomorrow night to ......xmas haha.
Now i only have 1 1mm disk left
Ive got a handful I didnt use...what's postage to the boondocks?
are those new radius arm mounts from yrm? Look tidy. Just as well there's a lot of naive metal on those axles 🙂
More than itll be for me to drive to screwfix in the am and get another 2 boxes of rhodious disks. Did a mad dash to bnq tonight to find not one single cutting disk on the shelf.
I even exhausted my back up reserve 125mm aldi disks....they are terrible. Do not advise using them without a face shield .. They like to explode
Yeah they are yrm mounts they are good but not perfect , i had to modifie the panhard rod position it was at a fairly wacky angle.
yeah, mine are silverline "face shredders" so value for money.,... 😉
have you had a go at filling those swivels with something other than rust yet?
No that will be done at the end, they aint leaking.
Fwiw ive been told not to even try taking them apart if not on the car - good chance mines been in since 87..so will need the full 3 ft breaker and scaff pole.
Cheeky wednesday working from home..... That is manning the mobile/emails on the smart phone.
No one bothered me so we got progress + jobs like this that require hours of continuous grinding i like to do when the neighbours are at work so weekdays are ideal , they are great neighbours and i dont wanna piss them off by grinding all weekend..... Unfortunantly im at a stage in the project that requires lots of grinding. Turns out he used to build track day fiestas in his younger days , has some impressive work photos.
Ran a wire wheel over the whole front end after removing steering set up and bulkhead.
Stil not worked out how im getting the front bumper off without trashing it..... Previous owner snapped the bolt heads and welded the remaining studs to the bumper top. Ground this weld off ....expected the bumper to pull off and then be able to retrieve the studs....but now , the bumper has 2 plates and this studs long.
Have cut through one of the studs with the recip saw just struggling a bit with the other as access very tight.
Although i have bought a used tubular winch bumper with an A bar on.
From hear as d.ream once said......things can only get better.....
After all theres no more bits to come off.....well except the gearbox cross member......but knowing how much fun they are to fit it can **** off.
the other radius arm bracket came off in about 20 minutes - 40 minutes cleaning up the axel and placing the new one - welded on.
then had to pack up early saturday to go into town and get dinner/see dave gorman at the music hall.
sunday - fitting suspension sans engine is quite hard ---- lots of ratchet straps were used to pull weight into the chassis so i could jack against the radius arms.... still didnt go - found the new brackets face to face were 2 mm under size- and the new bushes were 1mm over size - using verniers.
dismantle - grind down to size and refit.
Front end done.
i have spring compressors - they did not help.
it was the radius arms giving me gyp.
how ever ive since watched a video on youtube....had i dropped the wheels off and rested the diff on some wood- then jacked up one side it would have gone not so bad.
ah. Mine took some wallop and jacking.
Hopefully taking mine next door onto my mates 4 post lift* this afternoon to refit the anti roll bar (new bushes) and top up some lubes.
* has to be when the weather is nice as he has to park his TVR outside if Im using the lift! It is orsum though!
how the other half live 😉
Mrs T-R said once finished we have to stop at 1 land rover project for a while.... i said no problem - if i do anything like this again itwill be after ive built a garage in the back garden - with lift - which is after the kitchen has been done. - so by the time this needs a galvo chassis in 20 years time i should be just about ready to strip it again 😀
spend so much time getting gear out and tidying away every night.
how ever i guess thats better than just leaving tools spread out all over the floor 😀
I have a huge Facom spring compressor should you need one.
I also had a four post ramp in the Spruce Goose Hoose, my shed back in Orkney. A ramp is a game changer, no job however trivial is not a pleasure.
ill bare that in mind mcmoonter.
based on the fact im pretty factually incorrect in my rebuild already ---- do you think i could get away with a marine blue/lime stone paint job instead of the original stratos blue/white ? - the paint job thats on it is pretty tired and the doors/tub cappings/roof need to be renewed/sprayed anyway - as all from different colour vehicles 😀
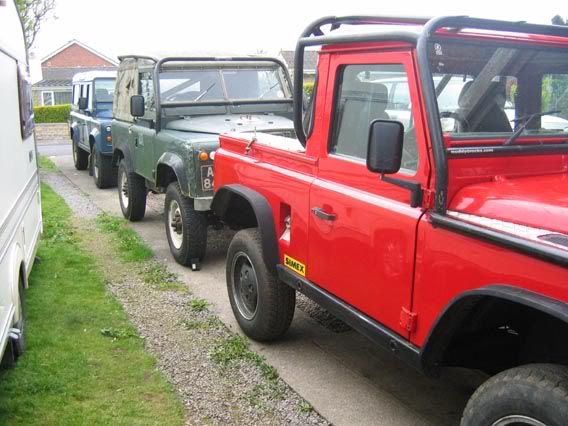
marine blue is a series colour.
we had a marine blue/limestone hardtop series 2a in the family when i was a kid and i always loved riding in it.....
another paddocks order in today .
HD clutch fork , slave , a 90 fuel tank and bump stops all round, elcheapo steering damper - as i dont think it does owt anyway and a couple of seals id forgotten.
they are expecting my fulcrum in mid november - i dont think that will hold up my mot by much 😀 will fit rear axel with the old one for now
[img] http://www.landrovercentre.com/wp-content/uploads/2012/08/P1110830.jp g" target="_blank">http://www.landrovercentre.com/wp-content/uploads/2012/08/P1110830.jp g"/> &w=523&zc=1[/img]
not a truck cab....but you get the idea.
a series 3 hard top ..but you get the idea ...
both marine blue.
stratos blue 90
wheels will be lime stone also - but are discovery steelies.
Mines going marine blue with limestone... well I say that I mayyyy keep it the colour it is and just repaint the black bits limestone and remove paint from the galvy areas as the paint work is actually pretty good.. but I've got itchy fingers and I want to take it back to its original colour also.
I replaced the steering damper on mine as it was only a couple of quid more than some new rubber bushes for the old one!!! It did come in a blue box, but it seems fine. As you say, it doesn't do a great deal save for stop the steering wheel braking your thumb when the wheels catch in a rut 😉
fancy coloured plakky bumpstops or nice fat black rubber ones?
Yep mines will be in a blue box also.
Just went for standard black rubber, didnt see the point in fancy extended ones at 20 quid a corner , thats why i bought long shocks and dropped mounts, why would i want to limit travel with rubber chocks.
Y'know the more l look at that stratos blue the more im liking it again. That landy makes it look good....mine did not 🙂
That orange stripe down the wall in the pic above reminds me of the scum at landrovers uk , unhappy times
But the colour does look good
I like the old series Marine Blue. My old IIA was that colour. My 300tdi Discovery is too, somewhere under the tree sap and grime.
I resprayed my IIA with some Tractol Synthetic enamel. The stuff they paint JCBs with. It's hard wearing but it lost its glossy shine after a couple of years. I never ever washed or polished it though.
Yeah dawncer .... 4 wheels on my wagon , just need a couple o horses to gies a tow.
New rear diff pan fitted and painted , bushes for trailing arms , trailing arms , shocks , springs , spring seats , spring retainers , steering box , fuel tank (inc painting ) all 4 bump stops fitted. Been a very productive day,
The only other photo i took today. Didnt have the luxury of time , today was my last week day off for about 5 weeks , shopping saturday , cycling sunday morning ....then probably away to turkmenistan for 25 day at somepoint next week or the week after 🙁
That is lovely Welsh.
I like how I'm not the only one to leave the galvanised bulkhead au naturel 🙂
BTW do you know much about the 30 acres for sale up the road at Capel?
I envy your barn.
Its getting cold out.
Mrs t-r says im not allowed another vehicle based project for a while......
I said thats ok ....my next project will be a double bloody garage so i can work on my vehicle projects in warmth for a change.
What do you want to know about it? I know who is selling it & I know several people who want to buy it if that helps. I also know what it is worth but know it will make silly money way above its' agricultural value. But then they aren't making land any more 🙂
But the one great thing about that 30 acres is that you can see my house from the top of it 🙂
🙂 a mate and I were dribblin' over it in the pub tonight. It's the kind of plot that is part of his future plans but it's about 6m too early. We both love the location.
I guess your spot isn't far away?
Edit : indeed not far then 😀
BTW was reading your troubles fitting the front springs. You need to get a small scissors jack in between the axle and the chassis and jack away (assuming the front wheel both removed and the car is resting on axle stands under the chassis so the front axle is hanging free). The spring will go in and out with ease
Springs went in no sweat ,i just lifted the chassis with the crane. its getting the front end of the radius arms in thats the ballocks but ive since been informed its best to do that part right at the end when you have the engine in and all weight on as everything will be in neutral and the bushes wont be stressed by the weight like thye would if i tightened them up now and dumped a heap of weight on them
Ah OK. I would just disconnect the radius arms from chassis end (elephants ears), roll axle forward 3 inches, and bolt them up to axle, then refit to chassis.
[img]  [/img]
[img]  [/img]
day time photo at a sensible hour.
I did try that Wf but the bushes were a tight fit into the radius arm brackets and i need something to jack against to get them up and in. hence the weight thing at the moment i just jack the axle/chassis off the floor.
next step is to roll chassis forward and tidy up the drive - sweep it andpr pressure wash it - see if its still the same colour 😀
your rear damper unit looks like a flaccid horses c**k 😉
Other than that, you have a great looking gocart!
a colleague sent me this via email this morning in response to my facebook photo last night.
Anyhoo - them boots are not designed for those shocks - came with them but are "bearmach" shocks are pro comp - so thats just howthey sit - If i clipped the bottoms in place they would sit better but gwyn said to leave them open so shit fell out - like mtb boots 😀
yeah its not looking too good there....
Throw the shock covers away. They only trap muck and moisture up inside them and rust out the piston. They are the work of the devil in UK conditions
not entirely convinced that for my usage they wont be useful provided i keep em clean and greased under the boots + leave the bottom open.
They aint the best shocks in the world - if i had OMEs or fox something with good sealing id leave em off.
having seen my mates shock without then written off by a rock flung up in a fit of throttle rage im also inclined to leave em on.
Just for you trail_rat 😉
Soooo much easier! Refitted the anti roll bar with new bushes and ball joints. While I was underneath replaced the rear damper bushes, blew out the axle breathers and topped up all the liquids. Not too much losses by the looks of it.
With the roll bar back it isnt half noticeable how much less under-steer there is with it on with new bits.
your steering guard needs a lick of paint. 😉
curiously - where do the ARBS go .... i dont have any 😀 - guess they just put em on the posh counties at that age. - not that im fitting em - they limit articulation :d
I have them on mine. Makes it handle on the road soooo much better. Really does not limit articulation that much as I still need to run dislocation cones or I lose my rear springs. But then again I also have a rear Ashcroft locker so articulation is not quite so important.
If your chassis doesn't have the mounting points then the only option is to weld some on which would be a PITA.
i have 11 inch shocks on and Wide angle A frame ball joint with spring catcher cones welshfarmer
not sure a ARB will cope with that - unless its of an entirely different design to my fronteras old one - it struggled with a 2 inch lift.
I dont have an ARB on the front, but here's the one on the back. Fits to two mounts on the rear of the chassis rails and then forward to two ball joints mounted on the back of the axle. If you going for massive articulation I cant see them being helpful.
A question for landy fans and this seems as good a thread as any to add to. If you had a choice between the Defenders below, which would you choose?
1.200tdi 110 van, same private owner for many years. Strong engine, Scruffy body, new rear cross member, chassis solid, bulkhead with some repairs, but is cheap enough to initially set £3k aside for tlc.
2.TD5 110 van, 10 years newer. good chassis, good bulkhead, but has been worked all it's life. Top of budget, so if there was any major unexpected work it would have to wait.
Either would be a second van, so being off the road wouldn't be a problem. My feeling is no 1, as at least I would know it inside out and could make it my own. I've also never had a 200tdi or TD5, only 300tdi in the past.
Thats the photo i wanted to see.
I wondered what the mounts on my new crossmember with extensions were for.... They will be getting cut off shortly.
Id buy the 200tdi out of those 2 sounds like its had the major work covered to keep it going pending quality of the repairs......bulk heads are very easy to bodge up. where as the expensive bills are only just beginning with the td5 its well known that their chassis's just dont last as long.
Mark90 - Don't suppose there are a few more pictures of that SII hybrid on your photobucket, are there?
Here's a few pics...
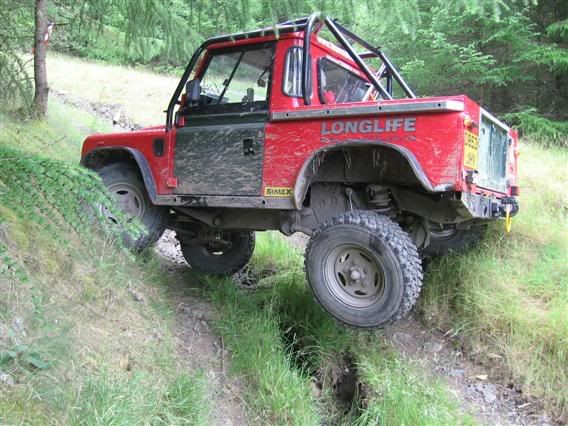
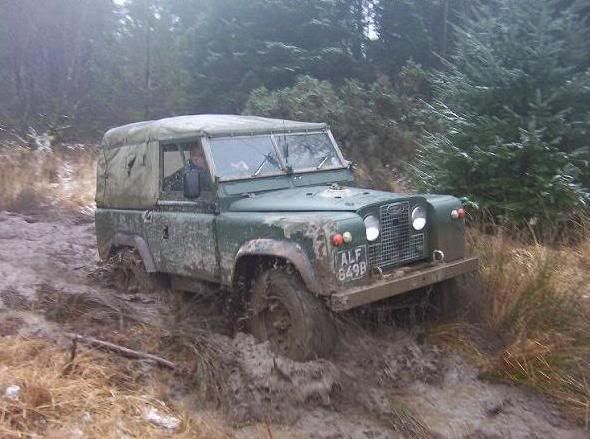
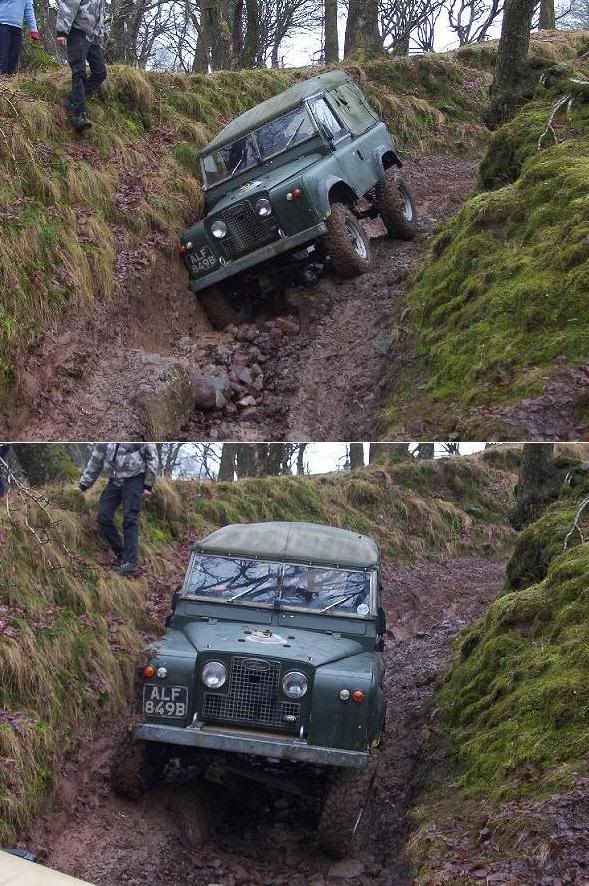
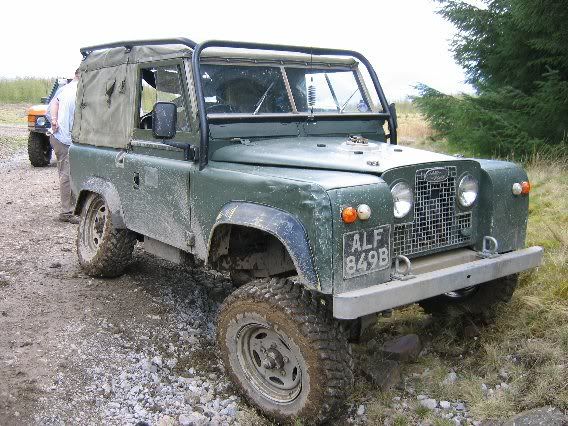
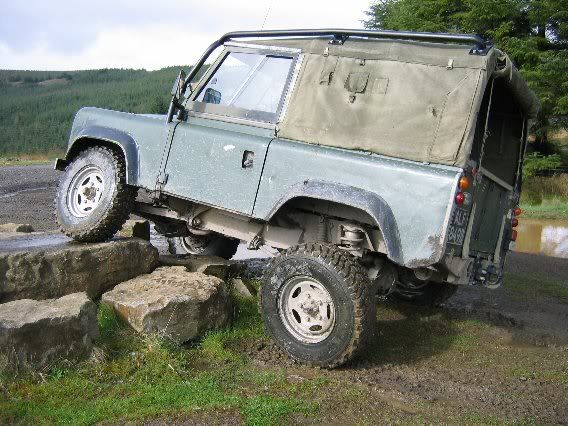
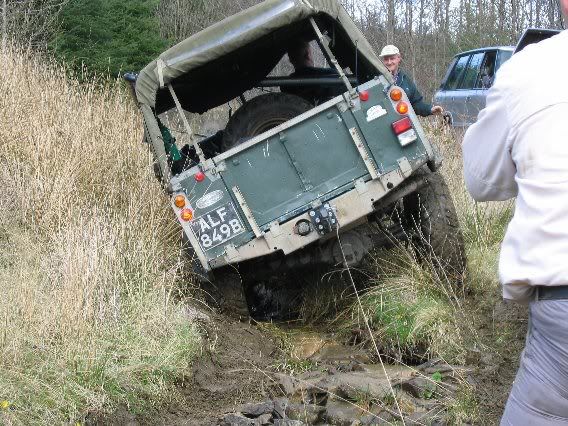
These two are from the article when 'ALF' featured in Total off Road magazine.
ALF had a galvanised coil sprung chassis, 90 axles, 3.5 V8, series gearbox. Has since changed hands a couple of times and now has a tdi. Was a great truck to drive off road, really very capable.
Ah, The Lane from Hell. Remember it well. I am sat here wondering how many Mark90s there are in the world and whether or not you might remember a trip to Morrocco a few years back. Would there be a chance that you might be in this film I shot out there? 🙂
Hi Pikey, there is only one Mark90 🙂
🙂
slow progress this week......
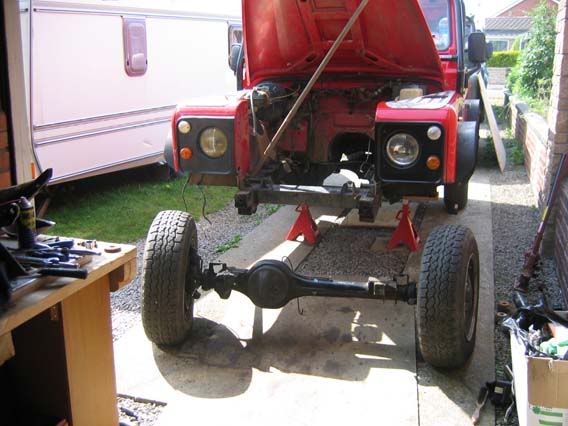
dragged the chassis down the garden to have a tidy up.....
rear brakes siezed solid - burst them open to find out what was the issue.
The wheel cylinders were jammed out , the lower pivot was gummed up and the escargots wouldnt move.
new wheel cylinders fitted - every other car ive done wheel cylinders on come with the nuts - not these :s so waiting on some 5/16" UNF nuts to arrive so i can finish up.
meanwhile i cut the snails off , wire wheeled and painted the back plates so they look reet good - ordered up fittings and T's for the brake lines - hopefully get them run this week and look at sorting out my flywheel housing/clutch cover to made teh 2.5TD LT77 to the 200tdi - properly.
soon be time for the engine and box to go on :O
on the flip side road tripped to lockarbie to pick up a low profile tubular winch bumper and A frame
one of my jobs next year is to replace all the hydraulic pipes and hoses before they explode 🙂
Found out why my alternator has been making odd noises and random voltages lately:
The rear mounting bolt had gone walkabout so I was worried that it might have sheared and left the shank stuck in the back of the power steering pump. But it was one of those days where everything is charmed for a change 😀 A quick knock with a file and I could run the tap in and out no problem.
The replacement alternator arrived last night, and joy of joys, was a direct replacement so the connectors just swapped over. Then, just as I was offering it up, I realised I had ordered a new belt...and it hadn't yet arrived. I bet on it coming today, so was just finger tightening the alternator mounting bolts when....my lovely postie, Wes, hove into view...with my belt! All back together again and squooshing out 14v by 11 o'clock coffee break. Ace!
whats wrong with that.......
im still waiting.
my drums and shit got sent to goods inwards instead of reception - it got passed around there for a few hours from another department to our stores guys before i got an email.
of course i got the email just as i had escaped dyce' traffic gravity and id be damned if i was going back.
had discovered that because i splashed out on the 11j i dont need to modify the flywheelhousing to fit the lt77 i off the 19j - unlike if i bought a disco engine.
My only issue now is ill need to custom fab an airbox bracket - it seems to be missing - bugger , no longer made - ill need to have a good look on that side of the garage - im sure it was in the box when i bought it - also the pipe work for the fuel lines comes in at a cool 112 quid for the feed fromtank to the pump. I have both ends so its getting some generic 8mm fuel hose and hose clips between - for 9 quid.
custom fab an airbox bracket
zipties 🙂
Stoner, these guys are really good for copper brake pipe and unions. If you can find a Sykes Pickavant pipe flaring tool the job is a real pleasure. You might be able to find a used on on ebay.
A pipe bending tool is useful too.
cheers P. My neighbour has a Clarke flaring kit somewhere, but Im not sure he has a bending tool. I will look out for one.
+1 for the sykes pickavent.
mines just a draper. does it but you really have to be on the ball with it as oppose i borrowed an SP tool and youcould really hammer through the connections with little care - twas alot less fussy.,
i have a bender but i find it much easier just to put long radius curves in by hand. with the exception of the caliper - swivel housings to the caliper needs some precise bending with the bender.
stoner im going for a little more elegance in a pair of the large rubber multi bands - like what the USE lights come with- will screw them to the wing and secure the airbox to that- airbox needs to be easily removable to change the filter - i think you have still the discovery airbox in your landy.
Looking to be making good progress on the Landy Mark, not seen it about for a while.
Didn't know you had a lift!?
cheers james - the lift is my neighbours. He kindly let me tinker in luxury the other day, instead of scrabbling around underneath the landy on the common. You guys well? Havent seen you in the plume for a bit.
t_r - it's a pity I cant use my 15/22mm plumbing pipe bender 😉
Oh those look sweet, Pete!
I think mines a stock 200tdi defender air box.
those benders aint spendy btw. the ones like petes picture can be sourced in screw fix for about 10 quid.


