![]() You don't need to be an 'investor' to invest in Singletrack: 6 days left: 95% of target - Find out more
You don't need to be an 'investor' to invest in Singletrack: 6 days left: 95% of target - Find out more
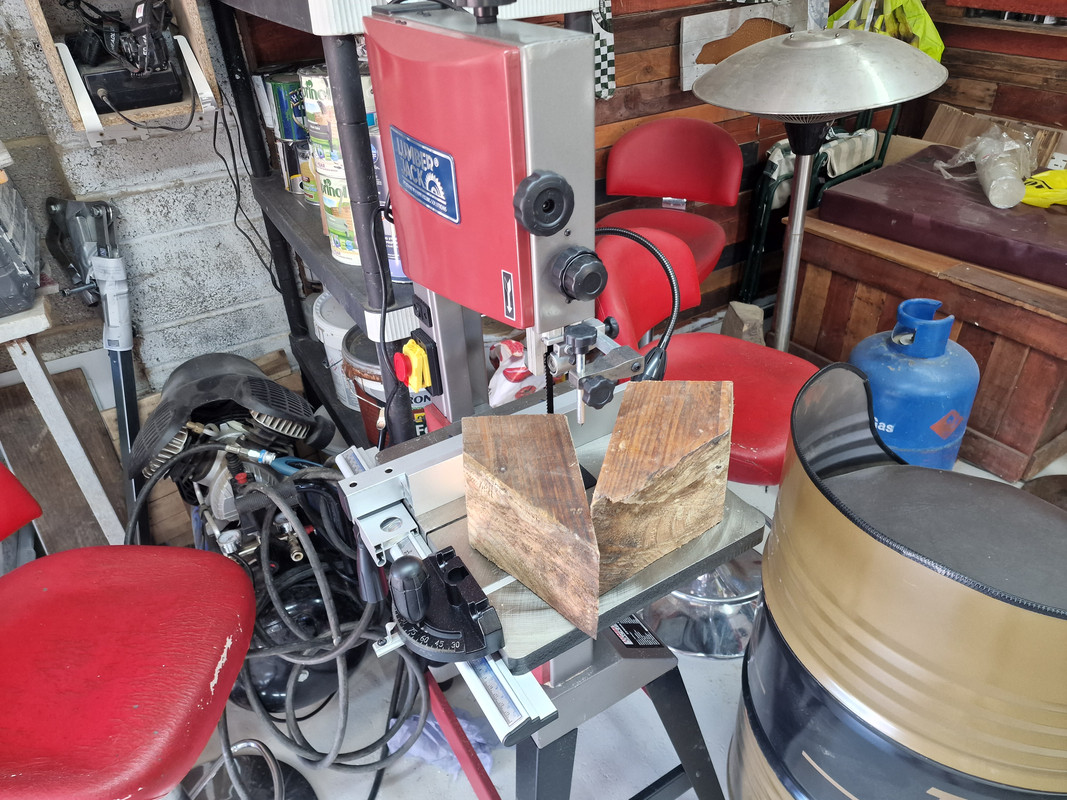
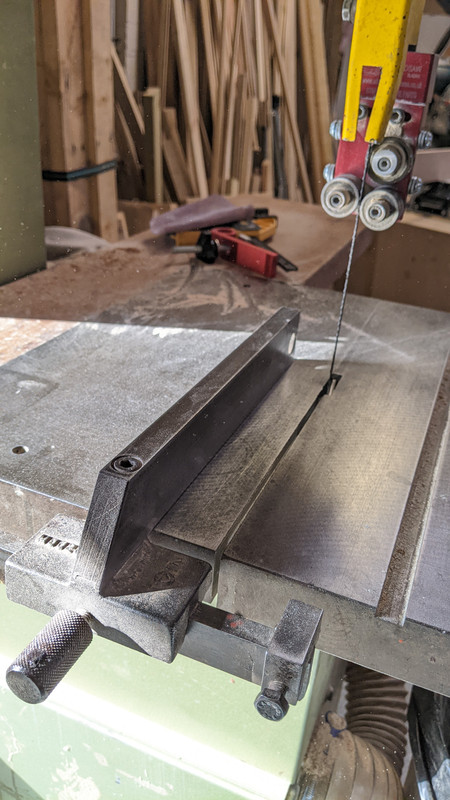
This is the starting point. Two lumps of pine(?) cut off from something in the dim and distant past.
Not sure what they will end up with but I am thinking a bandsaw box is the only 'first project' you are allowed so probably at least one of them.
Wish me luck and any hints and advice welcome - either before or after the accident.
As long as its not a journey to A&E Nick 😮
The bandsaw is one of the safest tools in the workshop apparently.
anyway, I only live about 500m from the A&E department so it is quite handy.
I hear they can do really impressive things with prosthetic hands etc now!
Before using it, set it up square. Use it. Set it up square.
Wish me luck and any hints and advice welcome
Good luck!
Don't make a bandsaw box.
They're the epitome of naff, imho of course... 😉
Good practise though I suppose...
Be careful with it. I still get the shivers when I remember a girl in my class at school band-sawing her middle finger in half from the tip down the entire nail. It took her that long to realise something wasn't right.
Our CD&T teacher nearly passed out when he saw it, although her finger recovered surprisingly well!
, I only live about 500m from the A&E department so it is quite handy.
Was that high on the list of prerequisites when buying the house or did they build it afterwards due to local demand?
Remember you can always bolt a chainsaw onto your wrist if you loose a hand...
Worked fine for Bruce Campbell.
Anyone else on mobile and just [I]knew[/I] who the OP was?
"I've got this bit of finger and I have questions"
've got ths bt of fnger and have qestons
FTFY
Take off the blade, fold and store it somewhere as a spare. Buy and fit a Tuffsaw blade.
You can improve a bandsaw no end, especially the cheaper end with a good quality blade. Not all blades are equal.
Go to you tube and watch a vid on set up. Don't be a lazy bones, set up is really important. Take the time now and it will cut better.
Funny enough a new blade was top of my list of to do. Actually, a couple. One wide for straight cuts and one narrow for curves.
Yes, band saw boxes are a bit obvious but it really would just be for practice. Look at the wood I have chosen for it, that is never going to be great but hopefully it will please a 4 year old girl.
Ys, set up videos and checking everything is square. Any recommended videos welcome.
Any recommended 'projects' once the obligatory bandsaw box is complete?
How many TPI for the 1/4" and 1/2" blades?
I guess the 1/2" will be for cutting long straight cuts fast while the 1/4" will be for finer work. Make sense?
TuffSaws SuperTuff Carbon options are
3
4
6
10
14
18
24
Snodgrass okay for set up guide?
3 or 4 is good for ripping. Though tuff do a specific ripping blade called Fastcut. Prices are pretty amazing. You'll pay 15-20 quid for a bog standard anywhere, and 1/2 that for a tuff.
For ripping wider is better.
Fastcut blades are limited to 16mm or 20mm so you'll need a saw that can take 16mm as a minimum. A 14" saw will, is that the size you have ?
I have this : https://www.amazon.co.uk/dp/B01334FITW/ref=pe_27063361_487055811_TE_3p_dp_1
It only has a 6" cutting depth so I won't be doing big bits of timber. Also only a 6 - 12mm blade width capacity.
I was thinking perhaps this for the fast re-saw blade : 1/2" - SuperTuff Sabrecut 1778mm - 2050mm
1/2" x 3tpi Extra Set SuperTuff Sabrecut.Diamond Ground 3tpi blades with extra set on the teeth for fast cutting all types of wood. Suitable for c..
Then something finer and thinner and maybe a really thin one for tight curves.
What happens if I go narrower than 6mm?
Ive no idea what happens if you go narrower. Probably snap, wrap itself around your neck and kill you.
No, i dont actually know if you can get lower than 6mm. but 6mm will produce a really tight curve. 2" i think, so pretty much going to be good for whatever youre going to do with it.
Your saw takes an 1826mm blade length, so you'll need to tell tuff the size when you order them.
When ripping, a slow steady constant feed will work best along with a high blade tension. Fence needs to be parallel to blade, so this is why going through YT set up vids is important.
I like your workshop, a good size.
Well it would be if it were tidier 😉
Talk to the dude at Tuffsaws. He's very helpful. I just told him the sort of stuff I wanted to cut and he advised.
I got a specific type of rip blade, made from a fancier material (forget what) and he advised that my machine(Startrite 352) might not be able to put on enough tension at that width for the blade to be tensioned properly, and to get a smaller width. Which I did.
Will talk with TuffSaws.
Remember that I am just playing and not a professional so I have finer tolerances than you guys but I still like getting things right.
I have decided, after watching the Snodgrass set up video, that my first 'project' will probably be a series of wafer thin slices of wood. I may make some kind of diorama from them or possibly a puppet theatre from the slices. They are more to prove the accuracy of the setup than anything else.
I have some solid bamboo flooring planks which should be a nice test but will probably start with the nice soft pine in the photo
Needs more trip hazards
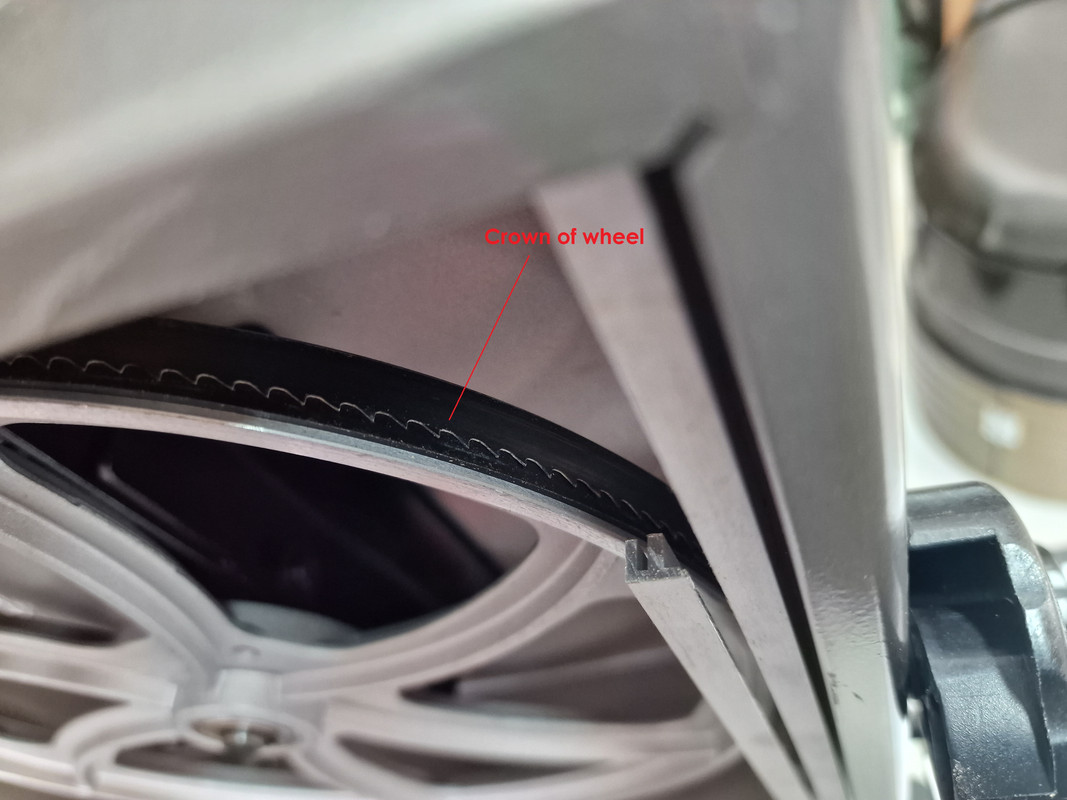
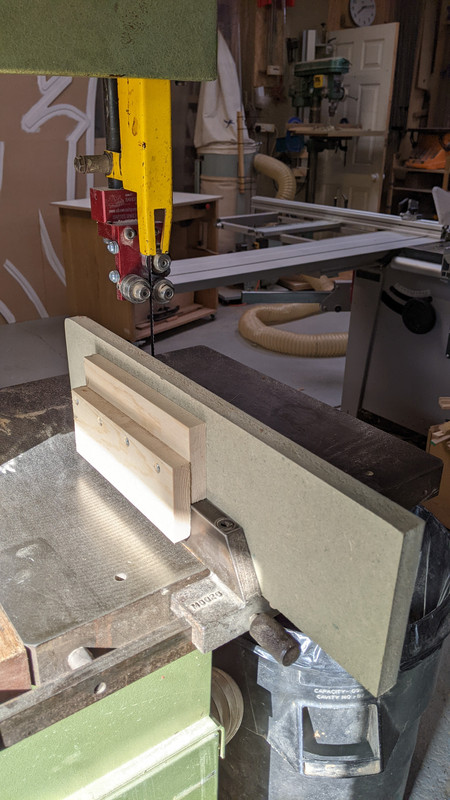
Setting up the Bandsaw (as per Mr Snodgrass) with some attempts at photographing the evidence
1) Get the blade on the main wheels so the centre of the wheel is just behind the saw teeth gullet.
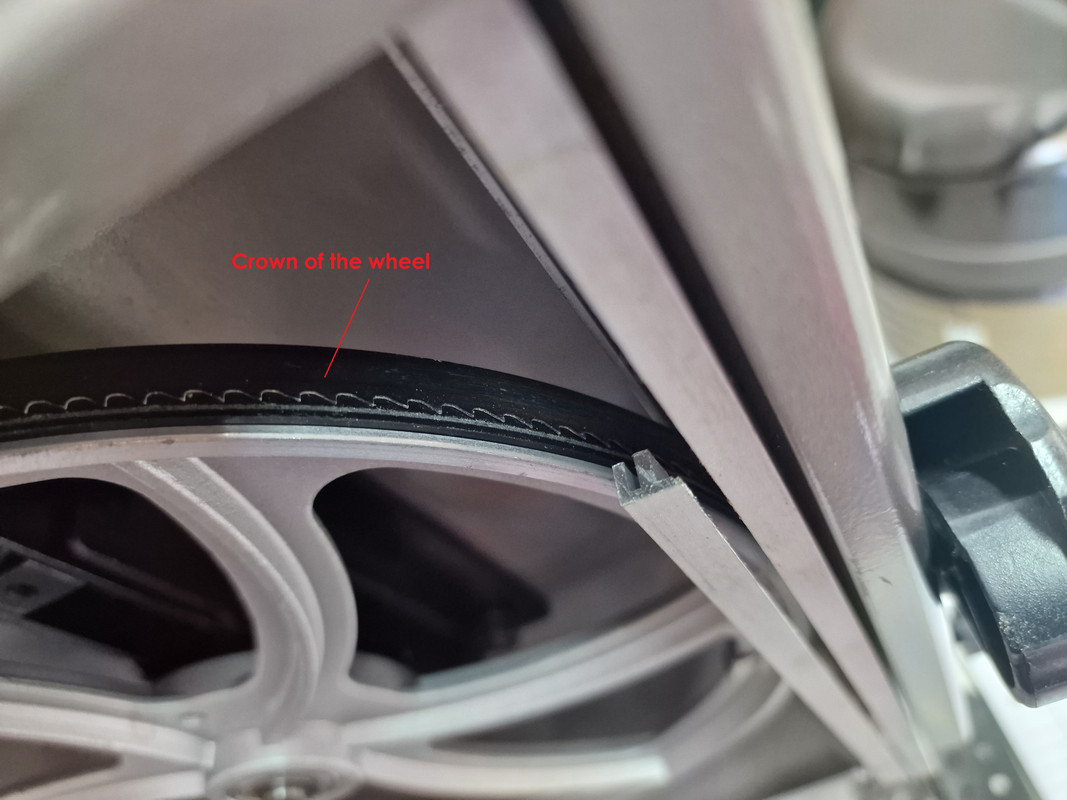
2) Tension the blade

3) Check the blade position on the crown of the wheels
4) Adjust slide guides front to back so they are just behind the gullet
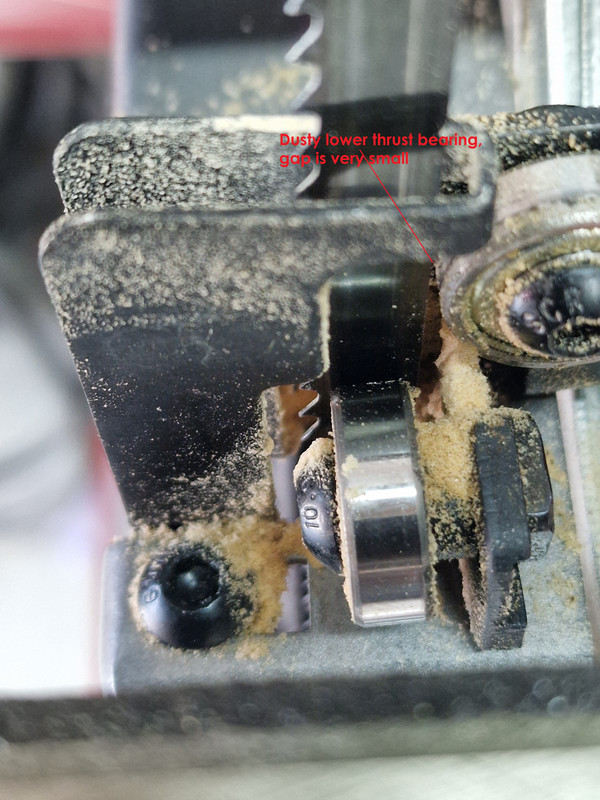
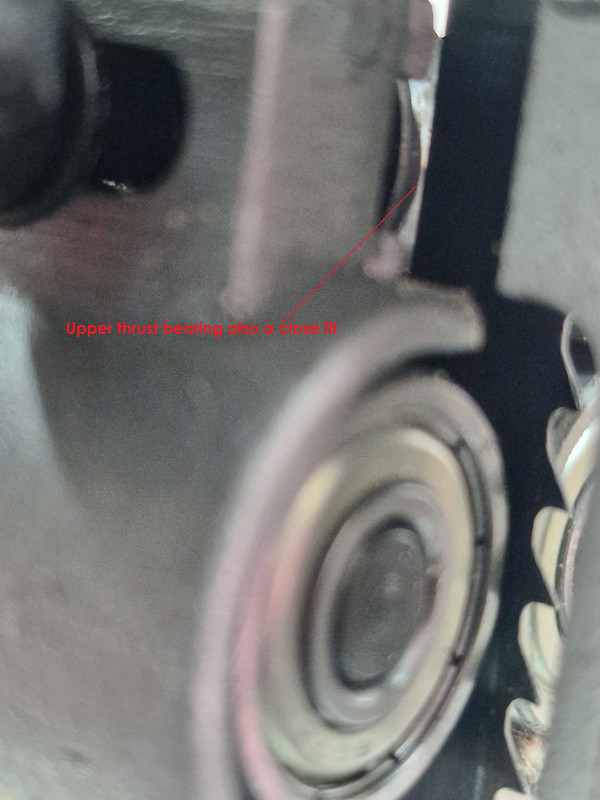
5) Adjust thrust bearing behind blade
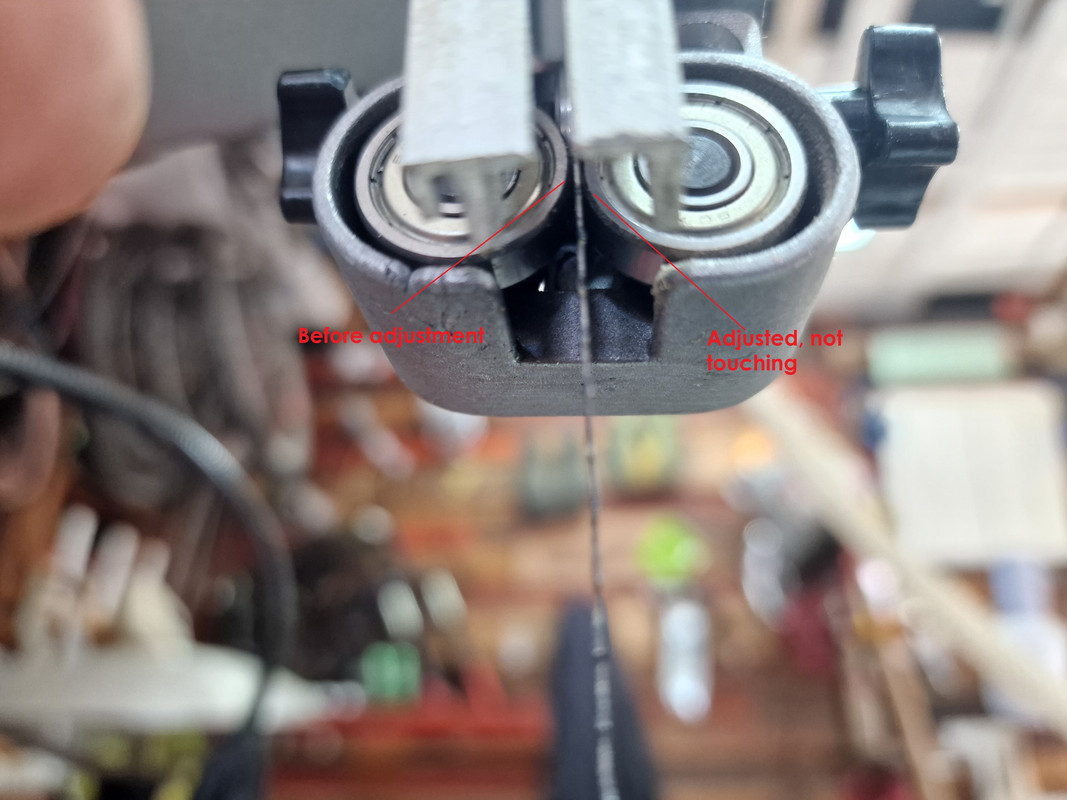
6) Adjust side bearings side to side
7) Check table is square to the saw blade
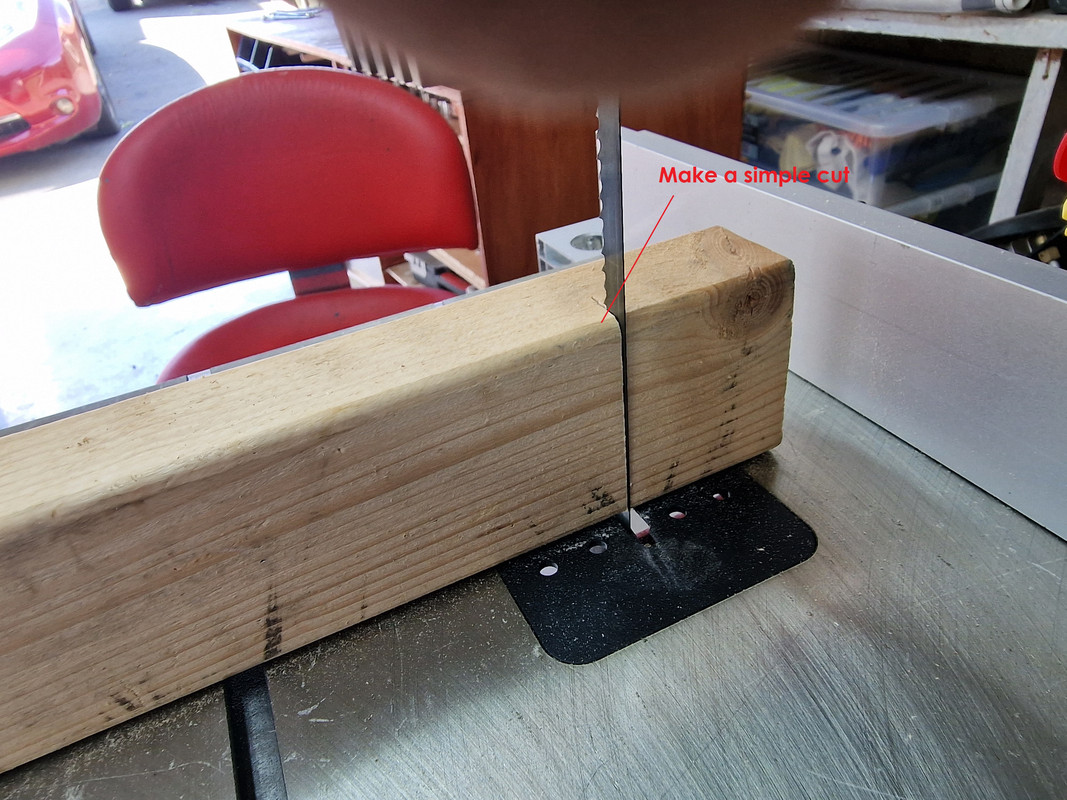
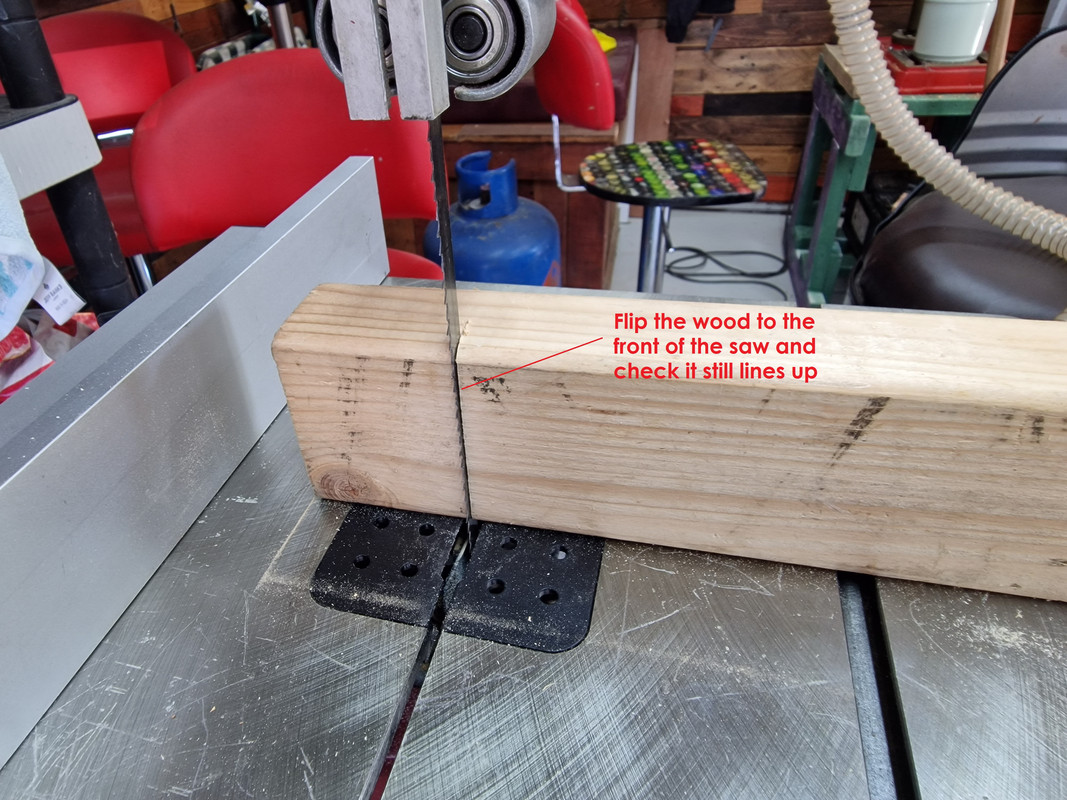
8) Check the Fence is parallel with the saw blade
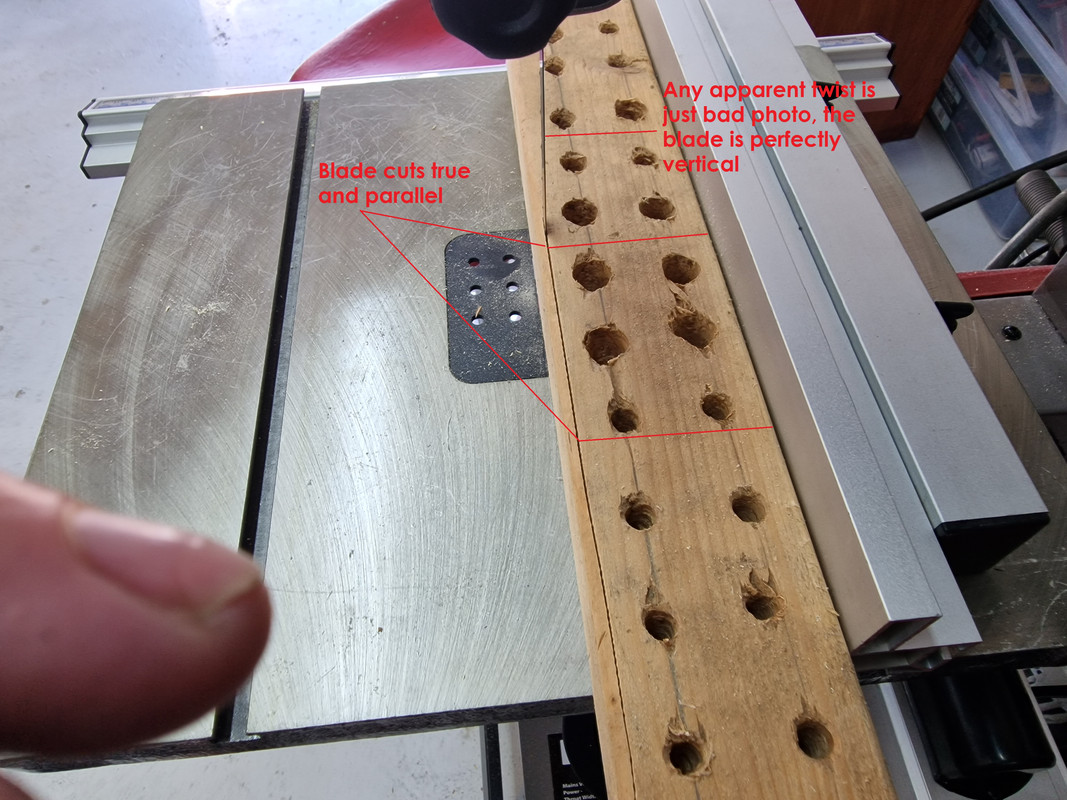
I think we are good to start using this while I wait for the new and better blades to arrive.
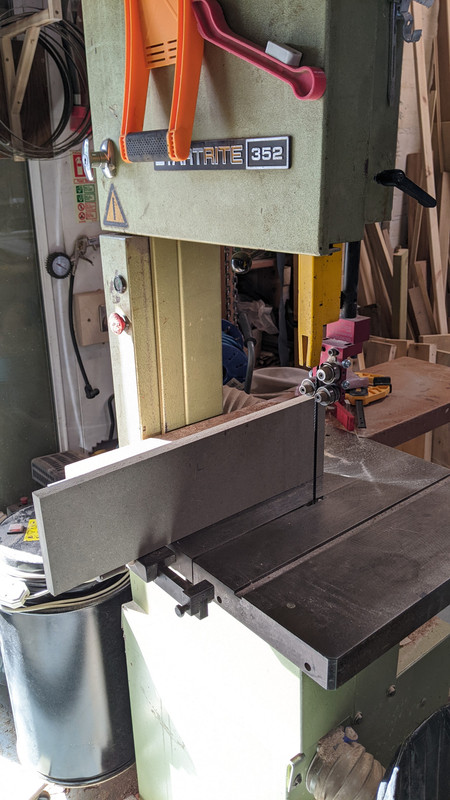
I forgot to show just how good the saw can be set up and what the new TuffSaw blade can do.
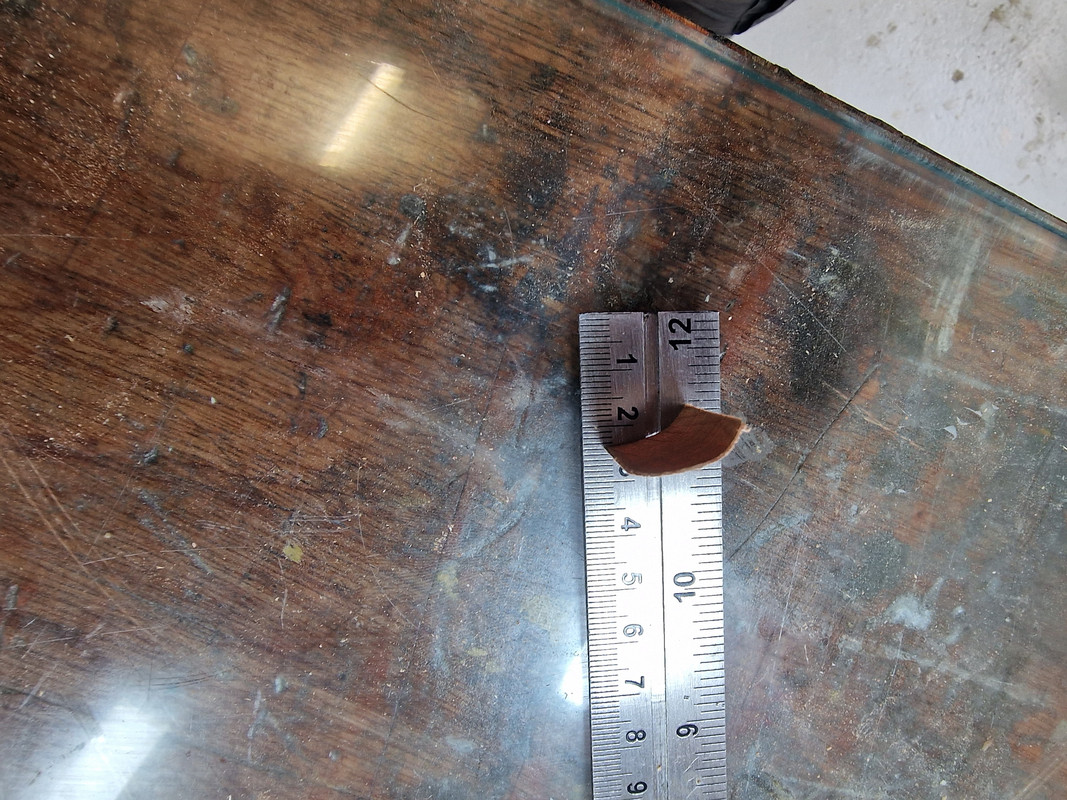
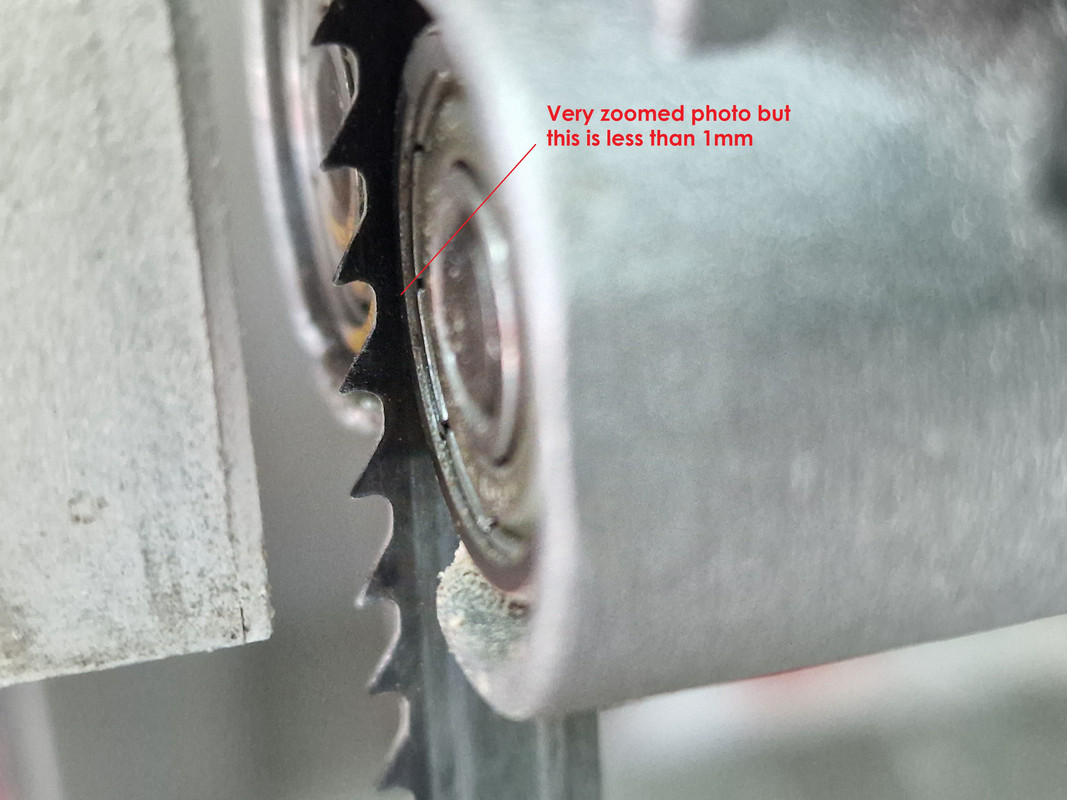
This is a bit I trimmed of the end of a piece of wood. Less than 1mm thick, the same thickness along the length and the saw cut was absolutely vertical. Basically perfect in x, y & z axis and able to cut extremely fine pieces. I am very happy and think the old table saw will be getting a lot less use and my cuts will be a lot more accurate.
Excelent, glad the tuff blade etc is working out.
I think to celebrate you should cut some thin stock and embark on a laminated project, maybe incorporating steam bending.
Whatever you do, don't cut metal on it. no matter how temping it might be.
yes it will do it, but it will kill it in the end
Whatever you do, don’t cut metal on it. no matter how temping it might be.
yes it will do it, but it will kill it in the end
Guessing he can get a metal blade and change the speed to suit, we used to cut only metal on our one, mostly 3mm or less alclad, aluminium, etc.
I got a 12mm 3 TPI blade for fast cutting
I got a 12mm Fine tooth non-ferrous metal blade for finer straight cuts - not planning of metal but maybe some thin brass inserts
I got a 6mm fine tooth for curves and fiddly bits.
[i]I think to celebrate you should cut some thin stock and embark on a laminated project, maybe incorporating steam bending.[/i]
I might do something with some thing cut stuff, tempted by a diorama I saw once.
Steam bending required a steam source and my wall paper stripper hot tank died when expanding the home made still many years back and was never replaced. Not sure MrsWCA would appreciate losing the kettle.
Im more than sure you could find another for a tenner on ebay or gumtree.
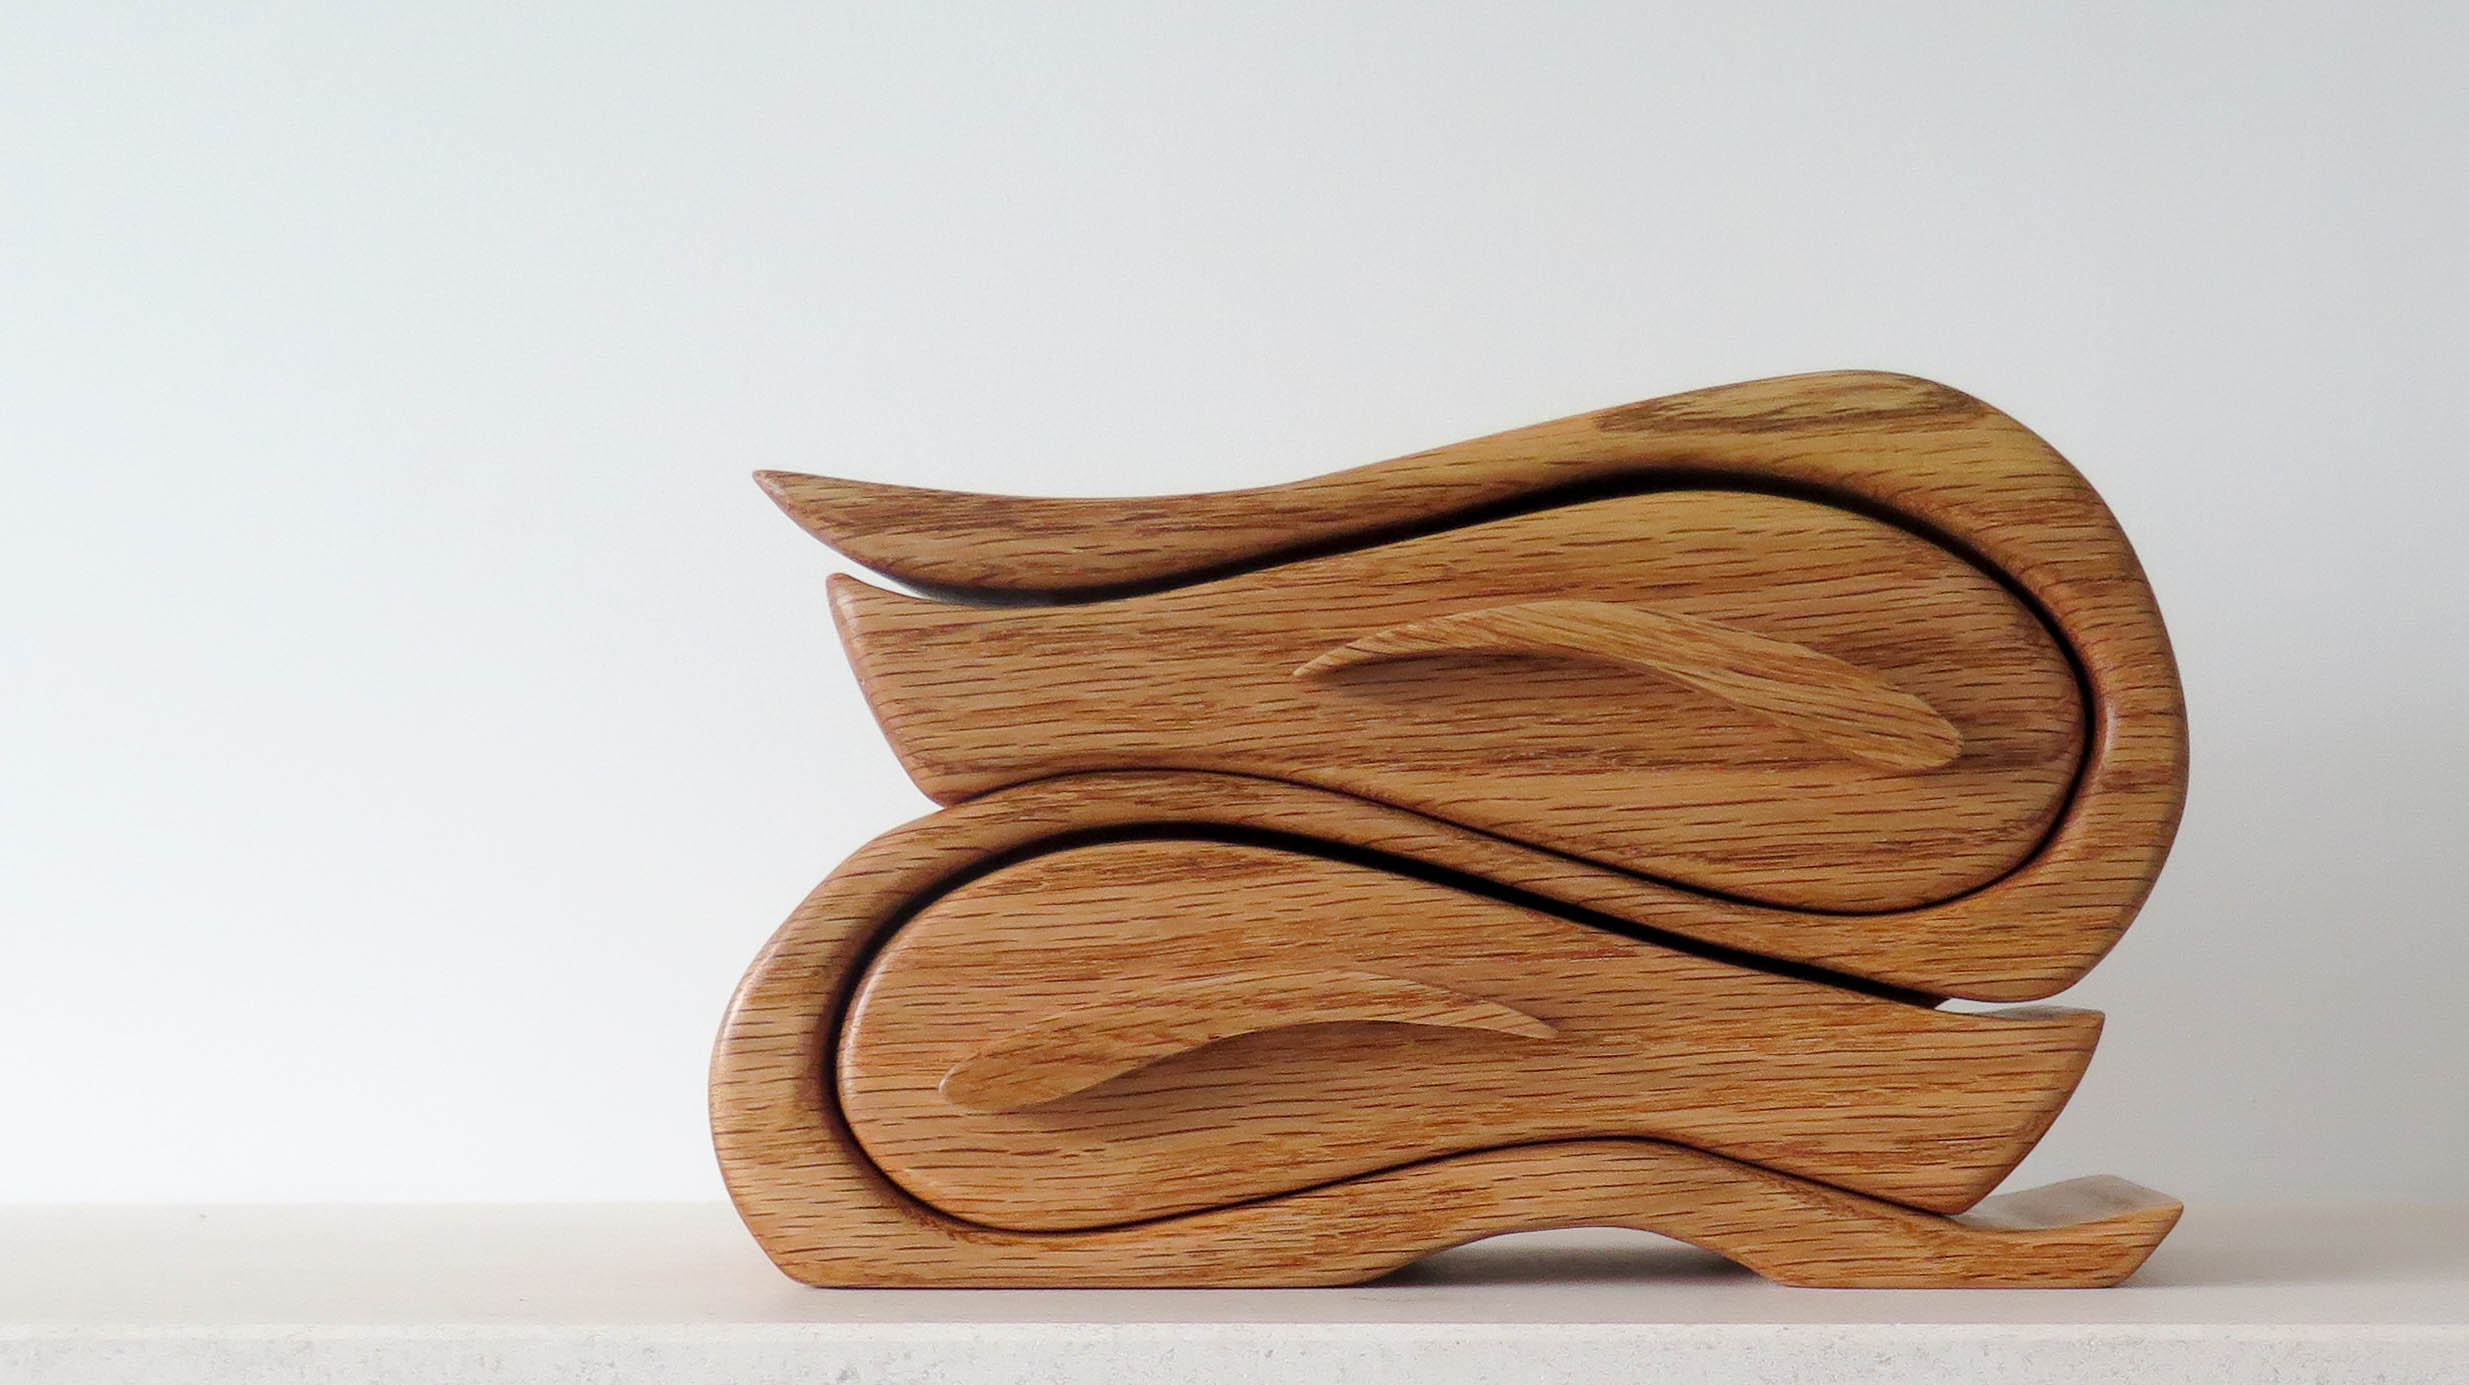
My first Bandsaw Box - not the type you might have expected

Playing at cutting thin bits of wood had left me with several thin slices so I glued together to make a box. As you can see, the last piece at the far end did not glue in well but it is only held with super glue (Do I have to call it CA glue now I am doing woodwork?) so I can easily push it out and refit properly.
The sides at 15cm x 8cm and all between 0.5 and 1mm thickness. I discovered that if I pushed the wood too fast through the saw I got more pronounced stripes in the cut (visible on the base). Also there was a slight tendency for the bottom of the slice to be slightly wider, only a fraction of a mm but visible, than the top. I think this if because I could get the top guide almost resting against the top of the wood whilst the bottom guide was further away under the table. I suspect upping the blade tension and dropping the cutting speed will help here.
On the saw you can change the pullies to give two speeds for the blade. I assume that the fast speed will cut quicker but is more likely to burn the wood of intricate work and curves. Is this right?
Yeah you can get some really lovely textures going with bandsawn timber.
I made a small wall cabinet at uni where the door was made up of horizontal strips of wavy-cut Oak, all different curves.
I deliberately used the bluntest blade I could find so I would get loads of lovely vertical cut and burn marks.
The speed adjustment is usually for different materials. Metals need a slower cutting speed for example.
There is usually a sweet-spot for feed speed. Think of each tooth taking a bite of timber and filling up the gullet of the tooth. You want that gullet to be able to exit the material below and dump its contents. Try to feed too fast and the gullet gets rammed with material, can't cope and ends up burning.
You can normally tell if the saw is happy or not, or at least, you ought to be able to.
Once you're in tune with the cut you'll normally find that sweet spot. Too slow isn't always best either.
If you're deep cutting stuff, it's worth making a false fence to sit on your existing fence that extends high to give the workpiece full support (if you haven't already)
Here's mine for instance (note-I've not got the right blade in there for what I'm showing)
The standard fence is only 50-60mm high so pretty useless for anything much taller such as 150mm as you have.
Simple drop on mdf 'cheek' that extends the vertical support of the fence.
There's a little dowel under the false fence that rests against the table edge to stop it moving forwards when you're cutting.
I only live about 500m from the A&E department so it is quite handy.
Did they also issue a loyalty card?
Some nice looking wood work there.
Second fence makes sense and will help solve the fast bottom problem, thanks.
I know what you mean about the sweet spot when cutting. I did about 6-7 cuts at different speeds, or rather different anointed of push pressure, to see the effect. That is why there are differences in the sides of the box. It was very much about learning to use the saw.
Time is cheap b&q solid bamboo flooring. About £15 for 6 x 1m+ packs. That box is just 15cm off one plank sliced thinly.