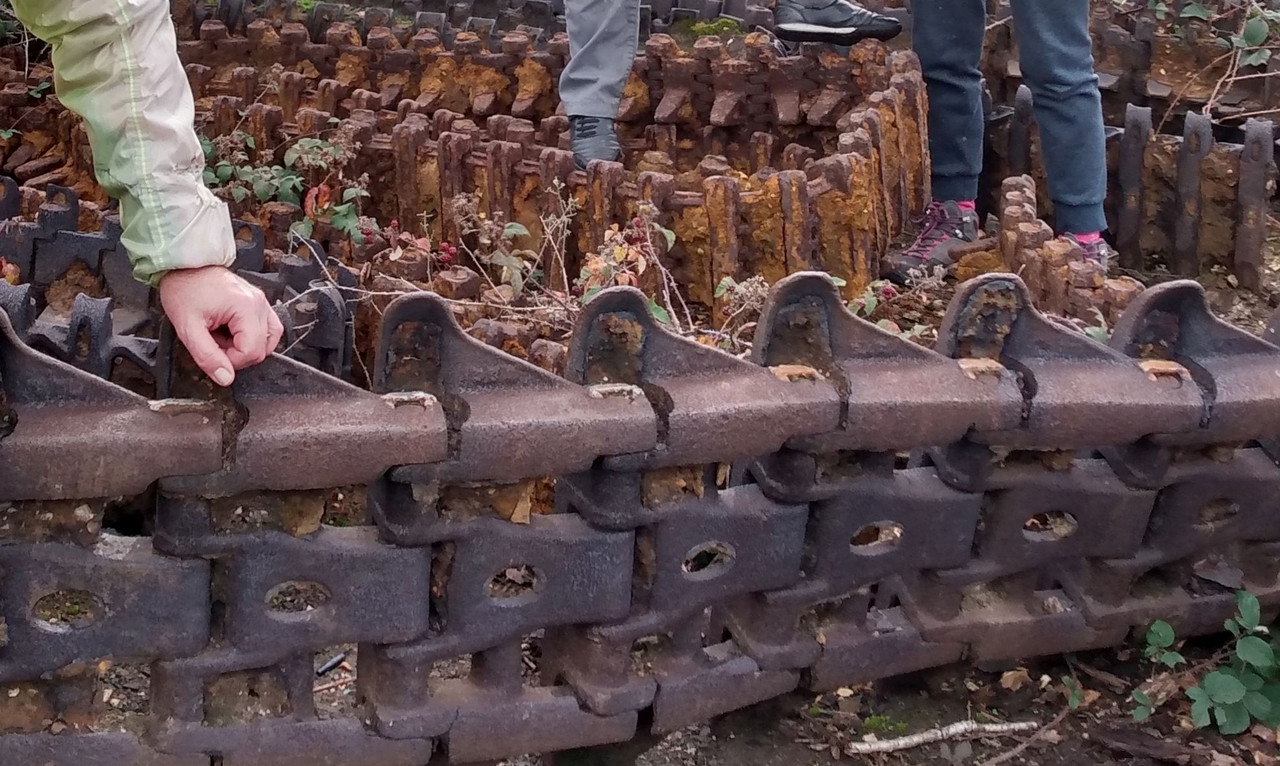
the metallurgy of the tracks is such that they wouldn’t rust anyway because of whatever alloy it is that they are made out of.
Here are some WW2 tank tracks that I came across on a ride a few years ago. I'd say they had a 'rusty patina'
Well, I've made a bit of progress on the Sea Harrier.
I am doing as much groundwork as I can before I need to get on with painting, but am worried I'll cock it up so starting to procrastinate.
I might try & tidy up the engine nozzles tonight with filler and then get on with painting some of the bits that can be done before attaching, like undercarriage, cockpit surround, weapons etc.
Anyway. Here's a boring unpainted grey pic.


You going to prime it? I find that acrylics go on better over a primed surface.
A caveat being that I don't know what I'm going.
I find that acrylics go on better over a primed surface.
+1 even (or perhaps especially) as a hairy brush user I usually mask and use rattle can acrylic over the main model (or the sprues) before applying any colour. Usually something from Humbrol (as that's what the local shop has).
Eek.
I hadn't planned on using a primer.
I don't have an airbrush so it would have to be rattle can.
Maybe something to think about for the future.
I just watered down the paint when I did a model a few years back and that went on ok-ish.
Maybe I'll try primer on the next one!
Trust me, a fiver's worth of acrylic grey rattle can primer from your local motor factor will do for half a dozen kits and save you a load of grief.
It also highlights all of the blemishes and joint gaps so that you can get them before you apply the finish coat. You don't have to bugger about with masking tape either, just stuff the intakes and cockpit with a bit of sponge torn off a pan scrub thingie.

I wouldn't bother priming or masking the canopy either. Paint it with a brush then tidy it up with a cocktail stick once the paint has dried but before it hardens. Learnt that one the hard way after years of ****ing about trying to cut masks!
Anyhow, that's my 2p worth and feel free to tell me to clear off.
Having been to enough model shows I can confidently say that I've only ever made about 3 kits that I would dare to show in public.
FAA Corsair II. 1837 Sqn - Operation Goodwood (naval) HMS Formidable, Norway '44. The raid against the Tirpitz. Wanted to do this as the Royal Navy were the only operators of the Corsair in the European theatre, and straight after this mission, most of the squadrons and planes went directly to the Far east. Apart from 1837Sqn which was subsumed into other units. So, had fun with this. It's a Tamiya F4U-1D converted to Corsair II which essentially means chopping off the wing-tips. IRL these aircraft has 8 inches or so removed to make them fit the smaller lifts on RN carriers, but really the later carriers (Like Formidable) had lifts big enough anyway. Stuck in Quinta Studio cockpit, and a set of Quickboost dropped flaps (ooh-err missus etc) The originals were really much more weathered than this, but I think it's hard to scale that well - by which I mean of course, I don't have the skill to scale it well. Will rig it tonight after the antennas have had some time to set hard.

Really nice looking build.
One of the wife's distant relatives bombed Tirpitz, although I'm not sure on which operation. He was RAF, so it would have been later in the war.
He was shot down and lost whilst on a mission in a Wellington trying to establish the quality of enemy radar near the Channel Islands. Analysis of the logs from both sides on the night it happened suggest that he was a victim of "friendly fire".
Analysis of the logs from both sides on the night it happened suggest that he was a victim of “friendly fire”.
I'm just reading about the Italian campaign, and the experience of some Beaufighter pilots. They keep getting shot at by the Navy as they mistake the Beau for the JU88. Despite briefings about timings and directions, the Navy gunners manage to shoot down several of their own side's planes...I imagine it happened quite frequently.
So I ignored the advice about priming 🙄😄
Mainly because it's another variable that I don't really want to fiddle about with.
Maybe if I'd have done it from the start before building but now I've got some momentum with this model I didn't want to stop to fiddle about with priming. Even if I'd have gone for a rattle can, I still would have needed some kind of spray area, which i don't have at the moment.
Anyway. I got round to painting the 4 bombs, even though I only intend on using 2. I wanted to have two spare I could use for testing and trying things out, and good job I did.
The initial paint finish came out really well. The photo doesn't convey it too well, but it looks really smooth and even. Any defects are probably where I haven't smoothed the part enough, or have got some gluey fingerprints on the plastic.

After a day being sat there I decided to give them a coat of XF-86 flat clear and it all went horribly wrong 😁
I stirred it well & thinned it down a bit, but when I brushed it on, the green became wet again and started smearing and getting picked up on the brush. I am not sure if this is because I thinned it or whether it would have happened anyway?
Last time I used the flat clear was over 2 coats of gloss clear and decal application and I didn't have this problem. Last time though I found the clear flat to be a bit horrible to apply, hence thinning out this time around. I don't think I did last time.
I then blew on the part to speed up the drying process and this happened 🤣😭 so I can now spend some time practicing repairing my painting disasters.

I am not sure I really need the flat clear on here, but wanted to try it out.
Any ideas what I did wrong? The plan is to fix with some more green over the top to get back to an even colour, then maybe try again with non-thinned flat clear.
I don't mind buggering about with a couple of these parts if I learn something in the process.
Also - white paint. Is it just a nightmare to apply? Or is that just me. No doubt easier on a primed surface? 😉 Without thinners it is super sticky and hard to get a smooth finish with. With thinners it goes on better, but hard to get full coverage. I painted the drop tanks and sidewinders last night and have stopped to let it fully dry before carrying on with it tonight to try and get more even coverage. Where it has gone on is nice and smooth, but just not very even.
OK, what paint did you use before you covered it in XF86? Some acrylics - XF86 especially, don't play well with enamels or lacquers. Also if you apply it thickly, (with a brush) it can go gooey and cloudy
White...You know I'm just going to say primer, right? many of the lighter colours, but yellow red and white especially need either spraying and/or a coat of primer. Sometimes you can get away with loads of coats on smaller stuff (like Sidewinders) but really; primer is you friend. Did I mention primer?
nickc
Full Member
OK, what paint did you use before you covered it in XF86? Some acrylics – XF86 especially, don’t play well with enamels or lacquers. Also if you apply it thickly, (with a brush) it can go gooey and cloudy
All of the paint I've got is Tamiya acrylic. The bombs were done in Olive Drab - XF62, I think.
I've read stuff about the XF-86 flat clear going cloudy & being hard to brush on evenly, so made sure it was really well mixed & thinned it down quite a bit. I wonder if I over-did the thinners, which I guess would make the already applied paint become 'wet' again?
Bit of a bummer that I can't remember what I did on the model I did previously, as that came out OK. I think it was 2 coats of clear gloss (X-22) and then decals, then a coat or two of the flat clear. Can't remember if I thinned though.
White…You know I’m just going to say primer, right? many of the lighter colours, but yellow red and white especially need either spraying and/or a coat of primer. Sometimes you can get away with loads of coats on smaller stuff (like Sidewinders) but really; primer is you friend. Did I mention primer?
Ha ha. OK. Maybe I'll need to look into primer then. The whole underbody of the fuselage on this is white, and I can foresee it being a pain in the arse. But, I really don't have anywhere to spray primer at the moment. Maybe I could create a small spray booth in the garage with a cardboard box?
I do have some light grey acrylic. Would that work as a primer, if I thinned it down & painted it on where the white is going to go? I probably have some scrap bits of sprue & maybe some bits I didn't need from another model I did that I could try it on.
Harry_the_Spider
Tamiya Clear is a bastard for re-wetting when it is brushed on.
I use Alcad II and spray it.
Good to know it's not completely down to my incompetence, then!
Maybe I could create a small spray booth in the garage with a cardboard box?
My spray 'booth' is 2 bits of cardboard propped up with some tins of paint so that I don't overspray onto either my table, or all the tools, and then I open the window. The pictures upthread of the Corsair show it in its 'travelling' mode.
I do have some light grey acrylic. Would that work as a primer
Yeah would work perfectly. I use Tamiya flat black. Then I can use that as a base for black basing the models to get some depth in the paint scheme.

My priming spray booth involves me putting on a rubber glove and spraying at arms length in the garden.
If it is raining I line the alcove where the hob is with paper and card, then switch the extractor fan to max and hope that I'm done before the missus finds out.
nickc
My spray ‘booth’ is 2 bits of cardboard propped up with some tins of paint so that I don’t overspray onto either my table, or all the tools, and then I open the window.
Yeah, that's all I would end up using if I was to go the spraying route.
I did a similar thing with the polycarbonate body of my Tamiya Neo Fighter a few years back & even though I was as careful as I could be, half of my garage ended up with a faint misting of neon pink.
I'll give the light grey a try first on some bits I don't need to see how it covers and what difference it makes to the application of the white.
I appreciate all the help!
1/35 Tamiya Chieftain.
Need to do the crew and maybe a bit of a diorama.


Well i finally finished the new Airfix Gannet. Its one of the best kits I've ever built in terms of fit and so on. There are a couple of errors and omissions in the instructions though and you need a heck of a lot of lead in the front.
Its a fantasy scheme by the way, this particular aircraft never few in those colours, i just fancied something a bit different!
[img]  [/img]
[img]  [/img]
Woah!
Great job on the Chieftan & the Gannet, guys!!
I might do a tank next.
Are the Gannet wings fixed in that position, or can they be extended.
As much as I enjoy seeing these amazing efforts, it makes me want to give up on my own builds as they seem so amateur and basic in comparison. I suppose you only get better through practice though.
Cheers! The wings are fixed like that. When they are spread it’s a rather large model that I just don’t have space for. You get different parts on the sprue depending on how you want to do it.
Three things improved my model making from when I first started in the ‘70’s. Tamiya Extra Thin and affordable airbrushes and compressors. Back then air brushes were out of reach of all but the wealthiest builders, today you can get a complete set for well under £100. I had a gap in model building of nearly fifty years, I got back into a couple of years ago.
But I still look at Gannets that other people have produced and I think mine looks rubbish!
Alclad 2 matt coat! Hides all sorts of crimes.
@Rockhopper Look at the shite that I was churning out on page one of this thread! Nobody could be as bad as me.
Perseverance and swearing are the key.
As much as I enjoy seeing these amazing efforts, it makes me want to give up on my own builds as they seem so amateur and basic in comparison. I suppose you only get better through practice though.
I feel the same against some of the efforts but then I look back at stuff I made when the kids were small and wanted a model "Air spitter" (the misnamed Spitfire of just beyond toddling) and realise how much better I'm making current stuff.
I've built some trash and it's gone in the bin but I'm getting better and produced a few things that now pass the 4 foot test (i.e. do they look ok from that distance).
I enjoy looking at other far more skilled people's work and if I can just pinch an odd idea or tip here and there I can transfer it to my own stuff.
I'm strictly, gear up and very lightly weathered if at all. I'm also long overdue finishing anything!
Never be afraid to can a really bad build - Airfix MK1 Blenheim I'm looking at you 😬
I might do a tank next.
The older Tamiyas are about £20. Silly cheap and they go together very well. Not up to the detail standards of more modern kits perhaps, but I'm very impressed.
The older Tamiya tanks are incredible value and build much better than similar Airfix ones for example. The chieftain and panther are less than £20 in most shops.
Decisions, decisions...

Think I'll do the STRV103C next. If I had a favourite tank this would be it because it is such a different concept. Worth a Googling if you don't know.
Price wise: Patton £15, STRV £22, Challenger £20.
Do that weird turret-less Swedish thingy next.
Great work on the Gannet and Chieftain, really excellent.

Thats come out really well! Figures are one thing I cannot do so i generally leave them off.
Yeah, these are for the photos only. I've already packed them away.
Do that weird turret-less Swedish thingy next.
Plans are under way. Doing it in a "Winter Splinter" camo scheme which will involve a lot of masking and swearing. Rather helpfully the instructions for the paint are in various shades of grey, which is absolutely **** all use, so I'm having to do some research. With a bit of luck it should look OK.
I'm currently mid way through a Special Hobby 1/72nd P40N-5, which is a nice enough kit (for a short run injection) but after a Tamiya click-together-no-filler-required is fighting me.
Found an interesting scheme though, Late Italian campaign RAAF, and going to try some oil weathering 😲...wish me luck
Also, keep coming back to the thread to have another look at @Rockhopper Gannet, that really is a beautifully made kit.
Agree with nickc, that Gannet is a thing of wonder.
How's the mad Swedish tank thingy coming along?
My latest; Special Hobby P40N-5 450Sqn RAAF, Italy '44. [nerd] the interesting thing about the camo scheme is that at this point all P40 were coming out of the factory in the USAAF scheme of olive drab over neutral grey, and the MUs just painted on dark earth to replicate the pattern of RAF temperate land scheme.[/nerd]
Model was the usual short run stuff, went together well enough if you took your time, instructions a bit vague, decals were the worst I've used in a long time.


I like that!
Where do you keep them all? I'm going to have to have a cull.
Weird Swedish Thing update:

Fiddly as Hell compared to the older Tamiya tanks that I've done, but fit is ok.
Going to have to put it away for a bit as I've got grown up stuff to do at the weekend for the next couple months.
I also like the bottle of Tamiya Extra Thin that appears in these pictures to give scale. Is this an SI unit?
Where do you keep them all? I’m going to have to have a cull.
Funny you should say, there's currently nowhere (apart from the workbench) where this can live...May have to have a cull. Detail on the tank looks super cool, can't wait to see it finished.
Is this an SI unit?
😃 I think it needs to be.
Detail on the tank looks super cool, can’t wait to see it finished.
Covered in tiny little hooks. I was putting them on "blind" as I couldn't really see what I was doing, then nudging them into position.
I've put enough on so that I can get to a point where it can be masked. All the "sticky out bits", the machine gun, smoke launchers, aerials etc can go on later after the camo has been painted.
There were more pieces on the crew hatches than on the entire upper hull of the Chieftain.
Another question - do people use Tamiya Extra Thin cement for all of their joining needs?
I find that it dries so fast, on larger parts I can't get a bead all the way around the edge before the start bit has dried. I find myself either having to rush to get the whole edge perimeter covered before slapping the parts together, or putting the parts together & then dabbing the cement along the seam to allow it to wick into the gap. This seems less than idea though, as it spoils the edges being joined.
I feel like I need an in-between glue that is not quite as volatile as the extra thin stuff, but less goopy than the cheap tubes of polystyrene cement you get in the starter kits.
Harrier progress is still going slowly. I've been doing quite a bit of on sprue painting for things like weapon pylons, undercarriage, air-brake & undercarriage flaps etc.
Once cut off the sprue they will obviously need tidying & finishing up with some dabs of paint to finish them off, but couldn't work out a better way to paint them & hold them.
White paint still proving a pain in the arse, but maybe getting a bit better at it. I primed all of the on-sprue bits before painting and the paint has maybe gone on a little bit better. I've decided I will prime the fuselage before painting.
I realised that I can't fit the drop tanks & the bombs that I spent ages painting, as they use the same rack on the wing. So, that is good as it allows me to use the bombs to practice different painting methods etc.
I filled the terrible gaps in the engine nozzles, but have not yet got round to smoothing & sanding the filler to finish them off before painting.
Slow progress when you can only do an hour or so on the occasional evening.
Like most folks I suspect, I use Revell Contacta for larger bits (wings fuselage etc etc)

It's pretty nice to use in large areas, you can go much more evenly and not rush things, the long metal errr, spout? makes it easy to be super accurate about where it goes, and it dries much more slowly that Tam, super-thin, it's also way less aggressive
Ah right. Looks like I need to look for something else to use then, alongside the thin stuff. Cheers chaps!
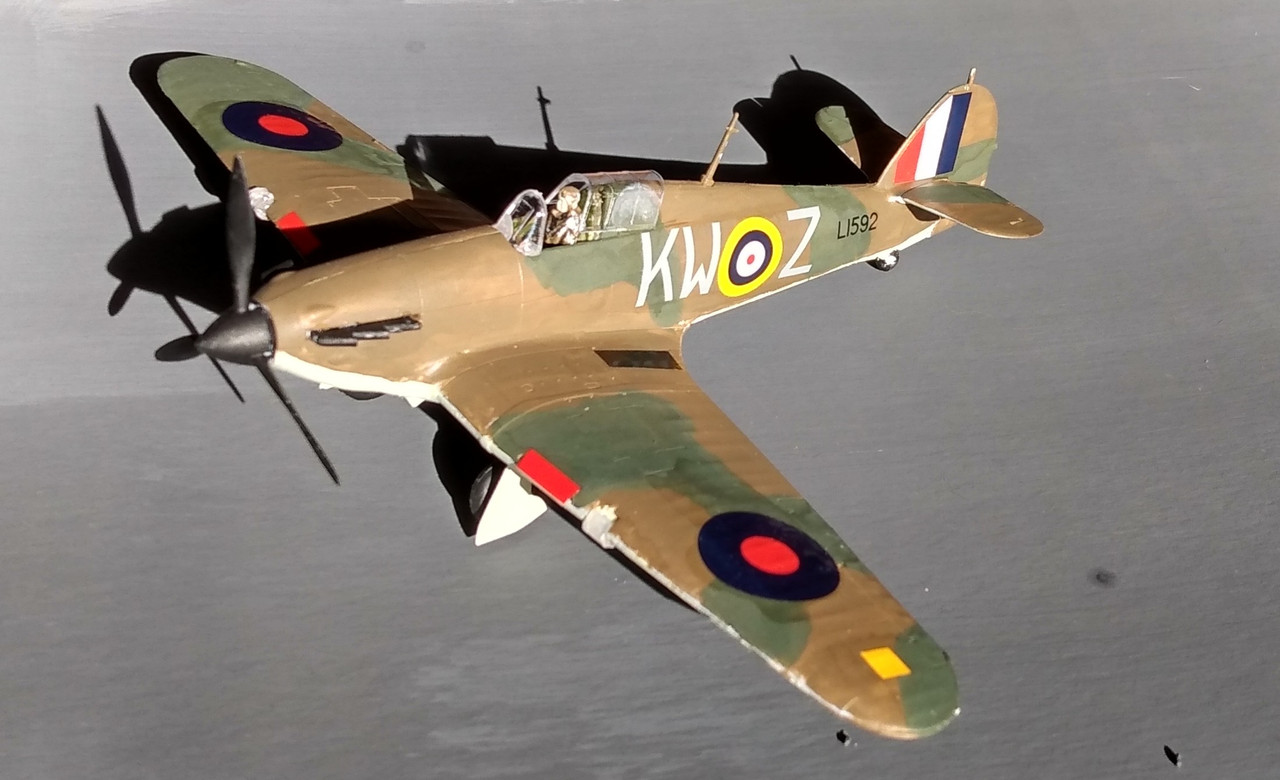
Aifix starter kit Hurricane, from the middle of Lidl. I think I need to thin the paint a bit more on the next one.
Tamiya extra thin - you are not supposed to paint the parts with it then press them together, you fit the parts together then the glue is so thin that you just brush it over the joint and it flows in between the parts by itself.
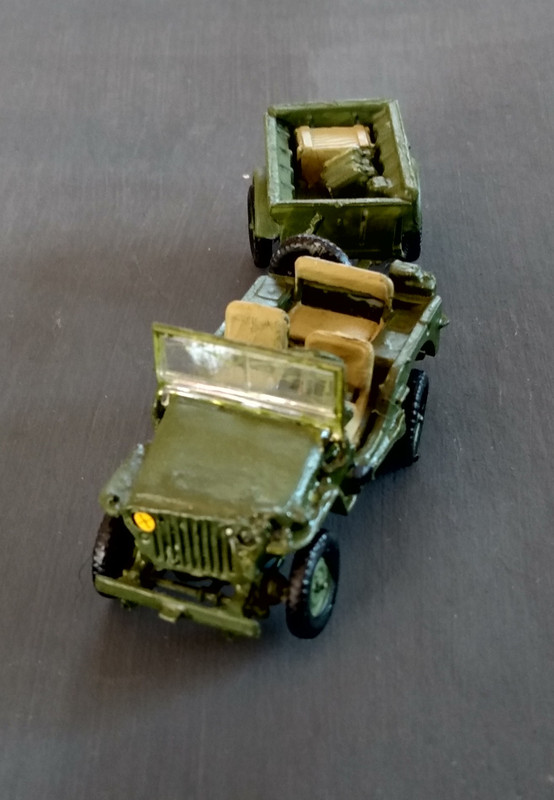

I bet that is tiny!
I tried to start on the Tamiya version of that Jeep, and I couldn't finish it.
It would have hidden it.
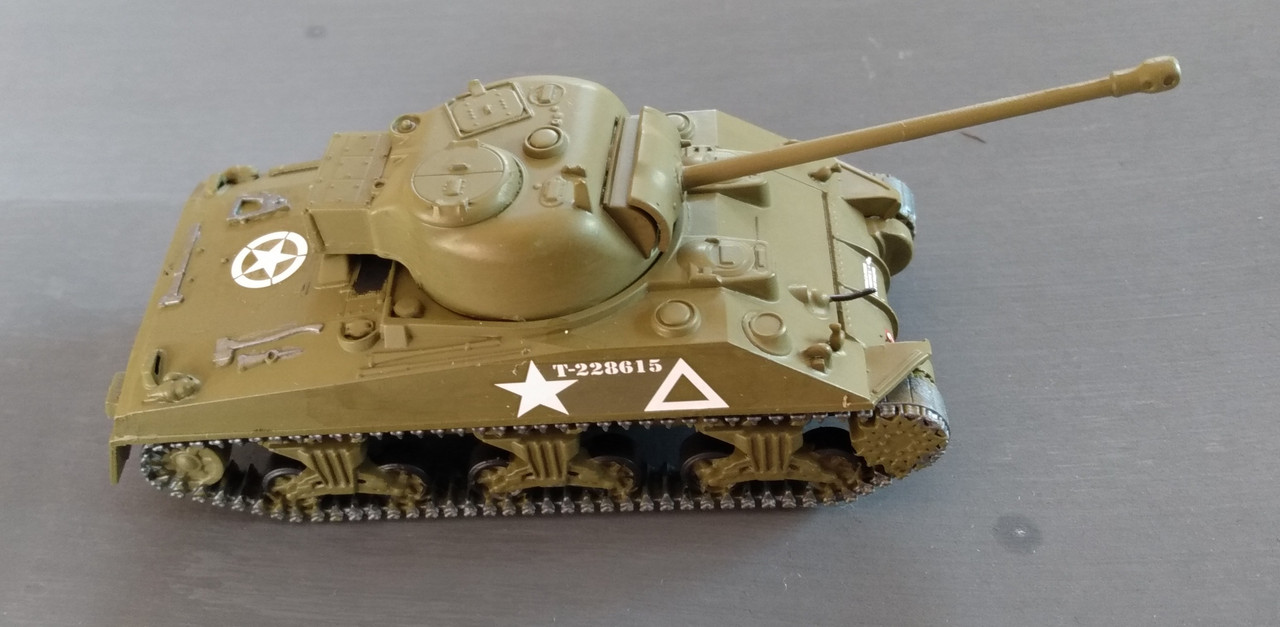
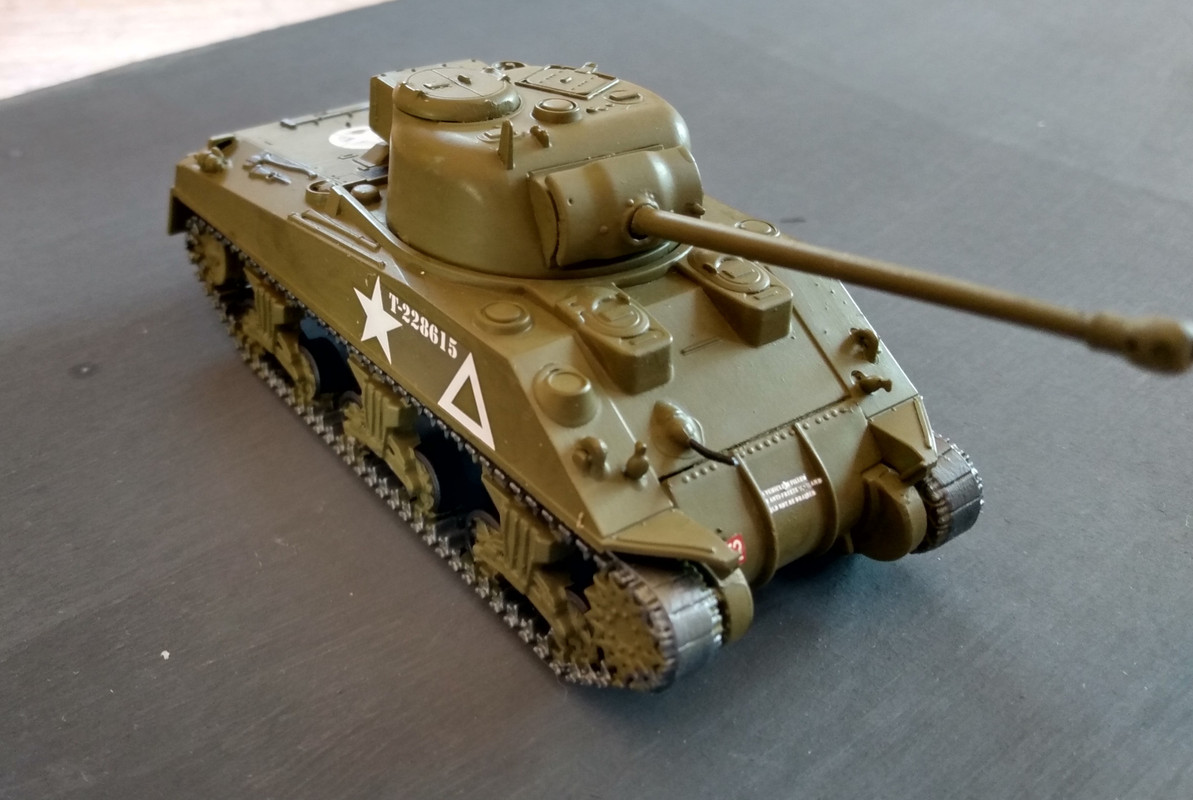
Another starter kit from Lidl, this time a Sherman Firefly, fresh from the factory...
Adventures in painting...I'm going for a "bleached in the SEA sun and washed with liberal amounts of salty water while sat on the arse end of the Intrepid"...Yes. Obviously it's going to be VA176, yes obviously the MiG killer, and yes Obviously with the toilet bomb...Who do you think I am? I hoping that while it does look a bit OOT right now, after a couple of coats of varnish, some weathering and the decals on, it'll tone down a bit. If not; I'll know for next time, right?

Is that the Hobby 2000 kit? I've got one in The Stash.
It is, the ex-Hasegawa 1/72 scale. It's showing its age a bit, a few bits of flash, some fit issues around the fuselage and wings, and that hard unforgiving Hasegawa plastic all present. But the decals are nice, there's masks included and the shape is about right (if you don't look too closely) Easy build as well - apart from endless amounts of munitions
Sounds like the same one. Will have to check if I've got the toilet included in my kit.
I do like Hobby 2000. A proper top opening box is always appreciated!
https://www.scalemates.com/kits/hobby-2000-72062-a-1h-skyraider--1439117
Cromwell tank (again from Lidl)
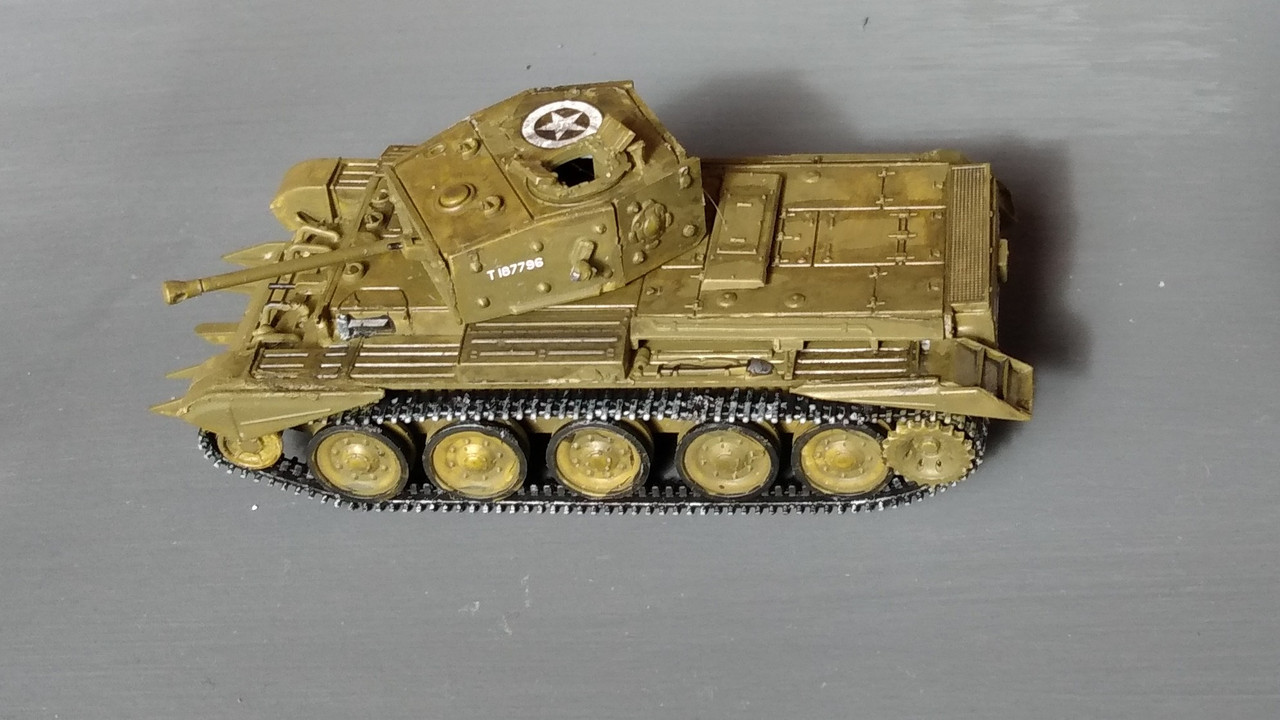
You are battering through these!
Yes, I've got a Tiger tank on the go at the moment.
I'm also building a Tiger 1, well I've opened the box anyhow. Its the Tamiya mid production version and I'm going to give it the full Zimmerit and battle damage treatment!
natrixFree Member
Yes, I’ve got a Tiger tank on the go at the moment.
If you fancy something bigger for not much more you can pick up 1/35 Tamiyas starting at about £15 off Jadlam.
If you fancy something bigger for not much more you can pick up 1/35 Tamiyas starting at about £15 off Jadlam
Sounds good.
battle damage treatment!
Be interested to see how you do this
Oooh, an AS90. BITD that seemed so modern "Artillery System for the 90s" seems rather dated now though.............
Any German armour experts in the house? Mid production Tiger 1 specifically. And it'll be overall Dunkelgleb with field applied Olivegrun and Rotbraun camouflage.
Would they have been red oxide primered then Zimmerit then Dunkelgelb or would the have done topcoat then the paste? I understand the Zimmerit was applied in the factory. If the Zimmerit was chipped off what colour would you see underneath do you think?
That's a question for the Britmodeller forum! They like that sort of thing.
A1-H NE572 Paper Tiger II of VA-25 USS Midway 1965 Yankee Station. The "Toilet Bomber". There are two stories about the choice of munition. Once goes that it was a protest about weapons shortages, the other that commemorates a bombing milestone. It's a big kit for single seater, in 1/72 scale its more the 4.5 Thin glues long and has an over 5 thin glues wing span. I've totally no room for this thing anywhere.


Any German armour experts in the house?
What I know about German WWII armour can be written on a very small post-it-note labelled Nick knows shit all about German Armour, sorry
My research tells me that most of the war they were red oxide followed by overall dark grey (Dunkelgrau) which changed to tan (Dunkelgelb) in 1943. They were sent out with two tins of pigment, red brown (Rotbraun) and dark olive green (Olivgruen) that the crews could mix up in the field and apply their own camouflage pattern so you'll never see two Tiger 1's that look alike!
The only thing i haven't been able to find is if the Zimmerit was applied before or after the main colour.
Hope that helps 🙂

That's a crazy looking thing!
like the tracks and wheels though 👍
I think I did say I wasn't going to do any more PE in 1/72 kits...Yeah, about that.

It's 'sort of' fun in a slightly masochistic way.
like the tracks and wheels though
Thanks. Looks a lot better now it has dried.
A lot of it will be hidden behind Jerry Cans that also contributed to the armour. The logic being that if they caught fire the fuel would leak and set light to the ground, not the tank.
Not a big fan of tanks that are caked in shite. In a lot of cases it doesn't scale very well. Not that I'm an expert I hasten to add.
I'm much more of a slightly dusty sort of chap.
