@Rockhopper do I actually need that compressor though if I already have one? If not, have you got a link to the airbrush without it?
Oh sorry, I didn’t notice you already had a compressor. If it’ll go down to 10psi on the regulator and it’s got a moisture trap and you can connect the airbrush hose to it then yes, it’ll be great
I’d budget £100 and get a Neo or an H&S Ultra. I use an Ultra, lovely bit of kit.
As mine has outlived the ebay £15 ones numerous times over it has worked out cheaper in the long run.
Christmas Build is GO!!!
And I fully expect to have it finished by June.
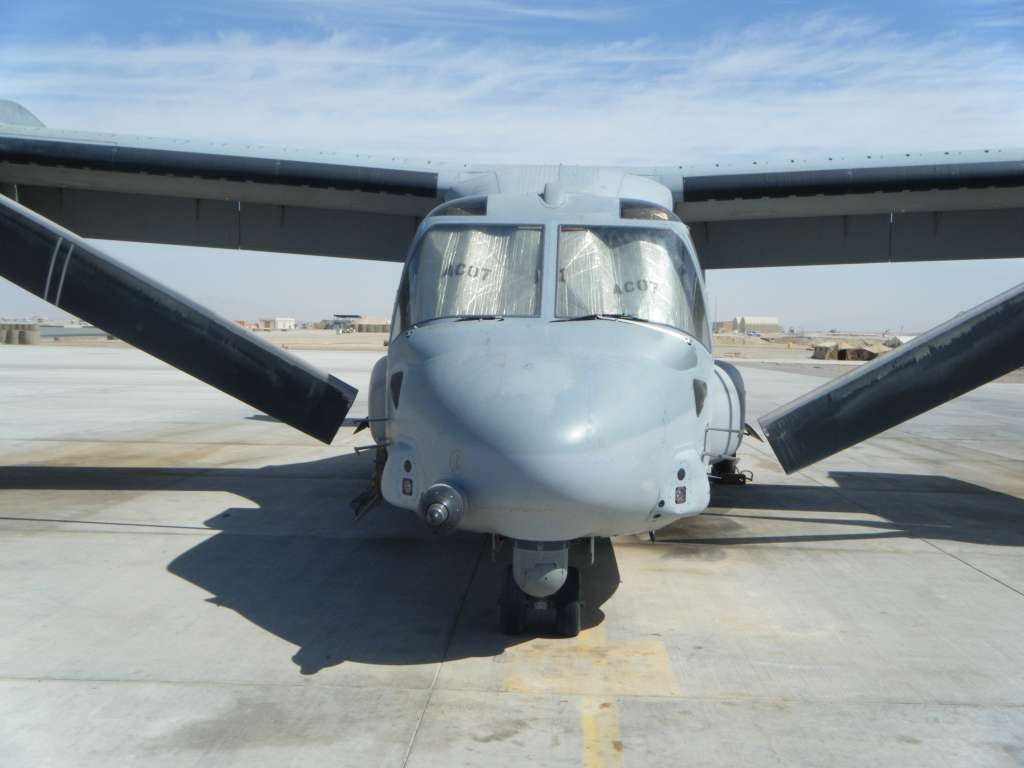
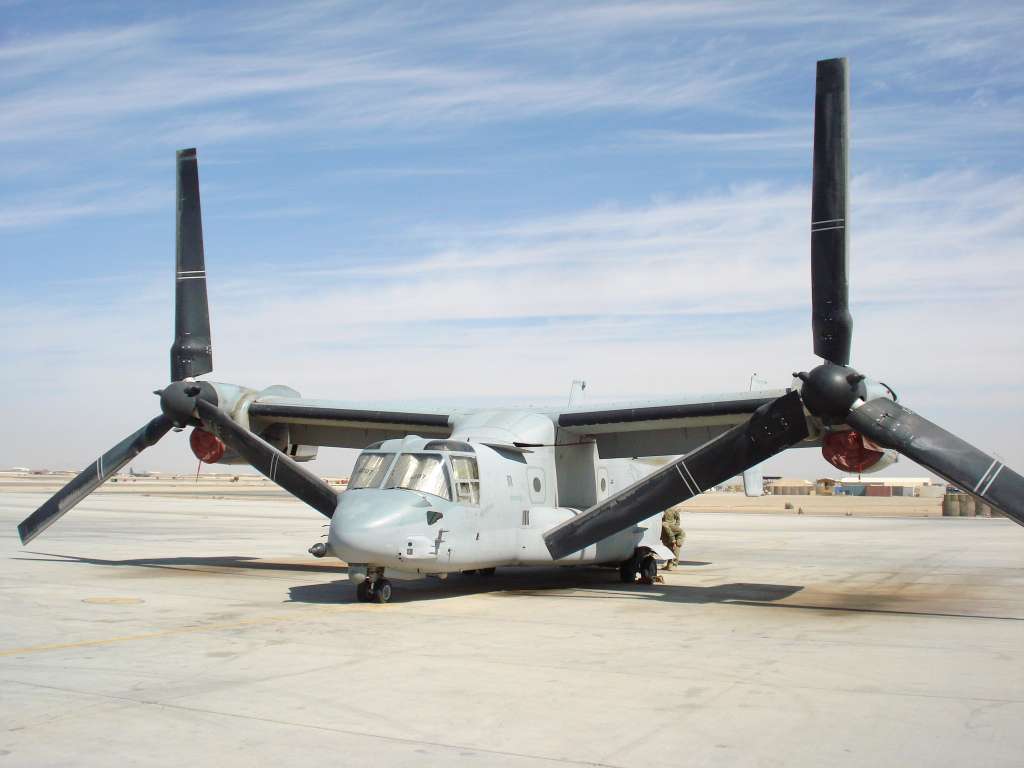
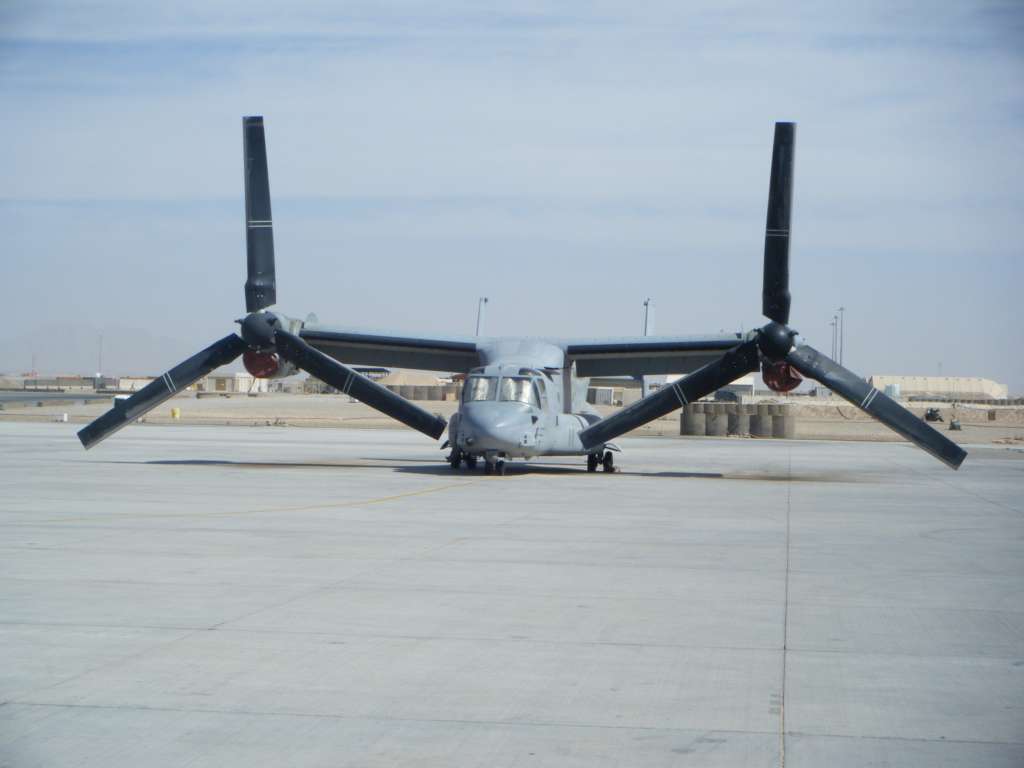
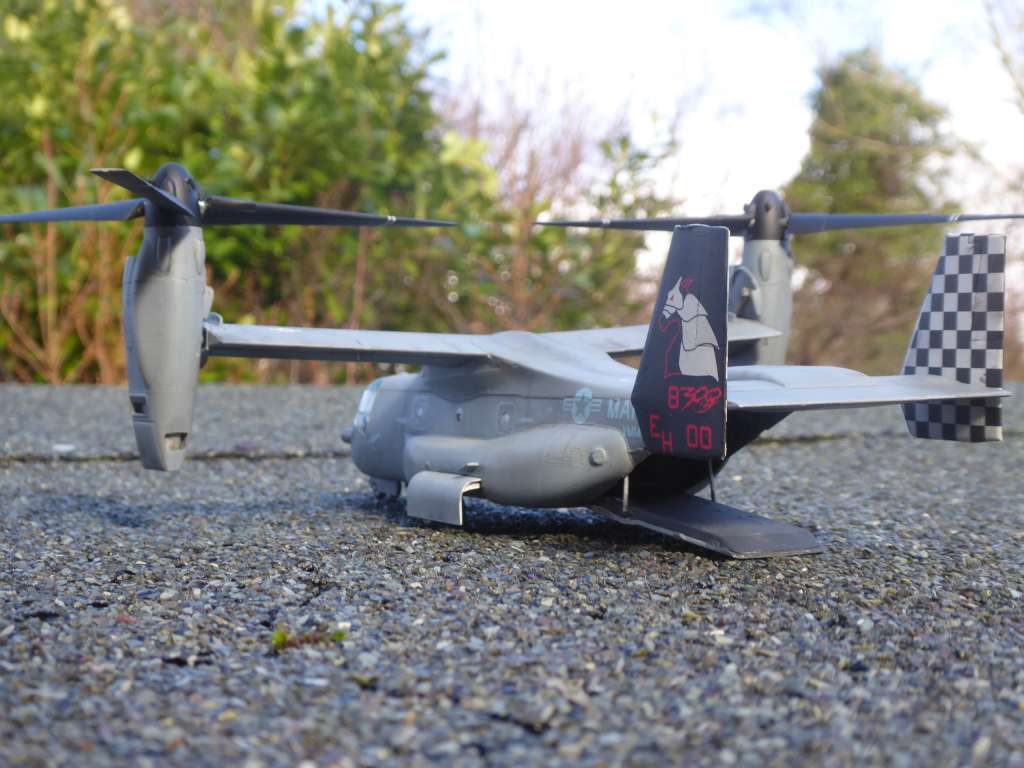
Which immediately begs the question what angle for the tilt rotors so it doesn't sag/fall over/sit on them?
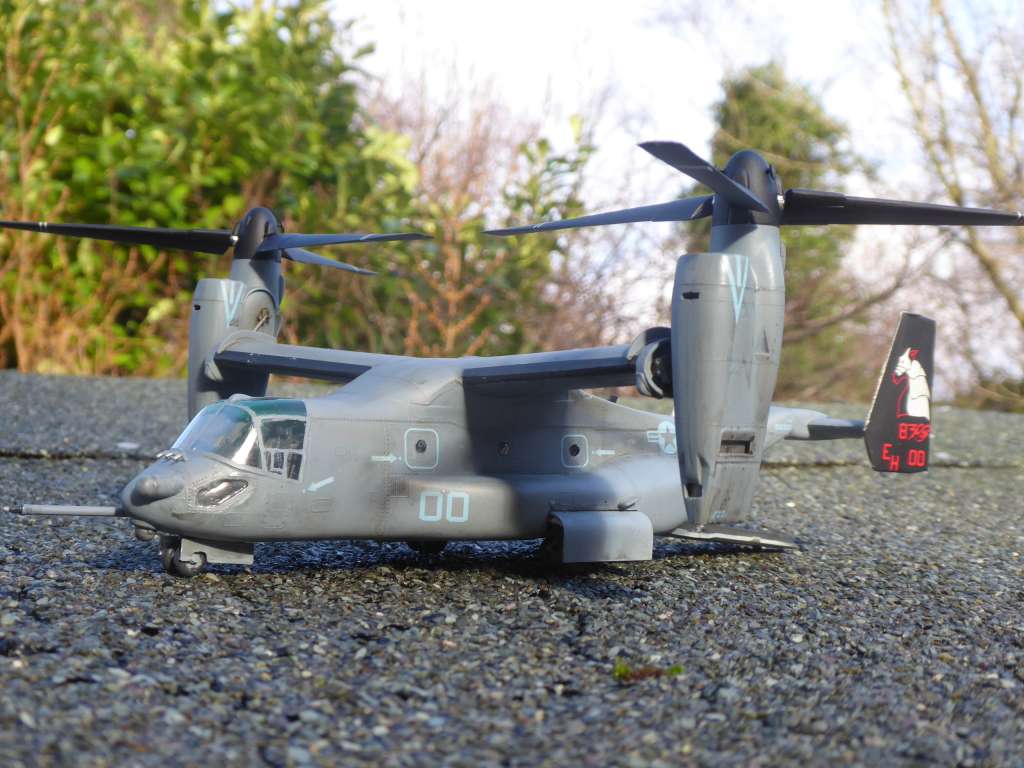
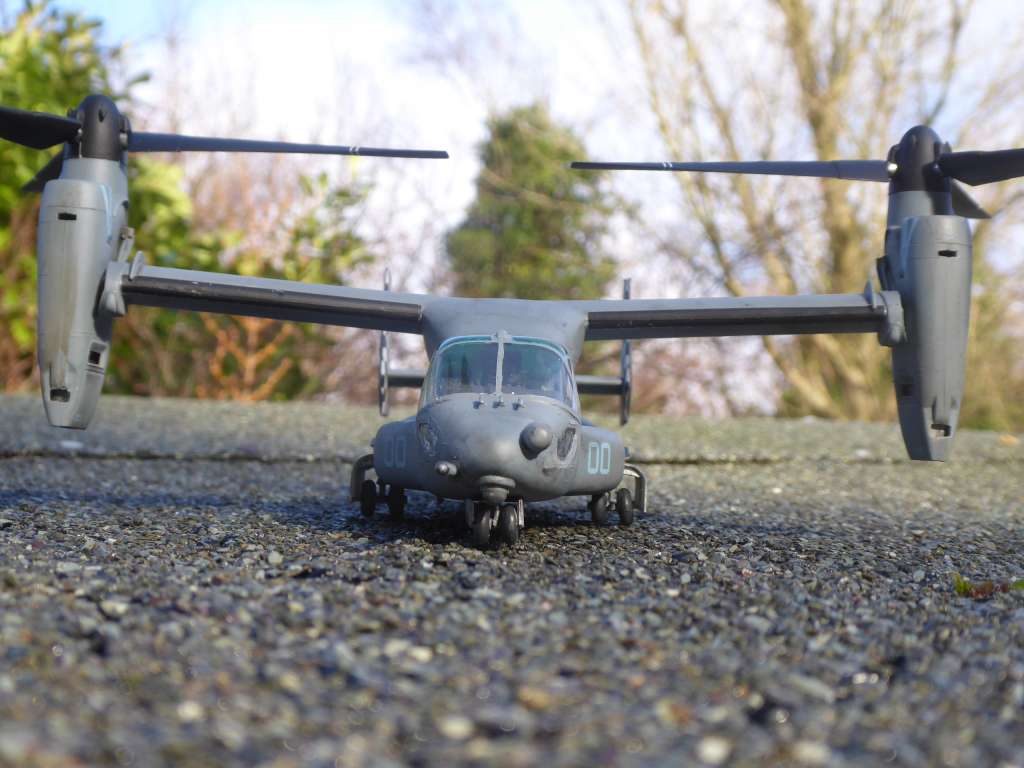
Rotors will be up. Wheels down, no crew and maybe the ramp open depending on how the interior turns out.
Less likely to crash if it is on the ground.
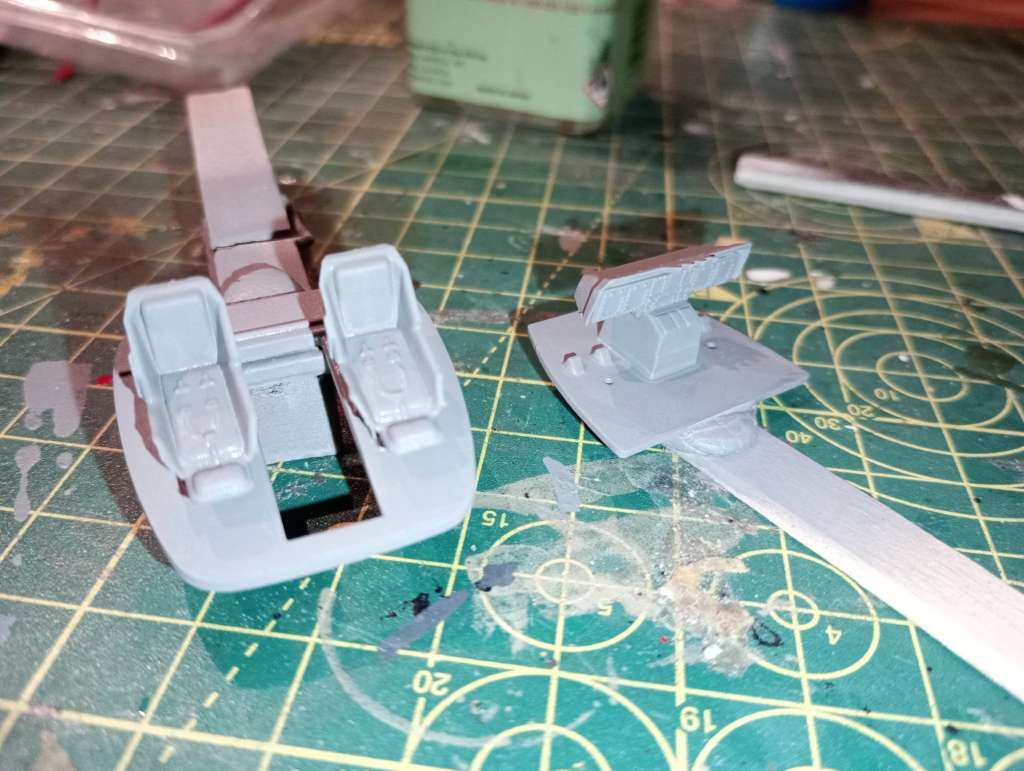
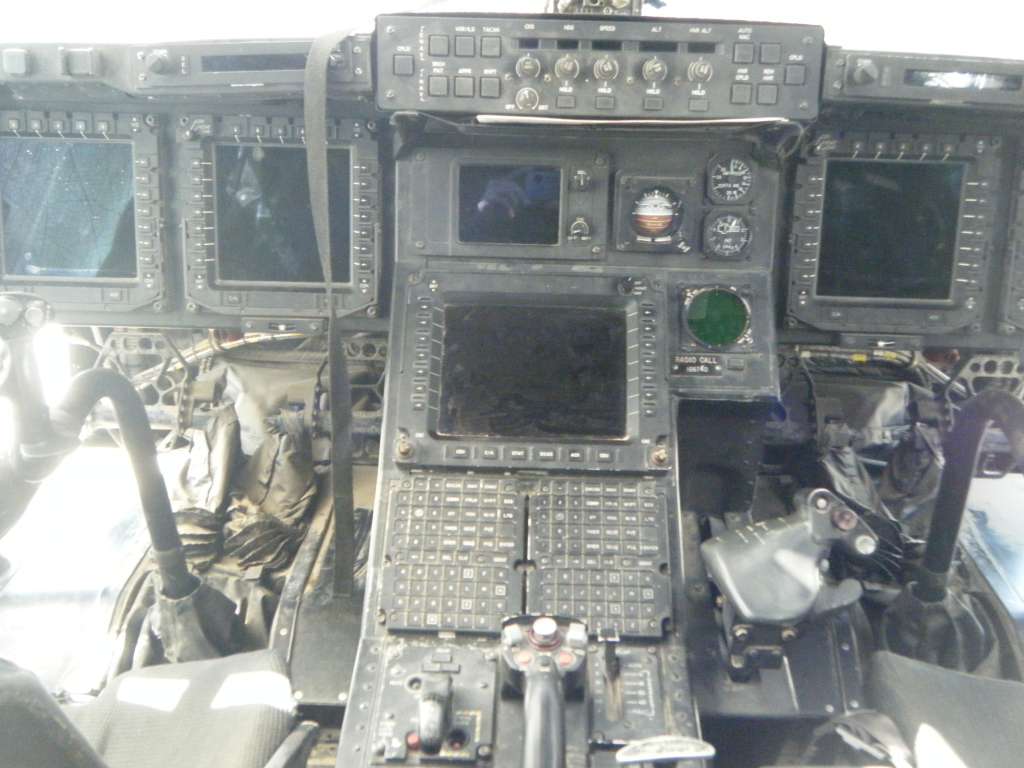
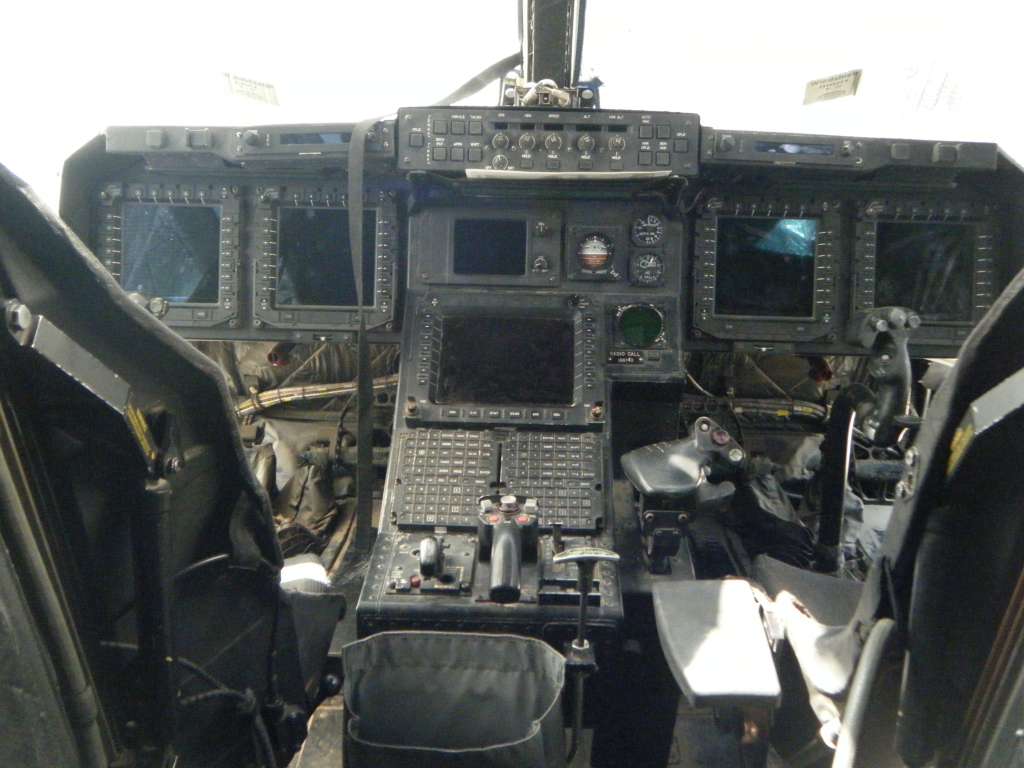
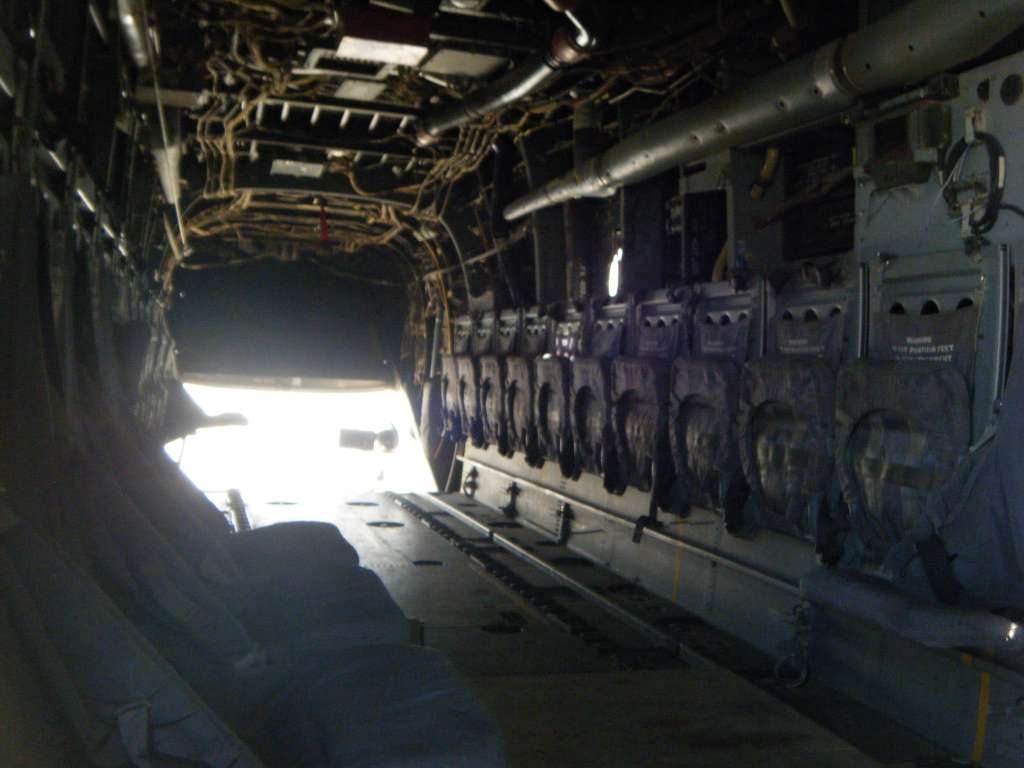
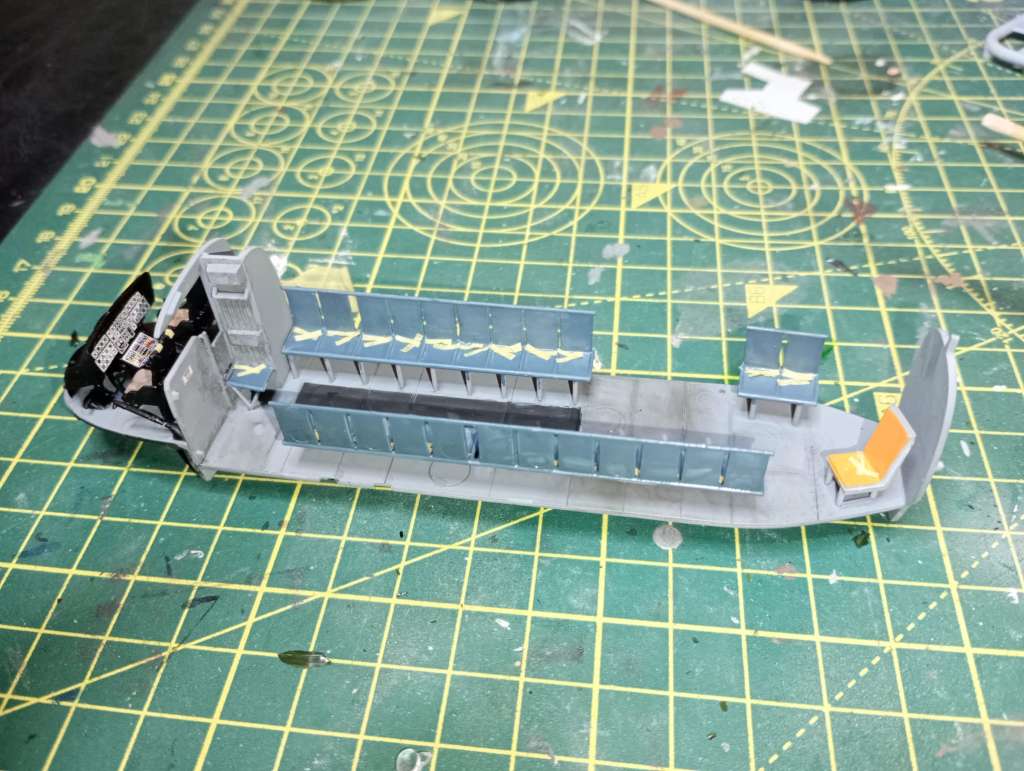
Harry, I have some up close photos if you'd like them for painting/decals etc?
Nice one! Anything from the main cabin would be appreciated. Also where it gets stained or dirty.


That should see you right Harry.
Thanks!
If you can't save them in higher enough Res, let me know and I'll googledrive them and send you a link.
They're fine. Interesting to see the mottling in the grey. Will try and replicate that.
Did anyone get anything off Santa?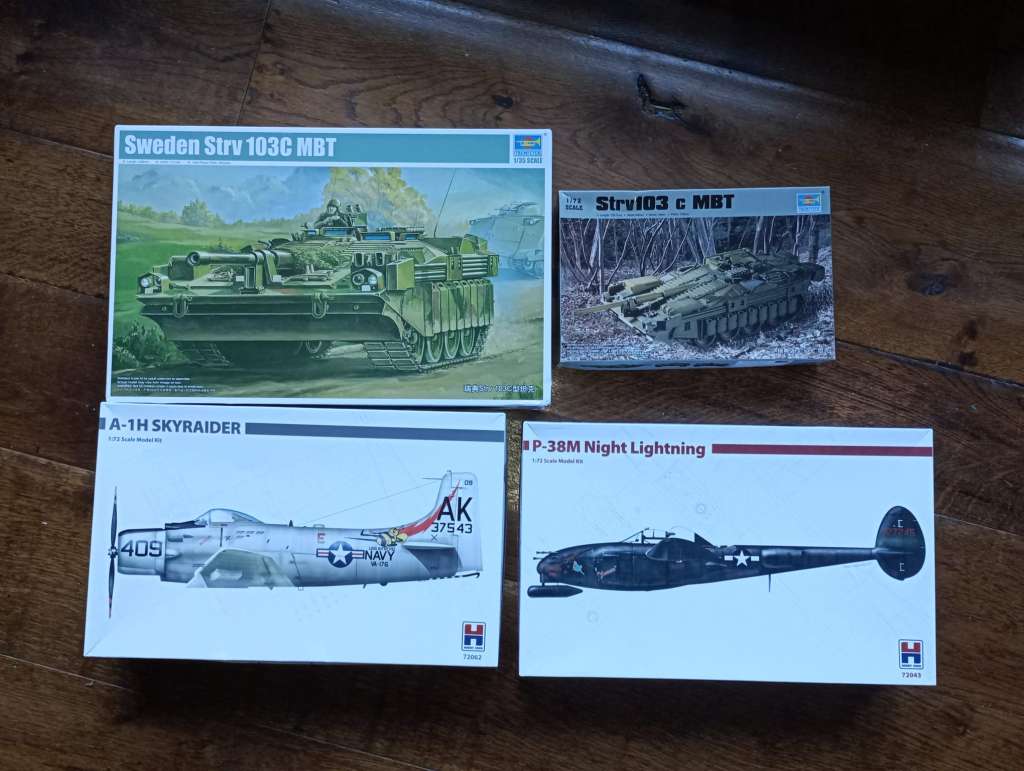
^^^^yes, yes, and yes again^^^^
Can't recommend Hobby 2000 enough. Reboxing of old, but very good kits with new decals, vinyl masks and a proper massive top opening box.
No new kits, we are slowly chipping away at the accumulated mass of half built stuff.
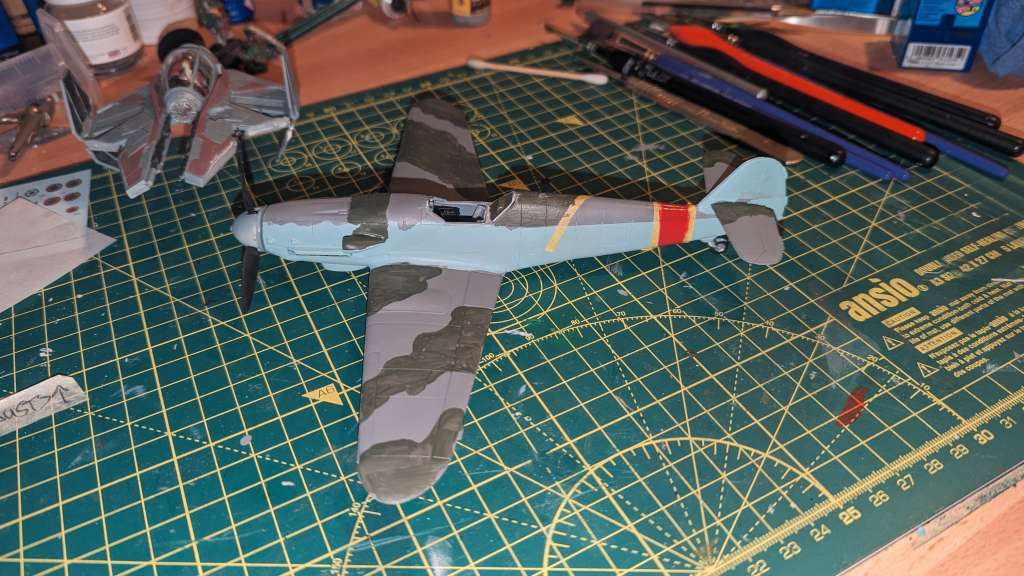
I have had some time over the last couple of days to make a bit of (slow) progress with the BF109 (excuse the mess on the board). I've freehanded the rough shape of the camo and I'll tidy it up by using putty when I've enough time to get all the further coats on and then putty straight off (see woes below).
I also learned a valuable lesson with the mig putty I mentioned a page or two back... It is brilliant to use but eats the paint finish underneath it if left on for too long (in may case about a month because I was busy and forgot about it 😖) and I had to clean the Hunter up with IPA, repaint bits of the grey and then touch up the green by hand / eye. If I'd finished it in the first sitting it would have been fine 😡😡😡 see new strategy above...
I'm doing the yellow and black striped wings for that per the Tangmere aircraft but decided to paint not decal the stripes. I'm in two minds whether that is the right choice given how badly the yellow is covering the metallic underside after two coats but I think it will be better longer term. 🫤
My younger son has some nice WH40k stuff in progress although what possessed him to buy Tyranids to add to the mix is beyond me.
Ignore that one 🙂
Christmas build complete!

The kit was a bit of a donkey, but I'm quite pleased with the outcome.
Just notices the shonky wheel. Will sort it out!
Mate, that's cracking, looks the business. Hope the photos helped.
They did. Particularly the staining on the paint.
Your runway needs some tlc, moss and very uneven. 😝
How on earth do you turn this stuff so quickly? Cracking as always.
I'm well on with the next one!
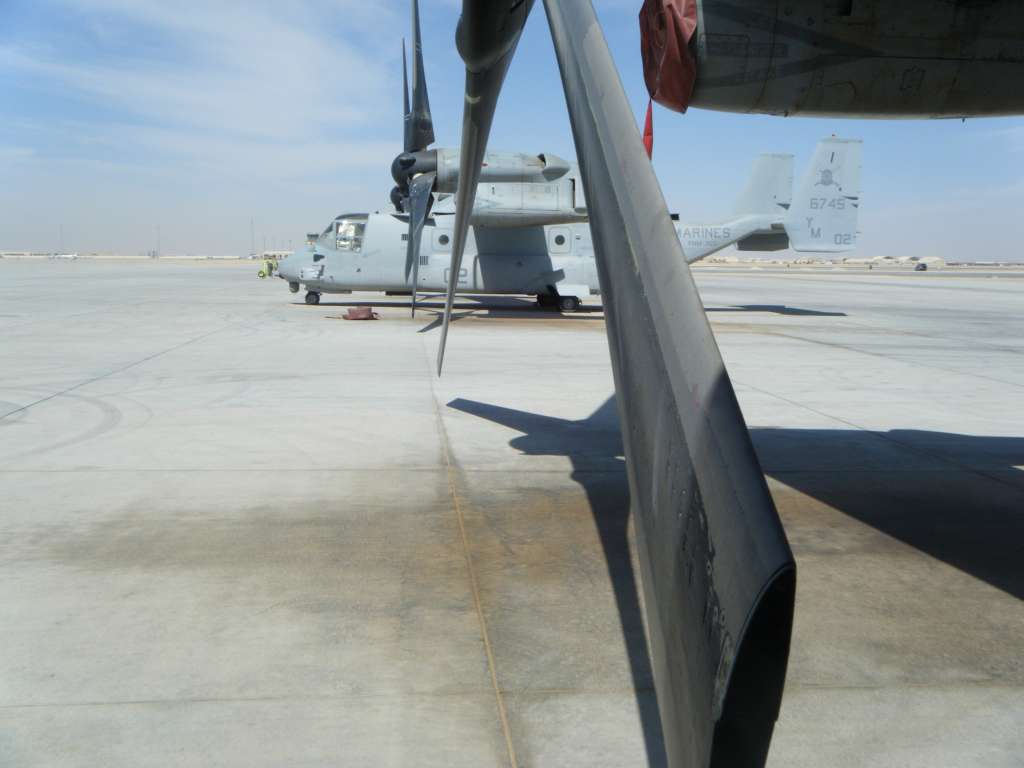
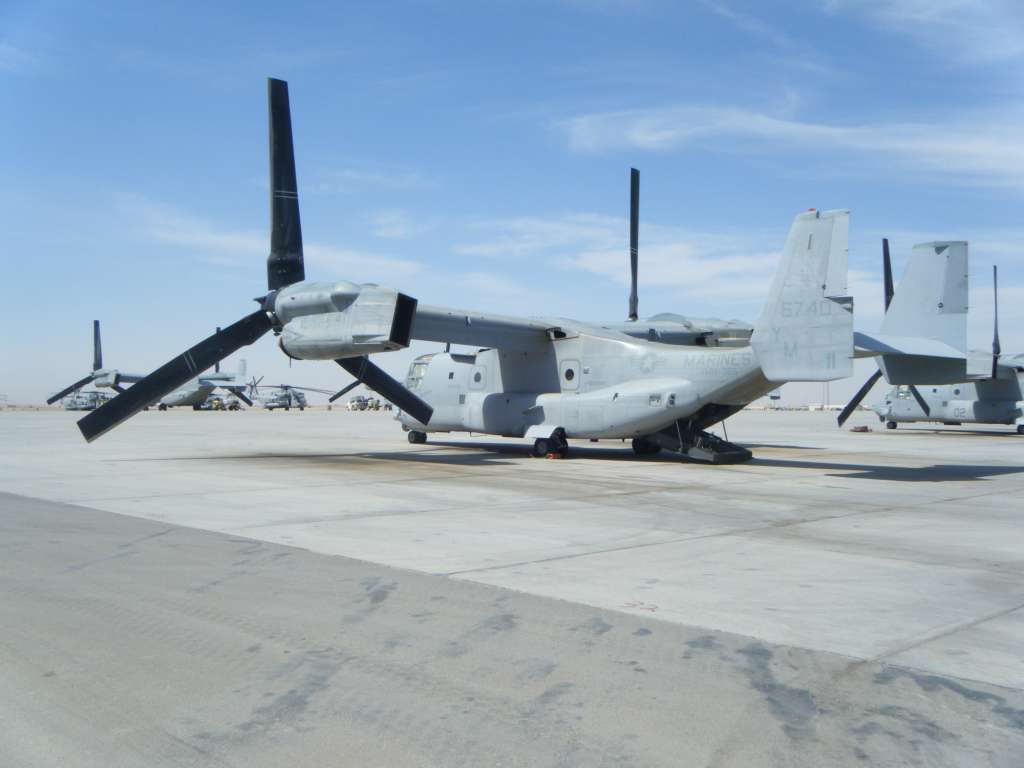
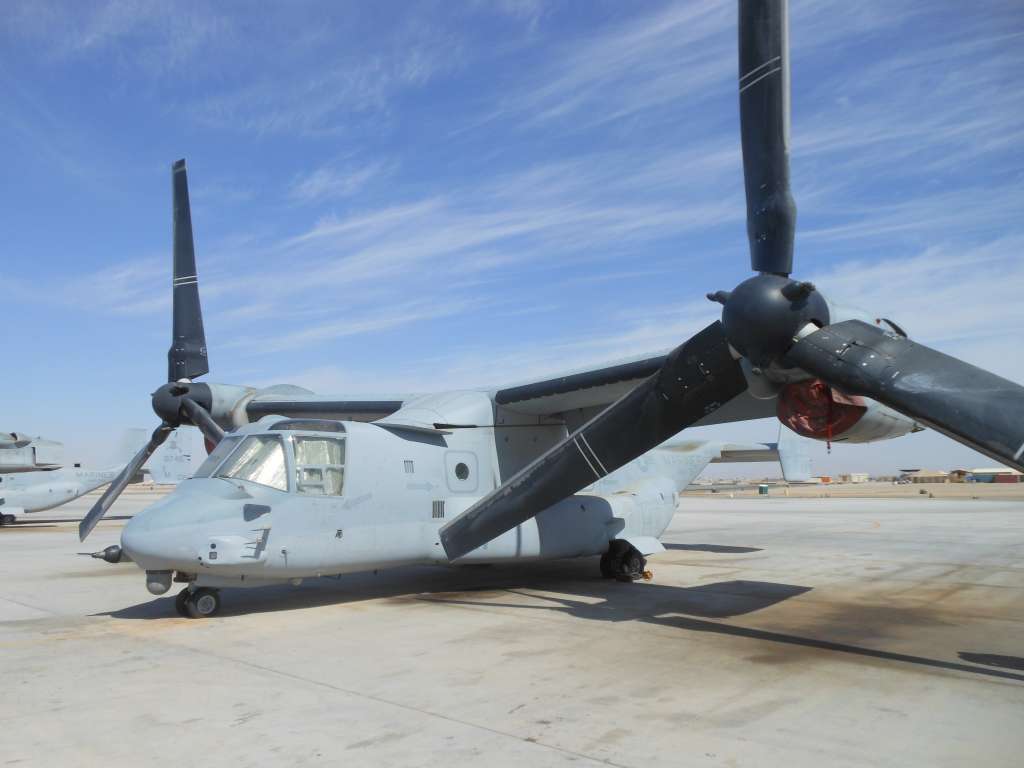
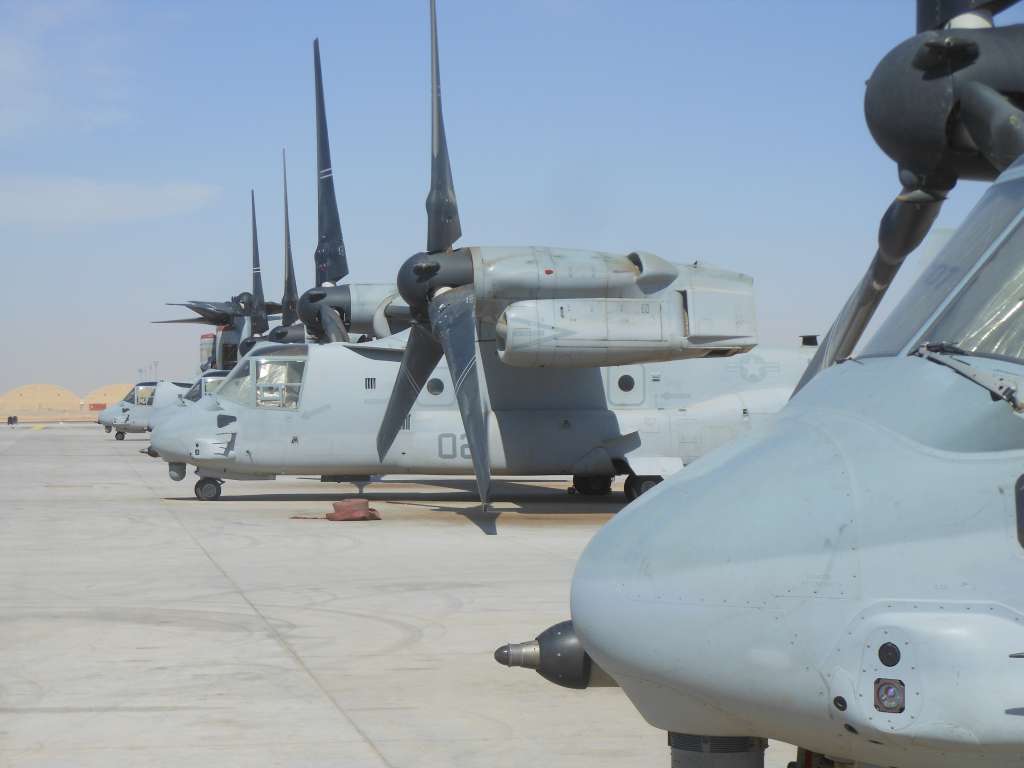
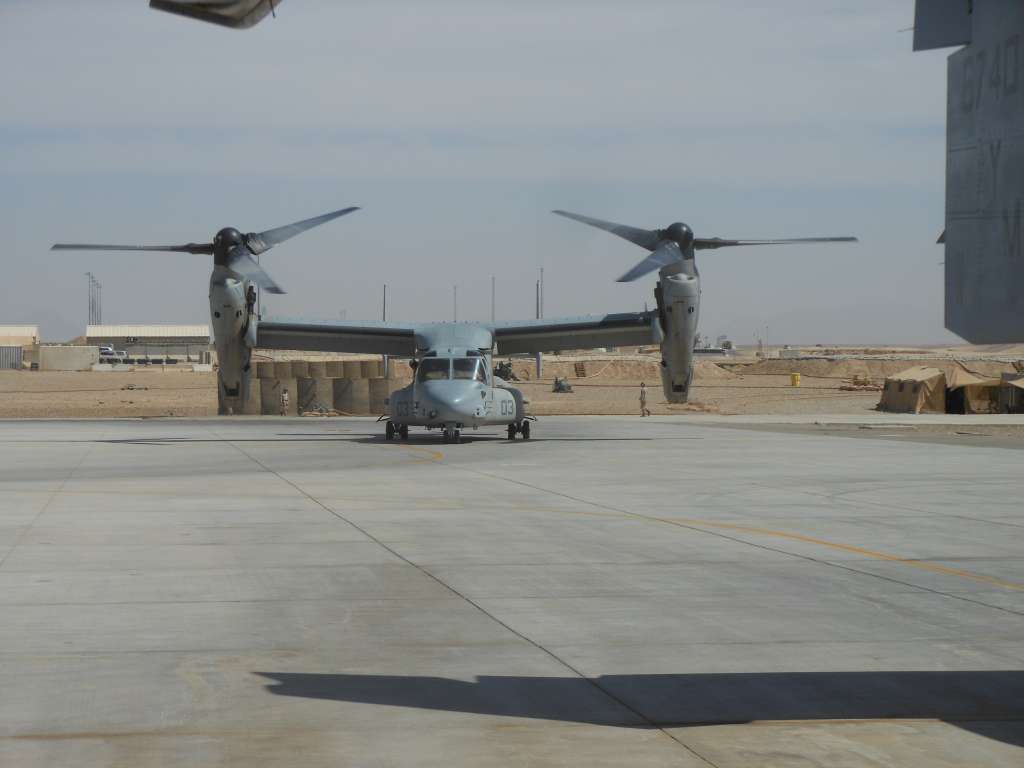
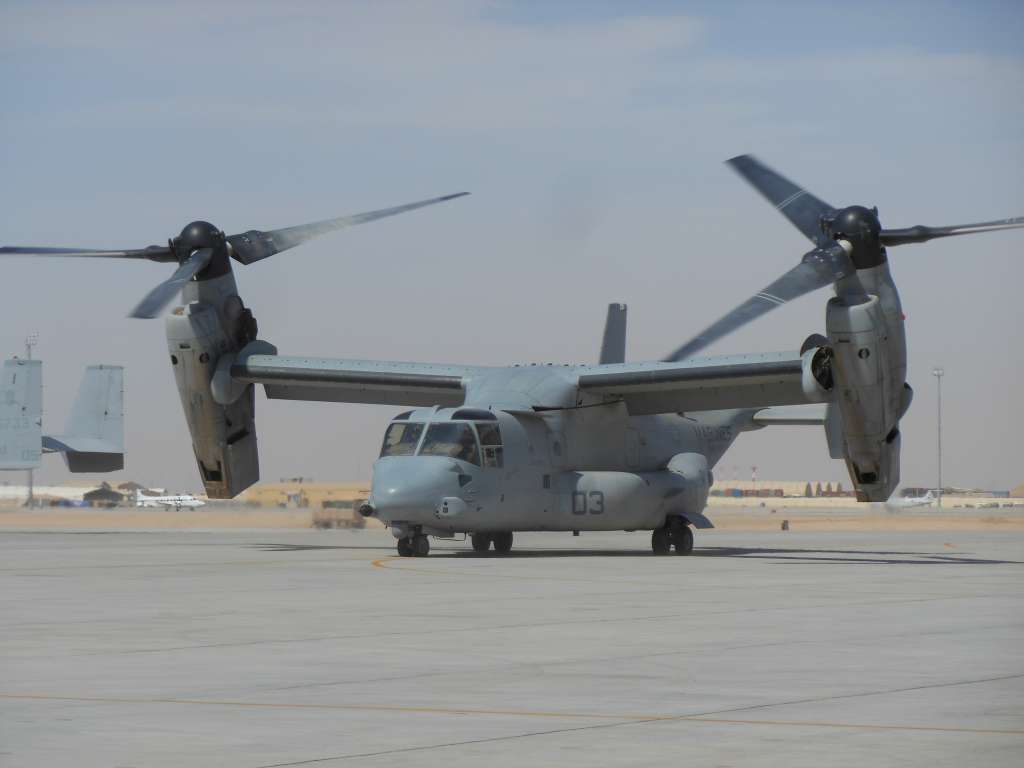
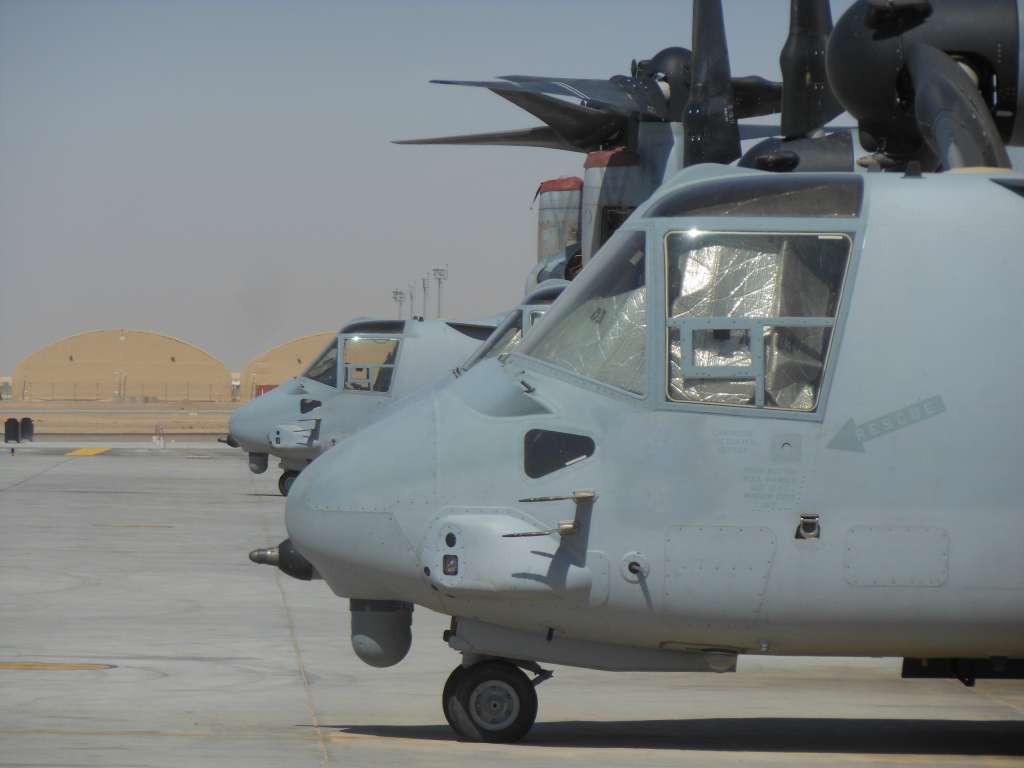
Airfix Sea King (not the new big one).
And a much better kit than the Osprey it is too! 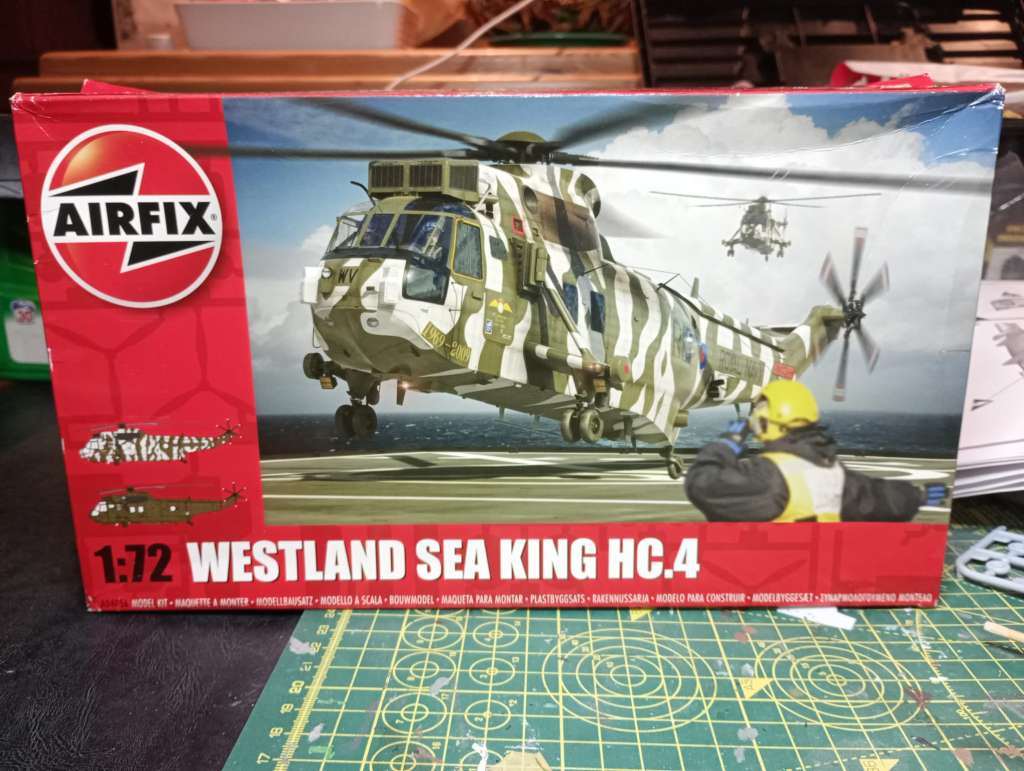
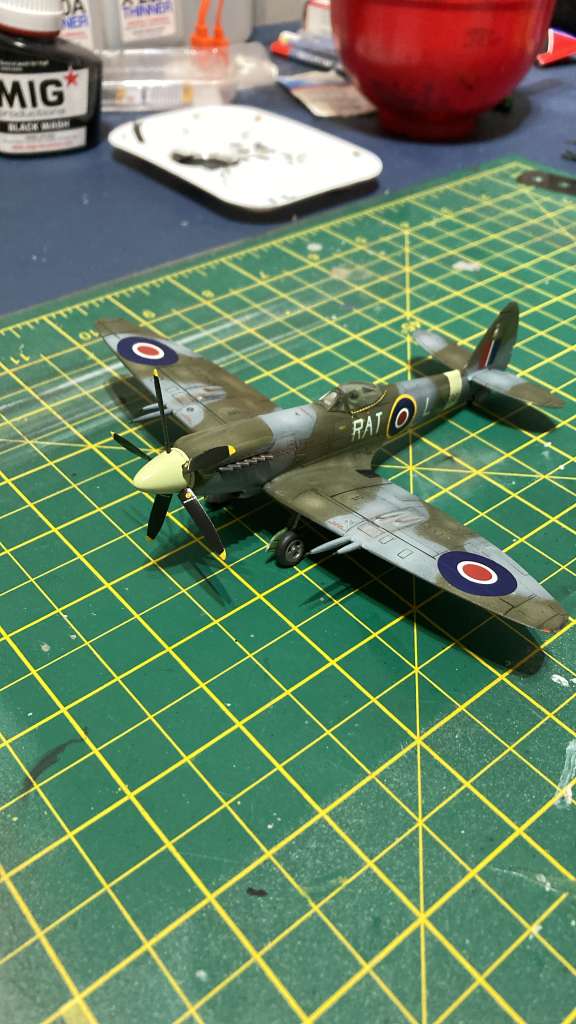
Christmas F22 Spitfire. 613 sqn 1949
And Airfix Zero WIP - Xmas pressie from my daughter
So, what have we all learned in 2023?
My “lessons” were as follows:
1) Paint canopy framing with a brush then neaten it up with a cocktail stick after about 10 minutes, when the paint has dried, but not set hard. Then mask over the whole lot.
2) Drop the pressure on my airbrush and keep an eye on the gauge as, for some reason, my compressor allows it to creep up over time.
3) Tamiya Clear is ok for the pre-decal gloss coat if you follow point 2.
4) You can put canopies on with Tamiya Extra Thin instead of PVA if you dot it in the corners and allow capillary action to do the rest.
5) Check the provenance of the kit, a fancy box (and price) may be disguising a crappy re-box.
Disclaimer: These work for me and may, or may not, apply to everyone else!
Lovely Spitfire BTW, and the Airfix Zero is a cracker.
My lessons;
1. Take your goddamned time.
2. Experiment, don't be afraid to try new things
3. PE on 1/72nd is rarely worth the effort, especially in cockpits; you should probs. stop buying it.
4. The more you look after your airbrush the more it will look after you.
My Modelling Resolutions
1. Try different eras, and go out of your way to do different kits to what you normally do.
2. Start/Finish that 1/48th Chipmunk in 6AEF colours you said you'd do.
Thanks for the kind comments @HtS, I've been trying different paint application techniques (cheaper Airfix kits are great for this) Quite leased with the results
I really struggle to find the time to do any model making. Need to get back on it.
I did a Bolton Paul Defiant that really got me interested in doing some model making as a relaxation hobby, so I bought the Tamiya Sea Harrier (not the greatest model, but I made one when I was younger that my brother smashed up, so wanted to do it again) and all the paints, glues, masking stuff, filler etc.
I have just checked the latest photos of progress for it and they are dated the 4th Jan 2023.....and that's just the pilot in his seat & the engine assembled & painted.
I need to find the time to get on with it.
Great models by the way - I love the Osprey & that Spitfire looks very good, nickc
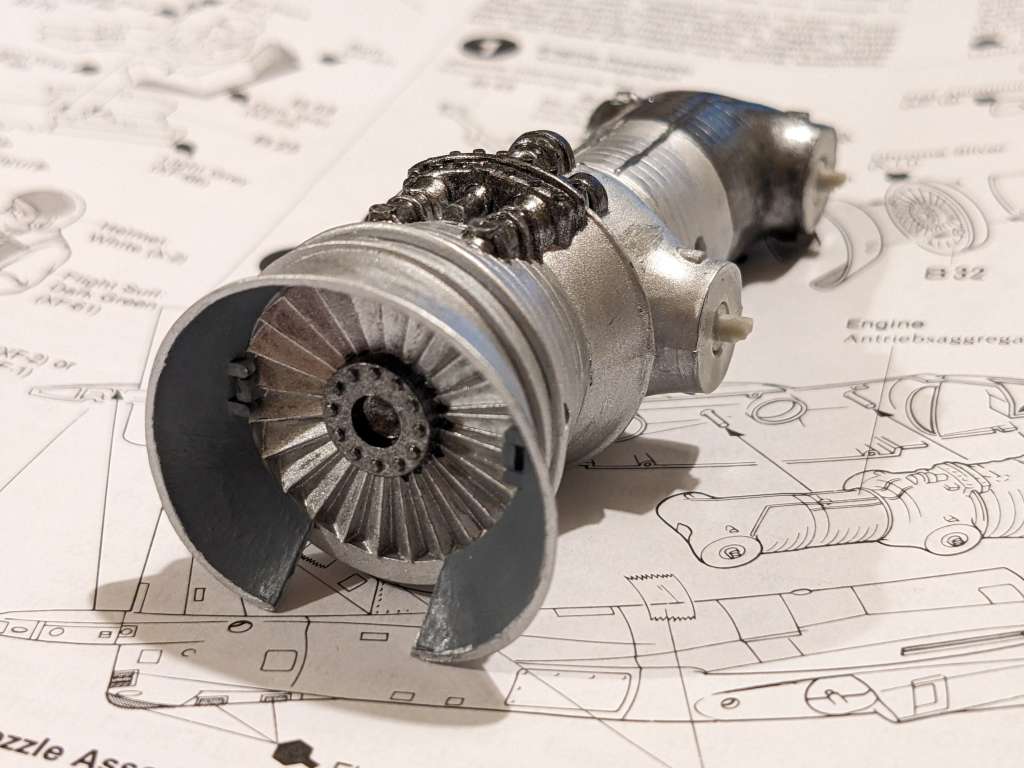
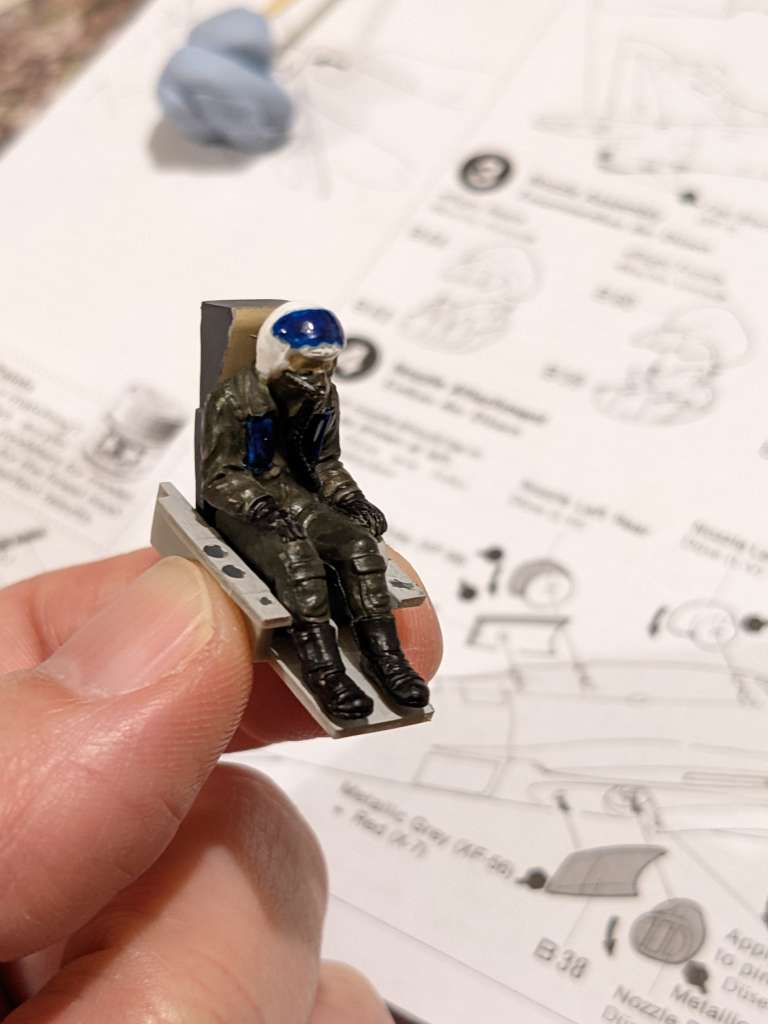
Looks like good progress @stumpy01, you should be pleased with that engine. 👍
That looks like the Tamiya Sea Harrier, it goes together well, but its not got a good reputation for accuracy.
Yeah, nickc, it is the Tamiya Sea Harrier.
Annoying thing about the engine, is that painting anything further back than the compressor fan is largely pointless as it can't be seen. I wanted to use it for practice though.
I have seen some YT builds of the model & there are some messy gaps and parts that I might try to fill. It also is inaccurate in places, but it was dirt cheap - I think I paid £12 & it's a good model to practice on.
I am not convinced how I am going to paint the fuselage yet, as it requires a mix of paints & I want to make sure I mix enough to get all coats done. I might just use a colour that is 'close', rather than worrying too much about it being spot-on. I had decided this already, but forgot what I decided as I've drawn the bloody thing out for so long.
I got a Trumpeter 1/35 STRV 103 C (Swedish S Tank – Mad looking thing… Google it!) for Christmas. This will be my first AFV and I’m keen not to mess it up. So, I bought a Tamiya Chieftain in the same scale for less than £20 as a paint mule. I think it suffers the same criticism as the Sea Harrier, in that it isn’t 100% accurate, but it goes together well. I’m looking forward to painting the Chieftain and playing about various “filth” techniques. I may even try a small diorama.
All this could go out of the window of course, as depending on how the Sea King goes I may decide to build the SAR version that I have in the stash.
@stumpy01 - Tamiya have something that is very close to Extra Dark Sea Grey. Will try and find which on it is...
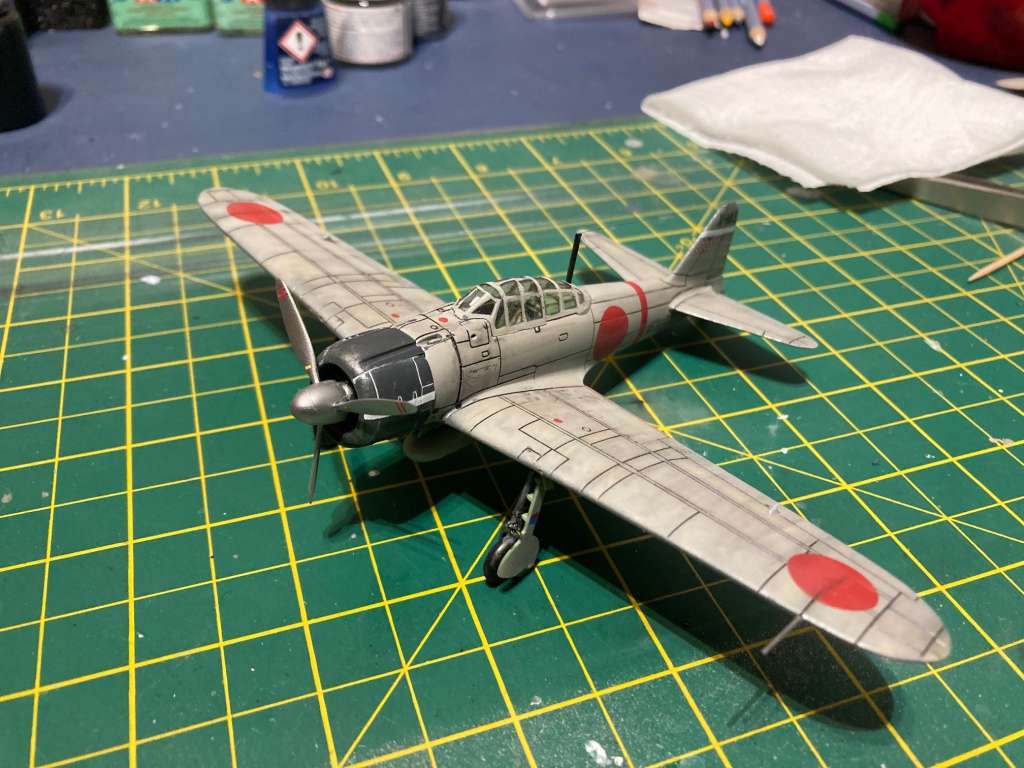
The Airfix Zero is a cracking little kit. I think mine was £6 from Lidl.
The Sea King is going together very well. Airfix seem to have sorted their act out. Anything produced in the last decade has been really good in my experience, and anything older has been nostalgic, but a bit shit.
Going to have to do more of their stuff and wean myself off Italeri and their re-boxes, because the last couple have been awful.
Harry_the_Spider
@stumpy01 – XF-91 IJN (Yokosuka Arsenal) Gray
@Harry_the_Spider - thanks a lot for this - just spotted it! It was so long ago that I bought all the paints & other stuff I forgot what my plan was for this colour.
I have just looked at the paints in my collection. I have two pots of XF-61, so have a suspicion I meant to order XF-91 at some point & got my numbers mixed up.
I also have a Humbrol colour 123 which is extra dark sea grey. So, maybe I bought that to be used instead. It looks very pale though, so would definitely need to try it first - it looks more like a grey primer colour.
Anyway - thanks for the infor - a great help!!
Like the Zero - nice texture on the wings. The panel lines look a little overdone, but thats an Airfix feature and I haven't figured out how to knock them back either
The Airfix Zero is a cracking little kit.
Yep, surprisingly good. Goes together well good detail in the cockpit, just a bit of filing on the fuselage seams, undercarriage is a bit spindly, but once in place its fine, decals are good. For the price you can't go wrong really
The panel lines look a little overdone, but thats an Airfix feature
Yep, they're somewhat trench like on the kit, so once you've started...Airfix are so inconsistent; I did the Spit F22 and that's got nice fine engraving, but this just overdone. IRL, they'd be centimetres deep.
I also have a Humbrol colour 123 which is extra dark sea grey.
Aah, the nightmare that is EDSG...Just don't go anywhere near the modelling forums if you want to retain your sanity.

nickc Full Member<br />Aah, the nightmare that is EDSG…Just don’t go anywhere near the modelling forums if you want to retain your sanity.
How does it compare to the great debates about Sky?
Equally severe.
In fact most of the colours of WW2 fighters - especially Luftwaffe RLM colours seem to attract the most fastidious of modellers TBH, they can (and frequently do) argue about whether EDSG contains any violet, whether 8th AF P47 were either solid green or a splinter dark brown/Green, and if they were; which brown. Whether early BoB 109s were ever painted RLM02 as an exterior camo colour. Why; after 1944 when the two tone grey day fighter scheme was replaced by a brown/green scheme did Luftwaffe Arado jets continue to be painted the two tone grey scheme....You name it, they will argue about it.
It's not helped by early colour photography of course. The colours these P51 were painted was the subject of much discussion over the years...Blue* or Not?

*Turns out they were either Olive Drab or RAF Dark Green...
Fortunately I’m blessed by:
a) Being ever so slightly colour blind.
And
b) Not giving a shit.
I got some pedant frothing last week by suggesting that a RN Sea King rescue helicopter was Extra Dark Sea Grey when it is actually Medium Sea Grey.
I quickly admitted my error, and may have even mentioned point “b” above, but it still had someone spit out his pipe and get ash on his slippers.

Because there's nowt on't telly, I'm getting through the Xmas stash. WIP P51 with added nekkid ladeeze. [insert Vic Reeves thigh rubbing GIF here]
That paint job looks very tidy!
Meanwhile, I've fallen down a 1/35 Tamiya Tank rabbit hole.
Older kits, but fit is meant to be ok. Can be found for about £20.
Got a Chieftain and there is a Flakpanzer in the post. I'm disproportionately excited about the latter.
Thanks @Harry,
I never really got into armour, although they look fun [tracks excluded] and no fiddly cockpit...
Thought I'd give it a go after painting dozens of lightly weathered grey jets.
Was going to build another Sea King straight after finishing this one, but the final stage is dragging a bit and I wouldn't get much fun out of it.
I fancy a bit of mud and rust. The Chieftain was going to be a "Test Pig" before I made the STRV 103C that I got for Christmas, but it looks like it should come out well so I'm taking it a bit more seriously.
Then I found out how cheap they are!
1/35 Tamiya? £20ish? Get in!
If I could be arsed checking I bet that the Flakpanzer was kit-bashed by ILM to make Boba Fett's ship and part of the Imperial AT-AT / AT-STs in Star Wars. It is a mad looking thing.
Finished the P51

Also, on the theme of colour variations of WWII aircraft, look at this nonsense...

Different researchers have come up with these variations for a single paint colour. Some are based on old colour phots, some are paint chips, some are just pure guess-work. Reading in one reference book, how the Smithsonian FW190 started life as a A-7, was converted to perhaps a "sort of" of A/F-8 late in 1944 and had a least 3 different schemes painted on it in its life...
No wonder I'm confused?!?
Was near a Hobbycraft on Saturday, so remembered to go in & get a pot of XF-91. 👌
Comparing to the box, it looks like a close enough match for my uncritical eye.
Quite impressed - they had a massive range of colours, as well as thinners, glue, masking tape, fillers etc.
I even perused a Tamiya Chieftain tank for £20, but figured I should probably complete the never-ending Harrier before I get another one.
Mustang looks good, nickc.
In my head, future models to try are BF109, Mustang and some kind of tank. Not necessarily in that order.
Tank update. Started on the Flakpanzer yesterday because it was raining and I was up by 7:00am. The kit is a bit crude by modern standards but, considering that the moulds are from 1977, it is snapping together like Lego. Only the tiniest smear of filler so far.
I've had notification that a package has arrived. Hopefully it is a helipad from Coastal Kits, so I can get some pictures of my Sea King.
Alternatively it may be a set of 4 serving bowls. In which case the photos will have to wait.
It was bowl. Shit.
Better than bowel **** I guess?
Is that P51 squint scale (1:72) or have I misjudged it against the mat scale? That's a lovely paint job.
Yes, 1/72. It’s a nice kit which helps massively


Been feeling a bit rough so I bashed this out in lieu of doing absolutely anything else.
Tamiya 1/35 Falkpanzer Gepard.
Wanted to have a mess about with some weathering techniques and fancies a change from doing jets.


Looks good👍 will you build more vehicles dyou think?
Yeah. I got a 1/35 STRV 103C (Swedish S Tank) for Christmas and I'll be doing that in "Splinter" camo, so I wanted a cheap tank in the same scale to have a play with and ended up buying a Tamiya Chieftain for about £20, with the intention of just doing it in green. Then decided to do that in "Berlin Brigade" brown/grey/white so I had to buy another cheap paint mule. Which brings me to the Flakpanzer, which was also about £20 including delivery.
Anyway, I'm quite pleased with it and had it finished in less than 7 days!

They're cheap for what they are, but some of those Tamiya tanks must be what? 20-30 years old now?

Airfix Fw190A-8 (maybe, more on that later). Come with me into the nightmare world that is late war Luftwaffe colour schemes. The top colours are right (maybe) RLM 81/82, I think it maybe had a 'sky' underside - a colour not a million miles away from the RAF version, or may have been RLM 65 - litchblau. (B&W photos obvs) It's supposed to be an Eastern Front plane that left the factory as an A-4, crashed landed, and had an upgrade in field with some A/F parts to make it a sort of hybrid, so has some left over Eduard parts to get a bubble canopy and the broad chord prop. Obvious missing decal is obvious (on purpose)...
I can stop any time I want...

Nice. I tried a Ta.152 in that scheme years ago, but the greens were indistinguishable.
I had a sheet of the obviously missing decals delivered a while back. Occurred to me that it was the weirdest thing that I've ever ordered or had sent to me in the post. Was quite pleased in a way that one flipped over whilst it was in the water and I didn't notice because I'm not an expert on the obvious missing item in question.
Yeah, they really were shabbily built by the end. The panel gaps wouldn't pass QC at a car plant fo'shure!
Can't bring myself to use the obviously missing decal, even on grounds of accuracy, just feel wrong (to me) I understand why folk put them on, and I don't have an issue with it at all, just gives me the willies is all. The camo schemes are fascinating though, the more you look, the bigger the rabbit hole you can dive down...Its definitely something to come back to.
The kit was tremendously warped though. If you put the fuselage together at the tail, the front port side stuck out at about a 30deg angle! There's much use of superglue on the top nose parts to keep it al together. QC on Airfix kits about the same as Focke- Wulf by the end of the war.
Want to do something daft now though. Super detailed just for the sake of it. Just go mad with all the aftermarket cockpit decals, PE, and resin I can find, and bung it on a kit that won't look any different from OOB 🤣
Was thinking a FAA Corsair, or Far East P40...
So, it turned out that its the FAA Corsair. It's going to be a bit of project, I'm spamming the thread with these pictures because when the fuselage halves are closed up, most of this won't be visible. I also bought some aftermarket drooped flaps and spent a good while mildly panicking as I sawed through perfectly good plastic....


Woah. Great detail in that cockpit.
My attempt at detailed brush-work looks like amateur splodges at the moment 😁
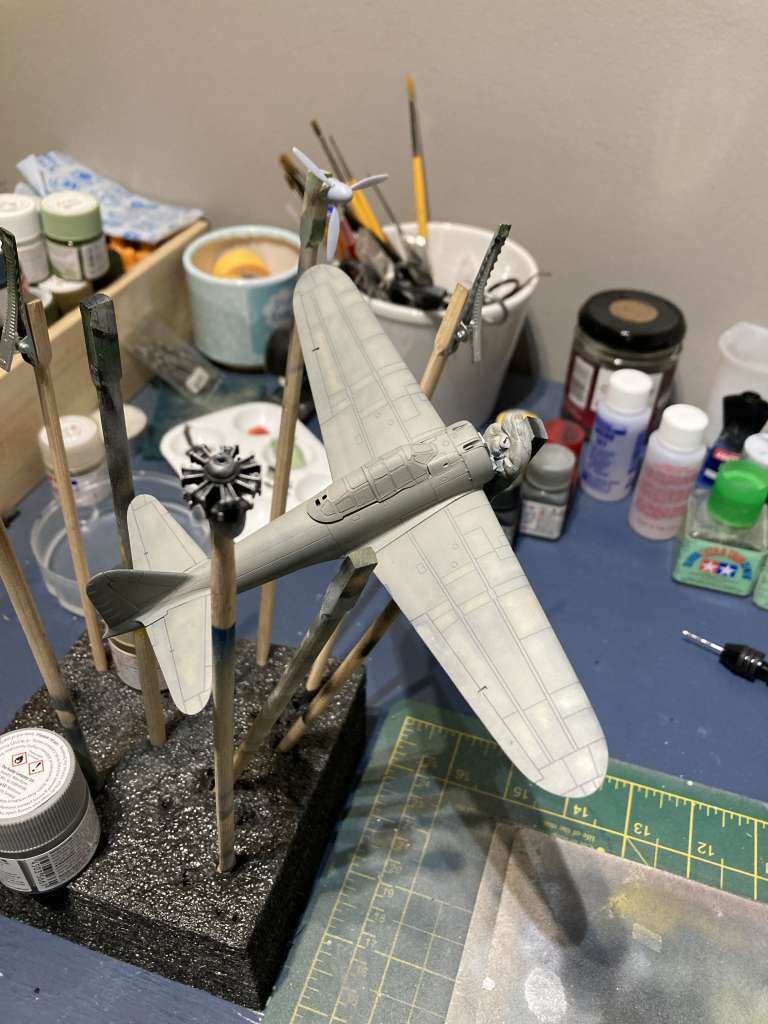
My sea harrier is finally coming along, although no pics so far. Pilot & engine are in.
Inner faces of engine intakes are painted - I went for metallic silver, rather than the proper fuselage colours which probably would have been more authentic.
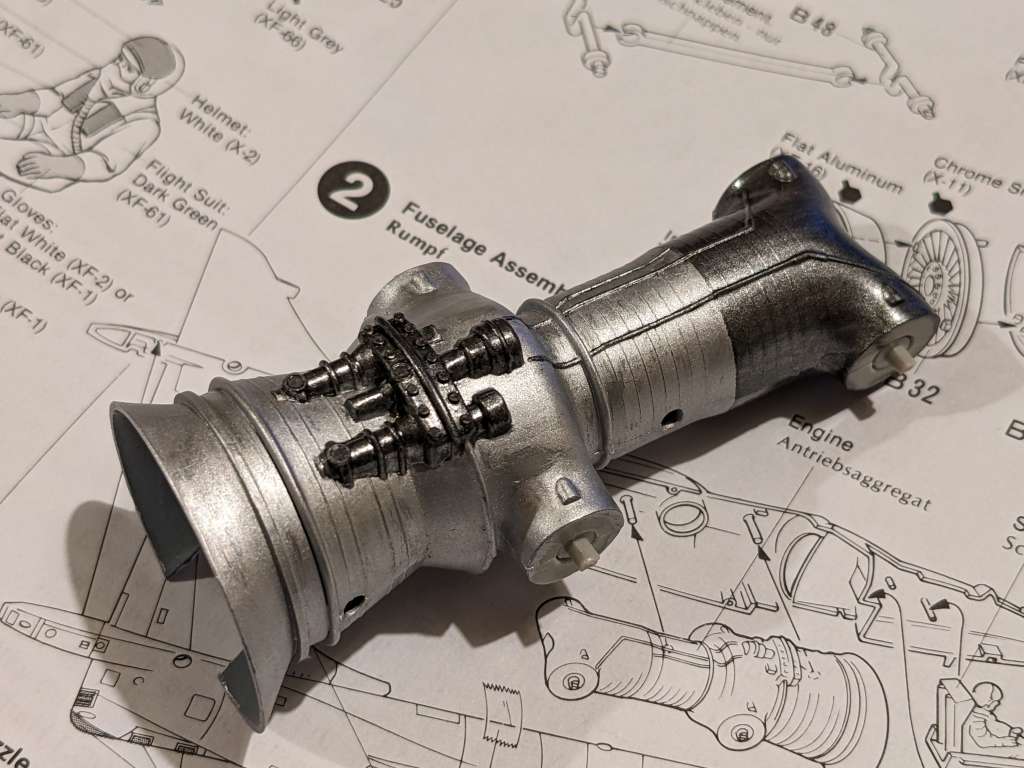
The jet nozzles are glued & roughly tidied - I am debating whether to try some of the model filler I bought to tidy the gaps up - they really are pretty bad.
Finally I've stuck a few embellishments on the fuselage - I've got a few more to put on, such as the centreline gun pods & then the wings can go on, before I start initial painting. I'll need to paint & apply decals in bits & pieces which I've never done before, so am really trying to think about what to do, when, and in which order. Hopefully this will make it easier down the line, but I am probably just over-thinking it.
I'll take some pics once I get a bit more done.
Nice cockpit!
I'm enjoying not having to faff about with that sort of thing at the moment and plugging away at the Tamiya Chieftain. The kit is 50 years old, but fit is OK with only minimal filling.
It's shaping up to be a big old thing!

All the weathering and painting experiments you can do on military vehicles looks super fun though.
There’s a thread on Britmodeller about how tanks don’t rust.
All these WW2 models that you see rotting under layers of corrosion are inaccurate apparently, even if they are beautifully painted. Primarily because they didn’t survive long enough to rot! Also, the metallurgy of the tracks is such that they wouldn’t rust anyway because of whatever alloy it is that they are made out of. If you see the Mr Hewes stuff in YouTube you’ll see them rescuing stuff that has been abandoned to the elements for 30 years with virtually no exterior corrosion other than the tin work around the exhausts and the stowage boxes.
A former tanker also popped up and said that modern tanks don’t rust because they wouldn’t be allowed too even if they could.
I’m just doing mine dusty with a bit of filth on the wheels and lower hull. The Chieftain is going to be green and black and it will look mean. Was originally going to do it in Berlin Brigade scheme (brown, white and grey blocks), but mine is a MK2 and B.B. were MK10 with quite different turrets and engine decks, and it would bother me a bit too much.
Also, I may have accidentally won a M48 Patton in eBay for £15. That one will be covered in Vietnamese themed dust, which is apparently more red than European.
There’s a thread on Britmodeller about how tanks don’t rust.
I'm entirely unsurprised by that. The two (sort of) opposing forces in modelling; realism/accuracy vs artistry/creativity rarely see eye to eye.
I'm on the realism side. The overweathered ones are superbly done, but look a bit "Warhammer".
Here's a thought... The oldest Sherman at the end of WW2 was half the age of this thread.
I’m on the realism side.
Sometimes...I'm looking at loads of pictures of FAA Corsairs (natch) and some of them just looked knackered though...Matt paint, left on deck in all weather and not well looked after...Trying to replicate that at scale, and it'll look daft...you have to to wind it in a bit.
Look at these two, in 1/72, accurately...they'd look overdone

Same with Luftwaffe airplanes, early in the war, quite weathered, as they'd often seen action in Poland and France and BoB, later on, barely as they just didn't last that long off the production line. They were often box fresh, but shot to pieces.
