![]() You don't need to be an 'investor' to invest in Singletrack: 6 days left: 95% of target - Find out more
You don't need to be an 'investor' to invest in Singletrack: 6 days left: 95% of target - Find out more
I'm in the process of renovating our new place - gutting and restarting again basically!
In the lounge is a low internal sill/window board that had nasty tiles on it.
I've taken the tiles off (with some of the plaster, but the room's being reskimmed...) and this is what I'm left with:
[img] 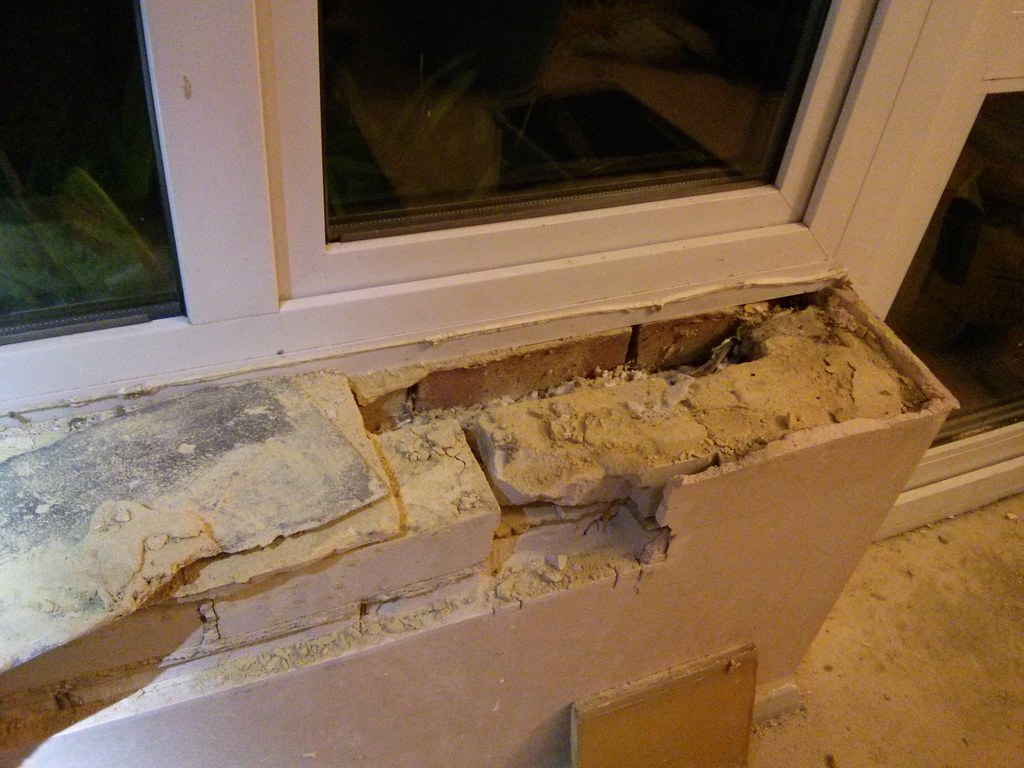 [/img]
[img] 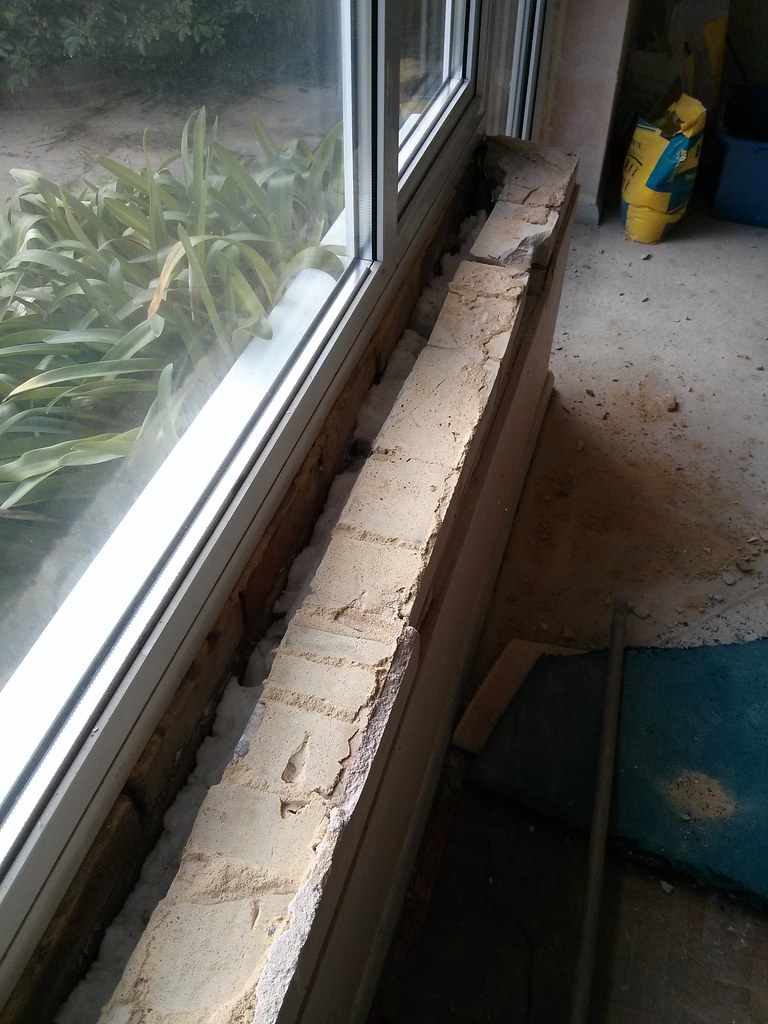 [/img]
[img] 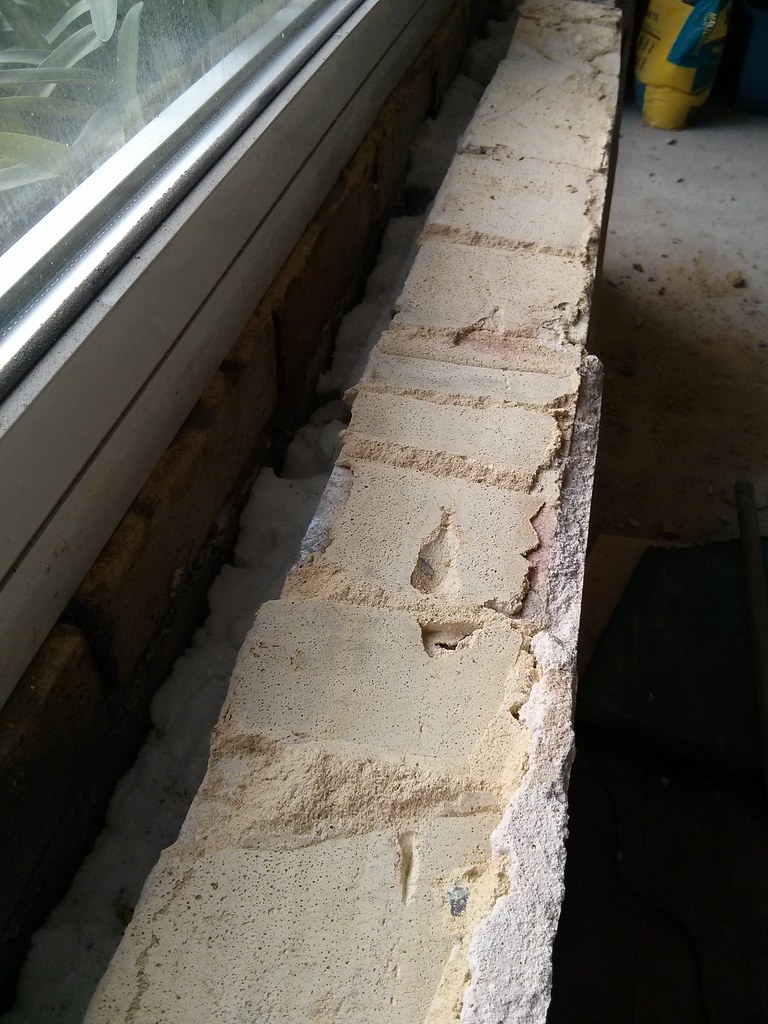 [/img]
You can see, from the external wall, it's:
External wall
Cavity of about 50mm, filled with marshmallows...
Internal brickwork (which needs redoing in places)
We want to replace the nasty tiles with some 'waney board', like this:
[img]  [/img]
My questions are:
What should I fill the cavity, and 'top' the cavity with? I've been looking at 'cavity fillers' like therma-lite for the top. They any good? What would [b]you[/b] use?
Secondly, once the top of the brick work has the old mortar cleaned off, and cleaned up, how would you affix the wood board to it?
Some online resources say expanding foam (with weights on the board), others say cement/mortar, others say grip stuff....
Hmm...
Advice would be appreciated!
Ta
DrP
for completing the fill in the cavity Id just grab some off cut insulation (rockwool) from a builder's skip. You dont want to go and buy anything as you will have far too much.
And for attaching the sill depending on the surface profile of the brick top go with expanding foam or no more nails. If you go with the foam fill then you could just not bother with anything else in the top of the cavity as the foam will fill that up for you.
Heavy weights on the board though,.
I'd put a thermal closer across the top;
[url= http://www.screwfix.com/p/thermal-closer-yellow-85mm-x-2-5m/92968 ]http://www.screwfix.com/p/thermal-closer-yellow-85mm-x-2-5m/92968[/url]
maybe that loose insulating bead stuff to build up the existing insulation to meet it?
[edit] the thermal closer doesn't fit the way you think it might - the DPC bit tucks under the window frame and runs vertically down the wall, rather than bridging the gap across the cavity. You can trim the foam to width.
Personally I'd try and avoid gluing down a whole board over the brickwork.
Partly because it seems a little bit permanent, as in, if you ever wanted to remove it, you would be in for a right nightmare, and partly because you are not allowing the solid timber board to 'move'. That's unless expanding-foam or 'no more nails' is still elastic to a degree when set.
I reckon I would fill the void with insulation, glue in a batten to the cavity running the length of the void, then screw and plug the windowboard down to it, perhaps running some foam along the top of the brickwork to provide a bit of a seal.
Obviously that sort of approach takes longer... 🙂
^ thats why kayak doesnt have load-bearing newspaper in his house 😉
Interesting window sills.... so you're not planning on selling the house at any time then?
[i]you're not planning on selling the house at any time then[/i]
he could always trim the square with a router when the time comes and if people complain?
Globalti - don't be cheeky!1
I think that board is a bit 'extreme'... something like this probably...!
[img]  [/img]
Thanks for the suggestions - though it's not going to be a huge job, I want to do it right!
DrP
If it was me, I'd pull out all the marshmallows and drop back in 50mm Celotex as it's a better insulator, but then I'm a bit OCD about these things.
Then that is what I shall do...Actually, what I'll do is vacuum it all out!!
It's fluffy and weird - not like glass wool, not solid. Makes me feel a bit sick to touch it actually.
This is all kind of what I was thinking.
Sort the bricks.
Fill the cavity with decent modern insulation
top with a cavity filler type thing.
Fix board to all the above.
Sit on window sill, book in hand, contemplating life....
DrP
It's the stuff they inject through the holes when they add insulation to an existing house with cavity walls. Like very fine expanding foam (but with no structural strength at all).
[i]Then that is what I shall do...Actually, what I'll do is vacuum it all out!![/i]
How much are you going to vacuum and how are you going to be sure you've filled it again properly if you've vacuumed the lot out?
Stick with Stoner's advice...stuff it full of rock wool and go from there.
I'd also fit the window sill and then use expanding foam to fill the gap beneath it (above the celotex) to ensure there were no air gaps around the window edge to maximise insulation and stop any drafts. Let the foam cure, trim off any excess (much easier than trying to trim or wipe it as it cures which is very messy) and then skim over the edge of the foam..
How would i put the foam in ONCE the sill is in place? surely the sill would be the last thing to go on?
How much are you going to vacuum and how are you going to be sure you've filled it again properly if you've vacuumed the lot out?
Vacuum it all out, then fill the void with something else again? Or am I over simplifying it?
The marshmallows are so 'patchy and sporadic' that it's not really doing much.
DrP
[i]Vacuum it all out, then fill the void with something else again? Or am I over simplifying it?
The marshmallows are so 'patchy and sporadic' that it's not really doing much.
DrP[/i]
You may as well squash rockwool on top of it as you'll be pushing the existing into possibly previously sporadically insulated areas.
good thought...
so looking at it, rockwool and celotex are both 'solid type' insulators.
Is celotex better as it seems to be silver coated??
DrP
How would i put the foam in ONCE the sill is in place? surely the sill would be the last thing to go on?
Inject expanding foam through the gaps left, it will find and fill all the voids for you. Very handy for these sorts of jobs.
Rock wool is the fibre glass stuff that comes in rolls with/without foil. Just get the non foil stuff and push it in with a broom handle or the like.
I wish you had that old polystyrene ball type insulation they used to blow in years ago, I can imagine you wondering why the bit you had vacuumed kept filling up. I'd just fill any gaps with whatever insulation I had to hand then stick the sill on but then I may be a bit of a bodger.
Very handy for these sorts of jobs.
But could make a mess of his nice (no doubt expensive) window sill if he squirts too much in and it all leaks out of the the gaps and keeps expanding on the wood and window upvc.
I can't see celotex being any good to you here, unless you get a good seal all round it to stop cold air working it's way round the edges, also you'd want a nice close fit to avoid air pockets. Just can't see you managing that with any rigid board poked through a slot. I'd add a top up of looser insulation, probably bits torn from a slab of earthwool, a bit denser than loft style rockwool, then put a closer on the top and make it airtight.
But could make a mess of his nice (no doubt expensive) window sill if he squirts too much in and it all leaks out of the the gaps and keeps expanding on the wood and window upvc.
If you don't disturb it as it sets, it forms nice lumps with a hard skin which are quite easy to remove when it's dry. I normally put masking tape over any nearby surface I don't want any spillage on.
The worst thing you can do with expanding foam is try and wipe off drips / over expansions when it's wet as that makes a right mess and is 10x harder to clean up. Just let it set and then snap off the excess bits.
If you don't disturb it as it sets, it forms nice lumps with a hard skin which are quite easy to remove when it's dry. I normally put masking tape over any nearby surface I don't want any spillage on.
This and I would attach the windowsill with a board, screw and plugs as mentione earlier. I always feel uneasy about using any sort of glue method that makes subsequent removal a nightmare.
Don't "stuff in" rockwool if you actually want it to do anything other than act as a thermal bridge.
Perhaps it's best that first you understand how a cavity works?
Fill it full of anything and as squirrellking says, it will act as a bridge for moisture and lo and behold, in a few months you'll be asking why you have damp issues. Cavity wall insulation is the worst idea ever, unless an air gap between it and the outside skin is maintained. So at most, if you have a 50mm gap, no more than 25mm of insulation board fixed to the inner skin.
As for fixing the window board, the rebate running along the length of the window frame is your friend. Buy window board that comes with the matching rebate and fit it in there and then you can use a couple of screws and rawlplugs to fix it to the inner skin and these will prevent any cupping of the board.
As for crazy foam... Bodgers delight!
Rockwool batt's out of a skip as per Stoner,this is how you would insulate new brickwork. Do not "wedge it in" as it is designed to work at it's correct thickness.
Cavity wall insulation is the worst idea ever, unless an air gap between it and the outside skin is maintained. So at most, if you have a 50mm gap, no more than 25mm of insulation board fixed to the inner skin.
Odd that all modern houses have the cavity 100% filled with closed cell foam (Celotex etc).
As for crazy foam... Bodgers delight!
Nonsense, expanding foam is excellent for filling gaps round frames / windowsills where you are most likely to get voids and drafts / convection which will completely undermine the insulation you've just fitted.
Must say the houses we build don't have 100% celotex/ king span cavity fill, just partial, as cavity air flow is still deemed very important, unless regs have changed recently?
😀 @ footflaps
I don't know what you do to earn a living, but I sure hope it's not building houses or anything with tools With that level of understanding and acceptance.
😯
Having had an extension built recently I can assure you it is not completely filled with insulation, the inner skin has celotex whilst the gap between that and the brick course is an air gap.
Is expanding foam the new mastic then?
Update...!!
I had a little trip to Cocking (s****) Saw Mill )on the South Downs Way) and chose a plank of oak - picked a lovely piece. Only needed 2.4m x21cm, but as you buy the whole 'slice' I've got lots left over for other projects!
I took all the mortar off the inner skin of bricks, and have decided how I'll mount it...
I've fixed some 20x40mm baton to the outer skin wall to 'thicken it up', and will use gripfill on the rear or the sill.
I've got some 'L brackets' which I'll use to mount the front of the sill, fixing the bracket to the underside of the sill, and to the brickwork on the inner skin (i've removed sections of plaster to expose the brick face - it's all getting re plastered anyway..) This will mean the board is at least screwed at the front, and will allow me to 'fine adjust' the rise/angle.
Then, I suppose, I'll squirt expanding foam underneath just for laughs... THis will help fix it down, but also insulate the top of the cavity...
Here's some artists impressions..
[img] 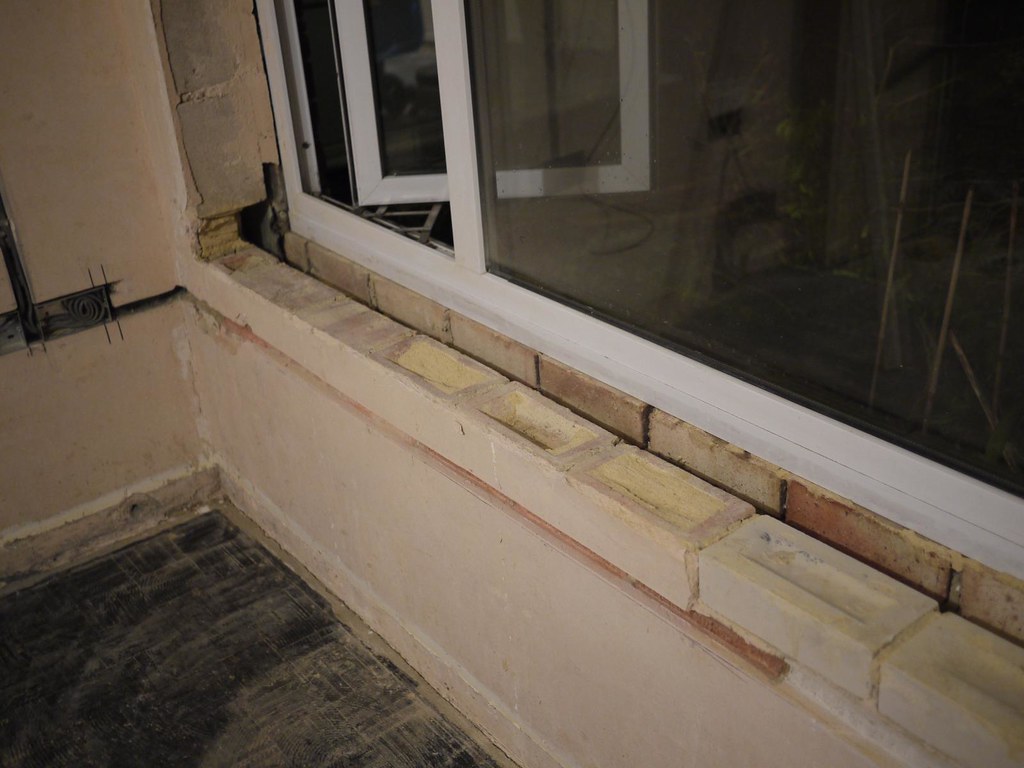 [/img]
[img] 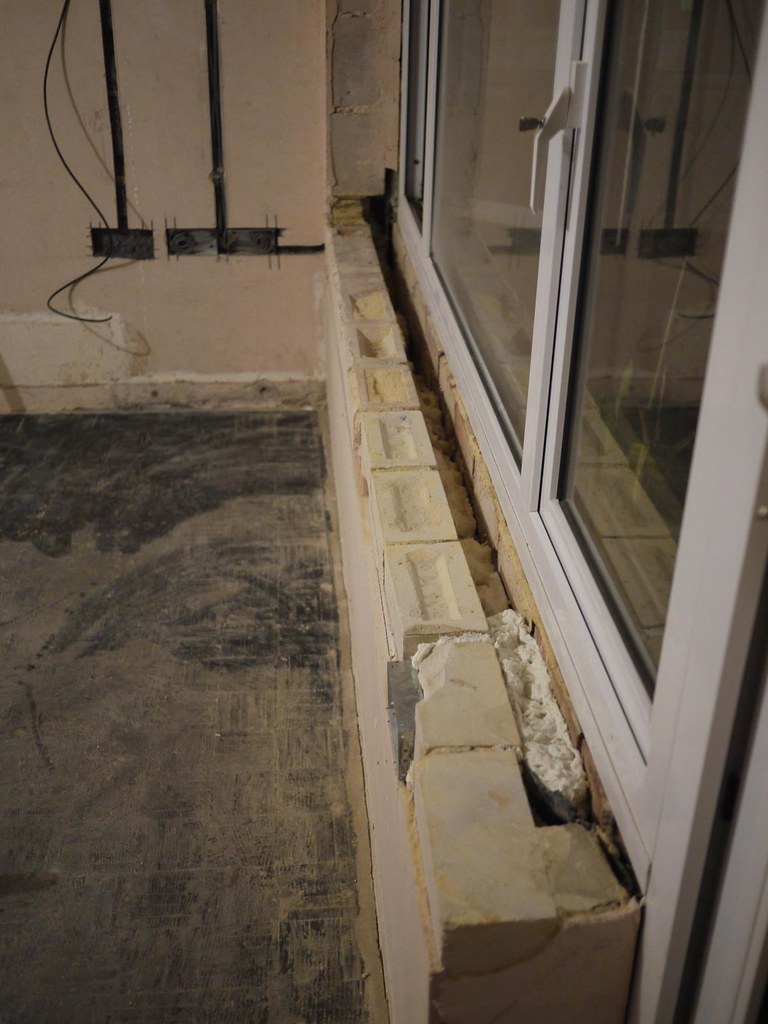 [/img]
The board before any prep:
[img] 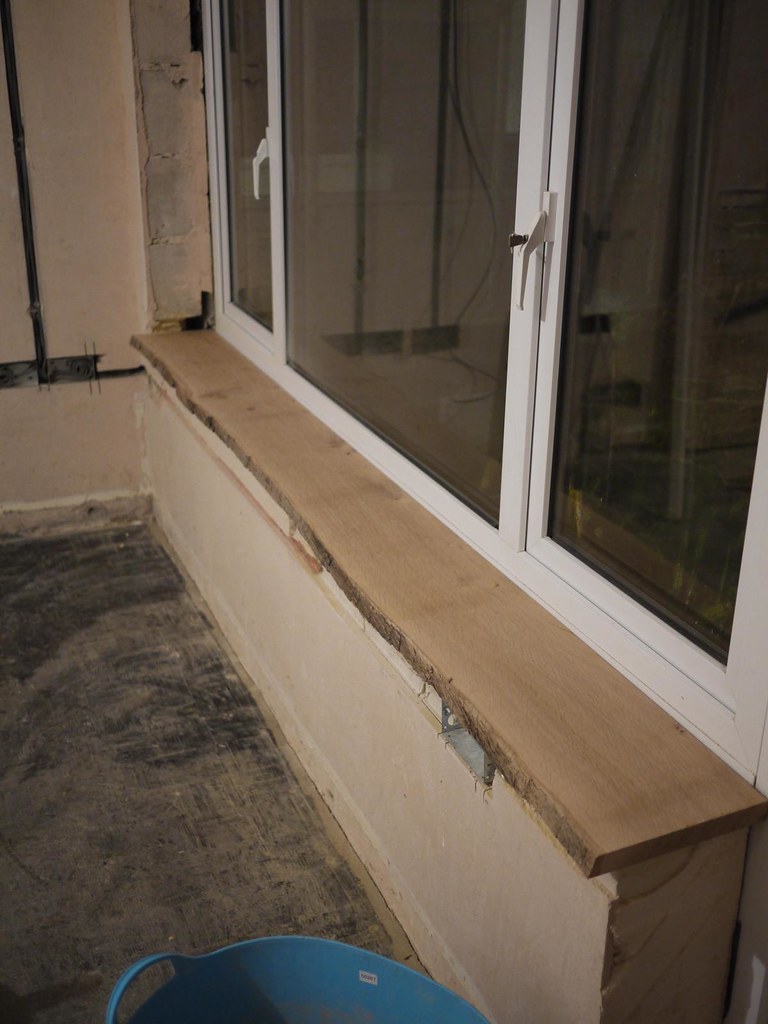 [/img]
My oiling bench..first coat last night..
[img] 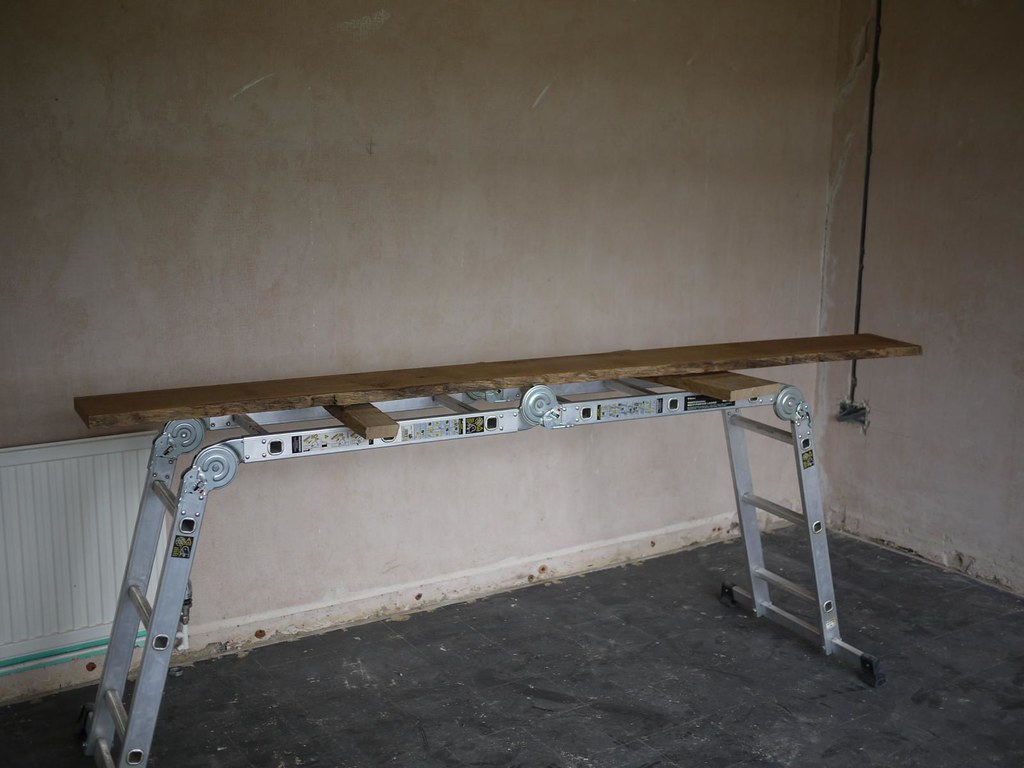 [/img]
[img] 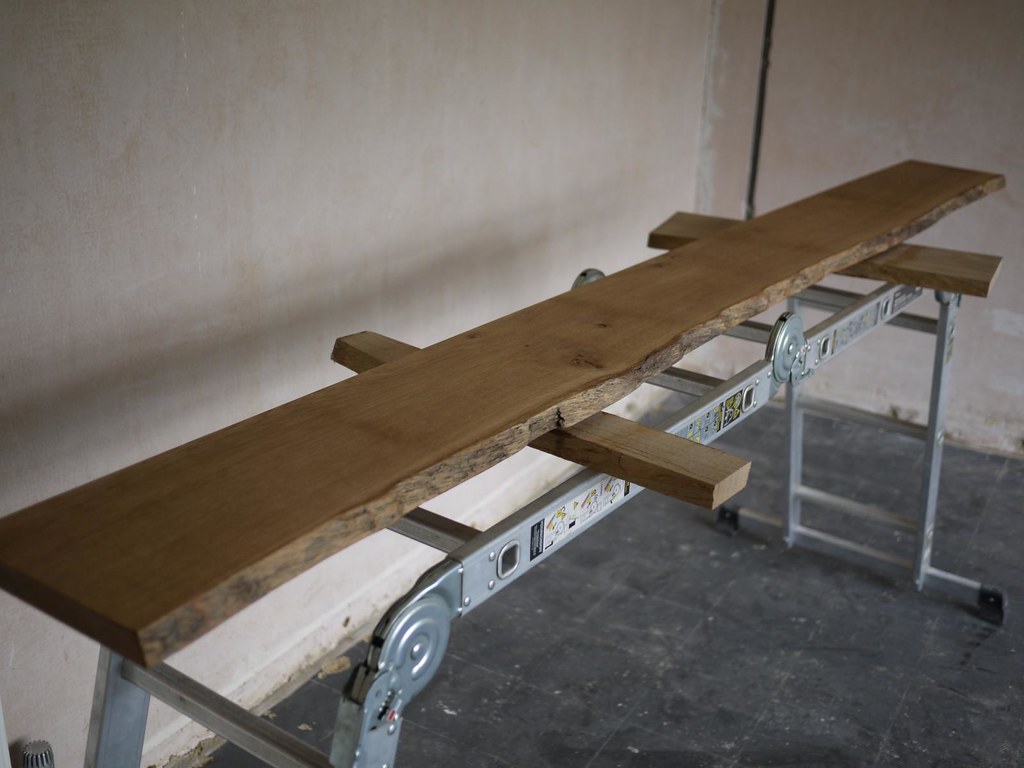 [/img]
Second late today..
[img] 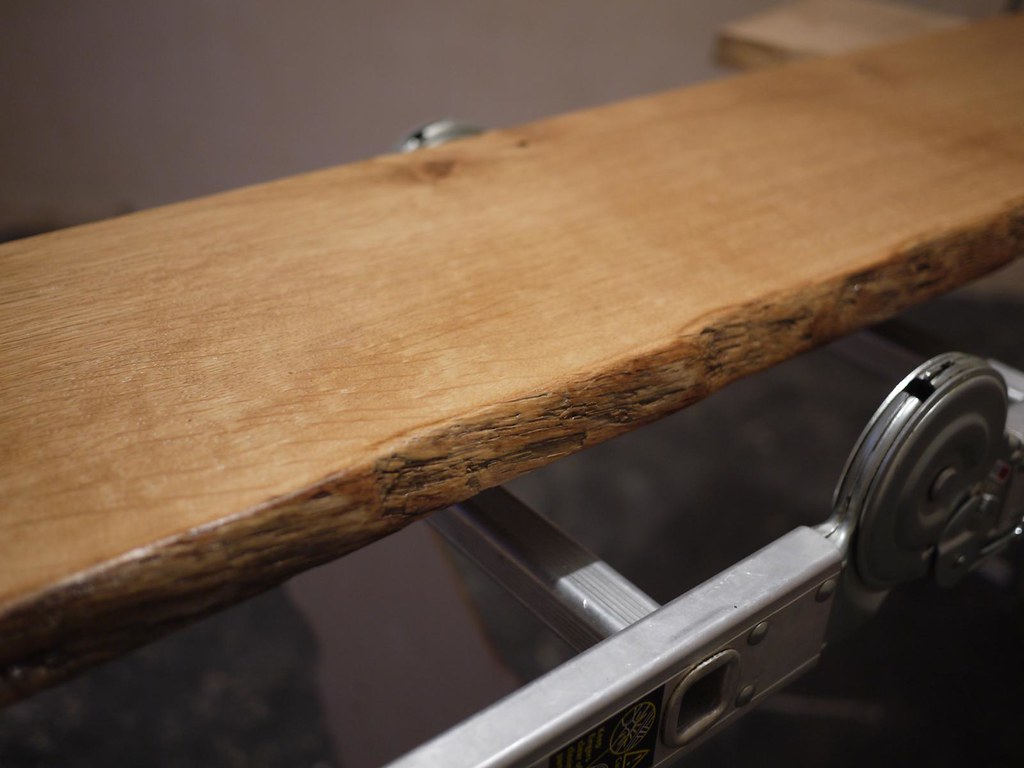 [/img]
[img] 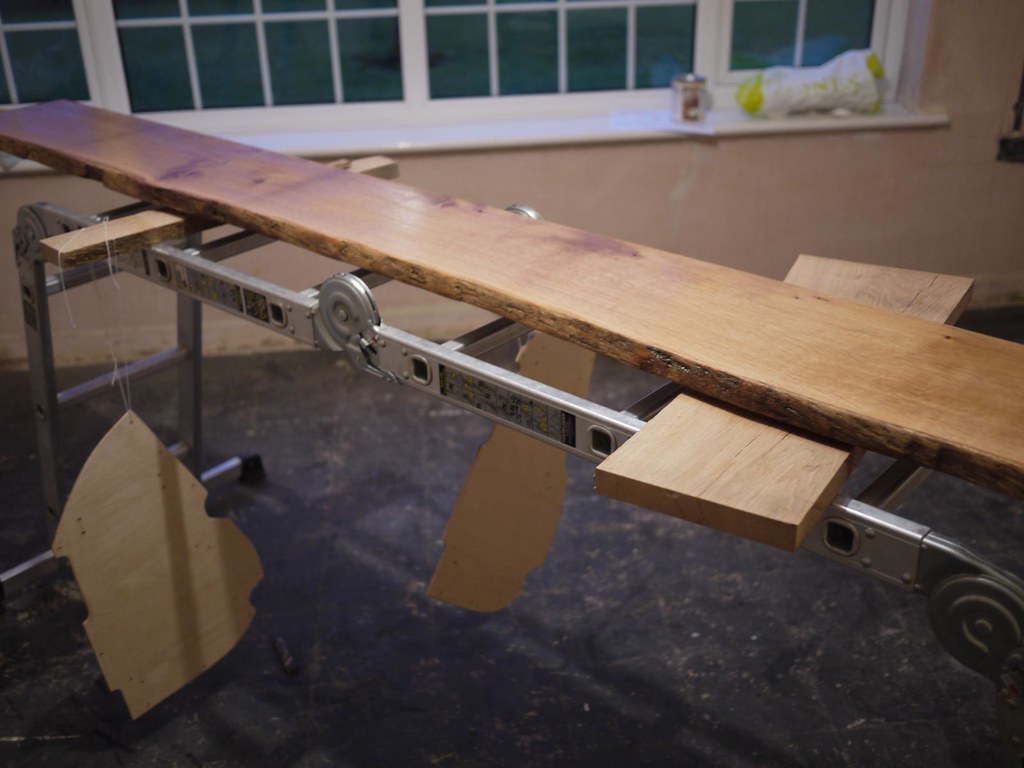 [/img]
(I also made some wheel skirts for my cargo bike, which are being varnished too!)
The aim is to finish off tomorrow, so the plasterer can ideally start next week!
DrP
It's done!!
[img] 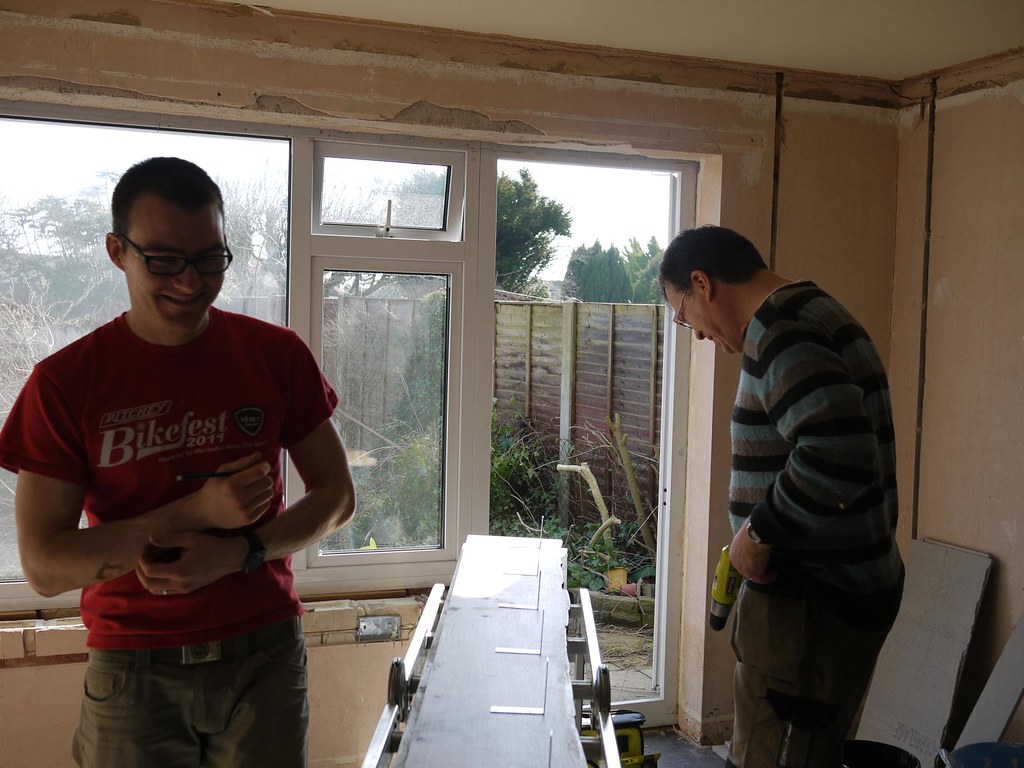 [/img]
[img] 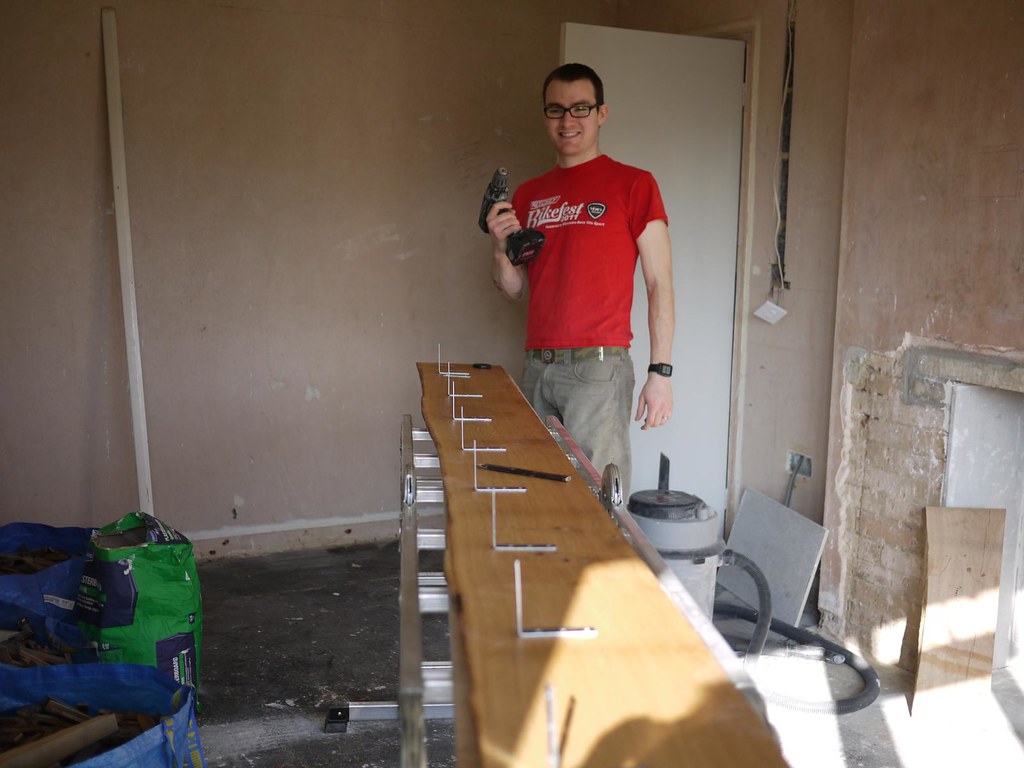 [/img]
[img] 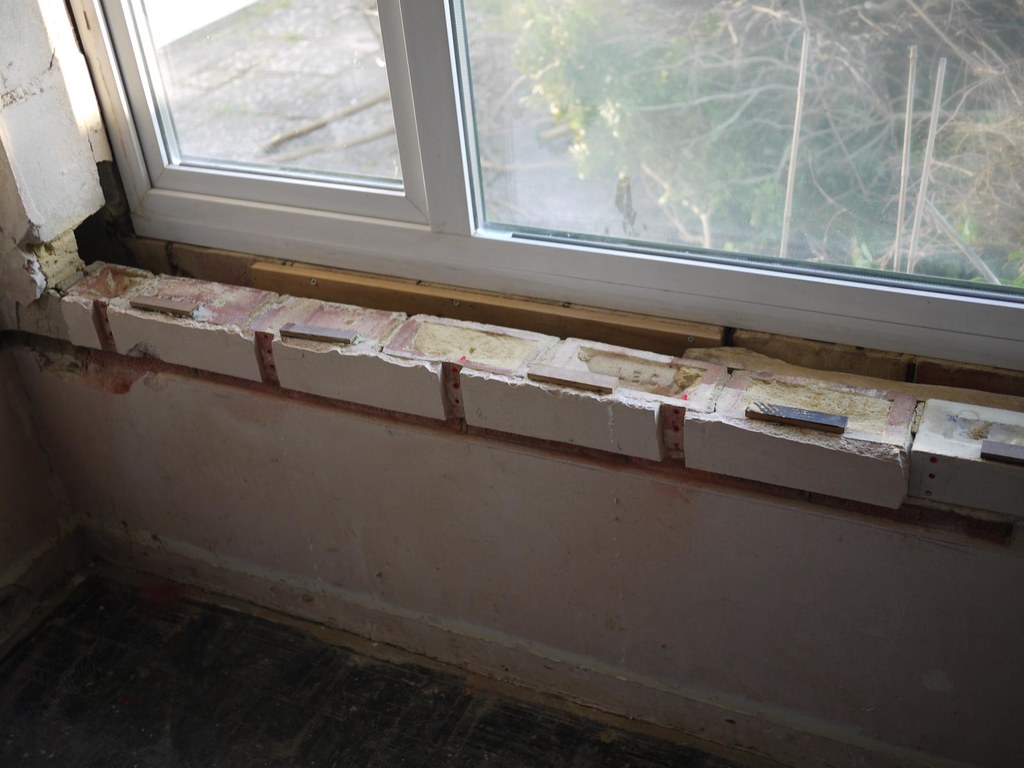 [/img]
[img]  [/img]
DrP
Booo
Wanted pics of you stuck to the shelf after you
Sit on window sill, book in hand, contemplating life....
Safe to say ive never seen it done like that.
Looks like it will be a neat install , if not very disruptive to remove if you ever need to ......not that you should.
Looks very neat, waiting for the fireplace episode now 🙂
Out of interest where and how much was the wood..... I need to change my front room windowsill to be deeper so the rwdiator heat doesnt go inside the curtains.
This would suit my room 🙂
Trail rat - having read a lot of online instructions, it seems that using L brackets is a common route, especially as it allows you you level out the board/angle of the board.. Bigger ones are called window board brackets!
I've put pics on a group Facebook and it's raised fears that the oak will expend and push the plaster off at the front, and that I should have simply bonded it to the top of the bricks..! I can see the point.. However it's glued at the rear with a small gap for expansion (1-2mm). Hmm.. Not sure if I've done the right thing!
Anyway, the board + cutting and planing to 28mm was about £130...
Beating in mind it's 'other half' is lying around as this is half the plank!
DrP
I normally just bond to the brick and use shims to level it out.
I need to route a lip on the rear edge as my windows have a groove for a tongue in them
130 isnt bad for a cut and finished oak board. Would do 3 of my windows i reckon.
A piece of finished rounded nose redwood for a deep window sill from the merchants is about 30 quid a length. And looks shite in comparison 🙂
Surely your front apron will limit the expansion effect pushing the plaster off ?
Didn't have an apron. Just jeans and T-shirt.... 🙂
DrP
(could you define the above comment please?!)
If anything, the board will shrink, rather than expand. Unless it was an air dried/seasoned piece? I'd imagine at £130, it was air dried. I know the mill the OP went to as English Woodlands and so long as they were informed as to what the board was required for, they'll have supplied one that is reasonably stable.
The only potential issue would be cupping, or curling, of the board as it dries out any further to suit the conditions of the room. Depending upon how you orientated the board, in terms of whether the growth rings as seen on the end grain, were concave or convex, will generally give an indication of its likelihood to curl up or down. That you have fixed the front of the board very firmly to the masonry, the back edge is the one that will move, if at all.
Rule of thumb when fixing any boards, either horizontally or vertically is to orientate them so the end grain rings are in the concave, ie 'heart out'. This will generally mean the boards will then curl in, towards what they've been fixed to. It's a rule of thumb however and the wood will ultimately do what it likes in terms of twist, curl or whatever, as much depends upon where the tree grew, how it grew and what part of the tree the board was cut from.
Ideally, ask for a quarter sawn, or rift sawn board. The growth rings are then vertical in cross section and the boards are much more stable.
There are lots of 'woodworkers' about nowadays, very few are 'carpenters', or engineers who use wood. And like any engineer, if you don't understand the material you are working with, then the luck factor increases.
Building wooden boats and green oak framing are very similar in terms of understanding how you can use the material properly to help achieve a well engineered and strong result. 😀
It was a quarter sawn piece - the chap at Cocking told me all about it after I told him what it was to be used for. As you said, the rings are pretty much vertical on the end grain.
The 'way up' of the board was really dictated by the 'angle' of the waney edge. But like you say, the vertical rings mean it can go either way up!
Quick breakdown..the wood plank was £68+vat, and milling/planing/sawing another £45+vat..I'm loving this - I adore learning a new skill and the vocabulary that comes with it!
Cheers for the input all, will see how it all turns out!
DrP
Yep, they're good people at English Woodlands, I used them a lot when I was in that neck of the woods.
Well done OP, nice job 😀