![]() You don't need to be an 'investor' to invest in Singletrack: 6 days left: 95% of target - Find out more
You don't need to be an 'investor' to invest in Singletrack: 6 days left: 95% of target - Find out more
Saturday night I had nowhere convenient to rest my glass so I got up on Sunday morning and designed something. I then built it in between celebrating someone not dying for 70 years. I left it with the first thinned coat of varnish to dry overnight and will go look at it later today if I can be bothered.
New camera and editing software so video and production quality is even worse than before and at almost 10 minutes you will probably need more than one biscuit with your tea while you watch it.
OK. Apart from the obvious you didnt sharpen that saw blade 🙄 despite promising to, you need to stop putting your hand past the blade like that. It was scary to watch,
Use longer push sticks, or get into the habit of using the push sticks to push the workpiece past the saw, not doing it with your hands, they were really too close to the blade
You need a surface planer as well as your thicknesser. Even a cheap one, its going to make a big difference when timber is warped like that.
Can io ask though how much youre taking off in a pass ?, it sounded like quite a bit judging from the motor drop off. 1/2mm doesnt stress the motor, and helps keep the blades sharper for longer
Love the sketching. Hmm, bit like this, er... that bit there ,and this thingamajig 😆 Exactly the way I sketch, despite being trained to do loads of proper drawings I still do unintelligible sketches and work it out in my head
I know, a bit critical, but im only trying to help 🙂
Thanks Dyna-ti, this is really useful feedback for me. Remember that I work alone in a agarage and have no training beyond watching some Americans in YouTube and have no peer review to advise if I am doing it right or not. Basically I look at the tool / machine and try and work out how it works, how I would expect someone to use it and if that doesn't kill/cut me then I just keep doing that.
1) Saw Blade : New blade fitted in April following your advice
4484V x 1 Erbauer Wood TCT Saw Blade 250 x 30mm 24T £23.98
I suspect that the saw itself might be getting a bit old and worn as I bought it second hand and it has been used a fair bit and looks like a cheap one originally.
2) Hand Position : I didn't realise you weren't meant to push past the blade
In the thumbnail frame I can see what you mean about a longer push stick in the right hand but is it wrong for the left hand to pass the blade? I use the left hand to push down and against the fence so if it is too far before the blade then the wood can wander or lift when cutting. Advice or instruction videos would be good.
3) Surface Planer : Is this just an electric plane?
I do have something like this : ERBAUER EHP1050 4MM ELECTRIC PLANER 220-240V (636FV)
I agree about using it to get rid of the warp but if you look at about 5m - 5m 30s you can see I partially designed my way out of it by cutting the main block so one section was before the twist occurred. I really could have taken the corners off the other piece as I describe in the video but as I planned to screw that piece tight against the floorboard base it didn't matter that it had a 0.5mm twist in it. Clever cutting and a design allowing for my laziness ensured there is not wobble in the finished product.
4) Thickness cut depth : 1/2mm at a time
Thanks for pointing this out. The blurb I read said it could take off 1mm of hardwood without issue and I assumed 1 full turn = 1mm. I had been spinning the adjuster on the top 1/2 a turn at a time or maybe a 1/4 turn for fine finishing thinking this was 1/2mmm or 1/4mm. Reading the instructions properly this morning, following your post, reveals that it is 1/2mm per 1/4 turn of the adjuster. I will now adjust my technique accordingly.
5) Sketching : Trying to show the design
The sketch really was done for the video only as I had worked it out in my head while drinking my morning coffee so I didn't want to spend too much time on it. In truth, I could have spent a lot more time drawing it out slowly and taking my time but it would have been no more accurate or useful as the dimensions of the piece were largely dictated by the dimensions of the timber I found.
Thanks again for your comments. I have corrected (some) of my behaviour and will look for better advice on the table saw
Just thought I would try to show that this stuff is all done on a budget with tools and materials built up over time rather than simply throwing money at the problem. Material and tools list shown below.
Materials
Main block is left over from £30 bundle of bits taken from Timber merchants scrap bin
Shelves are end of stock floor boards ~£20 for Oak, Bamboo & Oak Faced ply
Slate from a skip where a roof was being replaced
Tools
Table saw - 2nd hand bought when building the cabin having been quotes £12,000 by a builder so did it myself for about £3,000
Chop saw - Cheapo Screwfix model, also from cabin build
Large Router - Used to make the window beading in the cabin from cheap stock timber rather than buying lots of quartic. Paid for itself in just 2 windows.
Slate Grinder - 2nd hand for £5 as the grind stone is worn and there is no sanding belt.
Vacuum Cleaner - The old house vac was being thrown out so I added a cyclone bucket and some PVC pipes to make a ceiling run for the shop vac
Dremel Router - Paid for by selling engraved portraits in wood
Clamps - Paid for by art sales and useful for hanging paintings in places where you can’t bang a nail in the wall
Thicknesser - a luxury I bought myself after selling a painting for £500 in a recent exhibition.
thanks, enjoyed that
If you haven't already I would recommend watching Stumpy Nub's table saw safety videos on YouTube.
For the cut where you took off the tongue. I would have run the wood the opposite way around, with the tongue away from the fence. My reasoning (I'm also self "trained" by watching YouTube) is:
1) the tongue is the scrap bit. Running the bit you care about against the fence should yield a more accurate result on it.
2) You were pushing the workpiece past the blade and also would have been pushing it towards the blade too (in order to provide friction to push it forwards), as the piece isn't supported by the fence it could flex slightly and you might end up with a wonky cut.
3) The lateral force applied could also cause the piece to bind on the back of the blade (as you have no riving knife) and cause a kickback which will ruin your workpiece, your face and likely your hand.
The tablesaw terrifies me every time I use it. I think that's a good thing. So many YouTubers are terrible when it comes to using their saws safely.
What you say about the good wood against the fence with the scrap away makes sense. The fun thing with the way I do it is that sometimes the thin scrap gets kicked back and flies across the garage like an arrow. This is why I stand to one side. Not sure if this is good practice but it is fun.
That looks great that. Nice one.
I love how you just seem to make your ideas happen and doesn't seem like you are troubled by any self-made barriers.
As a woodworker like Dyna-ti I can't help but comment on a couple of things you could do to make things a bit safer.
*edit- I see @geuben has said this above*
*Firstly, as a general rule, you always want the bit of wood you are keeping between the fence and the blade.
In the video you are running the offcut against the fence which means that you are pushing the piece against the side of the blade. As the cut completes, there is a danger of pushing onto the blade causing a bad kickback or just damage to your workpiece. Keep the main part against the fence and allow the tongue to be cut off and fall away. Safer and a better finish.
*Make two simple push sticks. As a general rule, where you hold it should be minimum 300mm from where it grips the work.
Make them like this style.

Not like this style...

Murcans... 🙄
*Get yourself a mitre fence for doing those tenons. You can get a simple fence that will run in that track you have in the saw table.

It's very dangerous to run a long piece like that along the fence with such a small amount of support along the fence. Very easy to apply twist to the workpiece and cause a bad catch. Might be an idea to build yourself a 'sled' that runs in that track like the American tubers do. They are far from ideal but are much safer than running your tenons along the fence like that.

They also make it nice and easy to set up a stop and cut away all of the face of your tenons too, instead of using a chisel as you did there.
*One way to use your thicknesser to surface a twisted bit of wood is by running it through on a sled to surface the top face first.
Take a flat length of ply, place your piece on it and rock it back and forth. Find the middle ground of that rock and glue gun small wedges under the piece to stabilise it in the position you want.
Screw blocks in front and behind the piece, cross-hatch the surface of the piece in pencil, and then thickness it nice and gradually until your pencil marks are gone.
Then flip the piece and thickness to size to make it parallel.

Cool little table though. I enjoy watching these. 😊👍
Good wood against the fence - Tick
Longer push sticks - Tick - will be made later today
Mitre Fence - I think I saw something like that when tidying the garage but had no idea what it was for. I will go have a look and see if it fits anywhere.
Cutting Tenons - I could have used the sled to make the cut across the end of the planks as I know what you mean regarding the piece catching. I have a sled I made but the problem is that the grooves for the runners are only as long as the table saw and then the piece goes onto a hardened glass worktop. This is an excuse for not using it rather than a reason. The reason was I have just tidied the garage and couldn't see where I had put it. I have since seen it is hanging from the wall so I will use it in future.
Flattening the twist - I know the theory and could have used either the hand plane or the thicknesser with wedges/hot glue but I judged this as unnecessary as one piece was flat and the other piece was being screwed and glued to a flat piece so the twist didn't matter. Laziness disguised as functional design thinking
StumpyNubs - I have seen a few of his videos so will look for the tables aw one.
Laziness disguised as functional design thinking
IF a flat piece can keep a twisted piece straight then the twisted piece can surely make the straight piece twisted?
I'll adda nother safety comment. Don't put the router down while the bit is still spinning!!!!!! if it catches anything its going to make a projectile, the projectile could easily be you finger.
[i]IF a flat piece can keep a twisted piece straight then the twisted piece can surely make the straight piece twisted?[/i]
Not if you don't screw it flush to the surface and hide the tiny crack with a bit of wood glue and sawdust.
Router - Yeah, I am a bugger for not letting tools finish spinning. I know it but I need to do it. Thanks for the reminder
WCA - look on YouTube for Steve Ramsey - Woodworking for Mere Mortals. He does a beginner series and also simple projects to do. He also does good videos on what power tools are worth having and safety issues too. He is good as he wants to cut through the crap of some of the elitist woodworking folk think and get you set up well with the right tools but not spend a fortune.
https://youtube.com/c/stevinmarin
Just watched a couple of the Steve Marin videos and like his presentation style. Useful info on the reason why things are dangerous or you should do things a particular way.
At this rate I will have to change my bloody forum name!
Other than the above, I do enjoy watching you make, or rather the finished piece. I like your enthusiasm for it. 😀
Surface planer - Also known as a jointer - and oddly enough the thing we call a thicknesser is also known as a planer in the US. So looking at vids on you tube, you'll get better results calling them by their American names
It enables you to flatten one face of a board,from there you can place this face against the fence and produce a square edge.
Its at this point you can bring it to your thicknesser and with the newly flattened face down, run it through to produce a parallel face on the other side.
Depending if your thicknesser has the depth, you can run the board through on its edge to create the second parallel edge. Its sometimes best, especially on thin timber to run multiple boards through at the same time as theres less chance of the thin board twisting to the left or right as it goes through the rollers- You've no doubt noticed this on your thicknesser
.
The handheld planer you have doesnt really flatten a warped board. Because of its small size it follows the undulations and just smooths the rough warped surface into a smooth warped surface. While the warp is there anything you do for example thicknessing it with keep the warp and transfer it.
If you look at hand planes, as in No7, No8, they are all really long. This is so the plane doesnt follow the ups and downs of a twisted or bent boards and rather skims over the surface first knocking off the high spots, and as a flatter surface is produces, the cut takes more and more.
The electrical surface planer is basically like a really long hand plane. The flat tables(in and out feed) mean that the cutter only initially takes off the high spots, and then takes a bigger and bigger cut as a flattened surface is produced.
Theres plenty of YT vids showing good and safe practice.
Word of caution. Surfacers are pretty dangerous as woodworking machines go. So try not to feed your hands or fingers into the whirling spinny blade, theres usually nothing left to stitch back on 😉 I have met a chap who did this and well, there wasnt much left. So watch the vids and take note of the guards, and while you might not have them on your saw bench, on a surfacer theyre a given safety item you mustn't deviate from.
Theres quite a number of cheapo planers for sale on ebayy/rutlands etc and few are that good really, though usually the fence is the weakest link, so take note and you might need to construct something of your own to make sure its steady and solid.
Spotted this on ebay. Looks to be ideal. Early axminster bit of kit. White denotes trade use so will be good kit for sure. And i think those tables look cast iron, whereas most of the cheaper ones use cast alloy, which is fine but no comparison to cast iron.
https://www.ebay.co.uk/itm/334465030795?hash=item4ddfab5a8b:g:G14AAOSwZ9RinOgq
I have no idea where you live, this one is in burnley. But if i was looking for one for myself. I'd jump at it if it was close to me. I'd certainly pick it over a new cheap one. Ax is usually pretty good quality and capability wise.
Starting off with square dimension'd timber is a must for the project to go without or lesser hitches. Otherwise youre effectively playing catch up and cutting joints or gluing or attaching to a warped surface just causes problems to compound themselves.
If youre really stuck, or poor, then maybe something like tis will help you get accurate timber to work from. Theres likely plenty of other build a planer (jointer) vids, but this one looks simple to make and should be well within your skill set.
I am in Southampton so a bit of a hike. I also have limited space in the garage. That upside down planer is something I seriously considered making until I discovered I didn't need it.
I did look at the planer on YT but it seems a big and reasonably expensive machine that does just one job. I would need to sell a couple more paintings to be able to afford one and then would have to find space to store it. Remember that this recent spate of woodwork is my first ever attempt at furniture and I have now completed all we need for the living room so will not be doing a lot more in the near future.
I don't have just one hobby so my garage is multi-functional covering wood working, welding, bikes, car building/repairing, sculpture, gardening, squirrel murder and also general household chores. Every new tool has to justify it's investment
New pusher ready for inspection.
From this
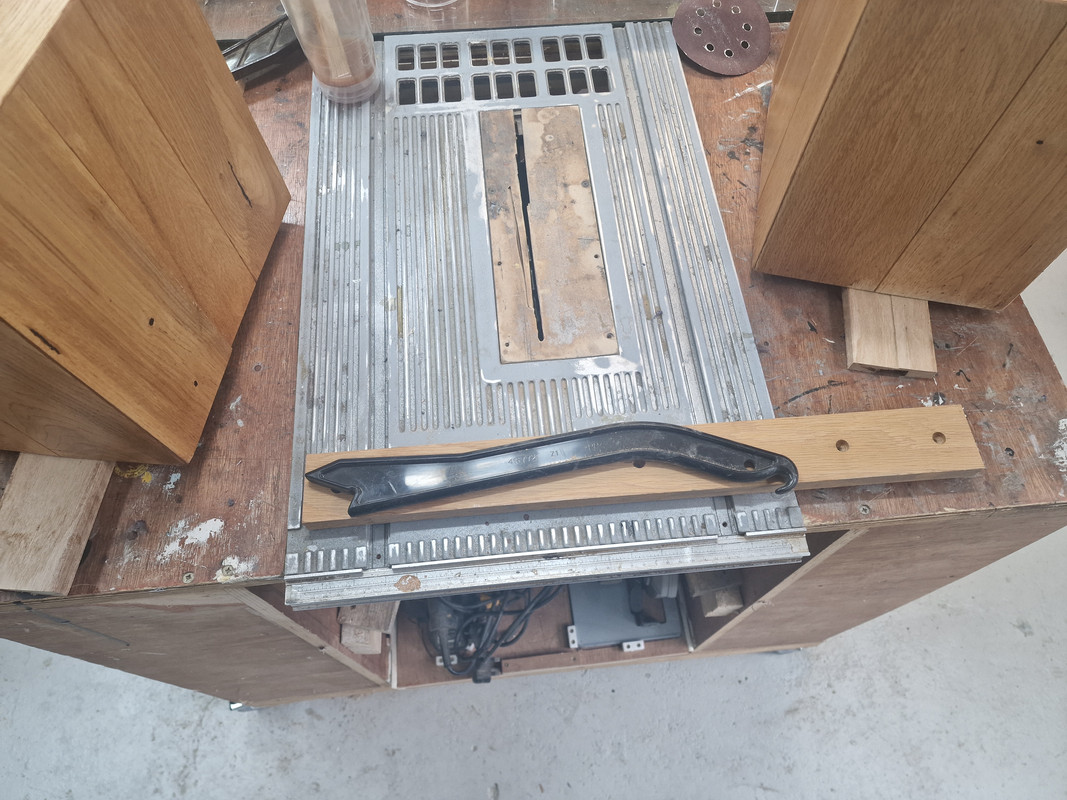
To this
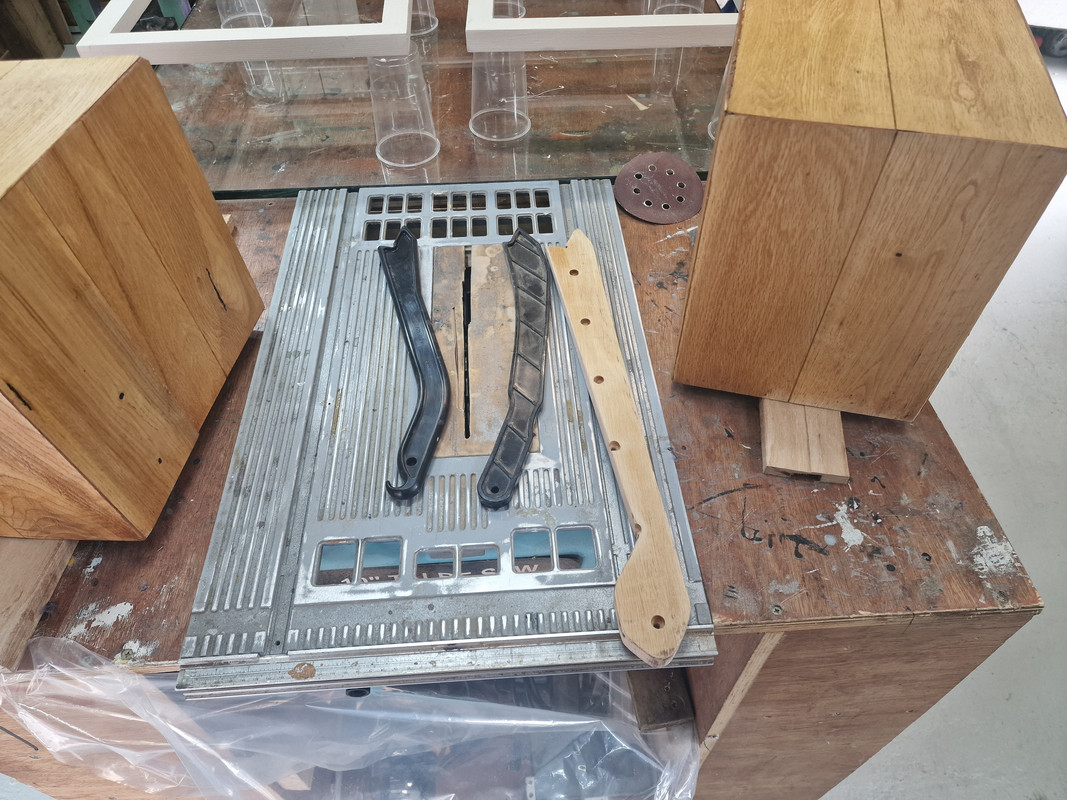
Better. It should be a minimum of 20".
You basically stand at the front and use the sticks to push material through and past the saw. Your hands from the front shouldnt go anywhere near the blade.
Thicknesser – a luxury I bought myself after selling a painting for £500 in a recent exhibition.
This is the best way to gain kit. You work it into the price of whatever youre making.
EG had to make a bed for a customer and he wanted turned columns. We didnt have a lathe so factored in a lathe into the price he was given. Bought lathe, customer paid and was happy with bed. Kit paid for 😀
I need a festool plunge saw, so im currently trying to talk my sister into doing her decking for her instead of getting a firm in.
Oh aye sis, we need one of them things there 😉 😆
I haven't started selling the woodwork yet, I have only made the coffee table and three shelves for our own use. This sold for £500 at me last exhibition which was nice. The other two that sold were for less but easily covered materials and the hire of the venue for a month so my 'art' bank account is looking okay at the moment, or was before the thicknesser