![]() You don't need to be an 'investor' to invest in Singletrack: 6 days left: 95% of target - Find out more
You don't need to be an 'investor' to invest in Singletrack: 6 days left: 95% of target - Find out more
Per the above (and my other thread about cheap mtb hubs) I’m gathering bits to have a go at a first wheel build.
I’ve got rims and ordered a Shimano FH-M756 XT rear hub. I now need to order spokes but want to check I’m ordering the right lengths. THTis is for a rear wheel with a disc brake hub.
Rim:
wtb St-i25. Weight 538grams / ERD 540 / inner rim 25mm / rim designation 25-559.
Hub:
fh-m756. Weight 496g / pitch circle left 61mm / pitch circle right 61mm / flange left 33.5 / flange right 20.5 / 2.5mm spoke hole diameter.
I think the above are correct and probably will get double butted spokes- most likely DT / Sapim - whichever works out cheaper for black spokes.
The DT calculator is suggesting 43mm left spokes / 34mm right spokes. Seems a big difference in length - does this sound correct (I selected 2.0/1.8 comp spokes)?
Then nipples it suggested DT pro lock squorx pro head alunspokes - 2.0 / 15mm. From what I’ve read brass nipples are preferable as less likely to corrode and jam.
Not massively worried about weight - just want a solid build that will last - it’s going on a hardtail and I’m not very svelte / subtle when out riding!
43mm and 34mm? That's a bit short.....
Putting the info above in to the calculator I get 266mm/261mm on a 3 cross pattern (guessed 32 hole?)
Just realised that - I’d slightly confused the inoutnto the calculator / what it was asking for! What could possibly go wrong with this build lol?
Revised the input and now suggesting left is 261mm and right is 259.
This seems more realistic!
But which nipples (ooer - don’t fancy yours etc etc)?
Ha. Think you might be missing a few hundred mm there...
I alwaysend up with aci spokes. Cheaper but with a rich spoke history.
I am just going with the standard 12mm brass nipples for my build. Was going to go for the proloc in black but as its my first go and probably lots of tweeking i decided against them.
I would just use normal 2x12 brass nipples, prolock if you want some added security. Coated nipples look a bit naff is you scratch the coating.
I always just use brass nipples and Dt comp spokes. Definately look at the German sites, such as rose bikes. They always work out cheaper for me.
Looking at cycle basket it’s 45p per black double butted api spoke that comes with a silver brass 2.0 / 12mm nipple. That’s looking the cheapest option - I guess I’d like black spoke nipples but if I have to adjust them a lot I assume they will scratch / get scuffed and look tatty? The same with any fancy coloured / anodised spike nipples. Must resist fancy red coloured ones!
Or am I worrying too much about spokes and plain gauge cheaper ones will be pretty much as good?
Do not buy alloy nipples.
Just don't its not worth it.
Silver ones look fine even if everything else is black.
sdeals is cheap for ACI.
So I can’t find spokes in the lengths 259mm and 261mm. Do I go longer or shorter than those lengths? The spoke holes seem to be quite recessed in the rims if that makes a difference.
Will stick to brass nipples.
Try to round lengths by the smallest amount you can, whether up or down
I'd recommend getting a copy of the wheel pro book. Covers things like how to measure ERD (don't trust the manufacturer) and how to round spoke length if what you want isn't available.
I usually end up with DT Comp spokes from Rose.
Cheers guys - I ran this through several different spoke calculators and apart from the Sapim one (which was suggesting lengths quite a few mm longer than other sites) they were all with a few mm of each other.
I rang Cycle Basket and the guy there was really helpful on the phone. He checked the lengths for me and have come out at 262 and 260 for non drive side / Drive side respectively. Ordered butted aci spokes from him which seemed a good price compared to everywhere else, plus a spoke key.
Shame the postage was £6 (!), although it seems he uses a courier so they might be with me by Monday which is rapid.
Shame Tredz aren’t quite so rapid with my hub delivery!
So I can’t find spokes in the lengths 259mm and 261mm. Do I go longer or shorter than those lengths? The spoke holes seem to be quite recessed in the rims if that makes a difference.
What were the actual spoke lengths from the calculator, not the rounded ones?
This site might help you visualize how you can tweak spoke lengths
http://www.kstoerz.com/freespoke/tech-threadengagement.php
Bigyan - yes the DT site gave those lengths - perhaps it rounds the number up for you? Also, I guess you can lose some spoke length like that if they are too long.
Hopefully I’ve got the right lengths ordered up now.
The DT calculator gives you precise and rounded, eg 259.82mm in small font and rounded 260mm in bold.
Not on the version I used! I’d screen grab it but it’s too much effort to do that to post on here quickly...
Tredz not planning to dispatch the hub I ordered until the 6th June despite the website saying they had it in stock. Guessing their wholesaler has it in stock and not in the actual store.....good job I’m not in a huge hurry!
My hub arrived today so I think tonight when the wife is out I’ll sit with a cheeky Thatchers Gold and start lacing my new back wheel. The XT hub feels very heavy but at least it should be solid. Once my wheel is built I think I’ll have the XT hub apart to make sure it has enough grease in the loose bearings - if it doesn’t I’ll pack a load in there.
Probably need to acquire a set of cone spammers before then.
Gone wild today and ordered a new front hub too - just need to get the relevant length spikes for that, then going to have a go at the front wheel as the next job!
Then I’ll have to tape my first tubeless rims (my other bike came pre taped and setup tubeless with sealant in) and havena go at getting the tyres setup.
What could possibly go wrong?!
Tredz not planning to dispatch the hub I ordered until the 6th June despite the website saying they had it in stock. Guessing their wholesaler has it in stock and not in the actual store…..good job I’m not in a huge hurry!
This is a favourite game of Tredz and you're not the first person here to be inconvenienced by it.
Good luck with the wheel build. The first one will take bloody hours, but take your time and you'll enjoy the experience.
I’m expecting the worst but hoping I get a rideable wheel.
If I can at least get it laced up correctly I’ll be quite pleased with my effort.
Vertical trueness and having it dishes right sound tricky and a lot of patience required.
From what I’ve read I’m going to try and get some even tension into the spokes first, then pop it in the truing stand and see what’s what.
It sounds like you hen take it on turns between literal and vertical trueness based on which one has trenworst flaw at the time. And also to only make small adjustments at a time rather than big ones to try and cure an issue in one go.
Sounds easier said than done but I’m looking forward to having a go anyway.
You can't lose tbh, worst case scenario is you lace it wrong, can't get it tight, take it to a shop, they take the piss and fix it for you and you're no worse off than if you'd gone there in the first place.
A good start that I can't recall ever seeing mentioned, is to do all the spokes up the same to start with- not looking for tension, just looking for a base point. My last couple, this has just meant "tighten til the threads are entirely in the spoke"- which I could check just feeling for thread with a fingernail. That puts the wheel essentially in balance to start with and makes the next steps way easier.
A homemade spoke driver helps enormously here. I made mine by sharpening down an old screwdriver bit to a point and then using a power driver to zip them all up until the spoke pushes the bit off the spoke.
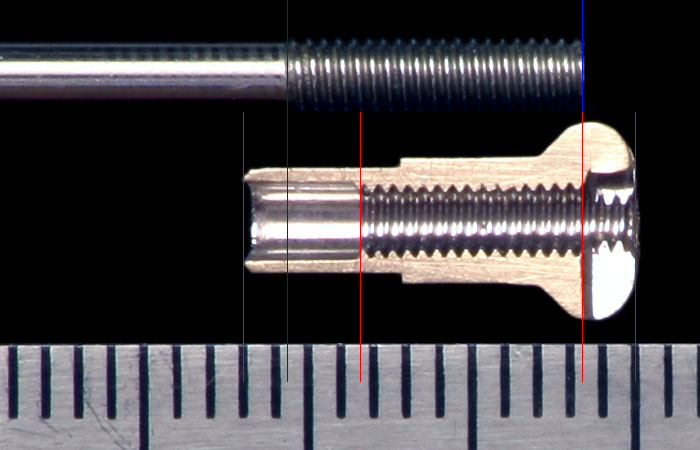
Basically, cut a flat screwdriver bit down to look like the end of this:

I wouldn't use a proper screwdriver, but rather a bit that can go into an electric drill. Much quicker 🙂
This gets you to a basically round wheel, with roughly central dishing. A good starting point.
Why would you need to mangle a screwdriver? Could you just use a normal straight one? I like the tip about electric just to get it to the point the spokes are all done up so the threads are just within the nipple. Just must not get carried away tightening up too quickly with the driver I guess.
Excited to start tonight and see where I get to. Thanks for all the advice so far!
pointy bit goes through the hole in the nipple and causes the driver to be ejected from the slot when the spoke is threaded in a certain amount - it's a quick way of getting the same engagement on every spoke/nipple
The point centres it in the nipple.
It also forces the but out the nipple at a consistant depth across all the nipples which is slightly easier than nirthwinds finger nail test.
Ah I see, that makes sense. Will have to see how many spare screwdriver bits I have for the drill - if only one I’m not mangling it and will just have to be careful. If more ham one of an appropriate size I may clamp in a vice and modify with the angle grinder / hacksaw
So I’ve built the wheel whilst the wife was on a night out with work. Few cheeky ciders and the wheel is fully laced. Used the Sheldon Brown guide for 3 cross lacing - I think it’s right. I compared it to my old wheel and it looks pretty similar (albeit that’s 36 hole rather than 32).
I started tensioning it up so all the threads were in the nipples and the wheel already felt fairly solid (but nowhere near the tension of the other wheels I have on bikes in the garage. Then put it in the truing stand and it’s not bad at all. If the dishing is relying on being in thre middle of that stand it was a few mm to the freehub side so I put a half turn on all the non drive side spokes. Then spent some time trying to get some lateral high spots in line. Vertically it looks good to go pretty much.
Now got to the stage where I think I’m about 2mm out on a couple of lateral spots, dishing looks good and vertical looks good.
Need to borrow a tensionometer now to see where I’m at overall. I think I probably need a little more tension in general and to work a little more on the lateral truing. I’ll then bang it in the frame it’s going on to check the dish works for that frame.
So far it’s been ok - just taken time and patience. Superstar have already dispatched the front hub I ordered his morning. So on Monday I’m going to order spokes for that wheel. More confident now I will get a useable pair of wheels out of this project!
[IMG]  [/IMG]
[IMG]  [/IMG]
[IMG]  [/IMG]
[IMG]  [/IMG
[/IMG
[IMG]  [/IMG]
Actually the biggest drama was dropping 2 nipples into the rim - took me ages to fish them out.
Even got the hub logo to be viewable through the valve hole as apparently that’s a thing.
[IMG] [/IMG]
Josh is spot on btw, I just object to that method because it's basically like camming out a screw and it hurts my soul. But it works perfectly so some would consider that not a good reason not to do it.
For the record i've also done the finger nail test. I'm actually the same about camming but i rounded my edges so it tends to slip out rather than gouge out a lump of nipples.
I have never got the ligo to point through the valve hole afmittedly i dont try very hard!
Good job there. Let us know how the test ride goes.
Had another look this morning and put a half turn of tension on every spoke and feeling more like the tension in some of the other bike wheels in the garage. Still dished ok and vertically true. Reckon I could do with another half hour of working on lateral then just need to borrow the tension meter to see what’s what. I don’t want it over tight or too loose.
Think I’m going to check I have no twisted spokes then mount up the disc / cassette / tubeless rim tape etc when I get a chance today.
So tempted to ride it this week and see what occurs!
Ali clarkson put up a video just last night on wheel building. in particular, an interesting way he stresses the wheels!
Someone else mentioned this today but I haven’t had time to watch it yet - must watch it tomorrow. I’ve done some stressing of the wheel but not sure I’ve done enough.
Ive also tries out the wheel in the frame (no tyre still until it’s ready) and found the dish isn’t right. The wheel is sitting too far to the left. Had time to move it part the way over, but it still needs some work.
Tried standing on the spokes per the above video - got some clicks and cracks but not as man as the video. I had tried other ways of stressing the spokes first so that maybe why.
I put a tyre on it last night and that gave some more creaks and clicks so I suspect I may need some further truing and tensioning. The tubeless tape wouldn’t stick well despite cleaning with isopropyl wipes - so I did a second loop round the wheel and the tyre went up first go - with a 2nd blast from the airwave pump (inbuilt tank for tubeless) I got a snap as the beads clicked in. It stayed up for 15 mins then I left it overnight. This morning it’s flat, but I didn’t put any sealant in. I’m torn with banging in sealant and see how that goes, or retape it from scratch?