![]() You don't need to be an 'investor' to invest in Singletrack: 6 days left: 95% of target - Find out more
You don't need to be an 'investor' to invest in Singletrack: 6 days left: 95% of target - Find out more
After reading mixed reports about the current range of 1x chain guides on offer and seeing other peoples attempts i thought id try my own.
I started off with this boat hook clip
[IMG]  [/IMG]
measured and cut it to fit over the chainring
[IMG]  [/IMG]
and fitted it here
[IMG] 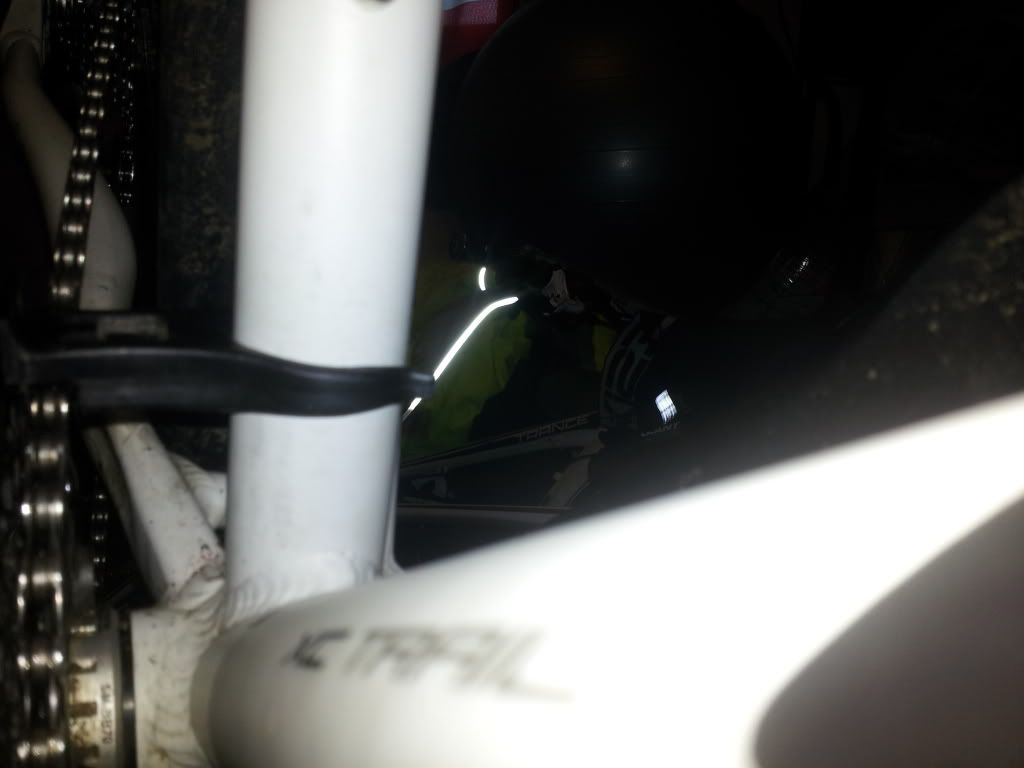 [/IMG]
If i can find away of actually securing it then im on to a winner.
theres not enough room to put a zip tie round the flared ends round the non drive side of the frame, so thats my first idea out the way, ive got another idea involving a hose clip and cable tying them together, but it like to see if any of u have any better ideas, other then buying chain guide....
Drill through the plastic on the drive side and thread a small zip tie through the hole and round the seat tube?
assuming it's not hollow at the back cut the 'wings' off what you;ve got and then use a screw through a hose clip into the plastic and then hose clip to hold it all onto the frame?
[edit] or keep the wings and run the hoseclip inside them
yup, zip tie that sucker 😉
looking at it again I do think you'll struggle to stop it bending upwards under any significant load (like the chain coming off the ring a bit and hitting the guide).
both good ideas, its solid plastic so could easily drill it.
its fairly sturdy, as it is, just needs securing firmly, im thinking the hose clip idea would hold it solid.
I do think you'll struggle to stop it bending upwards under any significant load
Waswas ,I thought that there was very little upward forces and the guide is just to stop it dancing around and off the ring ?
I am using an old front mech just now ,but was going to change to a bit of plastic bolted on to the cage.
..and ,I know ,I know ,there are proper guides to be had,but like the OP ,I just like bodging things sometimes 😉
I also have a front mech which ive got ready to go but it weighs loads, this weighs 10grams 😀
self tapper through the band into the seat tube.
fasthaggis - not sure tbh. I know with my one that the chain comes off occasionally and it's only the guide that holds it on - it 'rerails' itself as soon as I start pedaling but I can imagine with a guide like the one above that any lifting of the chain off the teeth will exert a vertical force?
It's certainly worth completing the thing and giving it a go, though.
Why dont you just use an old front mech.
Or just buy one that does work.
Your going to waste a lot of time and effort finding out that your bodge wont work. Life is too short, give up now and go riding.
[i]theres not enough room to put a zip tie round the flared ends [/i]
Really? Looks like there's loads of room for a zip tie.
nope the flared ends dont stick out far enough to get the zip tie on, maybe if i used a really thin zip tie then yes but it wouldnt be strong enough.
Ive just been for a ride with the front mech method which works but im determined to finish this idea off as it may work well.
heres the way ive mounted the mech
[IMG] 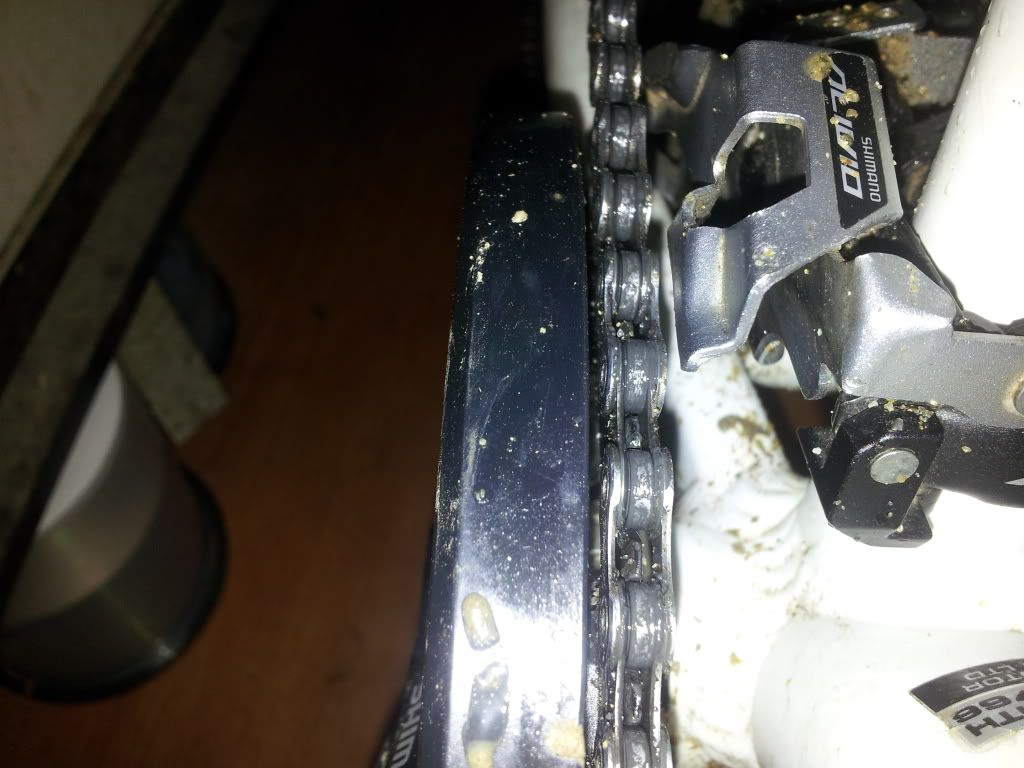 [/IMG]
Ive not given up on this yet, tomorrow i am off to find something like this
[IMG]  [/IMG]
and get the drill out
The front mech method works well but i think this is still worth a shot for the sake of a couple of quid.
Not quite what i had in mind and looks a little untidy but i will work on that at a later date, this is on there solid and works as i had hoped, [IMG] 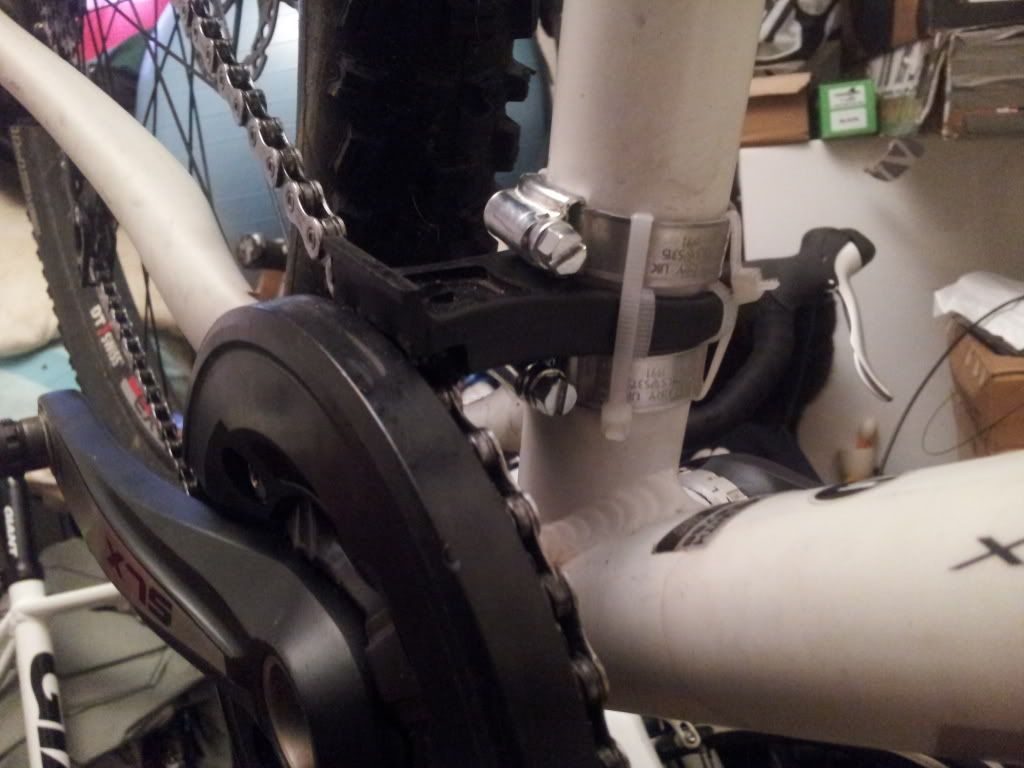 [/IMG]
2 hose clips and 4 cable ties = £3.
the main bit i found in the garage. proper bodge job 😀
needs more cutlery.
Can i just send you a tenner to buy a Superstar one and you stop posting pics of that monstrosity ?
@OP For a while I was right behind you in your bodgefest,but I fear you have over complicated the bodge .
That is indeed a monstrosity ,and you should just take the tenner from weeksy . 😆
if u squint in the dark it looks alright, weeksy please send the payment to the usual address..........
backtothetop - Member
if u squint in the dark it looks alright
So does the fat bird in Eastenders who died.... However... you woulnd't want to be seen out riding it.
You could have had my modified superstar one for 3 quid
Podge - what did you do to it? I'm managing without mine as it was getting on me nerves giz a look!
You have too much time on your hands. Weeksy says it well.
Buy a proper one and stop making your bike look ugly.
Sorry OP - Weeksy +1.
I agree with all of you, im going to order one up tonight.
I dont really know why i was trying to skimp on this but it kept me busy while ive been sitting at home on call for a week.
http://www.rutlandcycling.com/44549/Hope-Chainguide---2013.html
tinkering with stuff is fun.
sometimes the proper tool for the job is the best thing, though.
Thats ordered, anyone want to buy a DIY chain guide 😉
Tops, no pics but I scrapped the fiddly tube & grub screw then swapped the small bolt for a longer one & a nyloc nut.