![]() You don't need to be an 'investor' to invest in Singletrack: 6 days left: 95% of target - Find out more
You don't need to be an 'investor' to invest in Singletrack: 6 days left: 95% of target - Find out more
Anyone know of a bike shop or individual frame builder who might have one and be willing to let me make use of it for a day?
Do you mean a frame building jig? I can't think many people will let you use theirs for a day as it'll be the frame builders livelihood they are missing out on.
Aren't there courses you can go on where a frame builder will help you build a frame, is that an option?
Fair point. I'd be happy to pay, obviously, or a nice single malt say. I'm in the process of building up a bamboo gravel bike and the hardboard jig that came with the kit isn't really up to scratch.
Just need access to a jig to get the tubes properly aligned and allow time for the glue to dry. Not looking to take business away from anyone.
Have you been in touch with anyone? There are some frame builders in the area but I don't know if you've had a knock back already. Fiveland, Armour, Shand all come to mind.
Andy Armour might be your man - he likes odd bikes https://armourcustombicycles.com/.
I've pinged some emails out last night - FiveLand, Armour, one other. Shand are in Coventry now I think.
If it comes to it I can probably improvise and check alignment with carefully measured bits of string. What's the worst that could happen?
Isn't Shand now in Coventry?
I've spoken to Andy about stuff, seems decent, this might be a bit of an ask tho.
What's wrong with the one you have?
Appreciate it's a bit of an ask. Hoping the company I bought the kit from might come back with a solution. It was listed as plywood which would be preferable to hardboard I think. Problem with the existing one is the bits for the dropouts don't quite fit together right.
[url= https://i.postimg.cc/FzrxPtTp/PXL-20241117-115933823.jp g" target="_blank">https://i.postimg.cc/FzrxPtTp/PXL-20241117-115933823.jp g"/> [/img][/url]
I don't think you'll finish with the jig in a day, and will make a hell of a gluey mess so can't imagine anyone will want you near their jig.
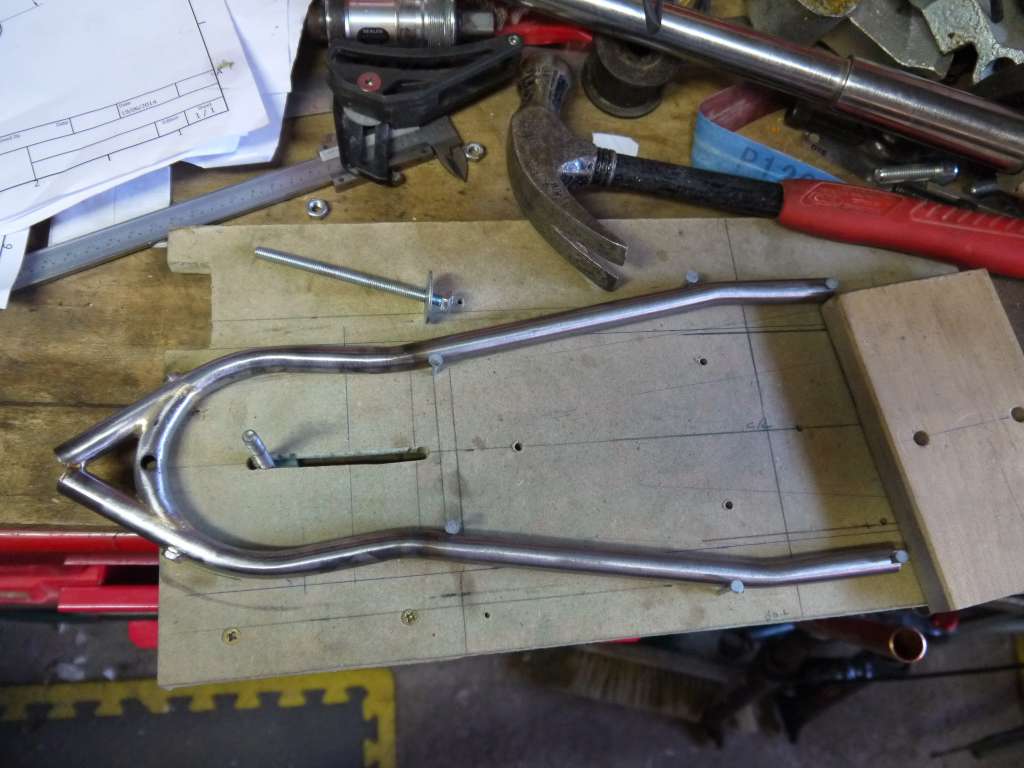
I'd try starting with making it as sub assembly of just the bb/chainstays/dropouts, maybe on the flat rather than on its side. Cut a nice square eg 135mm wood block and a couple of bolts to hold the dropouts in alignment.
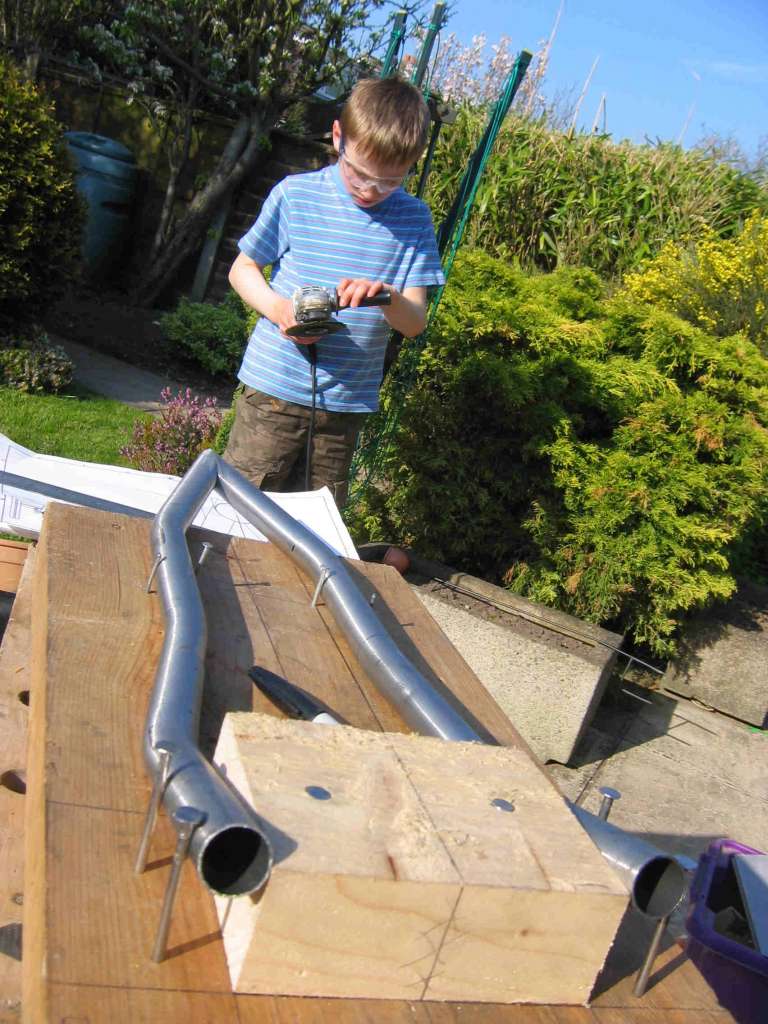
I knock up lots of basic wooden jigs when tacking together and mitring rear stays.
It's a lugged design so much simpler than that but you've inspired me.
Make sure you post some pictures as it progresses 🙂
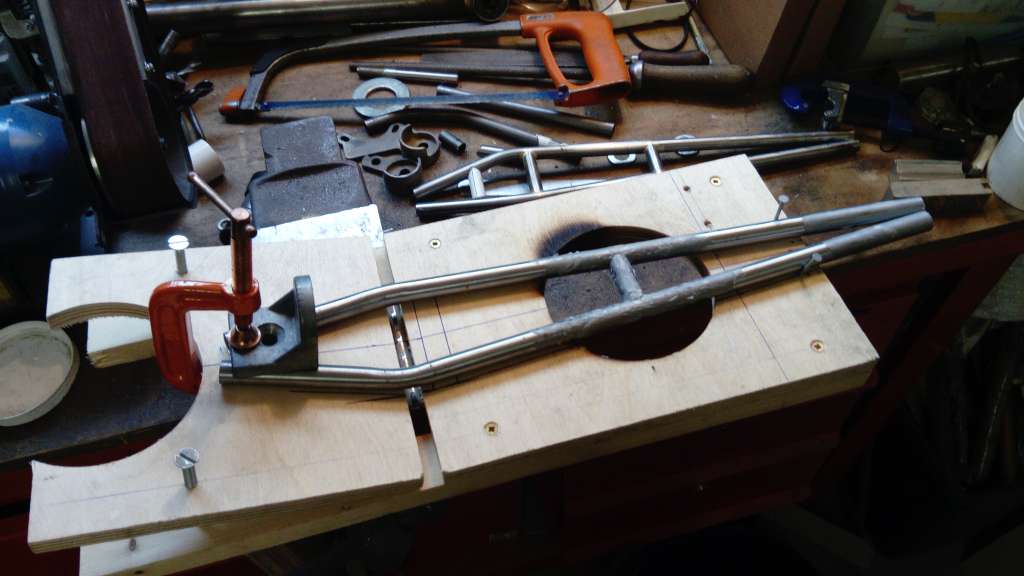
You'll have much more chance of a straight frame if you can get smaller sections stuck together and aligned rather than the whole thing moving around.
Nails are good as they have a bit of spring / can be bent a bit to lightly hold tubes in place. Guess you also don't have any heat so can use cable ties, tape, temporary splodge from a hot glue gun etc.
The proper jig is like this. I always start getting the seat tube and bb stuck together and square before doing anything else. If you aren't using a lugged bb, triple check you get the threads on the correct side.....
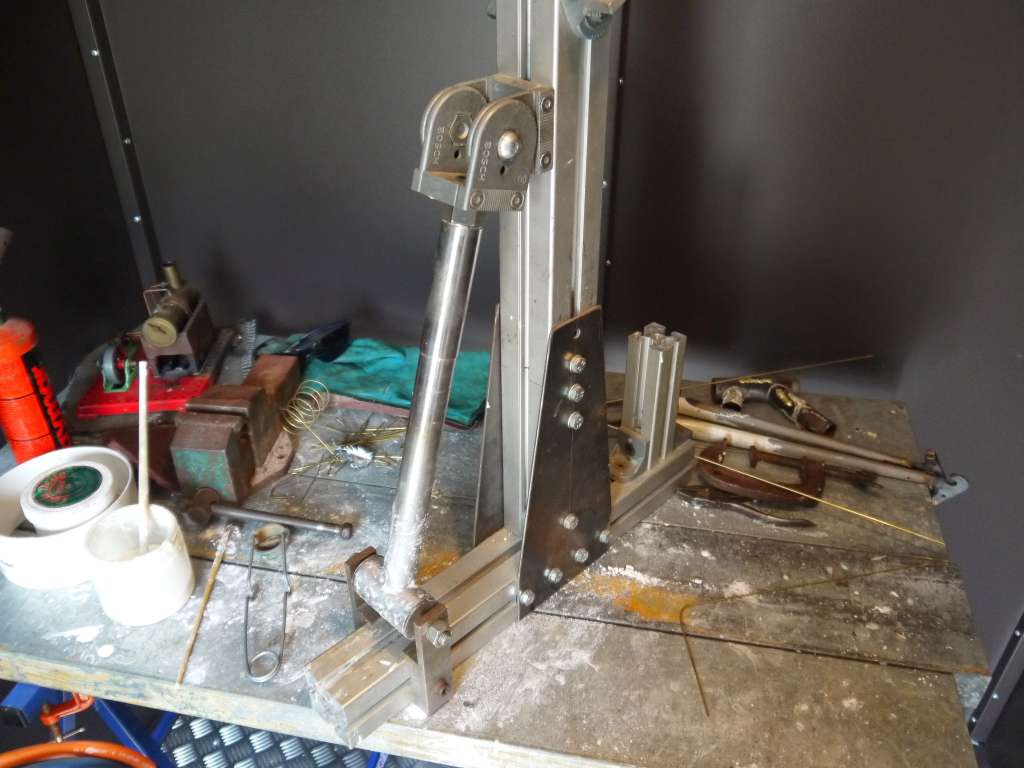
I made that mistake on the last one...
Thanks for the tips but Andy at Eastside Bikes has come to the rescue.
I've got a Bike Academy LCFF that you could use for this, if you'd like you could do it on Friday or Saturday? Or the 4th or 5th Jan?
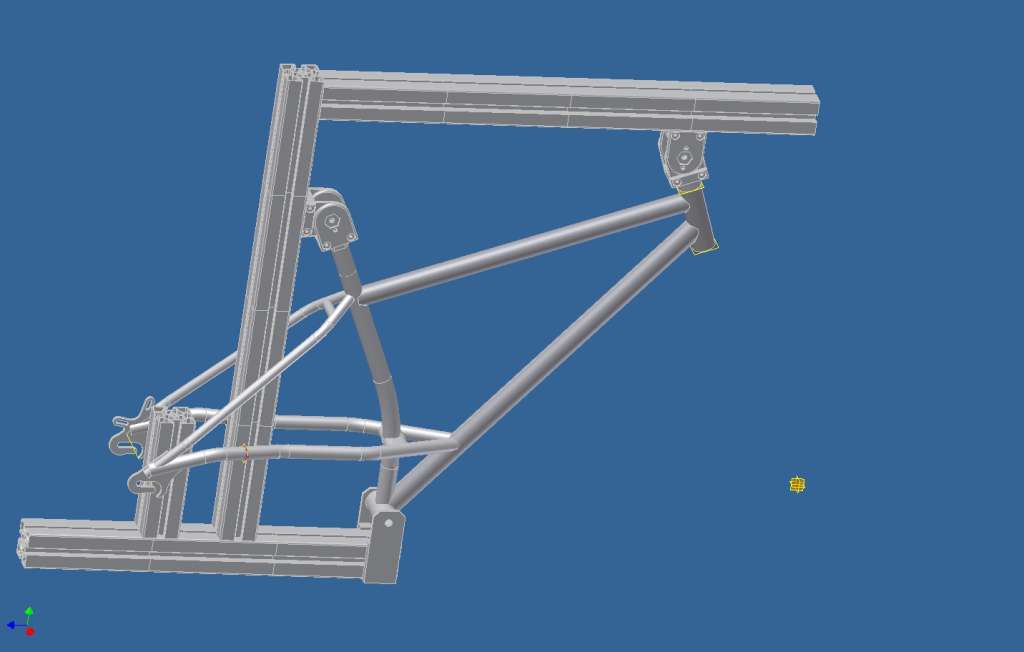
Do you have a BikeCAD file for it? The LCFF uses the setup numbers for Henry James jig.You could also put the frame in my paint curing oven to fully harden the epoxy if you'd like? Most epoxies cure hardest at 40C. Not sure what to charge but a bottle of single malt sounds fine by me!
Good chat with Mr Armour this morning and he's happy for me to make use of his jig (and extensive experience) so I'll head along to his workshop early in January to get it all aligned and glued up prior to a short bake in the oven to optimise the curing of the epoxy.
Couple of points:
The design is such that he's not worried about his jig getting messy - it's not a wrap.
Putting the headset cups in early (blame impatience) shouldn't be a problem because the bit of the jig that goes against the bottom cup is flat while the top one is conical.
The epoxy is supplied (ET4528) is 'thin-shearing' which means it'll flow nicely where it needs to go before putting the whole arrangement in the jig to fix it in place.
I'll use the qr dropouts for the build phase as they're nice and square and easier to clamp in the jig, and swap them for bolt through later.
All for a bottle of Bunnahahain.
Pics in due course.
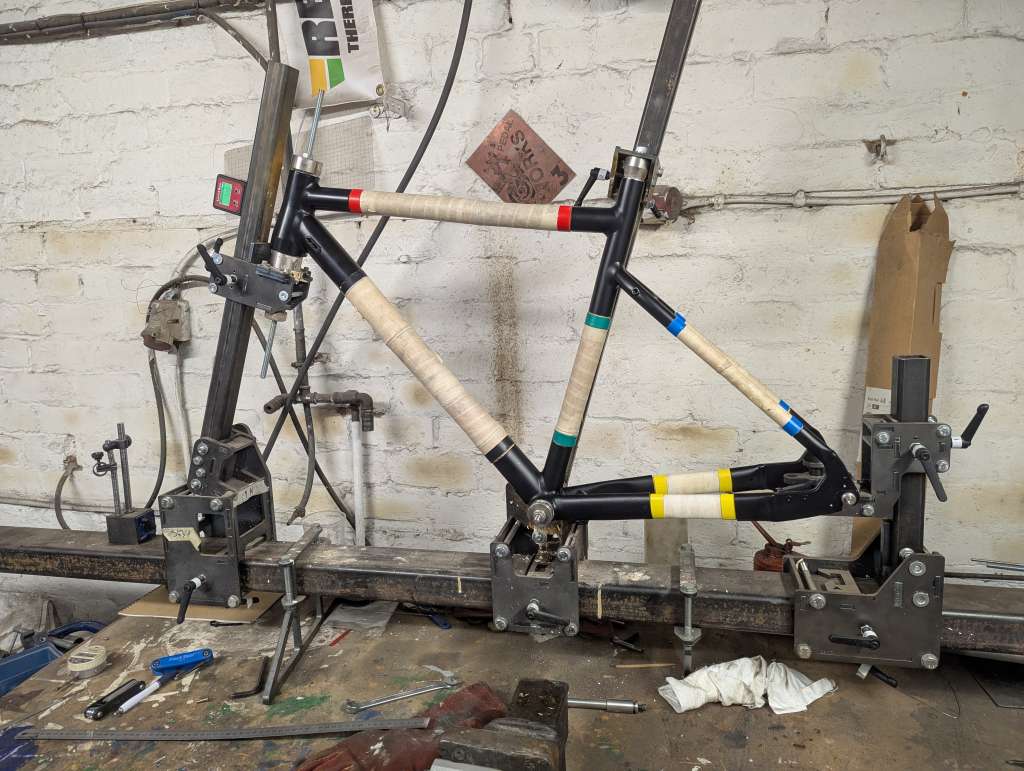
In the jig and now glued - much easier to put together with the epoxy acting as a lubricant. 6 hours in front of a heater and then a session in the oven tomorrow to set it off properly.
Bit of a moment when one of the seatstays started to crack during the dry fit (the walls are very thin to fit in the lug) but a wee dab of epoxy and a blast in the oven remedied that.
Think I've got all the necessary bits to build it up but will inevitably have forgotten something. There's sanding and oiling before we get that far anyway.
Thanks for the update. Didn't know they were doing those carbon lug kits now - looks much less messy than wrapped joints. Should be interesting to see how it rides.
Lugs are aluminium, though I believe they have experimented with 3D printed carbon ones. You're right it's a lot more straightforward/less messy but I'm curious about the strength myself; it'll be used for bikepacking so that will be a factor. The previous, wrapped, one was immensely strong and only broke when I replaced the cracked seat tube with a too-short carbon tube, when I should have just glued it. This one, you're removing material instead of adding so we'll see how it holds up. It'll be a few pounds lighter though.
Right, so, it's not that I've been idle but for one reason and another the build has been a bit difficult. Gears. I'm good at gears. I can do gears, but somehow this time they just wouldn't. Came back to it later, complete strip and clean and OK, now we're good. Brakes though. I thought I knew what I was doing but was completely flummoxed by not being able to get fluid into the system at all. Turned out somehow inserting the barb had ripped a strip of the hose liner and blocked it. That sorted, comedy moment ensued when pumping the syringe caused the plunger in the bleed cup at the other end to fly out, nearly hitting the ceiling. What else? Oh yeah, ordered the wrong thru axle assuming 142mm made sense (135mm for QR + 5mm for each dropout, no?) when in fact it needed 157.
It does line up though (well, almost - the rear wheel might be a couple of mm out of true which if I ever want to fit bigger tyres will be an issue) but it's built and while the hoses, and possibly steerer tube could do with shortening, once that's done I'll wrap the bars and then it's built and at just over 10.5kg I was a happy man.
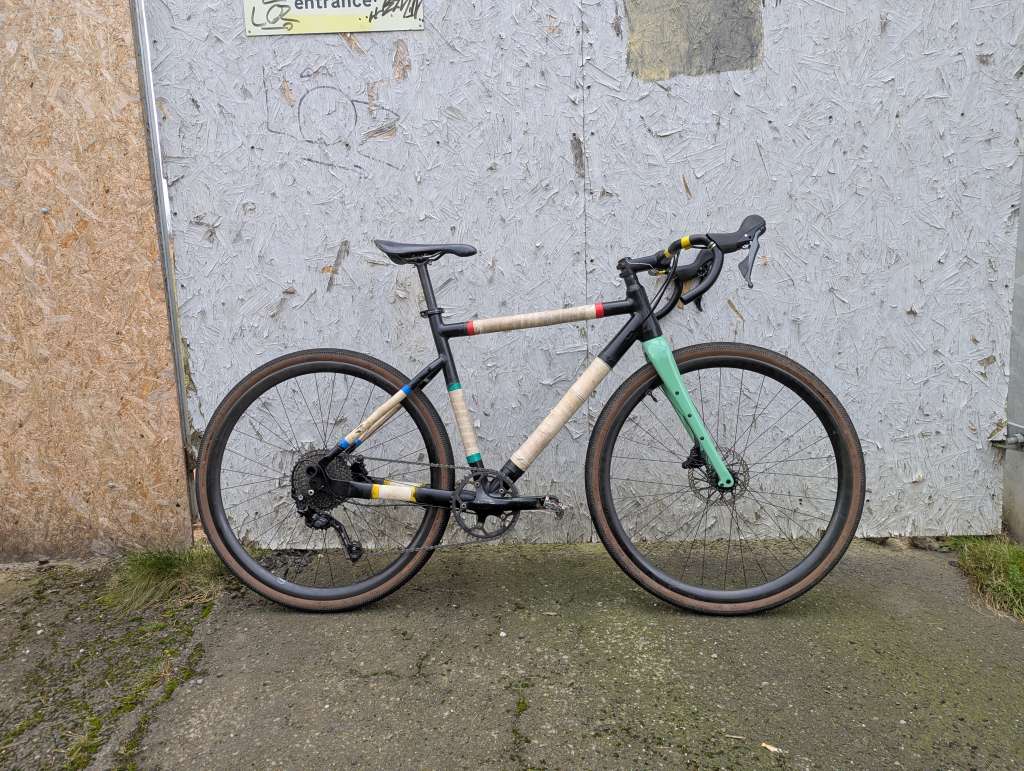
Was. Taking it for a ride there was an unmistakable knocking/grinding which I was hoping might just be the seat post slipping so added some carbon paste and took it out again and this time the problem was clear.
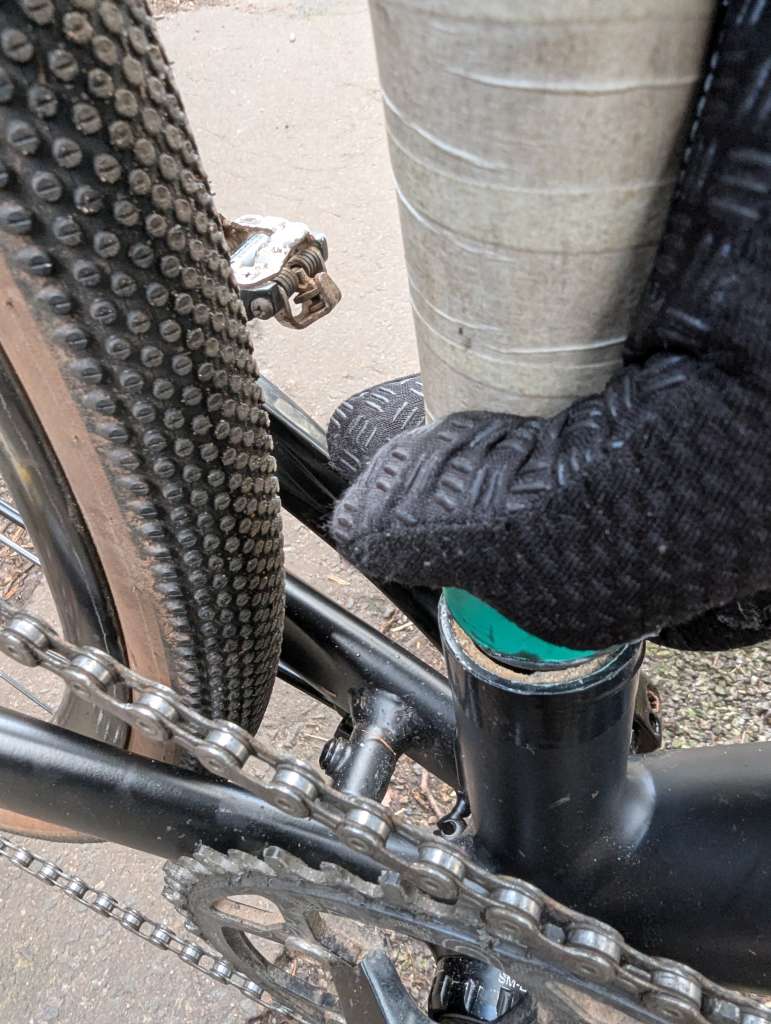 Yep, that's the bamboo having sheared completely where it's bonded into the top of the bottom bracket junction. Reckon it happened going over a speed bump two weeks ago on its first time out. Glad to have it happen now rather than later but now what to do?
1. Contact the company and ask for advice.
2. Wrap it in carbon fibre tow and epoxy and hope for the best.
3. Remove that section of bamboo completely and bond in a length of 31.8mm diameter carbon fibre tube (ideally with enough space internally to fit a 27.2mm dropper).
4. Other (answers below)
Its not very helpful i know but that design doesn't look nearly as sensible as the dound joins of old. Removing an inconsistant thin walled material to fit a given socket seems like a risky enterprise.
I would talk to them for sure how on earth are you meant to know you have enough material left?
That is a shame. It is a pretty / tidy / quick way of making a bamboo frame, but I must admit to thinking it lost a lot of the structural benefits of the original bamboo frame method - longer bamboo tubes, no step changes in stiffness, reduced stress raisers etc.
Wrapping the break in carbon fibre would be an easy fix, and you can still remove and go down the carbon tube route later. How much material was removed from the bamboo for the head tube joints on the TT and DT?
The design is such that the bamboo sits flush with the lug externally, so the amount of material removed is the same as the aluminium.
The older design is better, but more restrictive in terms of tyre size. This is the one I built in 2016 that served me well until I faffed with it too much, in part trying to fix that 'problem'.
[url= https://i.postimg.cc/xdfp4FwN/20170417-145653.jp g" target="_blank">https://i.postimg.cc/xdfp4FwN/20170417-145653.jp g"/> [/img][/url]
Advice from the supplier is to either add a layer of flax or carbon around the break to reinforce it, or do a rebuild on the front triangle. They've not seen this happen before incidentally, and it's entirely possible I was insufficiently careful with my cutting/shaving of the bamboo and introduced stress risers by cutting too deeply.
At any rate I'm inclined to wrap every joint, for peace of mind's sake, and hopefully that way it'll last ten years.
The advice on the jig was to use sandpaper by the way, which seems obvious now, and they offered to send a replacement.