
Why are Pete Scullion’s photographs so great compared to your own trail shot efforts? Is it the subject, the method, or a big pile of kit?
Words & Photography Pete Scullion

Social media has made even good photos quickly forgotten. Only the ones that are truly exceptional stand out, and those photographers who can reproduce the exceptional every time they leave the house are the ones you see lining racetracks and prolific in magazines worldwide. The difference between the pros and the rest of the field is the, often unseen, quantity of work that goes into planning and executing what might well be just a single photo.
No cocktail sausages
Ever since the advent of digital, and certainly phone cameras, photography has become an everyday event. With the rise of social media, a large number of people want to be seen to be doing the good stuff, and for anyone reading this, that’ll mostly be riding bicycles. Anyone who consumes bike-related media will no doubt be familiar with the absolute bangers we see day in, day out from the pros – on both sides of the lens.
Latest Singletrack Merch

Buying and wearing our sustainable merch is another great way to support Singletrack
Is good photography only the realm of the professionals? Can everyone and anyone take a decent photo? Why do we see so much crap? Am I doing it wrong? The main issue here is law of averages – for every banger, even a good photographer may well have some photos that never see the light of day. Quality in this instance is key, whereas quantity is almost irrelevant. One excellent photo is worth its weight in gold.

How you think you look 
How you actually look


What’s needed is to return the focus to quality. Far too many people feel like they should be posting daily on social media, and, to that end, photography is not even the chief component. A separation needs to occur whereby the photo becomes its own thing again. Once all the effort goes back to the photo rather than trying to post some motivational drivel, the quality will return.
Arguably the worst thing you can do is get home after your holidays and post every single overexposed snap you took of your pale legs and cocktails… you may as well have not bothered. Nobody is going to trawl through several hundred distinctly average images.
All the gear and an idea… and a willing victim
So why is the stuff in magazines so good compared to the shots you bring home from a ride? Most significantly, you’re going for a ride and you take pictures while you’re out. If I’m shooting pictures, I’m going to get the best pictures I possibly can and I’ll ride a bike while I’m out. That shift in emphasis makes me plan things differently, and I’m looking for other ingredients than great trails and a nice café.
The first ingredient is the rider. From my experience, you soon learn who can help you get what you need while you’ll have to just deal with what you can get from others. Part of the reason I shoot with Joe Barnes so often is threefold. He’s usually always keen, for one. Some riders think that turning up to a race is enough to warrant their pay cheque and simply won’t come on a shoot. Secondly, Joe is what I’d call an expressive rider. A unique riding style always helps when it comes to photos, and Joe is usually always sideways, loving back wheel or sending dirt flying, all things that assist in getting that extra bit of magic to make a photo happen. Thirdly, Joe makes his own videos and takes his own photos. He’s already got an eye and can visualise what I am trying to do, with the skills to back it up if I need him to ride a certain line in a certain way.

Riders who possess at least two of the three attributes above will be the ones you will see every month in magazines and brand adverts. They’re just easier to deal with even before you’ve started adding location and timings to the mix.
Timing is key and, as everyone knows, the best light is at the extremes of the day. I’m a big fan of dawn raids and sunset recon missions. Both are easier to get out for during the winter as they’re far closer together, though you’re also facing the weather. Sunset and sunrise are also close together in the summer, but at opposite ends of the scale. I prefer a sunrise, chiefly because it’s only going to get brighter, no matter how dead I feel afterwards. Sunrise shoots will test your riders’ commitment big time, however.

Location obviously depends on what you’re trying to achieve. It’s rare that a good shooting location is near both rider and photographer, but anyone who’s out to do the best they can will pick the location for a reason rather than simply convenience. Last-minute call-ups and stipulated locations can often scupper a shoot. Freedom of time is the best way to get the best image, so don’t rush it.
Know your limits
There’s old adage that the best camera is the one you have with you. A fair, if rather stupidly obvious phrase. You can’t take a picture without a camera. What’s key when it comes to equipment is knowing what it can and can’t do. You’re not going to get good shots of birds of prey with a fisheye lens, and you’re not going to get good wide-angle shots with a 400mm prime. Much the same can be said for phones too, as many now have wide, standard and zoom lenses, and you need to know when to use them. I’ve never bought a new lens until I’ve got the measure of the last one I bought – my thinking being that I’d rather have a few lenses I do know how to use instead of a bag full of expensive paperweights.
You can have the rider, the kit, the location and the timing dialled, but light is the most crucial component in all of this. The quantity and quality of light will make a big difference to the end result. With the right lenses, camera, and knowledge of how to use them, you can get good results almost anywhere, but it’s when light is at a premium that phone cameras start to falter. Most phones will run on what’s known as aperture priority. This is where the shutter speed changes automatically to keep the aperture at a certain spot and why you get blurry photos in the woods, because the shutter speed has slowed to allow more light in. It’s also the same reason that when the sun is blasting through the trees, you get a lot of bright light and shadows. In the former case, you might be better off trying to get a pan shot with your phone, using the focus point to track your rider as you take the shot. With the latter, you’re best off with a silhouette.

Once you’ve sorted your rider, kit, timing, location and remembered a spare layer, it’s time to ride. Sadly, something that is great fun to ride might actually be terrible for a photo. That drop that steals your breath might only look like a large root from behind a camera, and that corner you convinced you dragged your bars on might have actually only been ten degrees from vertical. If you’re like me and a four-foot double is pushing the limit, then it’s not going to end up looking like a shot out of Red Bull Rampage. This is also the reason why you get a lot of people riding trails they maybe shouldn’t (for their skill level), because wherever they’ve seen it in a photo, it doesn’t look too difficult and there’s a very skilled rider making it even less so.
Like knowing how to use your kit, you need to be aware of your own limits. Creativity with a photo can offset a large amount of what is just a nice bit of trail, albeit one that’s not particularly spectacular. This is where having a good rider sings, because they can do something stylish off something rather massive and, therefore, everything looks as impressive as it should.
Throwing shapes
The last time I headed out with Joe we opted for the classic Torlundy spot. One of Fort William’s stone-cold classics and one both Joe and I know well. Joe took me to a part of the Witches Trail that I hadn’t bothered with since racing 10 Under the Ben. He knew there was a blind rise in a turn that’s normally a climb, but it helped prove a point. There are essentially three ways Joe could ride this turn: flat out would likely see Joe hit the apex of the turn, aiming for the bank on the exit to use as support, hitting it brakeless and pedalling away. The ‘expressive’ way would be to aim dead centre of the trail and just do a big, filthy cutty in the trail and get the bike sideways to the trail. There’s also the option of just riding the bike up the hill.
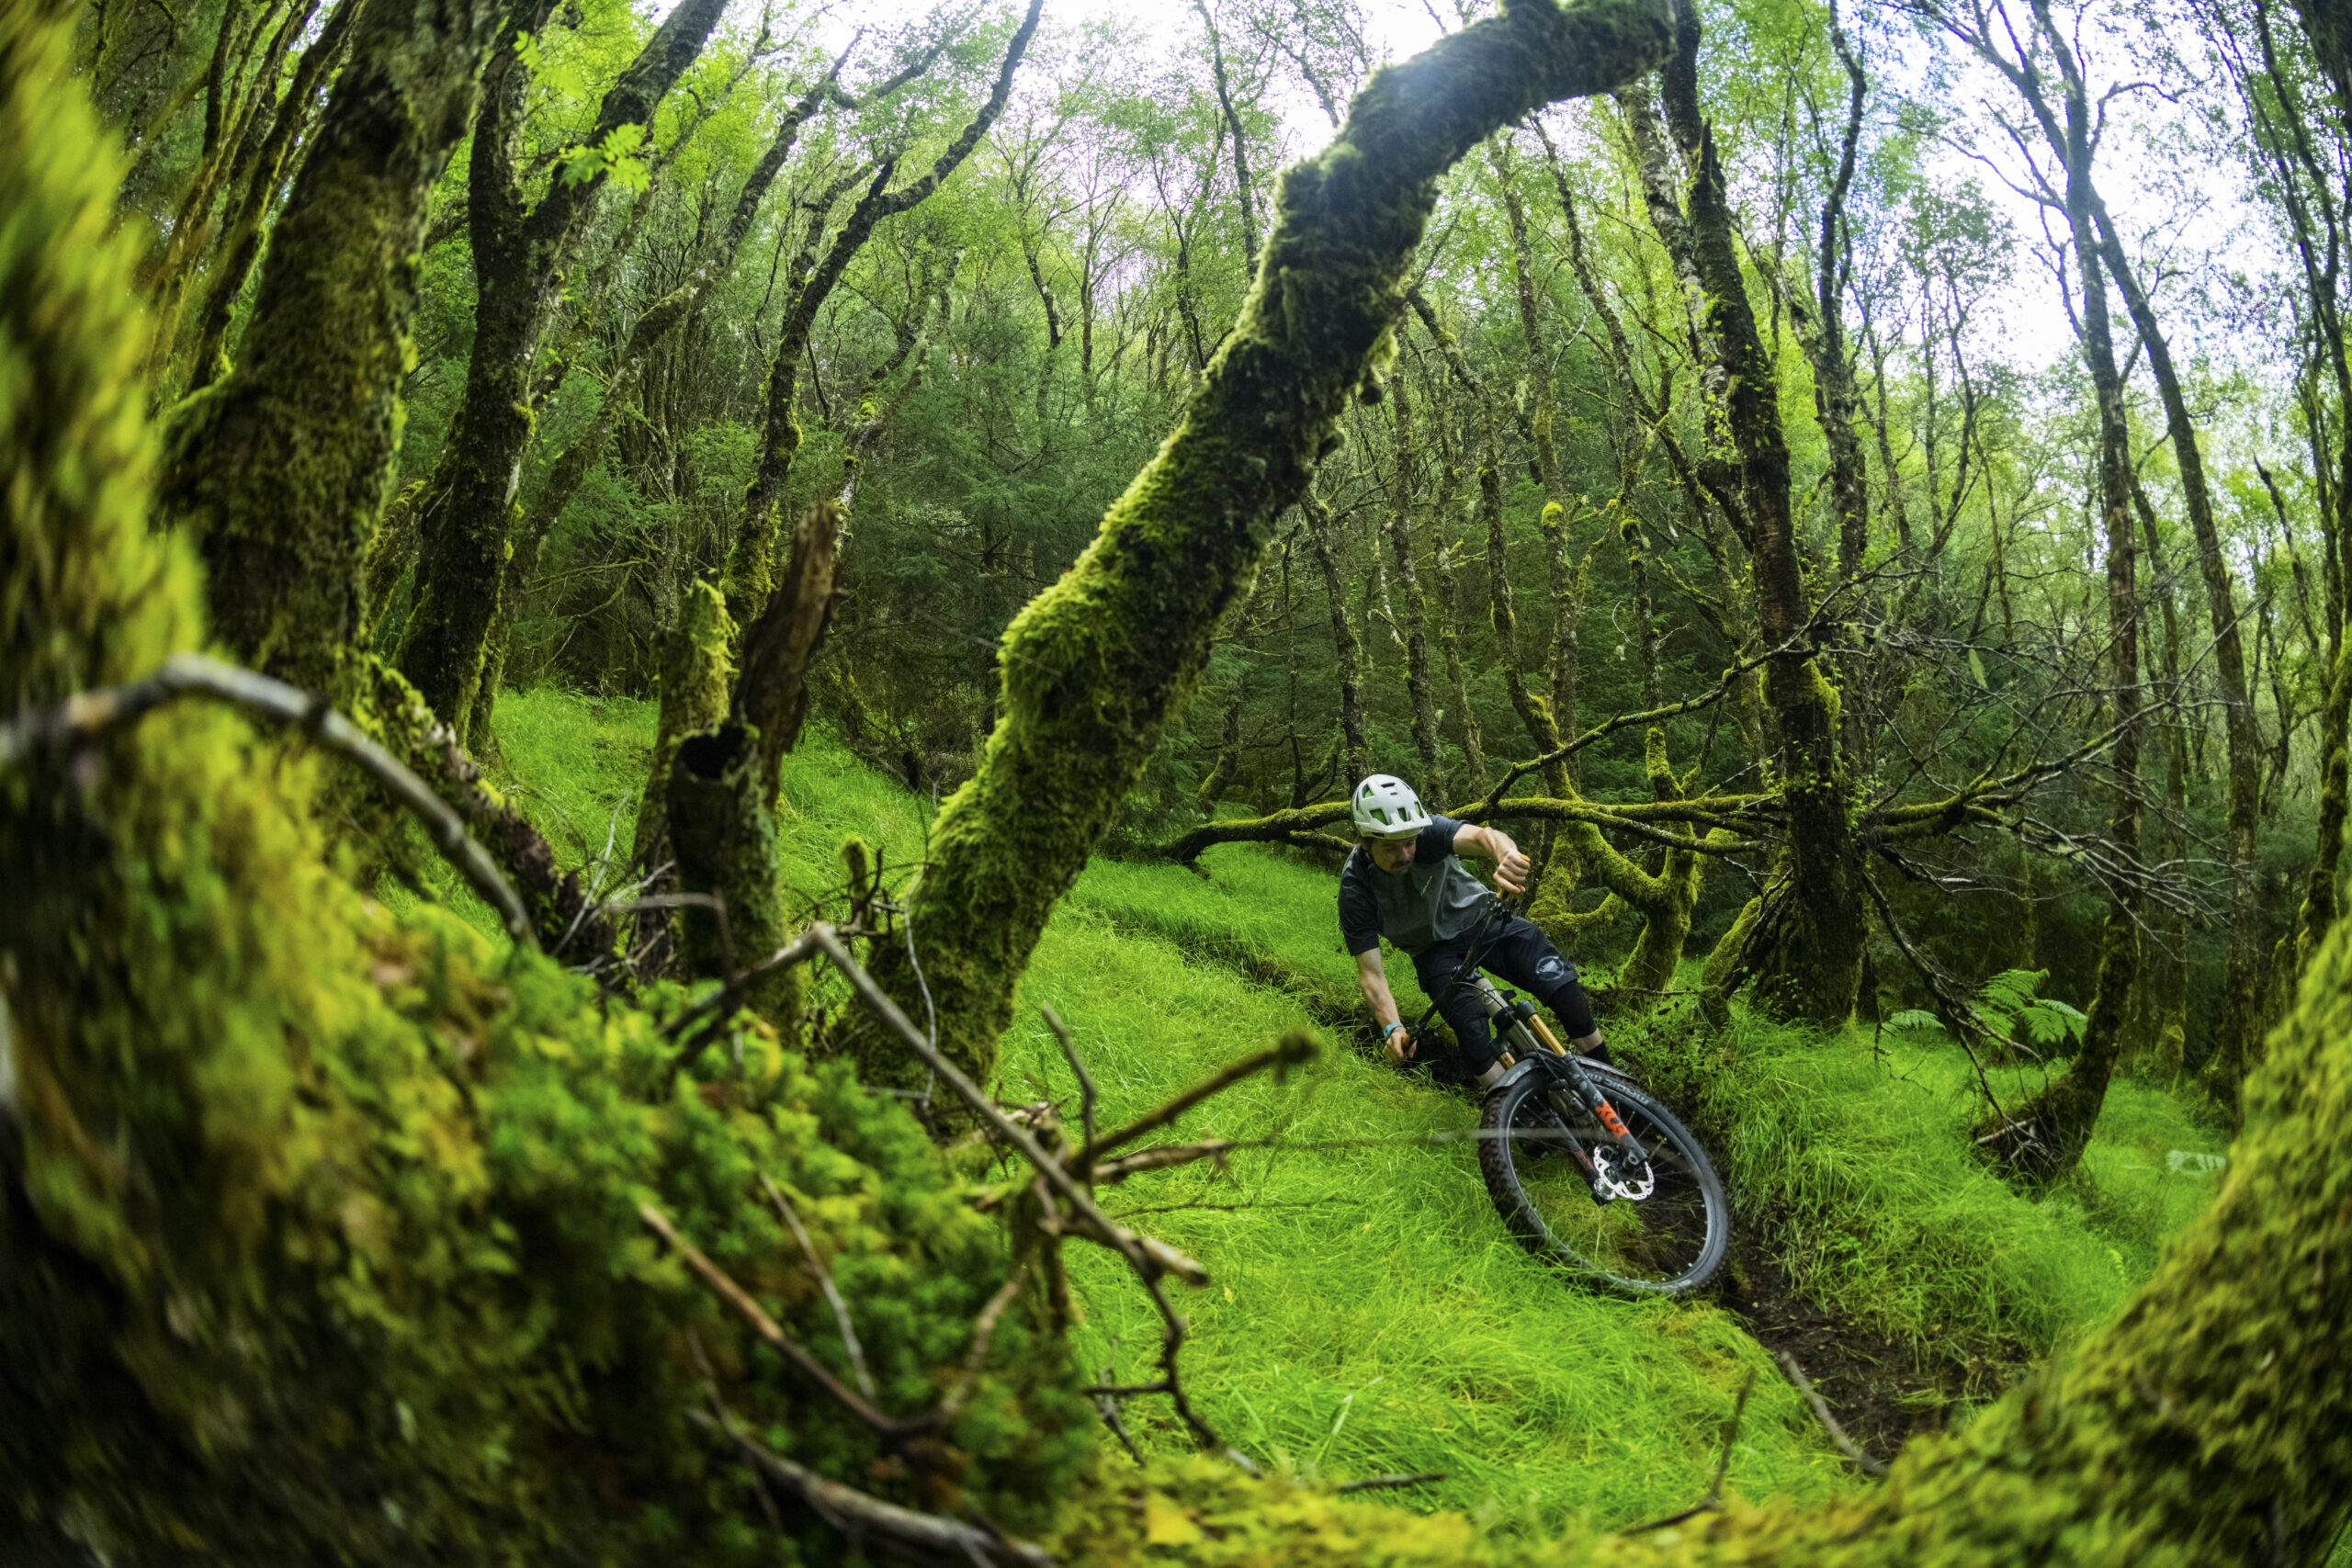


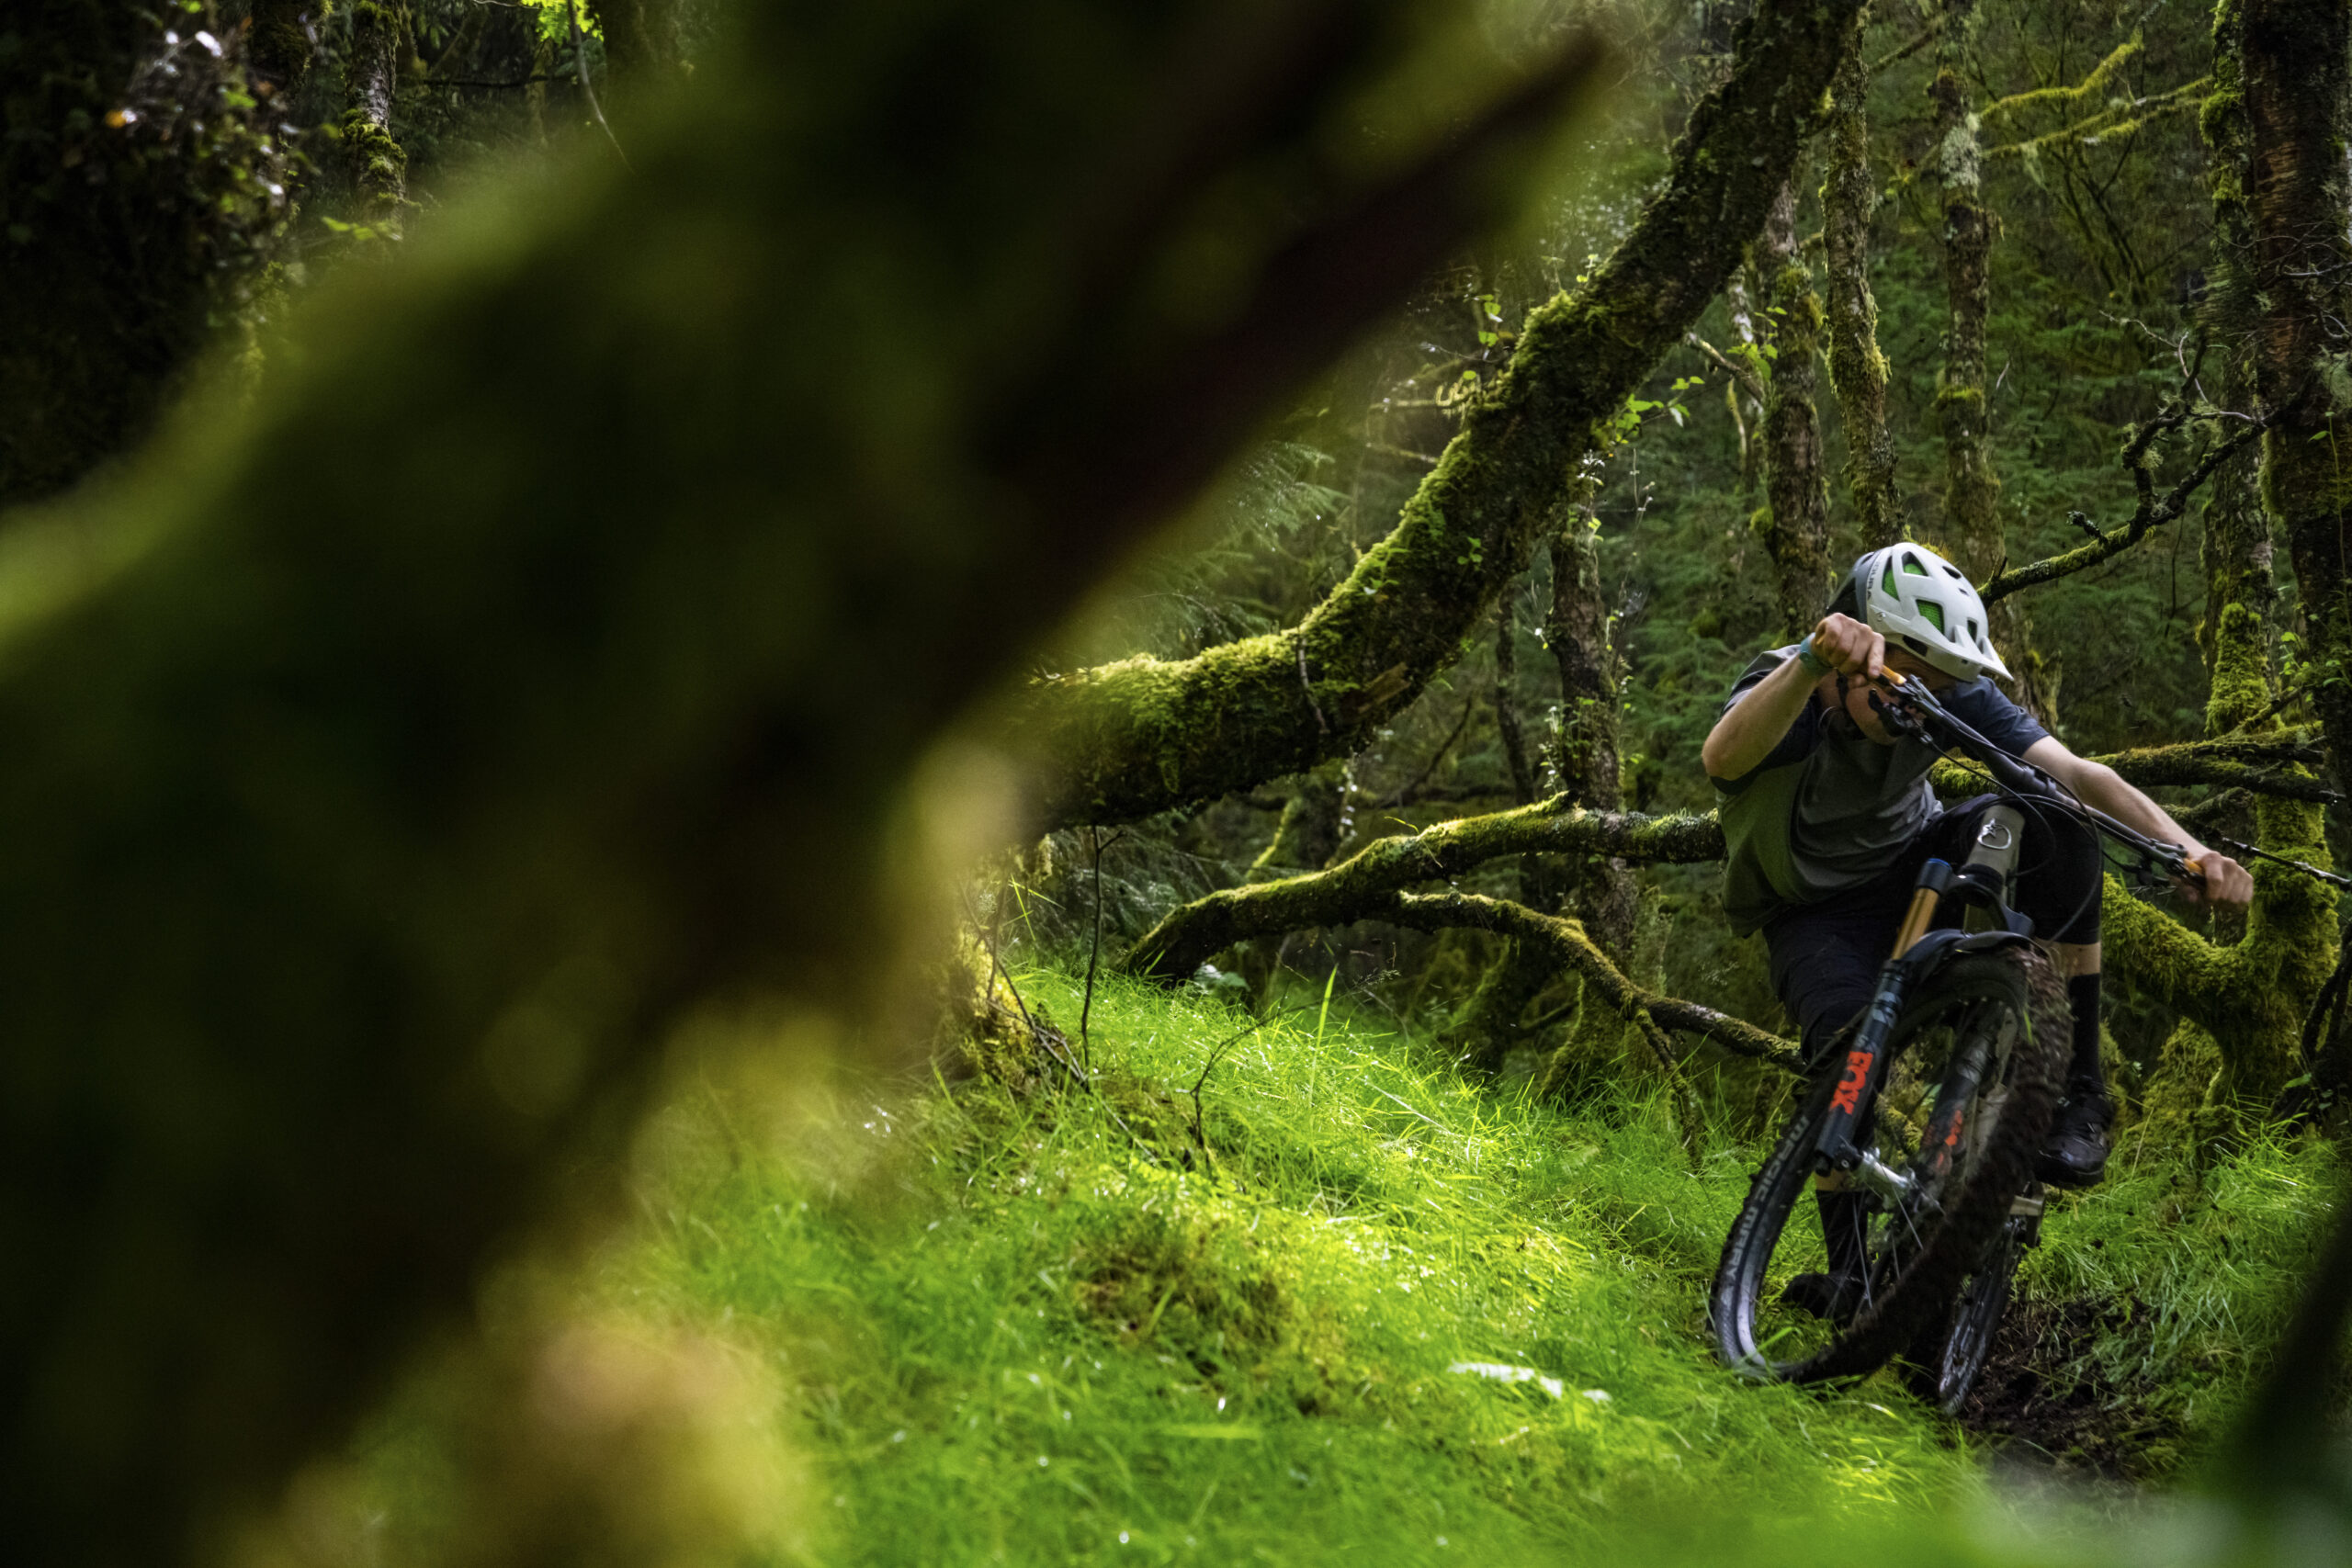


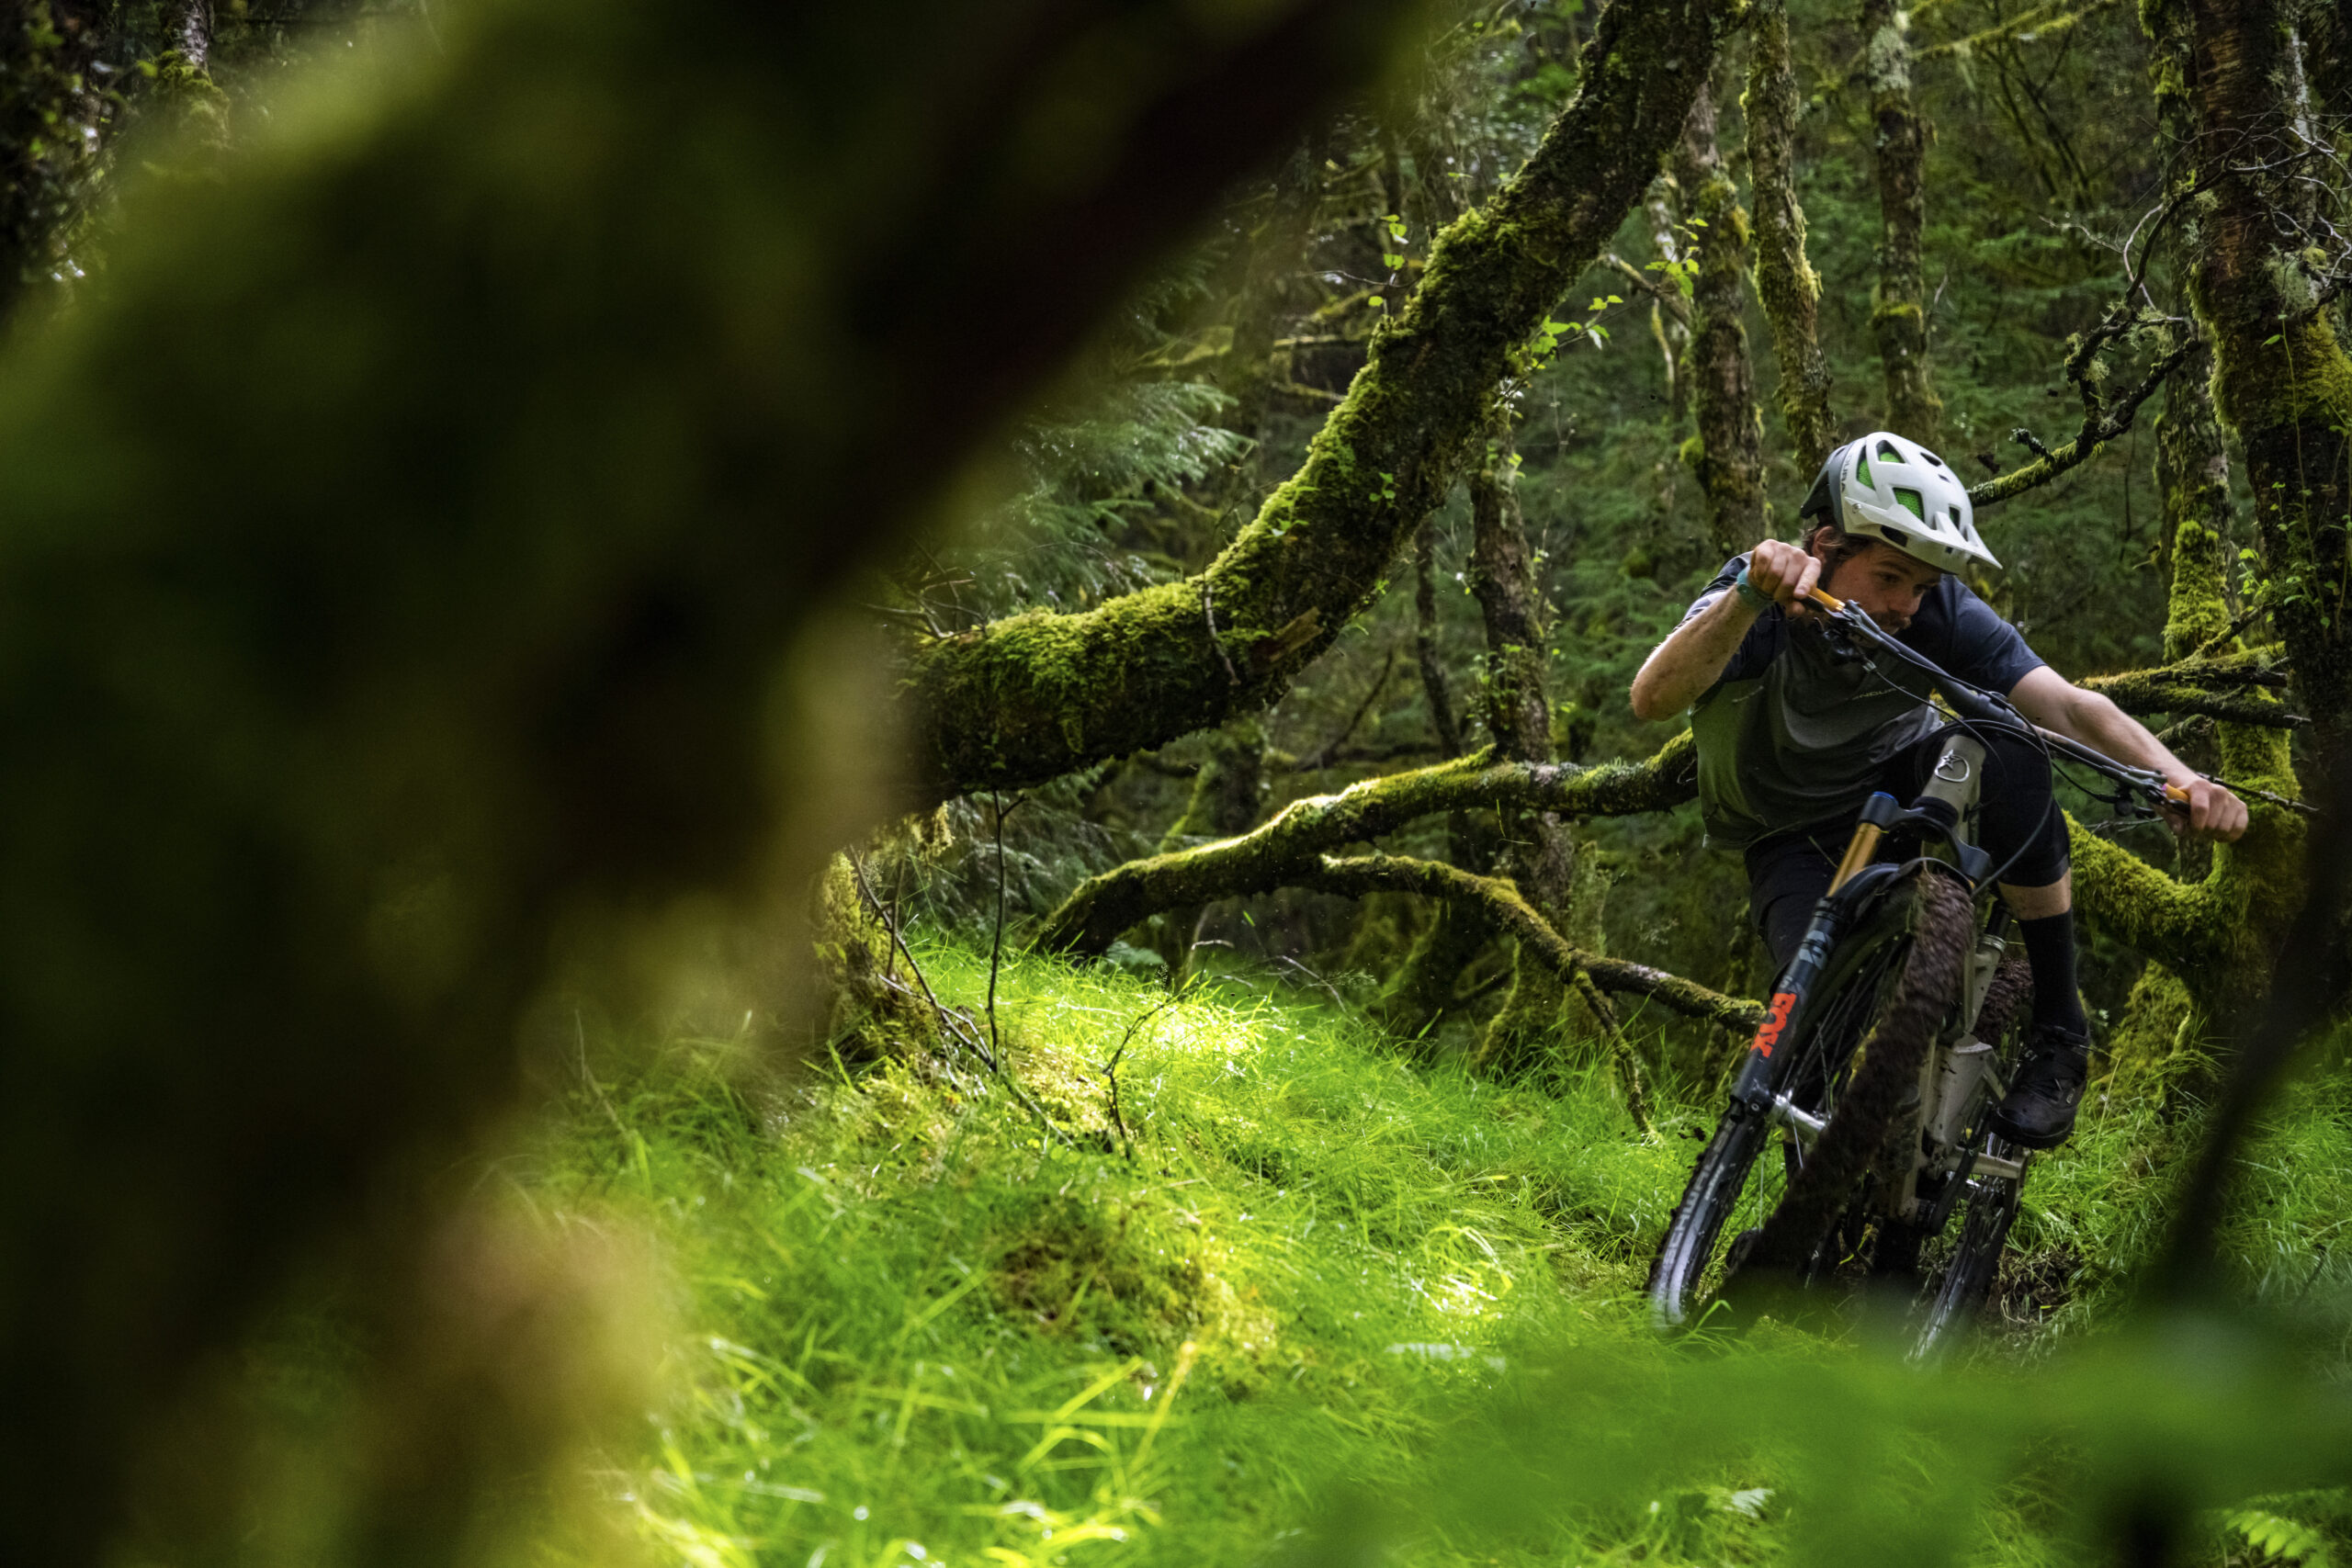
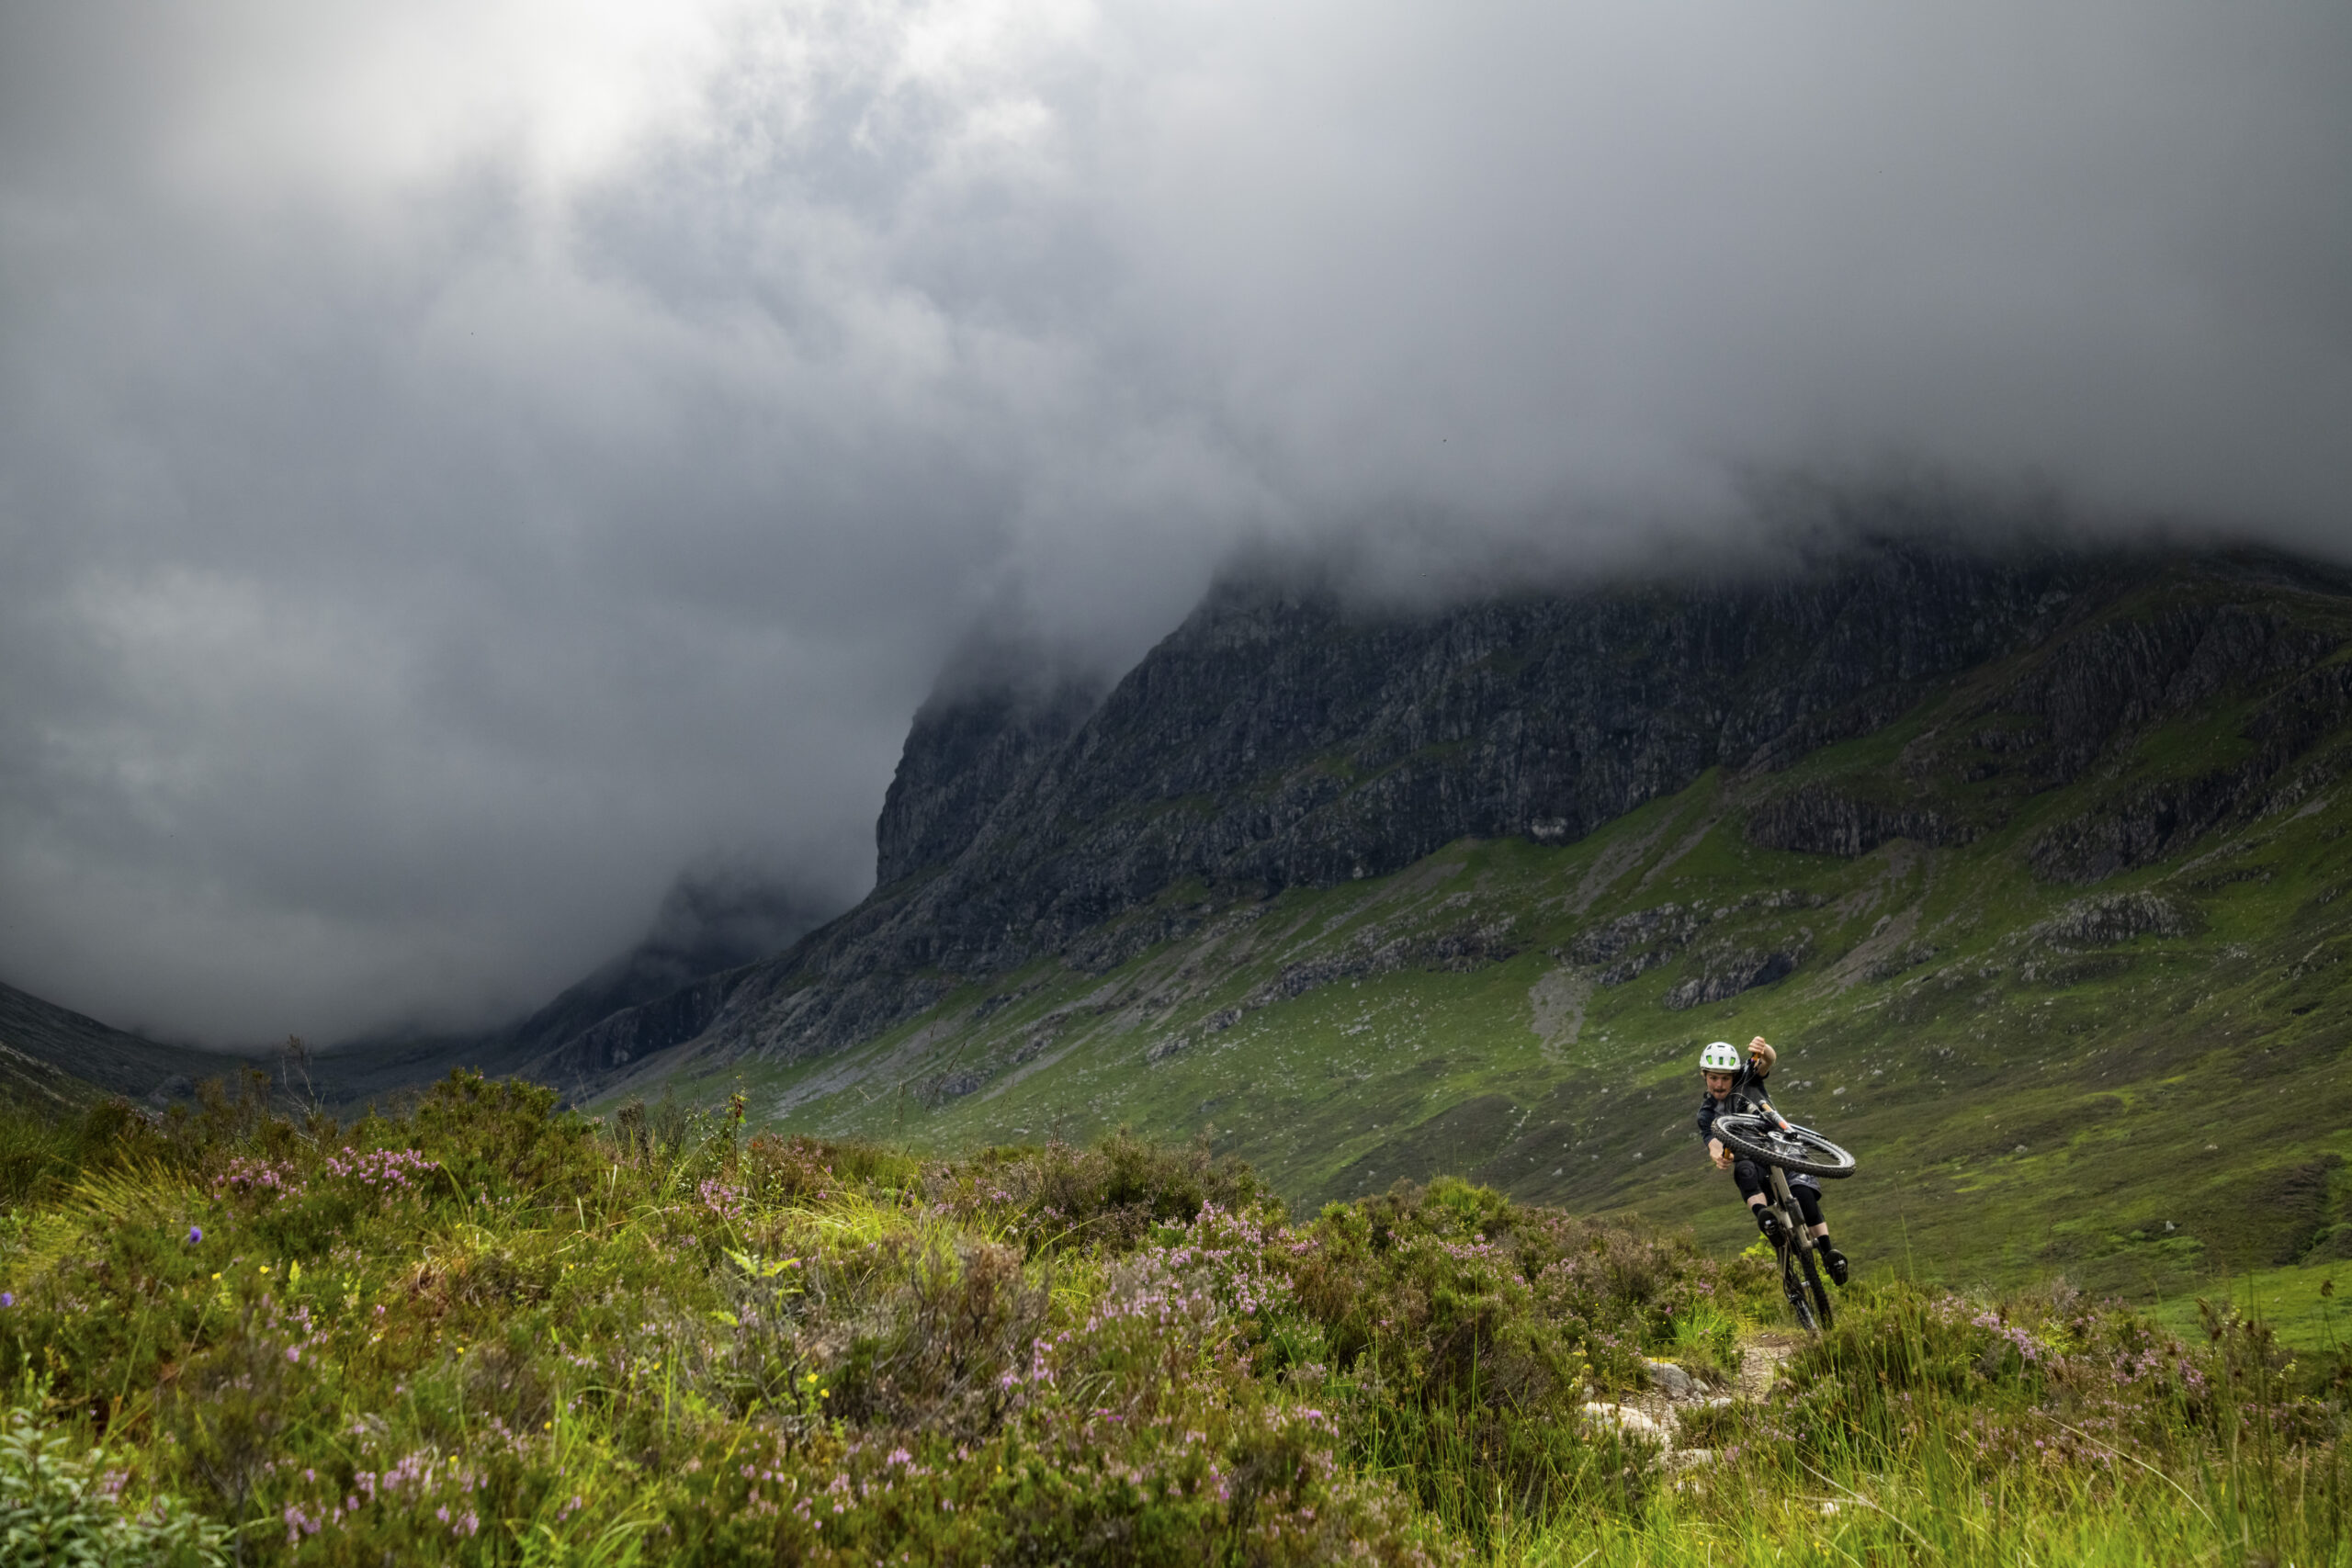
Not the best example of a rider ‘talking’ on a trail, but we found plenty of that in the woods higher on the hill. Joe knows where the sun is going to be on a certain trail, and if the woods don’t work, then we could head up the CIC hut path which gives you cracking views of Ben Nevis. We rode there too, Joe making mincemeat of the massive drainage bars that I walked over. The boy was flying.
It’s deeper into the woods that a rider like Joe can really start to ‘talk’ on the trail. He’s always lets his riding do the talking and when the ruts approach axle deep, he really starts to sing. I don’t think I’ve ever seen someone hit a rut so hard that they have to turn away from the corner following to set up for it. Having shot with Joe plenty of times too, I know he does most of his talking late in the turn, usually after the apex, and that knowledge helps me to bag a cracking shot on the first time of asking. Taking a photo at the apex of a turn means with Joe you’ll miss the best of the action.
Dialling it in
Even if you’ve no Joe Barnes or pro photography kit to hand, there are plenty of tricks you can use to liven up a photo if you have to just accept that you and your mates ride with a style that can only be described as ‘rigor mortis’. Composition is the first rule to go down the pan with a lot of phone photos. Always imagine your frame divided into thirds, so into nine equal squares. You want your subject somewhere on the intersecting lines within this grid. Don’t ask me why, but it works. The Romans were reportedly the first to introduce things in threes, like meals, so maybe it’s their fault. Line your subject up right and everything starts to make sense.
Framing is also a neat trick and you can pretty much use any kind of plant life for this. Usually the more colourful, in the foreground and out of focus the better. The latter makes the colour spread, and hey presto, your corpse-on-a-bike style is lost in a sea of colour. Bonus. Leaves, fences, you name it, you can use it to frame your rider. I find gorse and foxgloves to be the best.
Lead lines are not massively popular in action photography, but imagine you have a rider jumping a fence, and all the appropriate permissions have been acquired. There’s an angry looking sheep in the left of your shot that might steal the show, but you’ve aligned the fence that sits at 45º running from bottom left to top right, and it leads the eye towards the subject, namely, old corpse on a bike.
Water is an amazing thing, and we have an awful lot of it in the UK, which can give plenty of opportunity for reflections. Sometimes the wind drops just enough to allow the water to be reflective. Add in framing and lead lines with good composition and suddenly you’re onto a winner. Nobody notices the cadaver on a bike because you’ve nailed everything else. You even went when the sun was behind the rider and you’re not casting a dirty shadow into your foreground.
Whatever you do, leave the saturation and sharpening dials on Instagram alone. You’re better off not doing anything than using them. They’re what I call the ‘Sarah Connor Filter’. Remember the scene in Terminator 2 where Sarah Connor is trying to get the attention of her younger self in a dream at the playground just before the hydrogen bomb goes off in downtown LA? Remember that washed-out orange glow as she’s shattered by the concussion? That. That is what edited Instagram photos look like and they are awful.
Time and patience above all are key to improving your photography, regardless of light, location, rider and equipment. You’re not going to get a good photo if you just stand below a drop 30 seconds before your pal rides off it. Take the time to think about where the rider will be in relation to you, take a test shot without your rider, move if you have to. Practice does indeed make perfect. Pay attention to when your phone didn’t do what you wanted it to and think why – was the light too flat? Too dark? Too bright? You’ll soon learn the limits of your kit if you pay attention to what’s going on outside your phone, rather than just staring at the screen.
Happy snapping folks.
Pete’s Kit
- Nikon D850
- Nikon 16mm fisheye
- Nikon 50mm f1.8
- Nikon 24–85mm
- Nikon 80–200 F2.8
- Nikon 80–400 f.5.6–6.3. Monfrotto Traveller tripod
- EVOC CP26L and Stage Capture 16L

General tips
Learn how to pre-focus on the spot the rider will be coming through. If it’s too dark for action, then learn to pan with the rider as you shoot.
Learn how to adjust the exposure of a shot while composing it. For example, to bring out more definition in the sky, or to silhouette.
Only in holiday photos do riders look at the camera (and sometimes smile and wave…). For awesome photos, the camera is merely an observer and the rider never looks at it. Riders should be looking where they’re going, not at you.
If you see a great scene opening up in front of you, it’s probably too late, as your pals will have ridden off, or you’ll just get their bums as they come past. Learn to anticipate those moments. Ride ahead whenever there’s a gate stop and set up for their approach.
The human eye is great at compensating for scenes that are too dark, too bright, or both. Don’t be surprised if what you see and what the camera shoots are wildly different. Use that light and shade to your advantage and work with it.
Always be aware of the position of the sun. Photographer shadows in the photo are a no-no, but then if you’re shooting into it, you might get an unintentional silhouette. Don’t be afraid to ride trails the ‘wrong’ way if the light suits it better. You’re freezing a moment for a still photo, not making a ride guide or documentary.
Make sure your willing model always gets a decent photo out of it (for their own Instagram/Facebook or mantlepiece) even if it’s not one you’re after from the shoot. They might consider coming out again if so.
Some top tips for phone photography
If you plan to try to shoot a fast rider with just your phone then the above rules still apply, but there might be more to catching Sam Hill in action at an EWS while you stand trackside. Fast riders will position themselves consistently in a given trail situation. A rider like Steve Peat will carve a berm in a fast, smooth arc, making it easier to get that kind of shot. He will also tend to squash a jump, so you don’t need to correct for air time as much. A rider who a squares off a turn, or looks for an inside line wherever possible, will require you to have a similar appreciation of their style to get the best from your photo. Study your subject in advance and you’ll have a better chance of knowing where they’ll be when they come hurtling towards you.
Should you be adamant that you’re going to get the shot on the day with your pals, let them know ahead of time that you might want them to ride a certain section of trail multiple times. Maybe even mention it before you’re there and everyone is cold, tired and hungry. Some riders might even be more than willing to help you get the photo out of your head and into pixels.
If you’re not able to drag a pro rider out with you to get your shot, then having your rider square the turn rather than riding round the fast, smooth line will give them a more dynamic body shape, for the most part. Or as much as a good rider will have a certain shape to them, pay attention to where your pals look good on a bike. Everyone looks good somewhere, and you can tailor your shot to them if you can find the spot that works. If your friend looks recently deceased then you may just have to go for the aforementioned small rider, big sky shot.
Working with ‘proper’ cameras
What do all those dials do? Understand how your camera works, inside out, before you consider ‘needing’ any new and fancy gear.
Experiment with settings, even if you don’t have a subject. Learn what time the shadows play on the trail and when the perfect light hits the hills behind. BC legend, Sterling Lorence shot hundreds of empty (slide) photos of the North Shore, noting the best settings and shooting conditions before he ever got a rider to ride for him.
Learn to balance the eternal compromise of the effects (good and bad) that focal length, aperture, film speed and shutter speed have on each other. It’s a compromise, but you can always choose which end of the Venn diagram you want your shot to sit in.
Never underestimate how fast a good rider is. Shoot fast, anticipate where they’ll be and make sure your shutter speed and focus can keep up!
Consider where your photos are ending up. An Instagram pic has lower definition needs than a double-page magazine spread. Higher ISO numbers might be worth the trade-off in quality if it means you can get a crisp shot in the woods.