
[wcm_nonmember] This is an extended excerpt of the full article. Logged in users (It’s free to register!) can view the complete feature. [/wcm_nonmember]
The plan was relatively simple. It went something like this;
- Step 1: Finish jobs in early August
- Step 2: Trade in car and buy sweet camper van
- Step 3: Book Chunnel ticket
- Step 4: Spend two months travelling Europe while eating lots of food, drinking lots of coffee, beer and wine, and riding sweet mountain bike trails
My wife and I had been thinking about this trip for a while. We’d notified our respective workplaces when we’d be finishing up work, and we’d also purchased our one-way flight back to Australia, so the trip had its bookends. We just needed to fill in the middle bits.
Then we found out about insurance.
Latest Singletrack Merch


Buying and wearing our sustainable merch is another great way to support Singletrack
Turns out that as a couple of Aussies living in the UK with only a year or two’s history on their British driving licenses, we’re not particularly favoured by insurance companies – especially if we wanted to buy a commercial vehicle. In fact, the first quote I got for insurance on a second hand Volkswagen Caddy was £4800. I am not kidding.
With August fast-approaching, we scanned the internets for other *ahem* more affordable options. With our limited savings, we couldn’t afford to buy a ready-to-travel campervan – that option was definitely out. Converting an MPV rather than a commercial van was a potential solution to our campervan desires, but we were still having the same trouble with ridiculous insurance quotes for Japanese imports like Mazda Bongos and Nissan Serenas. And by the time we added on the cost of things like insulation, curtains, a bed, and all that other crap you need to live comfortably inside a vehicle, we were basically looking at nine weeks of fasting. With Italy on our itinerary, there was no way I was going to let that happen.
“Camping!” I proposed to my wife Suzie with convincing enthusiasm. “We’ll borrow a tent, some sleeping bags, mats. You love camping right?“
Suzie does love camping, as do I. But we really wanted to do the campervan thing. That’s what we’d envisaged the whole time. And could we really camp comfortably for nine weeks straight through a European summer?
It was kind of a rhetorical question though. As far as I was concerned, our bank account was going to make the decision for us.

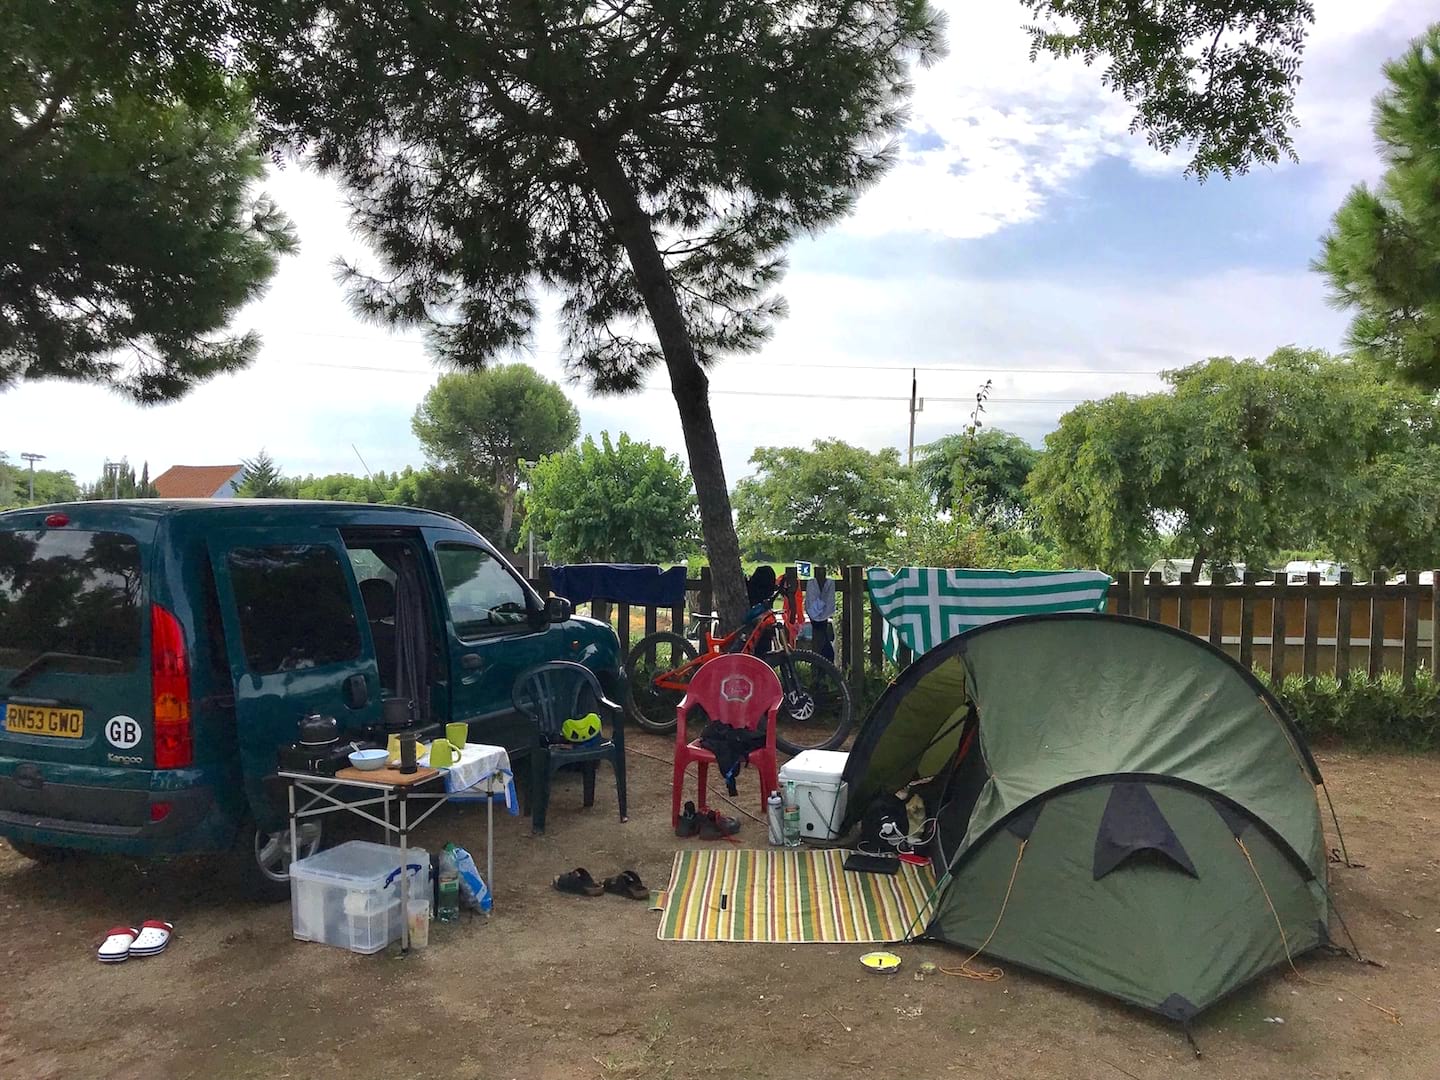
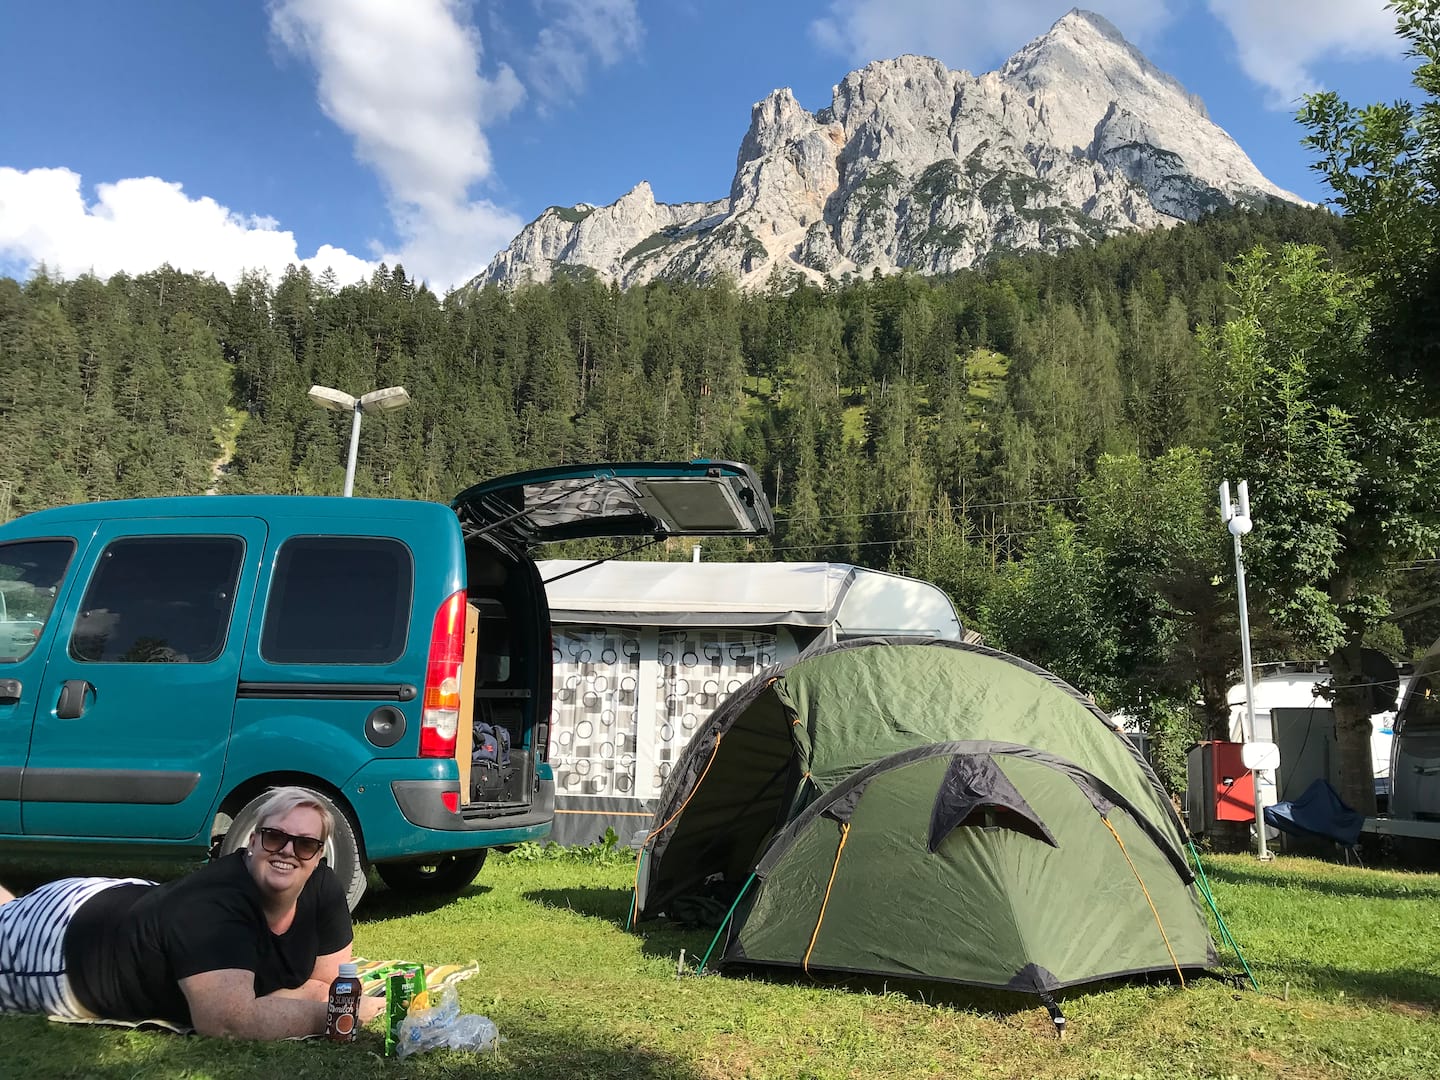
And so we set on adapting our current car – a 2004 Renault Kangoo that did not have air conditioning.
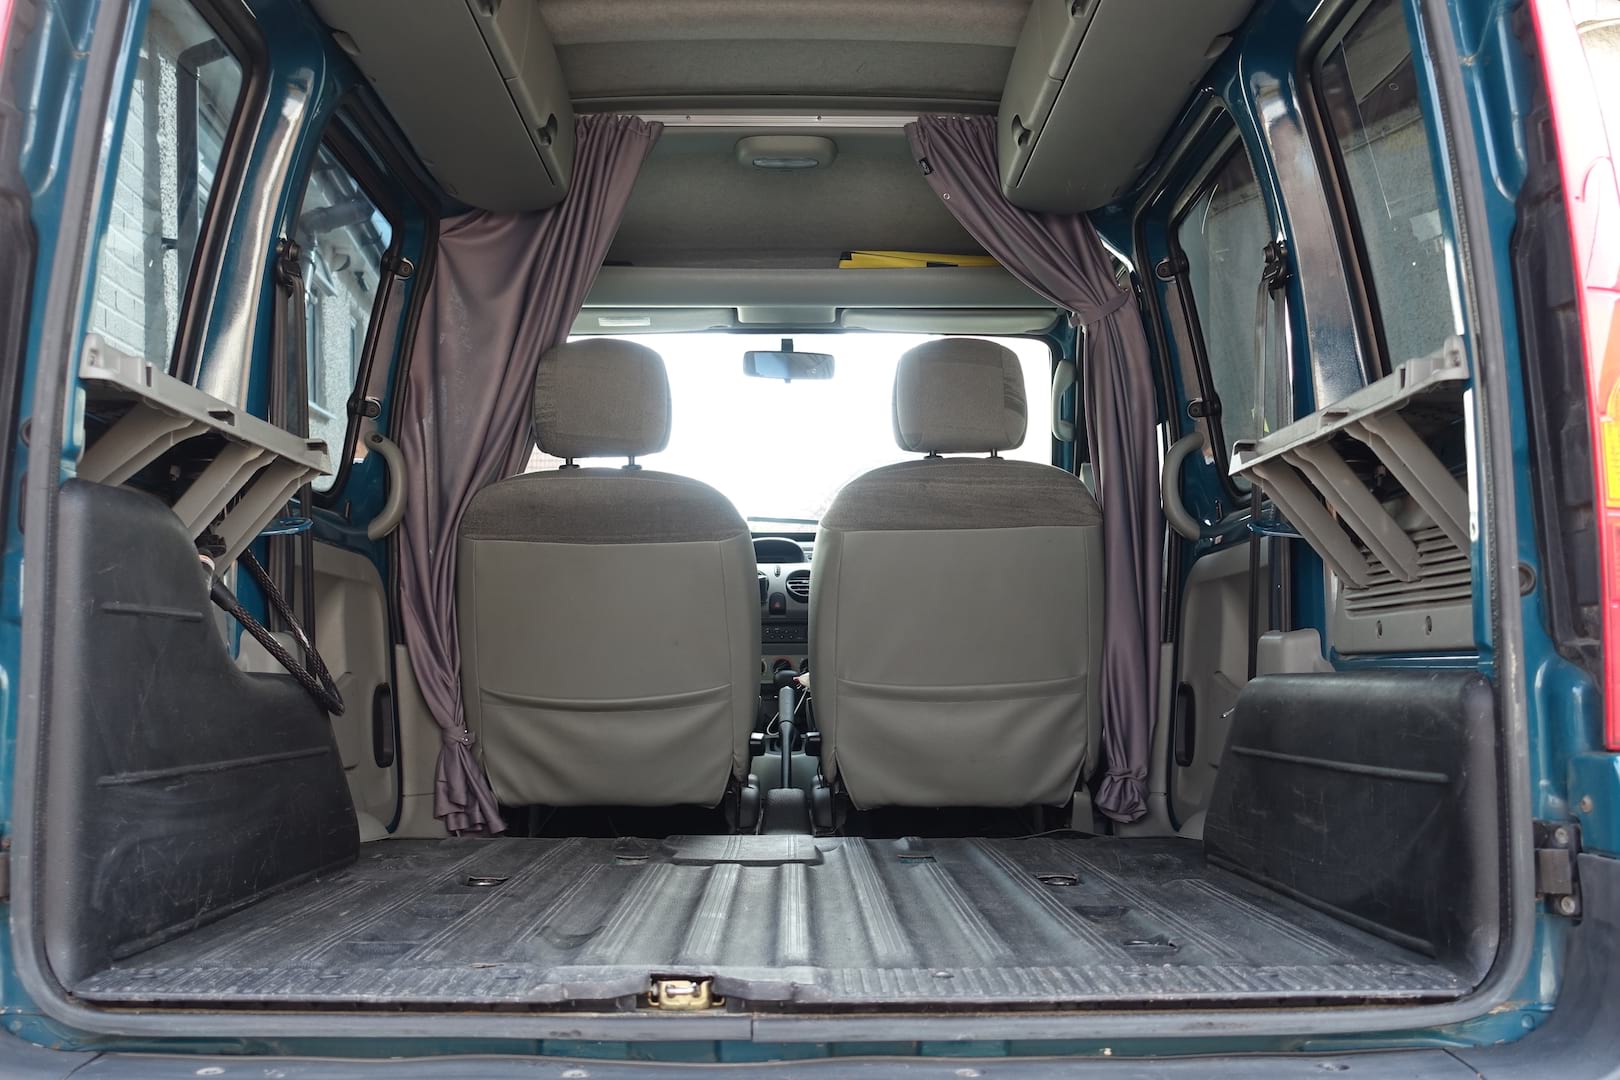
We’d owned the Kangoo for a couple of years, and it had proven to be a brilliant little van in that time. It had a fold-up back seat that provided loads of room in the boot for carrying bikes, along with a nice big tailgate for sheltering under when it was pouring with rain. The inside of our Kangoo was all hard plastic, making it easy to clean out all the mud and crap that accumulates after a weekend of wet-weather mountain biking.
Though it was too small to use as a dedicated campervan, we were ok with the idea of driving it around Europe for a couple of months and camping along the way instead. Except for the no-air-conditioning thing. Guess we’d be using good ol’ fashioned Yorkshire Air Conditioning™ (read: winding the windows down).
The only thing I was nervous about was having an expensive bike sitting in the back of it. The car is safe enough, but with the large windows providing 360° panoramic views into the boot, it wouldn’t take a detective to spot a colourful and expensive pushbike inside.
And so with only a fortnight before our scheduled departure date, we set out to make some modifications to the Kangoo to get it road trip-ready.
Having since completed our trip, and having had a cracking time doing so, there are plenty of lessons that we learnt along the way. Such as how not to drive a car on a narrow mountain pass (Italy), why air conditioning in a car is actually a great idea (Spain), and if you’re going to stop your car for one animal, be prepared to wait for the entire zoo to follow (Portugal).
With that in mind here’s a look into the modifications we made to the Kangoo to get it ready for our trip. This isn’t a fully fledged ‘how to’ guide, but rather a list of helpful tips and pointers we picked up from our experience of living out of a car for nine weeks straight, which you might find useful for your future road trip adventure.
Enjoy!
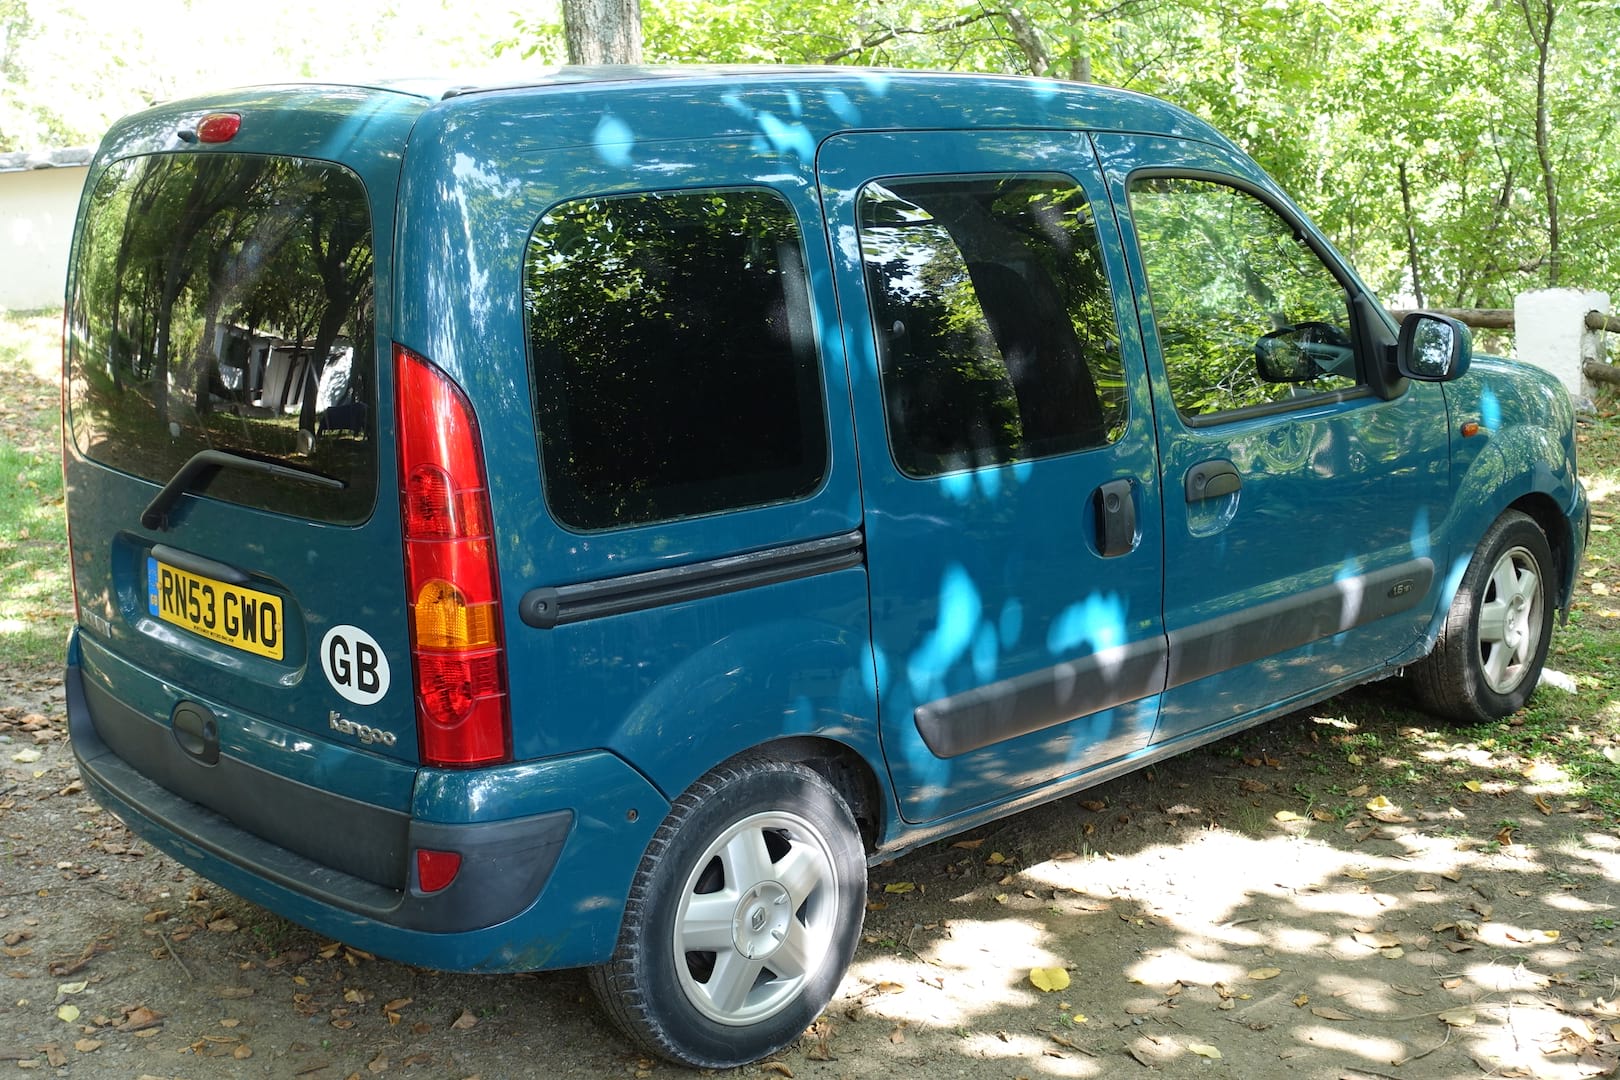
1. Tinted Windows
To address my main concern about the Kangoo’s greenhouse impression, we decided to get the windows tinted. This would hopefully provide a bit more security for our stuff in the back of the van, while also giving a bit more protection against the sun.
We went for the blackest tint you can possibly get for the rear five windows, and it’s basically impossible to see through them, unless it’s at night and there’s a light on inside the car. We got the darkest tint you can legally get for the two front windows and windscreen, which is decent but nowhere near as blacked out. Even with the tinting, I didn’t have any issues seeing out the windows while driving, which is kinda important, especially when you’re on the wrong side of the road.
I’m pretty happy with the results, and I reckon it looks swish too. I think the full job cost about £200 or so, and it was done in an afternoon.
2. Maximising Interior Space
To give us a bit more room in the Kangoo, we removed the back rear seats completely. Admittedly they don’t take up a lot of room when folded up, but we wanted to maximise every bit we had. All it took was a spanner and six bolts to remove, and the whole assembly popped out of the car.
With the back seats removed, there’s enough length in the car to lay down a sleeping mat and bag – if we were stuck in a pinch. There was also now enough length in the car to fit the bike in more easily, which brings me to my next bodgy tip…
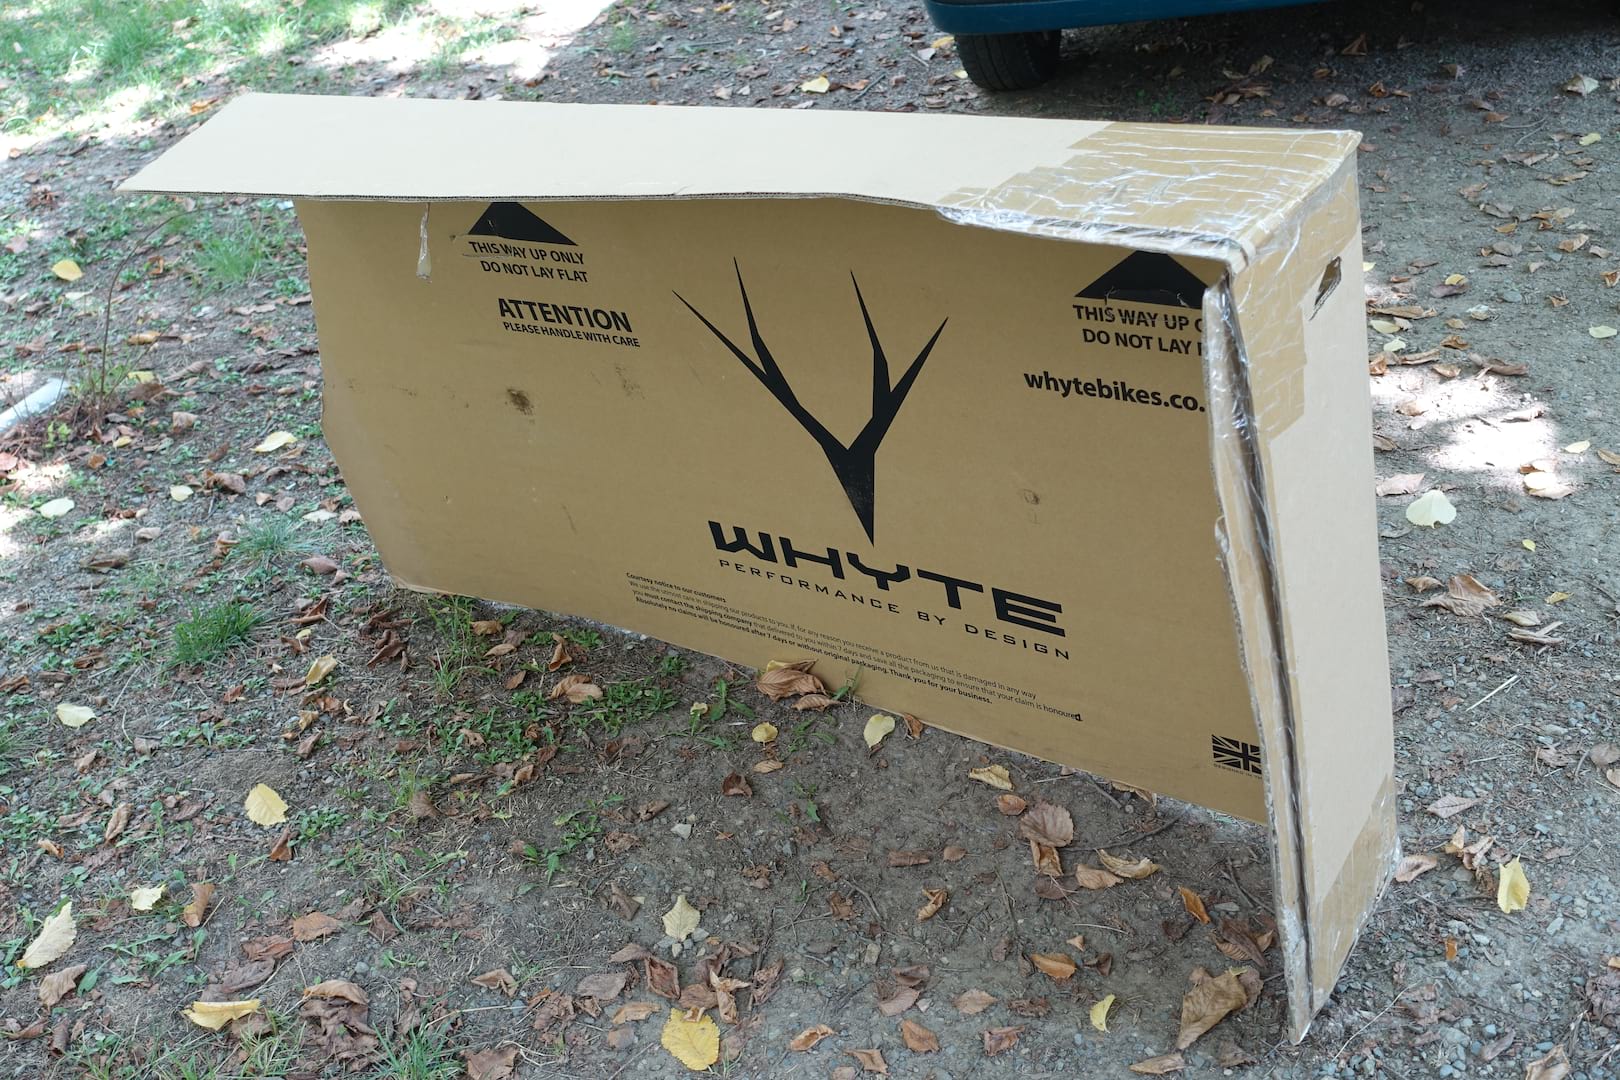
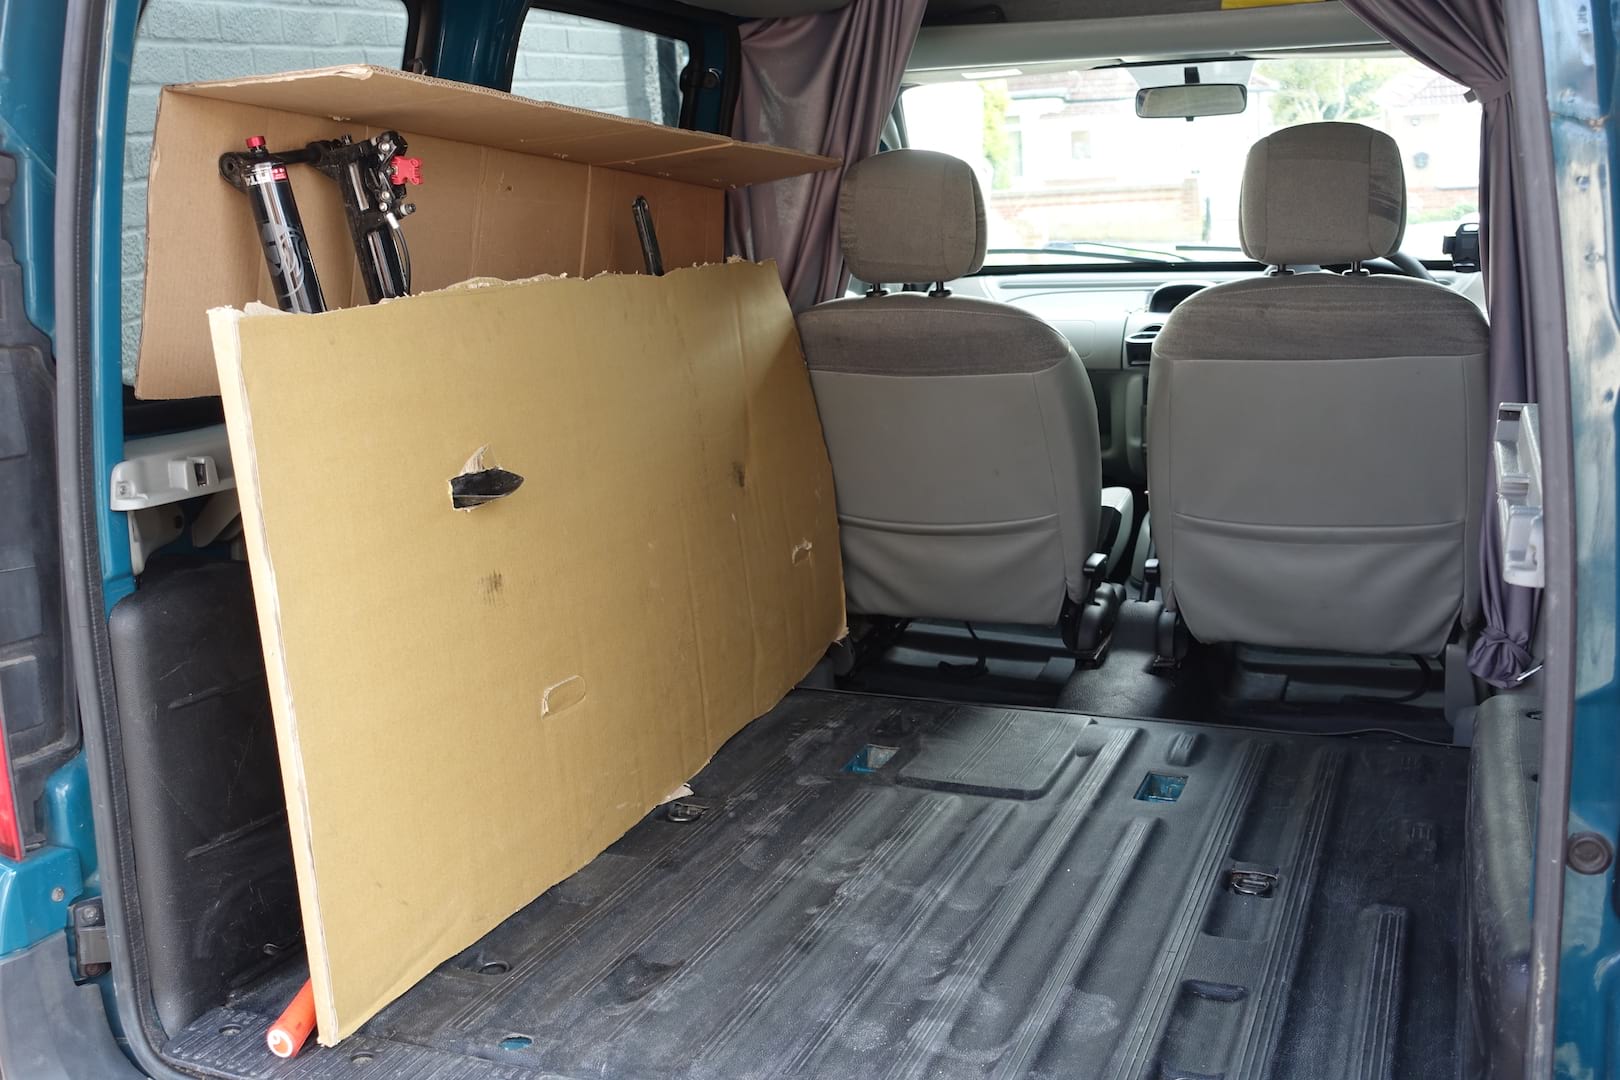
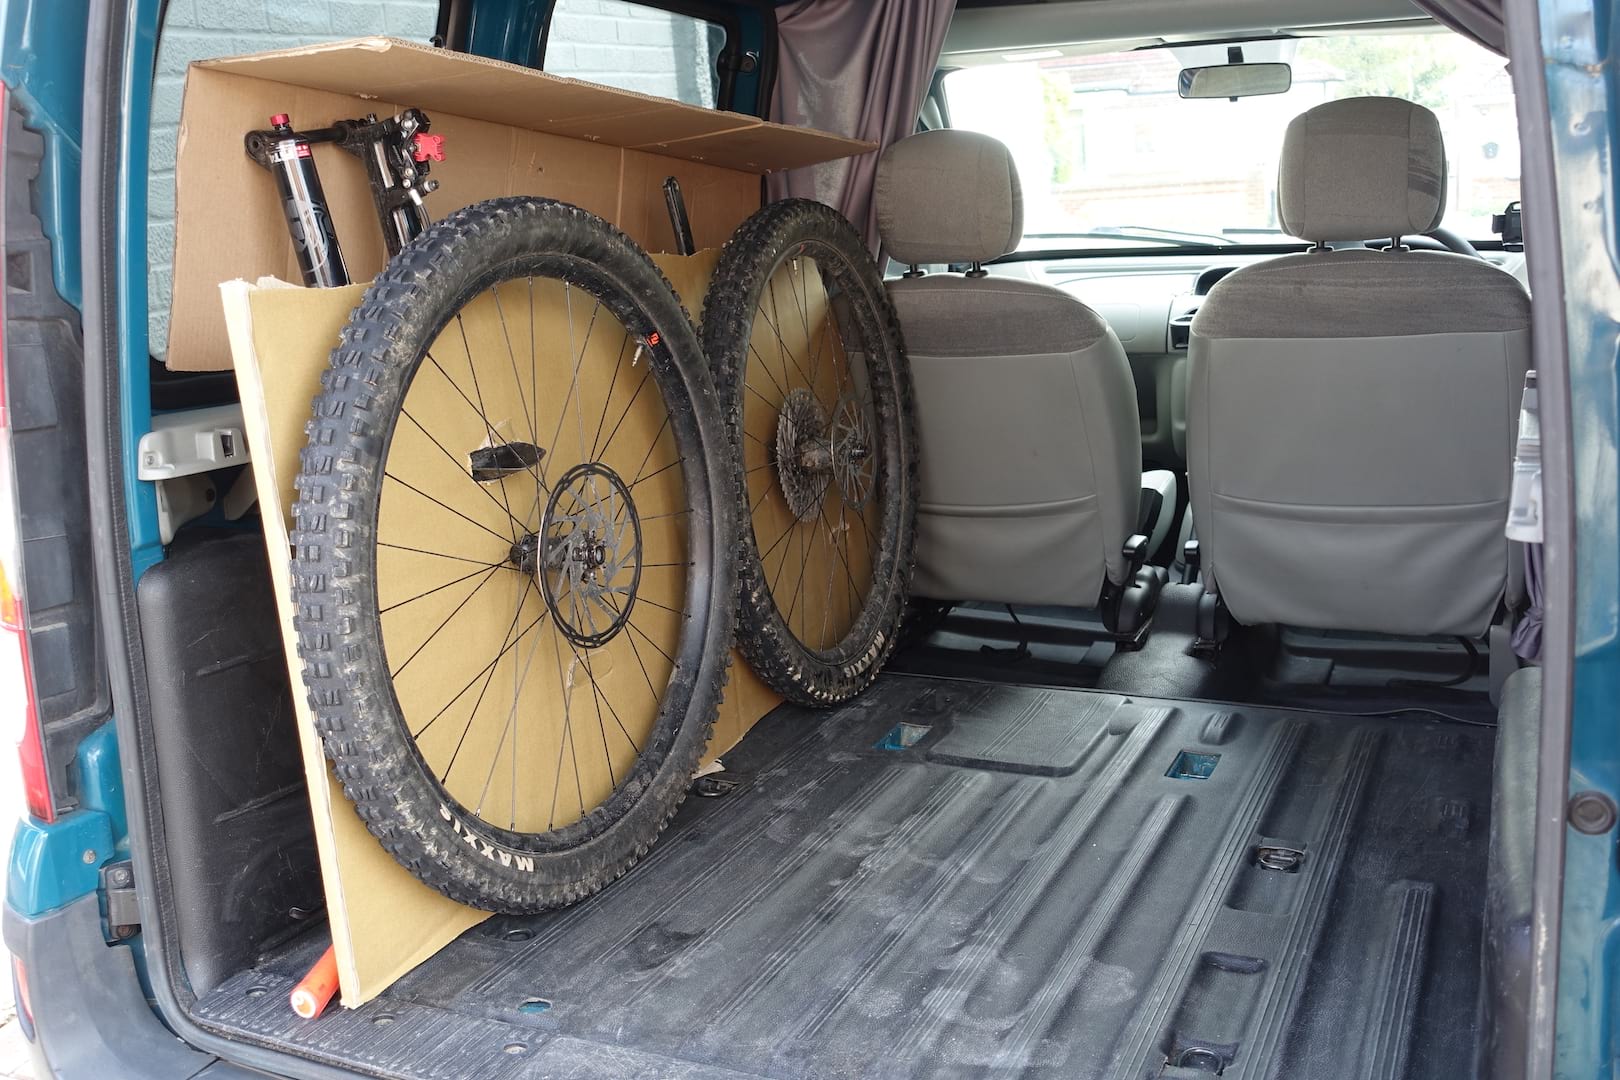
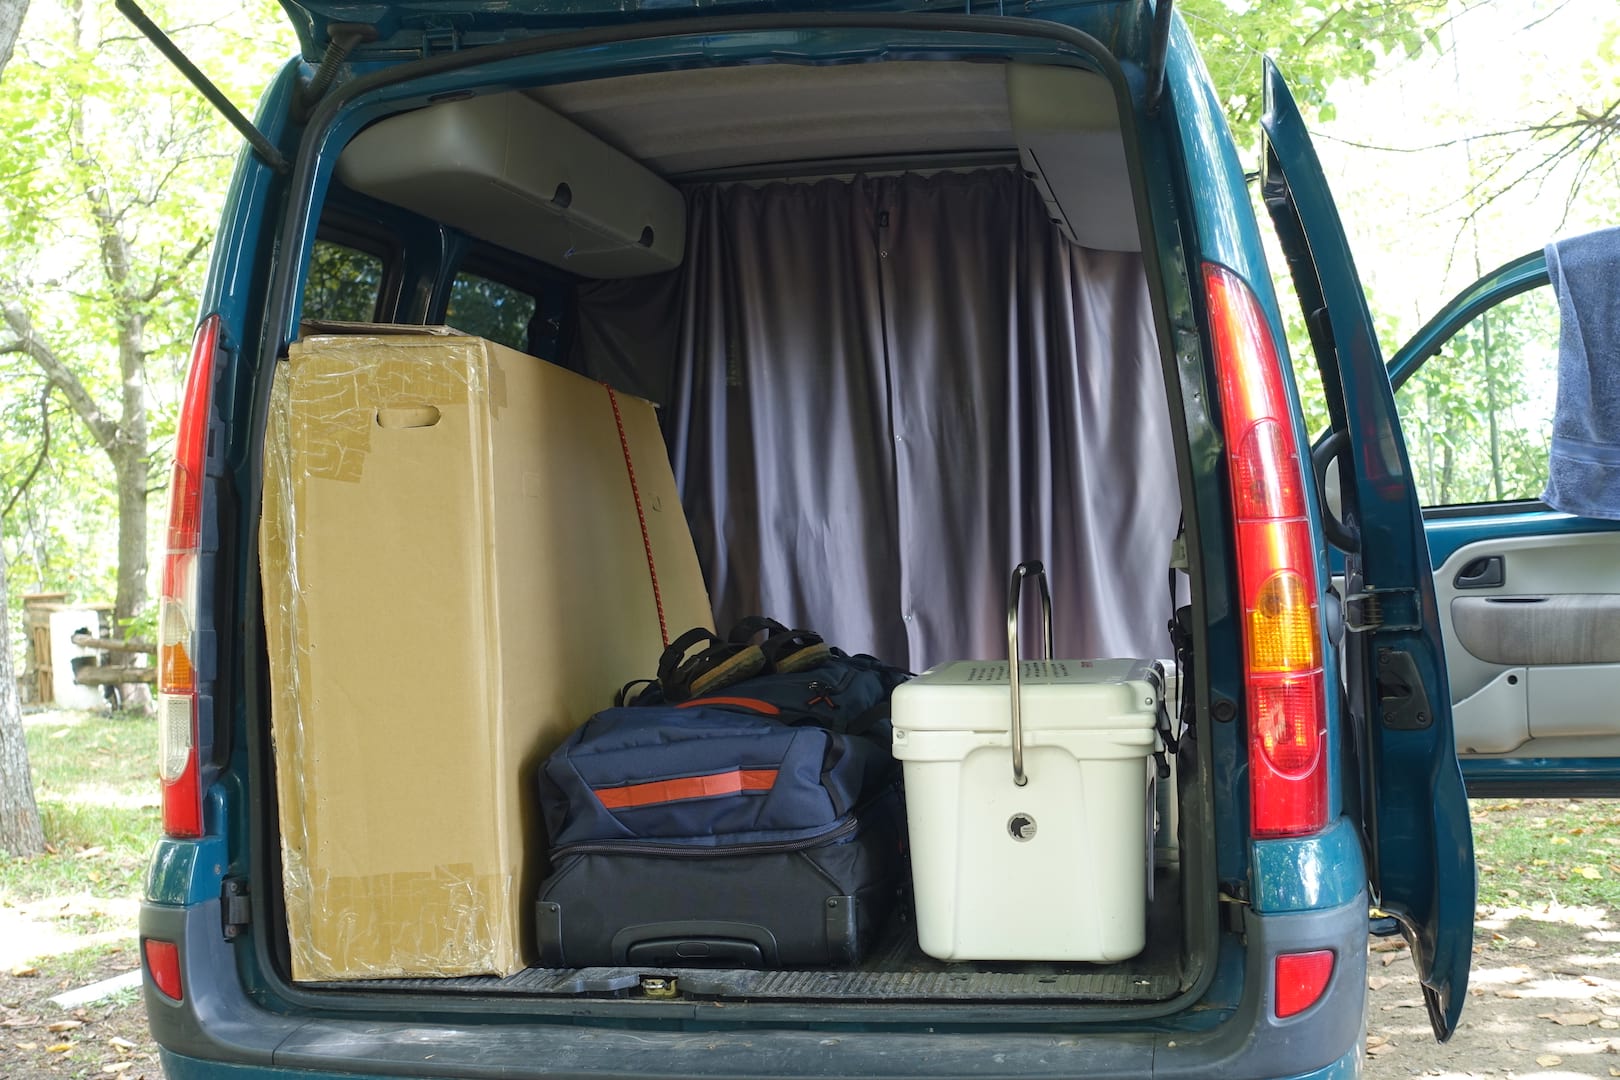
3. The Custom Bike Box
Even with the tinted windows, I was keen to keep the bike out of sight as much as possible. I also wanted to shield it from the rest of our crap to avoid any silly damage. A disc rotor can be surprisingly easy to bend with the right (wrong) force applied, but it’s also easily avoided if you take care with how your bike is transported.
To do so, I cut out a section of a bike box that would work as the main cover for the stashed bike. Oh, logos go on the inside of the box – don’t need to give more clues for those wandering eyes!
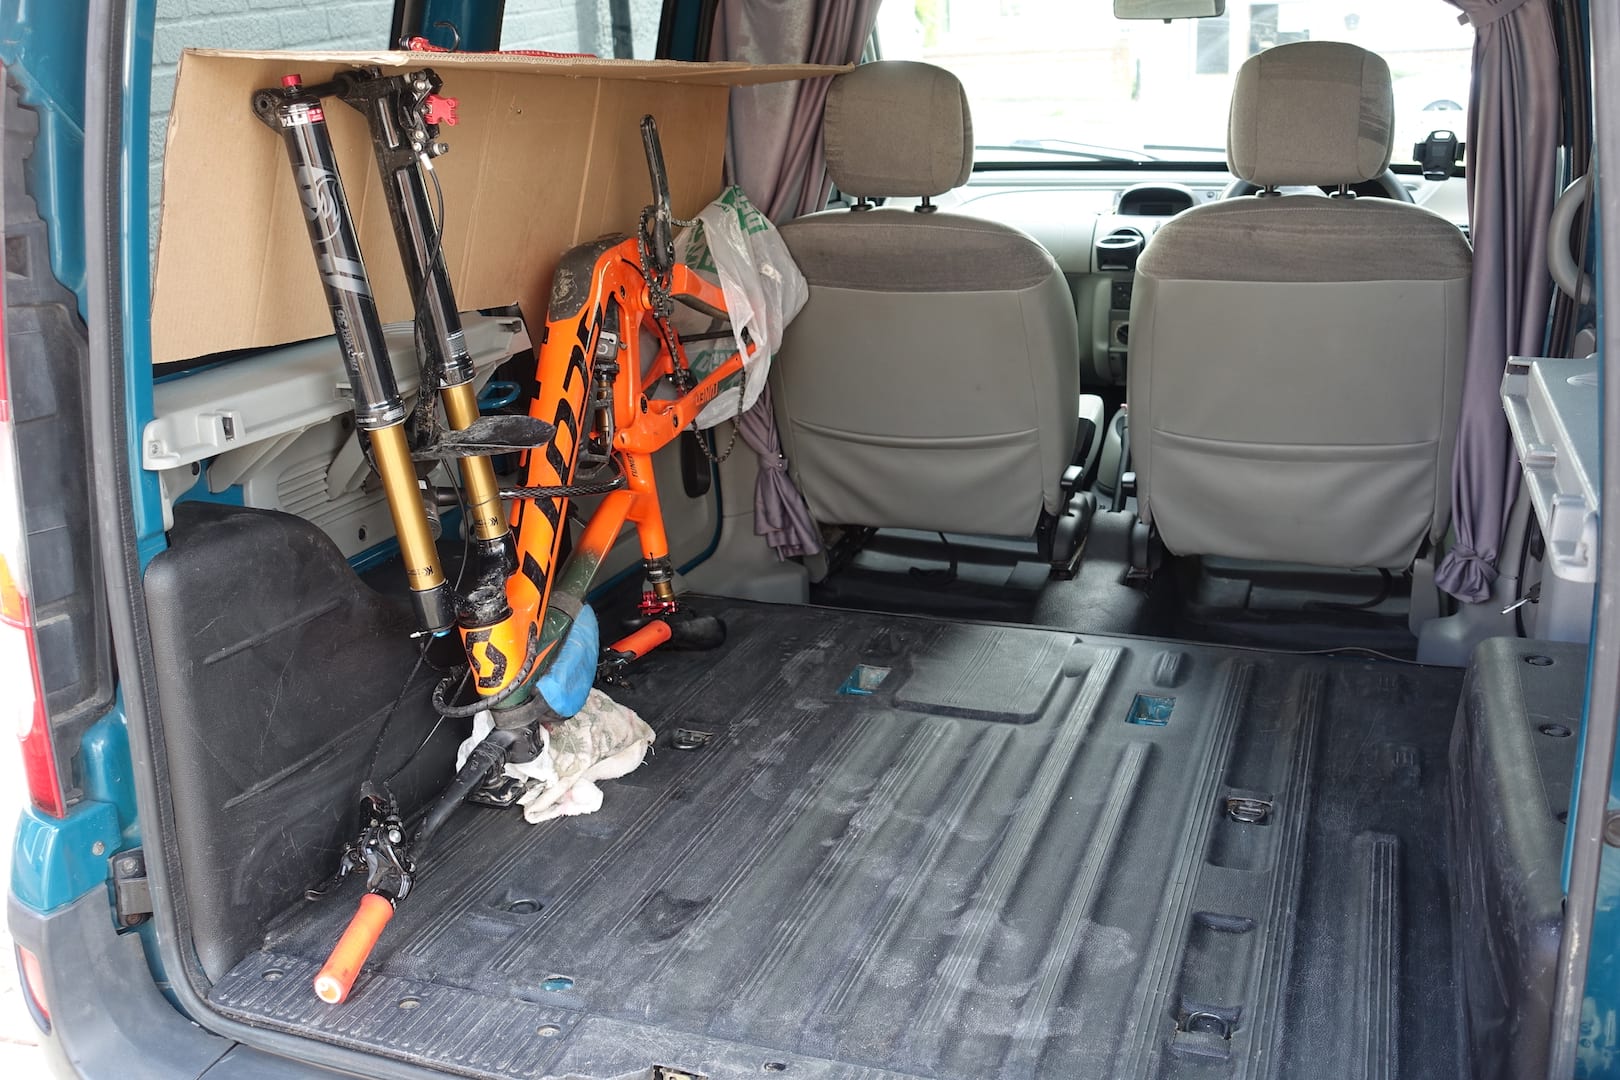
With the length of our Kangoo, the Scott Ransom test bike I had with me (admittedly a big travel 29er) wasn’t going to fit in square with either of the wheels left on the bike. So, both the wheels and the pedals came off, allowing it to slot it quite neatly up against the left side of the boot.
Because we’d be driving around Europe and parking on the right side of the road, we wanted the right sliding door to be accessible. Thought of everything didn’t we?


[wcm_nonmember]
Login now
The rest of this article is for logged in members only. If you have an account, please log in. If not, you can get access by registering here for free.
Members get access to exclusive content like this but they also get..
- Fewer ads
- Post comments to stories
- Join in forum discussions
- Sell unwanted kit for free in our Classifieds
- Automatic shop discount on Singletrack merchandise
- Access more members only content
Premier members get more
- Magazine content in print 6x/year post free
- App access to every new issue of Singletrack
- Ad free website
- Big discounts on shop merchandise
- Access downloads like GPX files, PDFs and even iBooks
- Full mag archive access to all Singletrack back issues
Premier membership starts at just £1.99
[/wcm_nonmember]
[wcm_restrict]
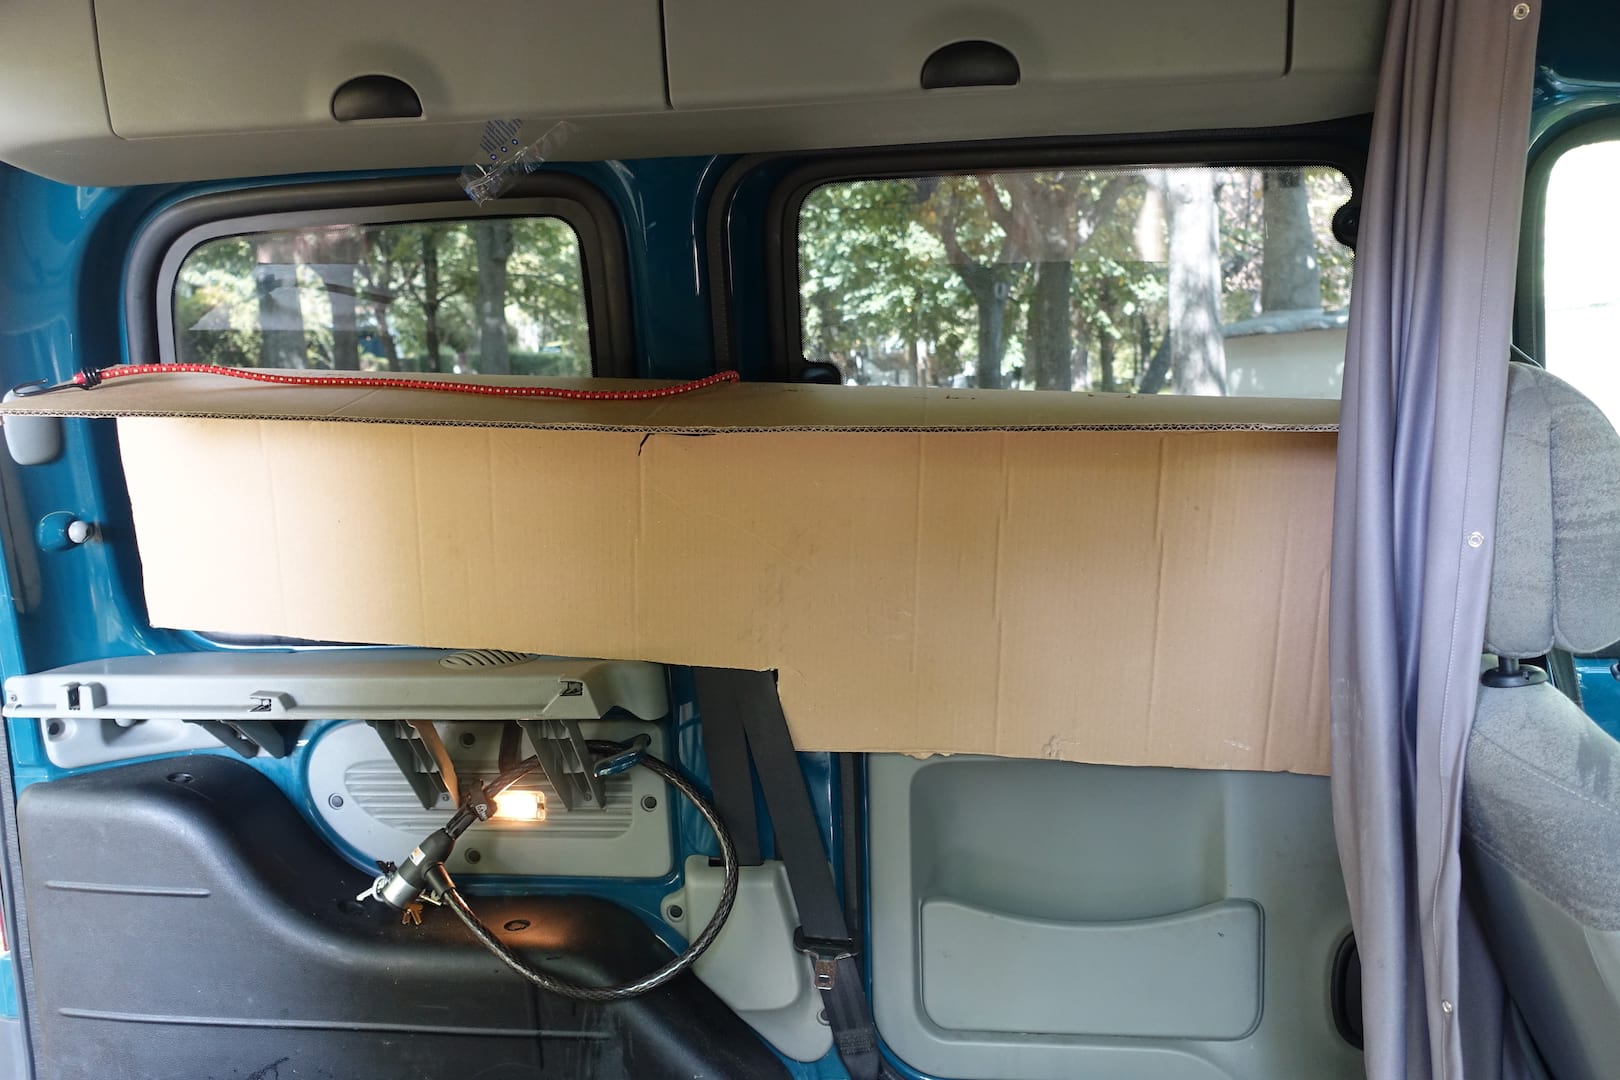
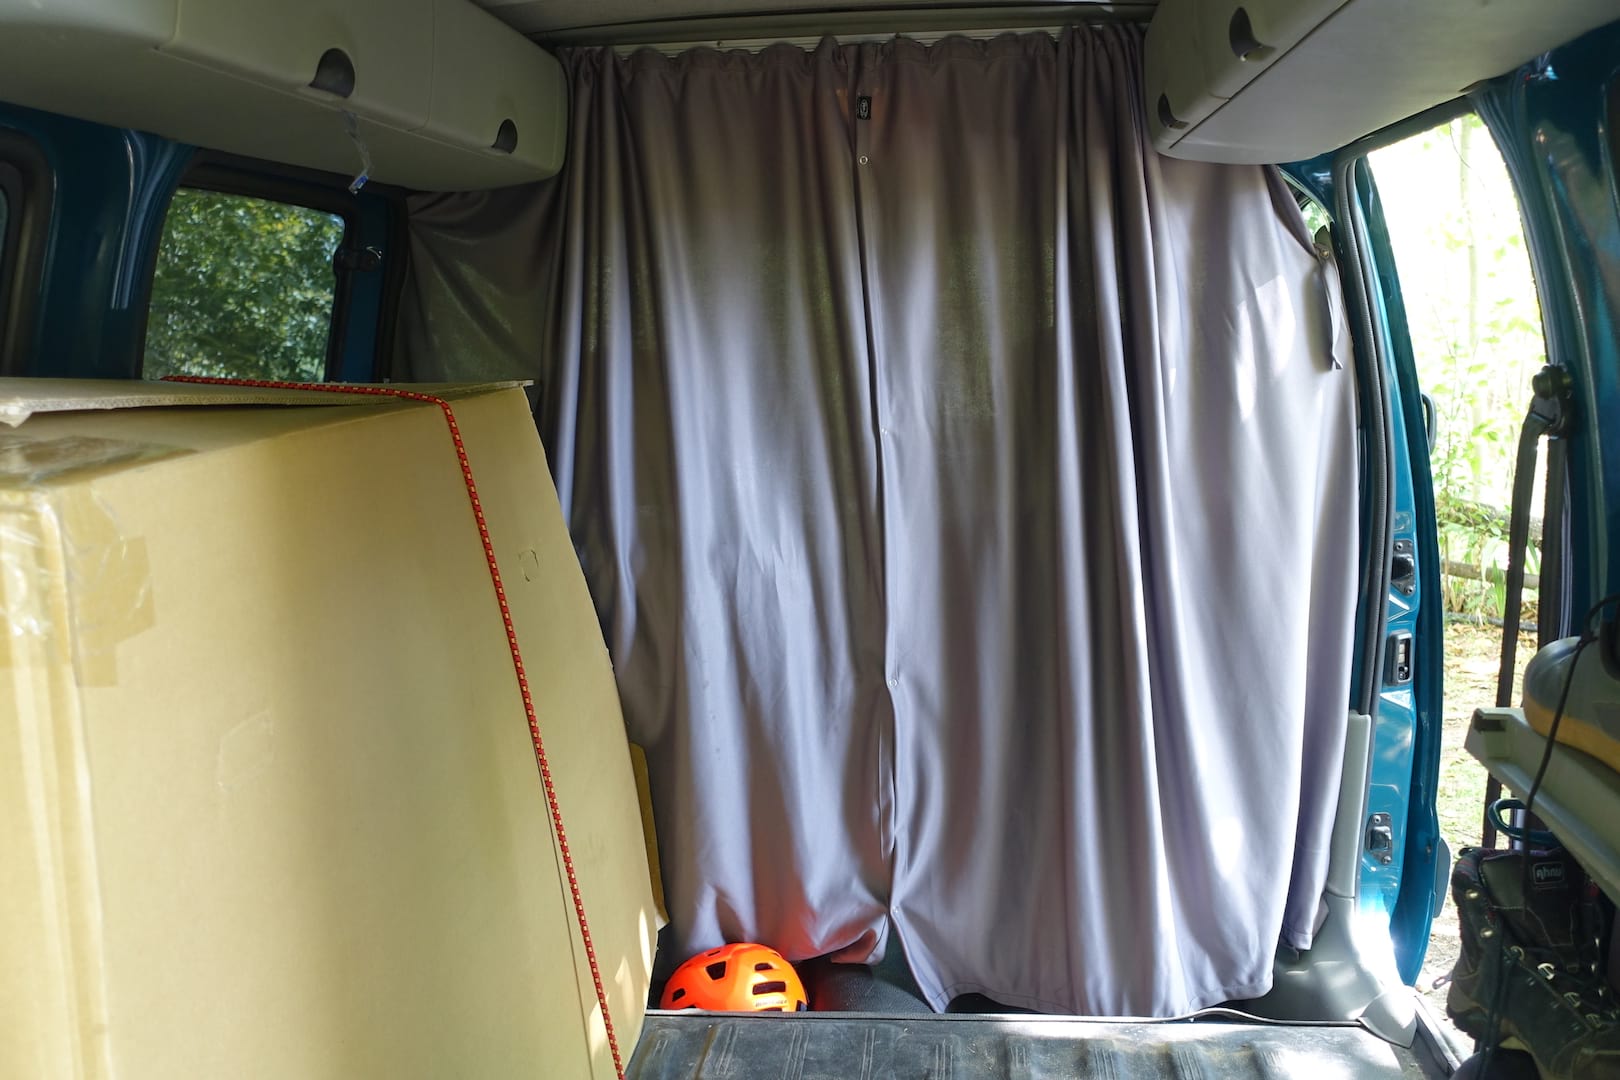
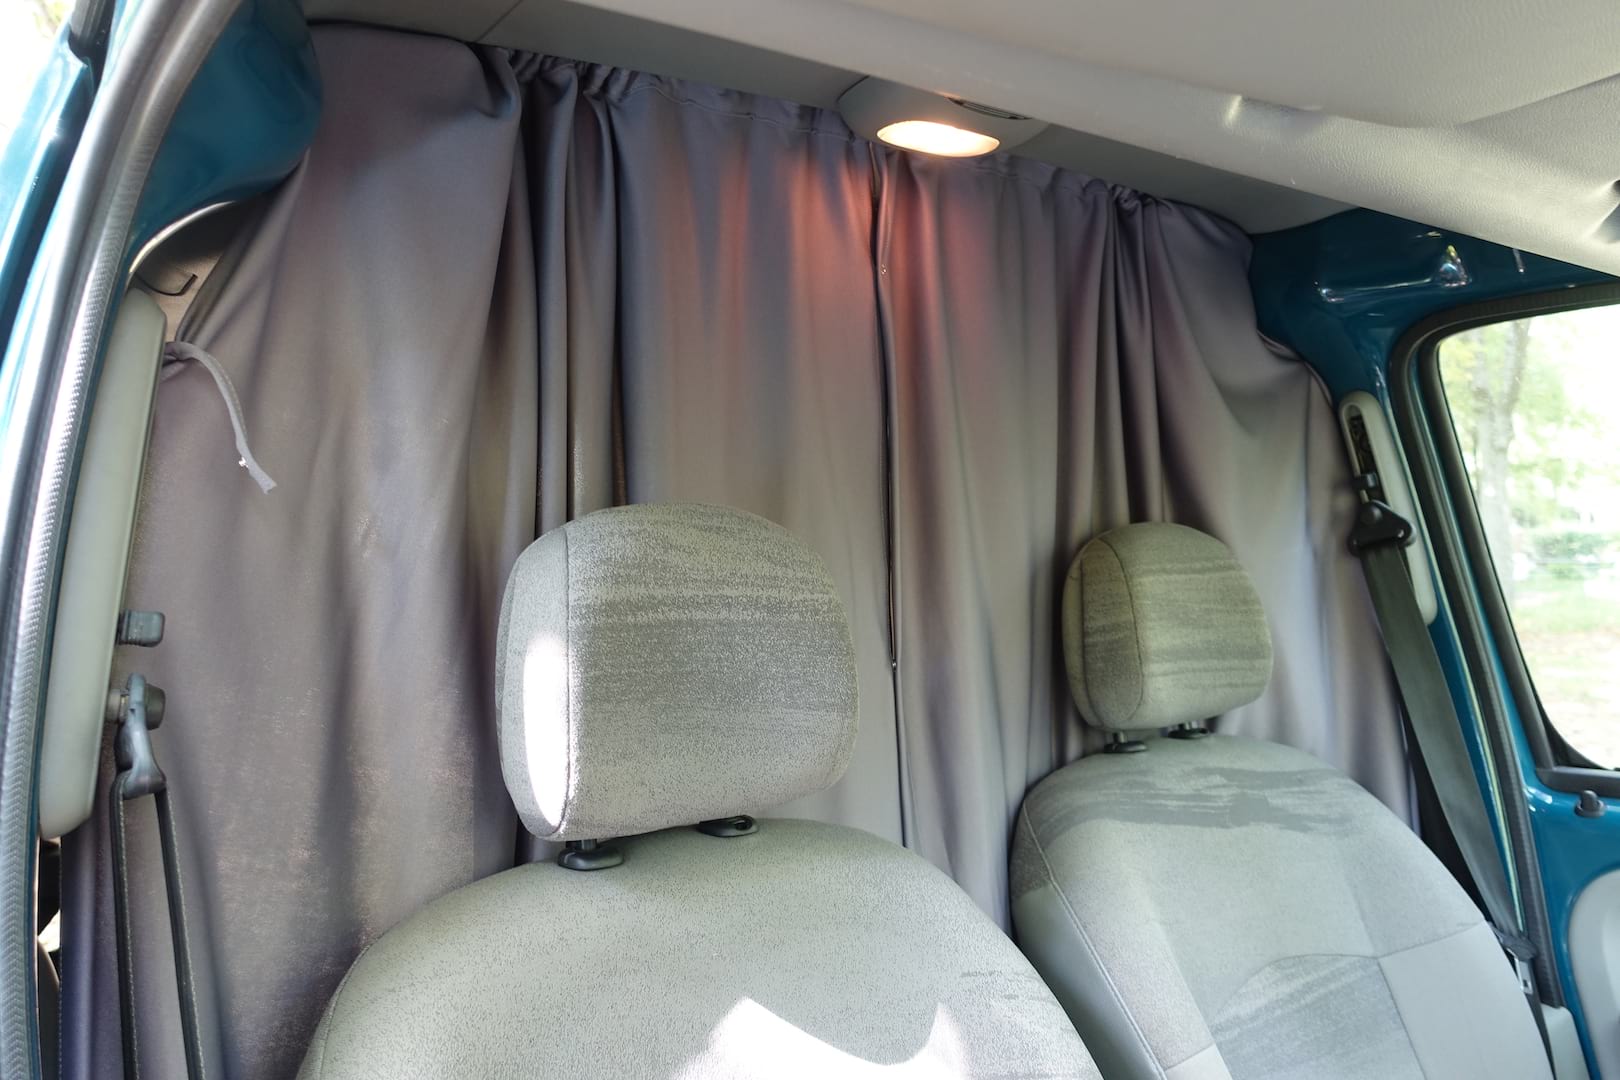
4. Privacy Curtains
Because the windows weren’t tinted as heavily up front, there remained a fairly clean line of sight through the windscreen into the boot of the car. Given we’d likely be parking the car in busy towns and cities, for an unknown period of time, we fitted some privacy curtains to seal off the back portion of the car. And while we weren’t planning on sleeping inside the Kangoo, the curtains would also be useful if we had to resort to that in an emergency.
I can’t remember how much this kit cost – probably around £20 or so. There’s a railing that screws into the bulkhead of the car, then a few pop-rivets go in on either side for the curtain ties, and et voila! You’ve got drapes.
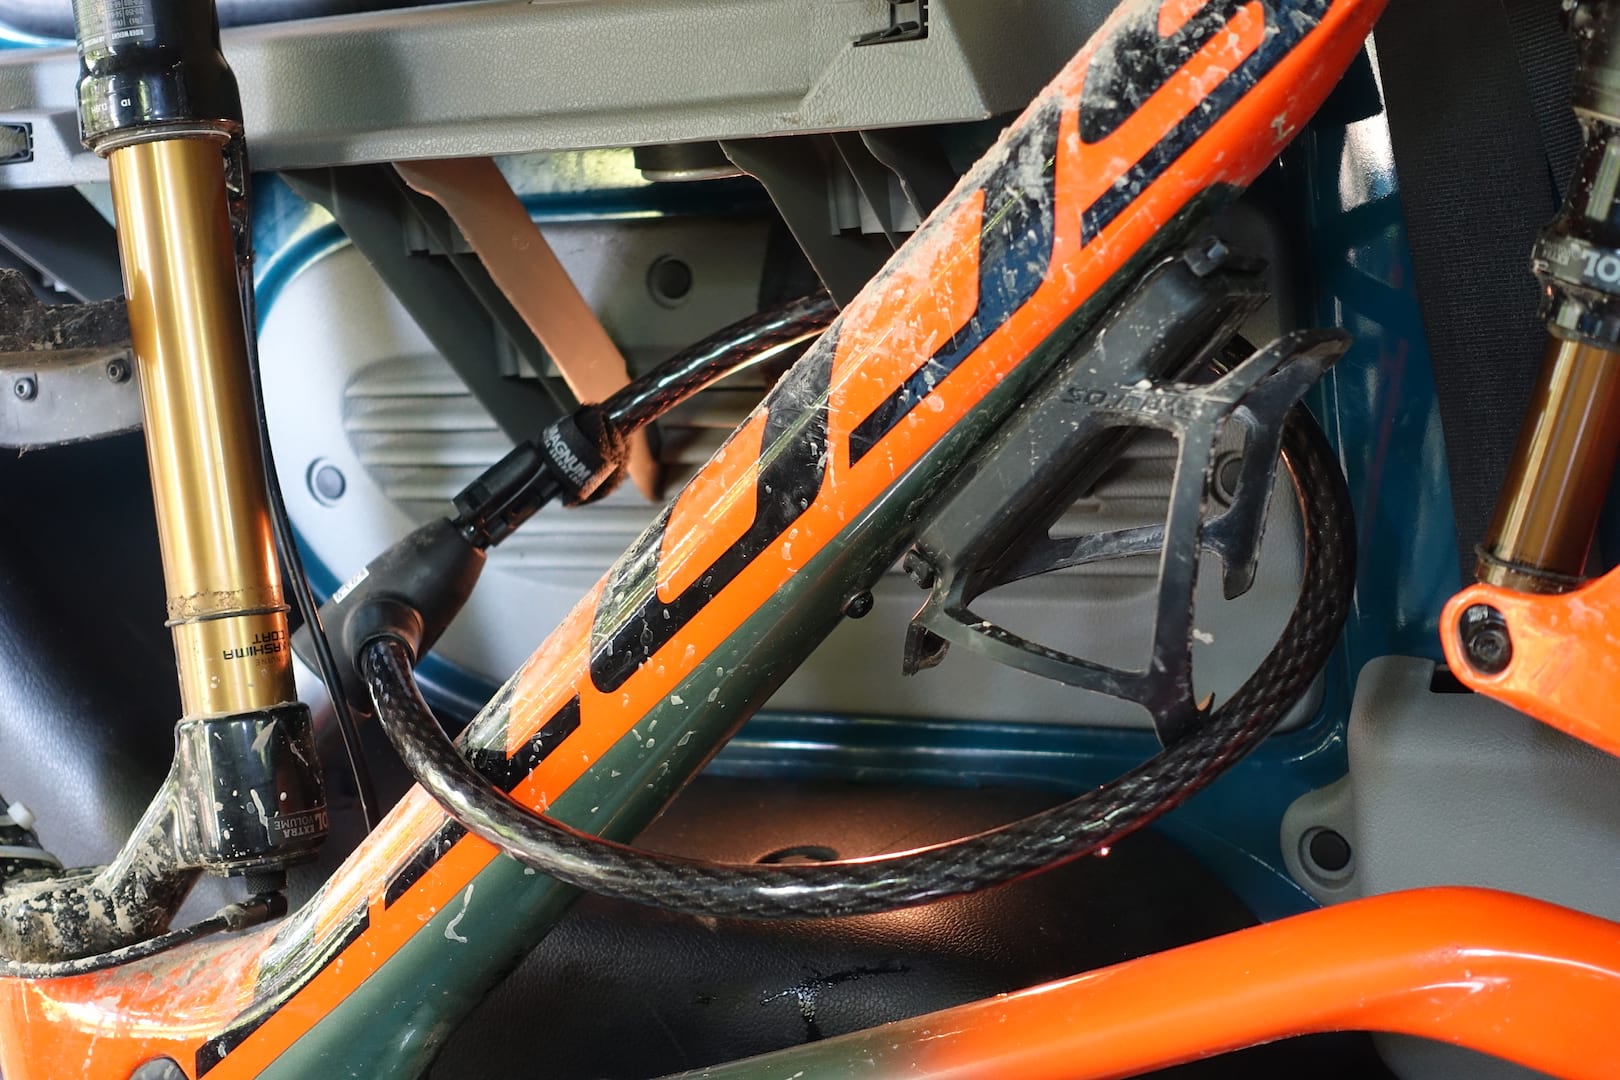
5. Lock That Bike Down!
If someone was still going to try to nick the bike out of the car, I was going to make it as painful a process as possible. Using a thick, woven steel cable lock, I locked the downtube of the frame to the car chassis. Obviously the wheels could be taken on their own, but it was the exotic carbon frame and all the other bits bolted to it that I was more concerned for.
Locking up the bike added a few seconds to the whole process, so it is no doubt worth the extra hassle. It also had the bonus side effect of keeping the frame more secure in the car, with less chance of it wobbling about while driving.
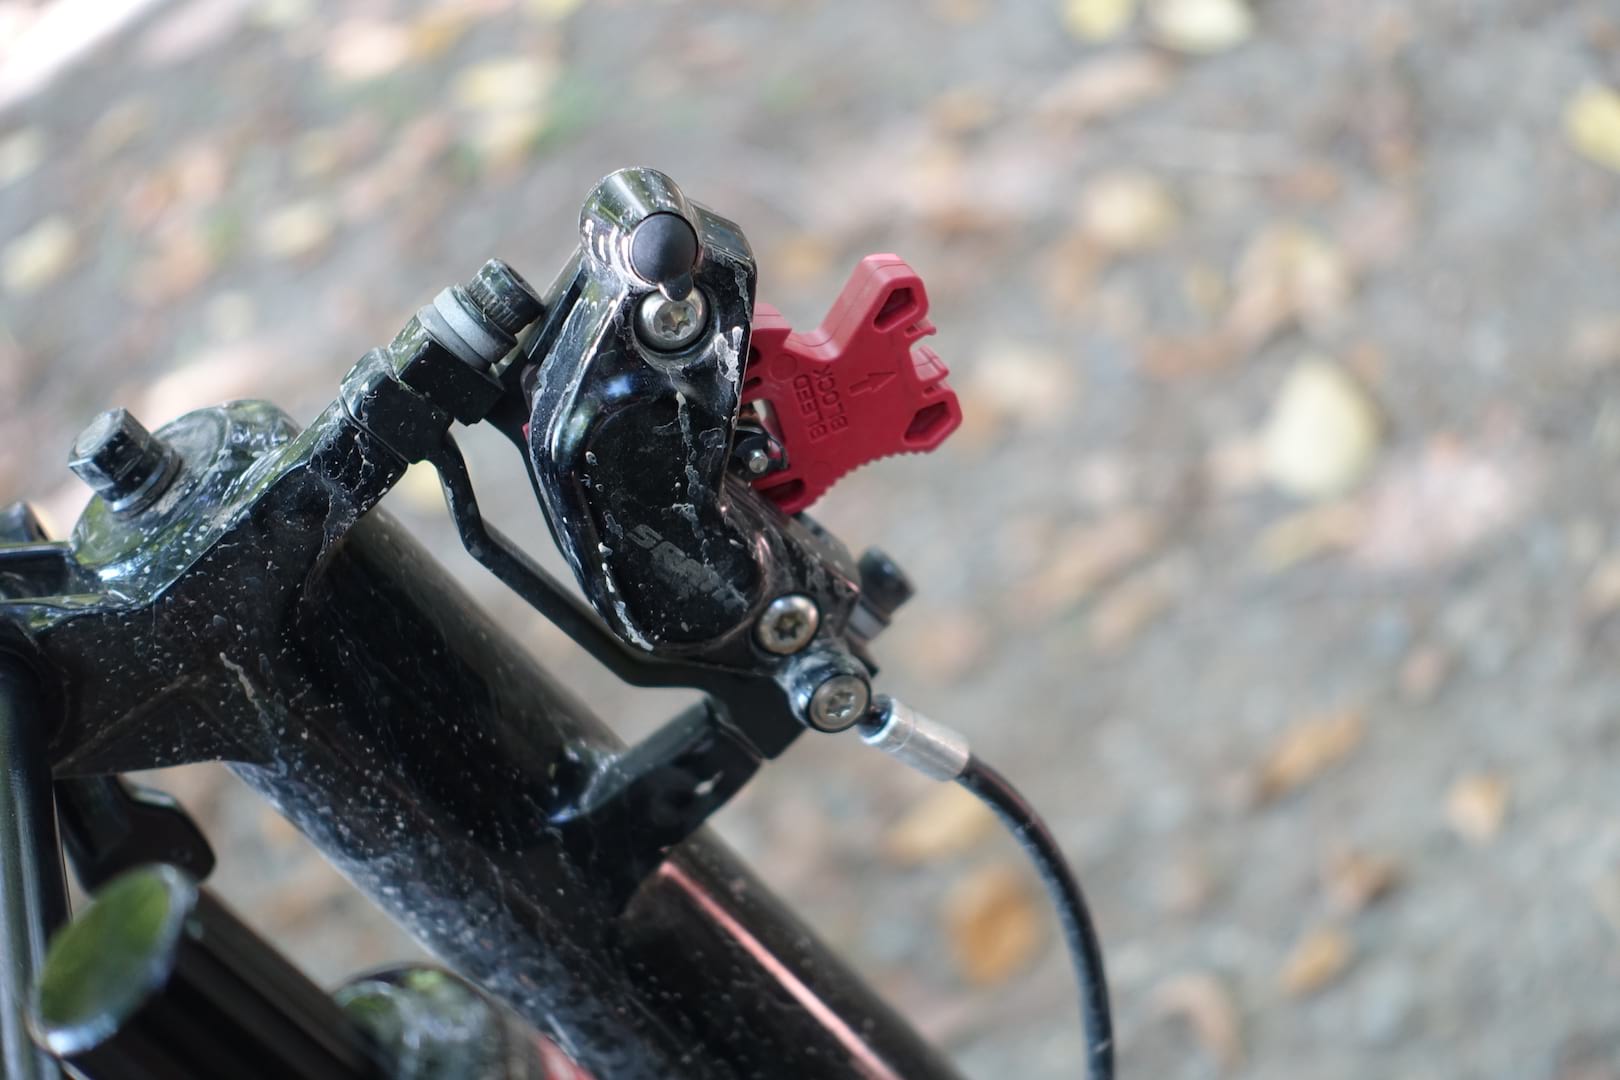
6. Wheels Off, Pad Spacers In
Unless you’ve got a big enough van that allows you to slide your bike in with both wheels on, at least one wheel is going to have to come off to fit a bike inside your car. If you’re doing that on a regular basis, then get yourself some dedicated pad spacers. These are designed to keep the pads safely separated when the wheel (and disc rotor) are removed.
A piece of cardboard will do the same job, but if you’re taking wheels on and off on a regular basis, the proper pad spacers are much easier to use and more durable too.
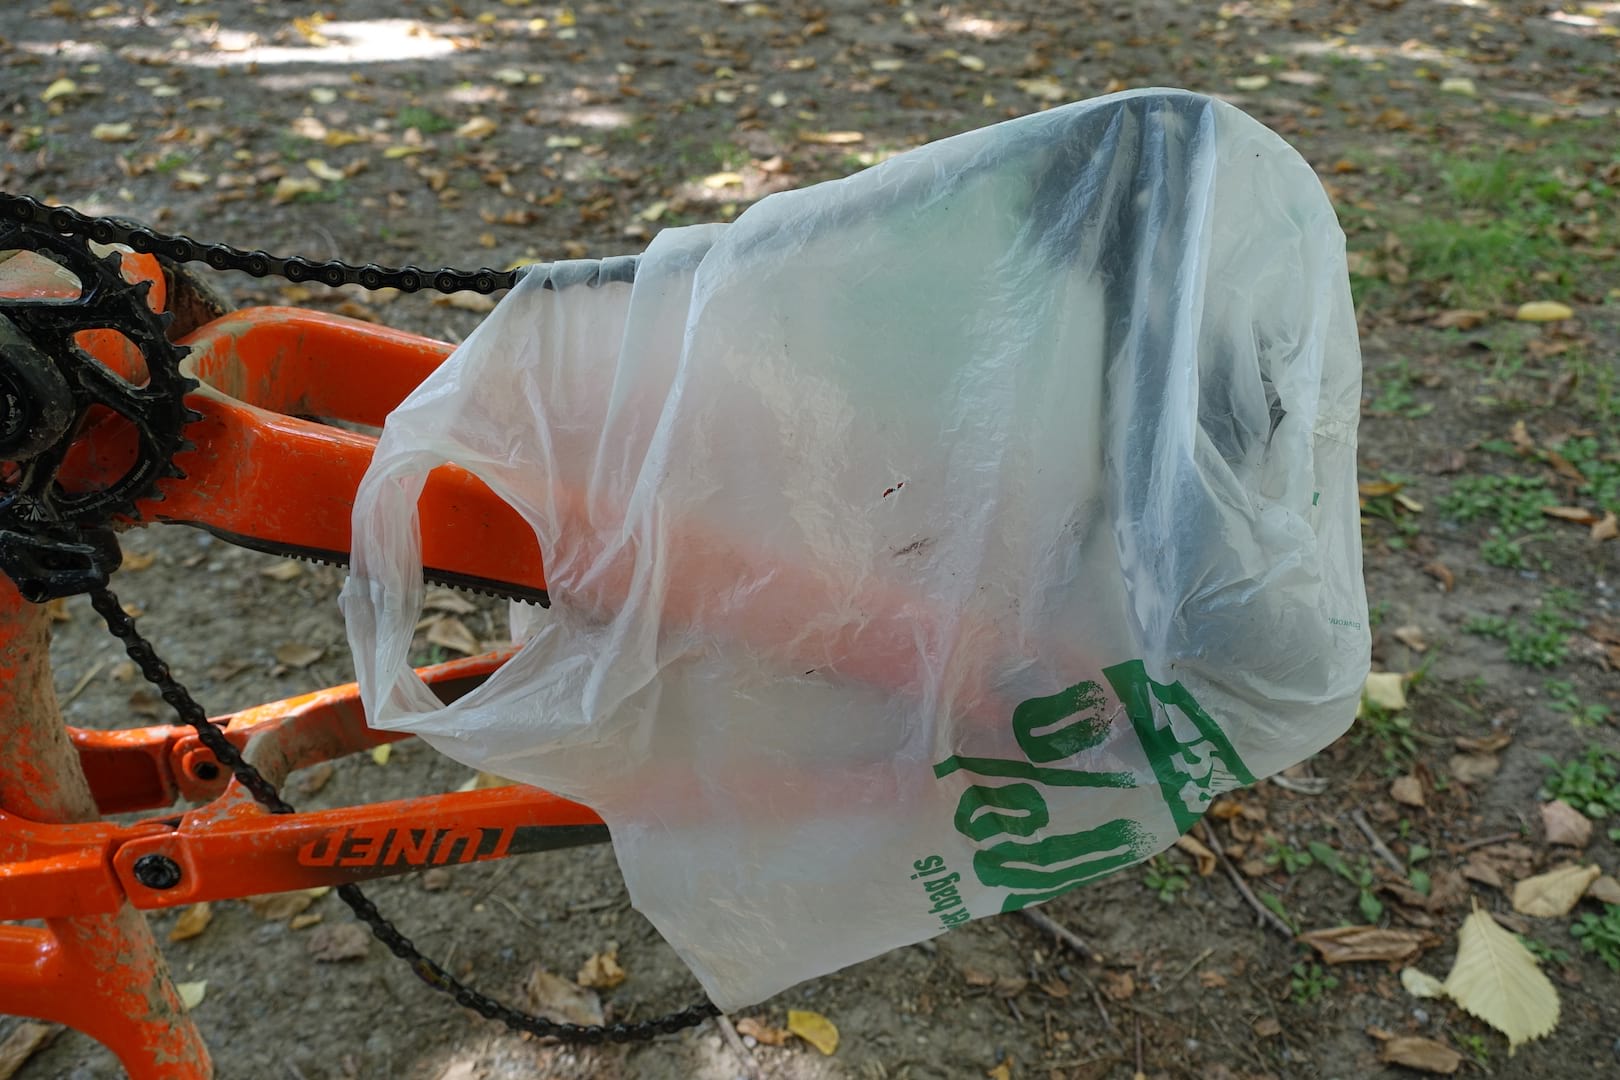
7. Keep it Clean
This may seem like a really simple suggestion, but often it’s the simplest ideas that work best. The drivetrain on your bike is greasy and covered in dirt that’s attracted to the grease. This black muck gets everywhere, and it’s really difficult to remove without the right degreasing solution.
Rather than deal with that, just wang a plastic or some other sort of bag around the back end of the bike to keep the grease and muck away from your civilian wares in the back of the car. Better yet, use an old towel or sheet to drape over the entire drive-side of the back.
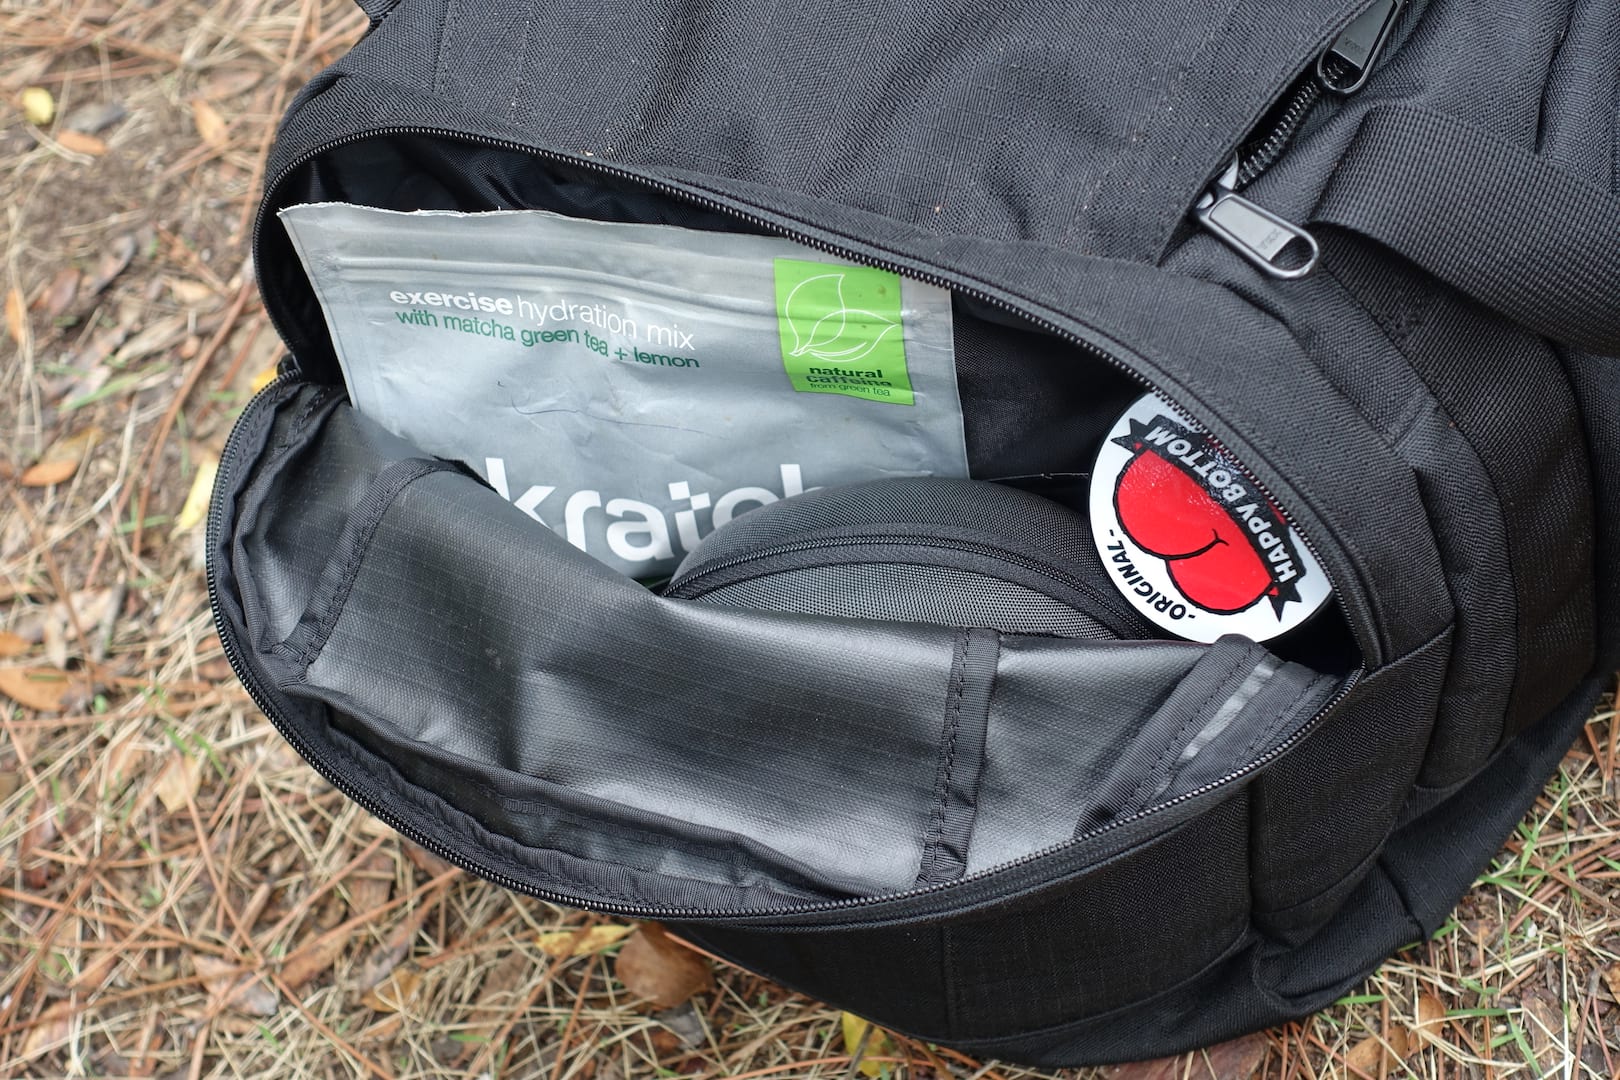
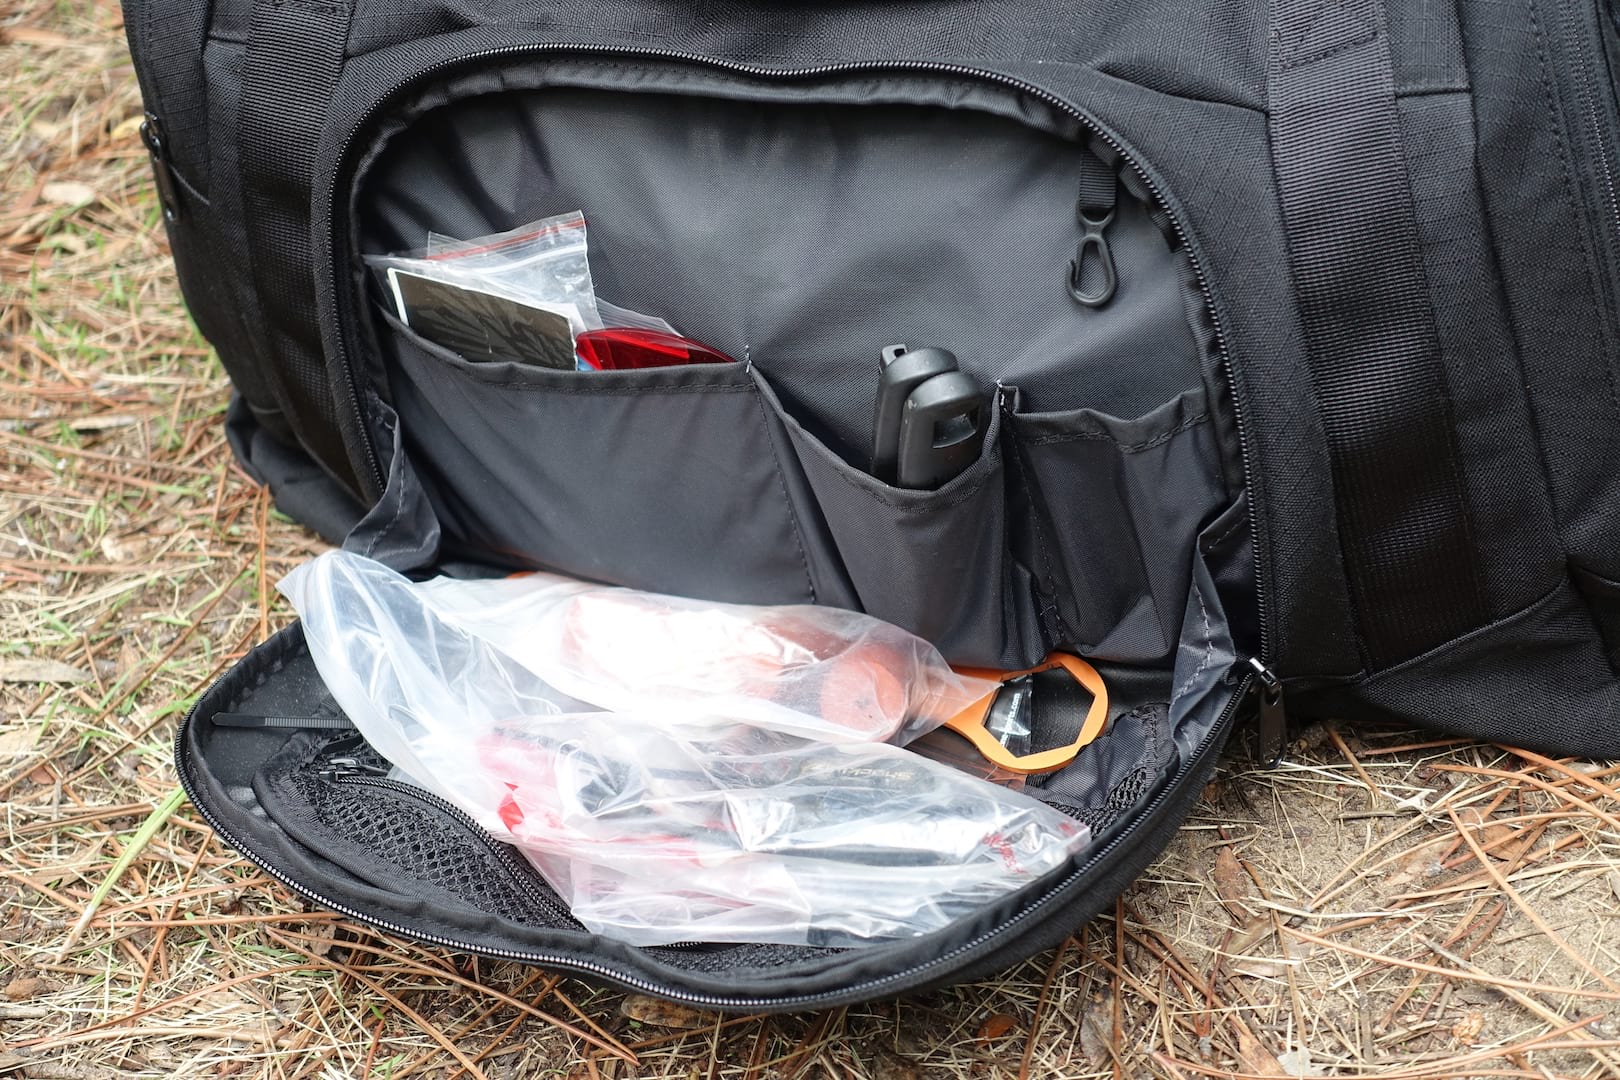
8. Organise Your Riding Crap
Having lived out of a car for nine weeks, I can attest to the value of organising your riding kit. Or at least, having a central point where all that smelly gear is collected and stored away from your partner’s clean clothes.
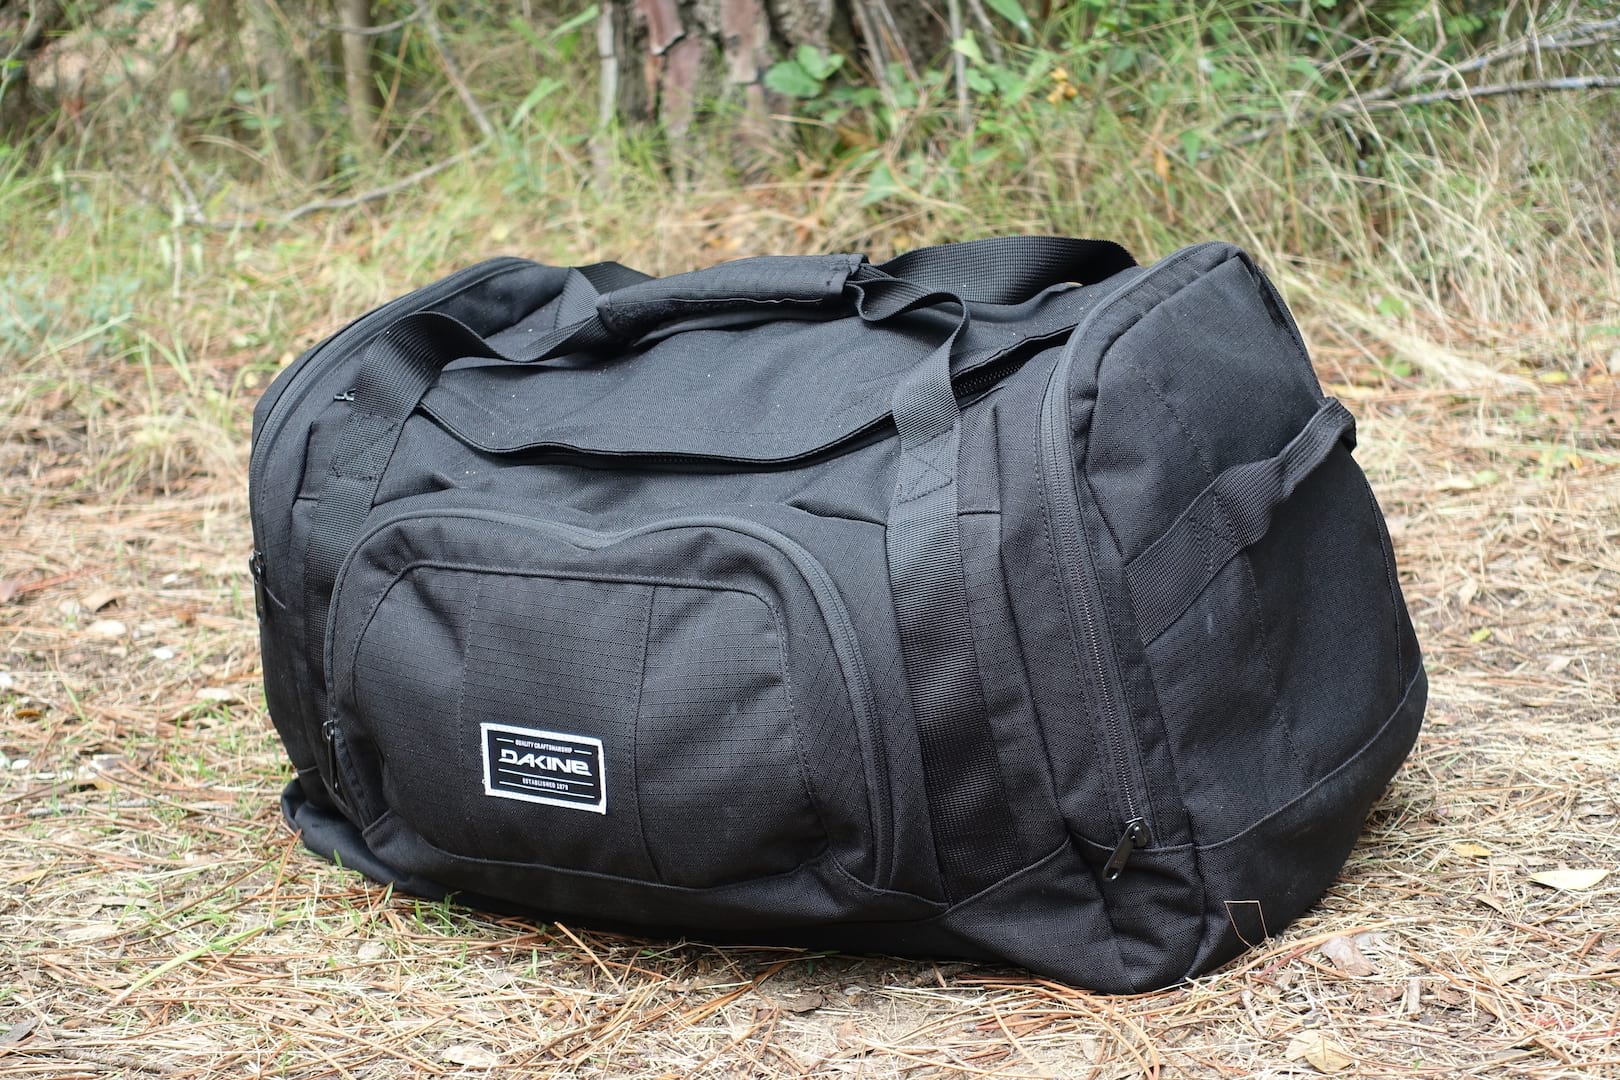
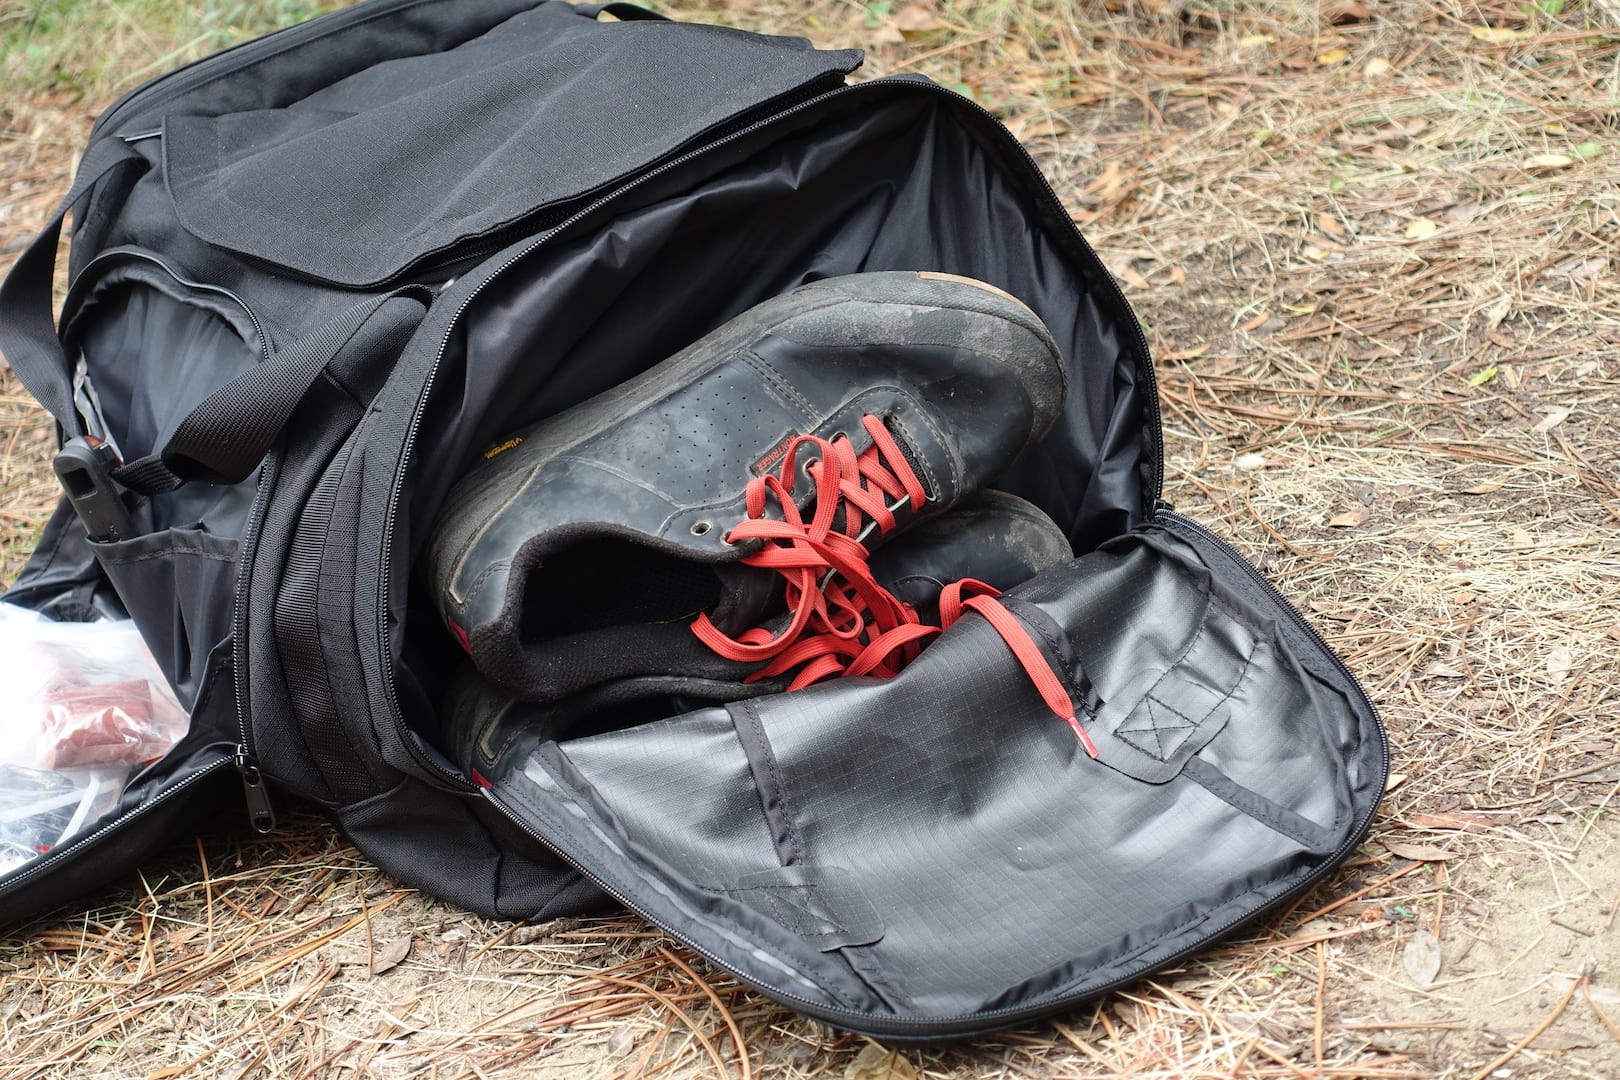
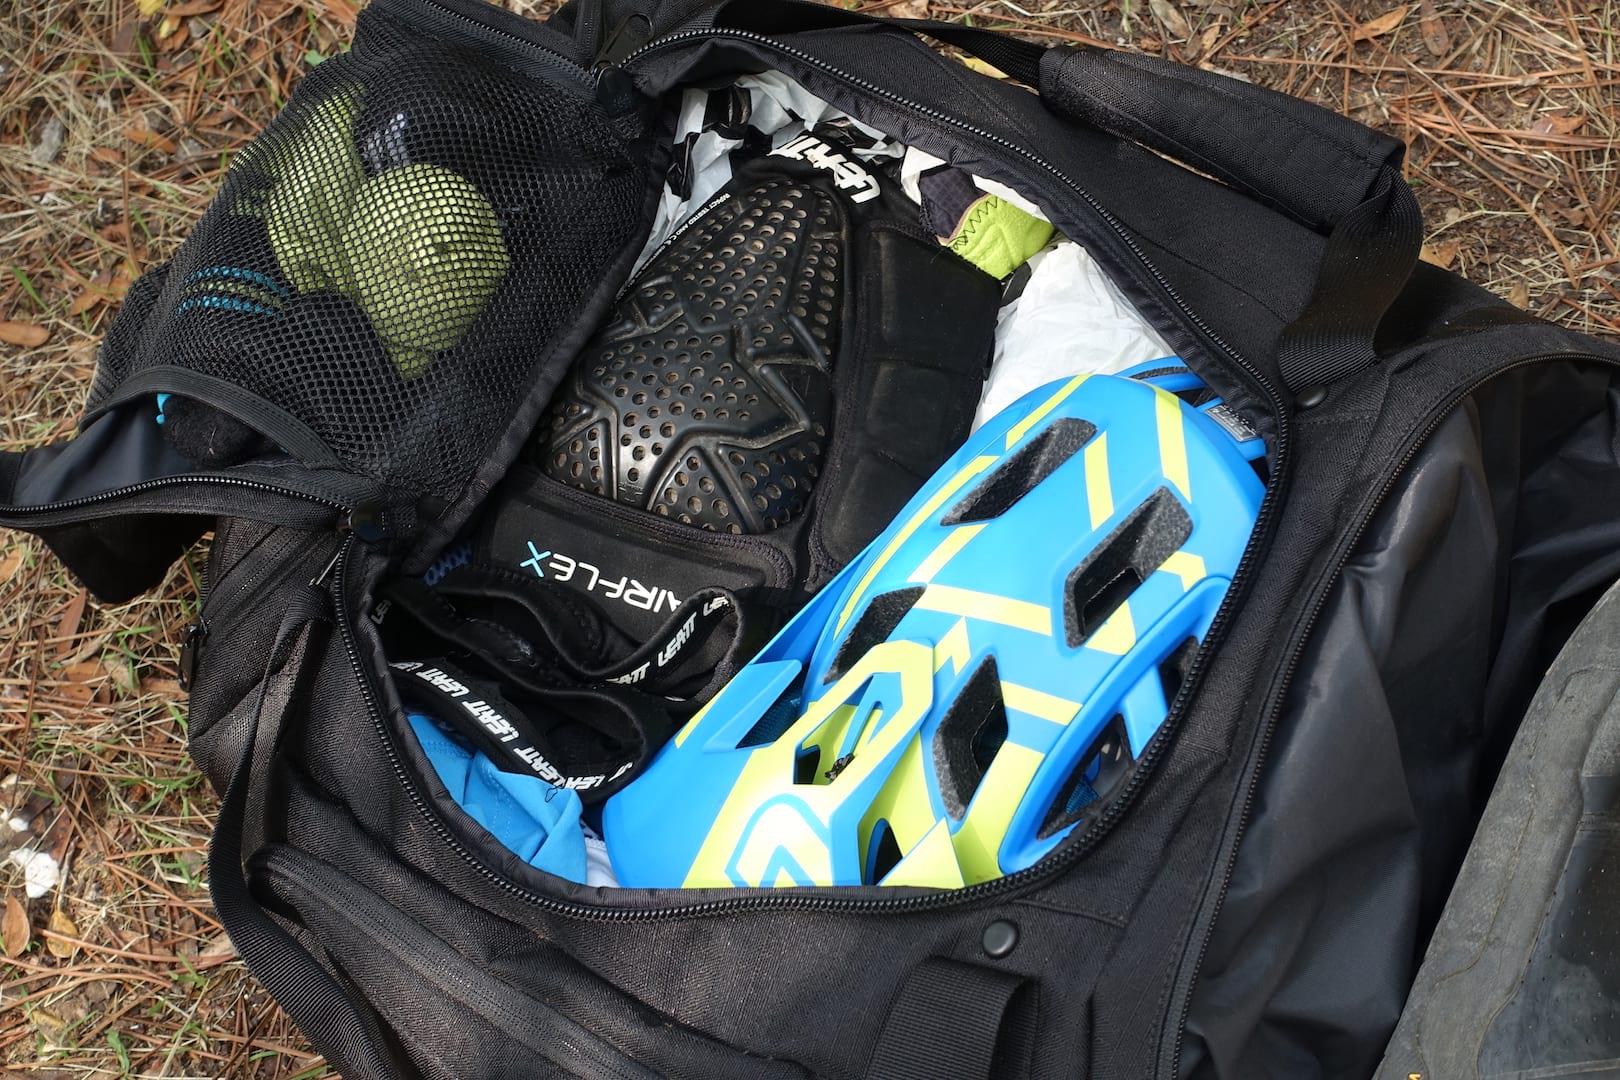
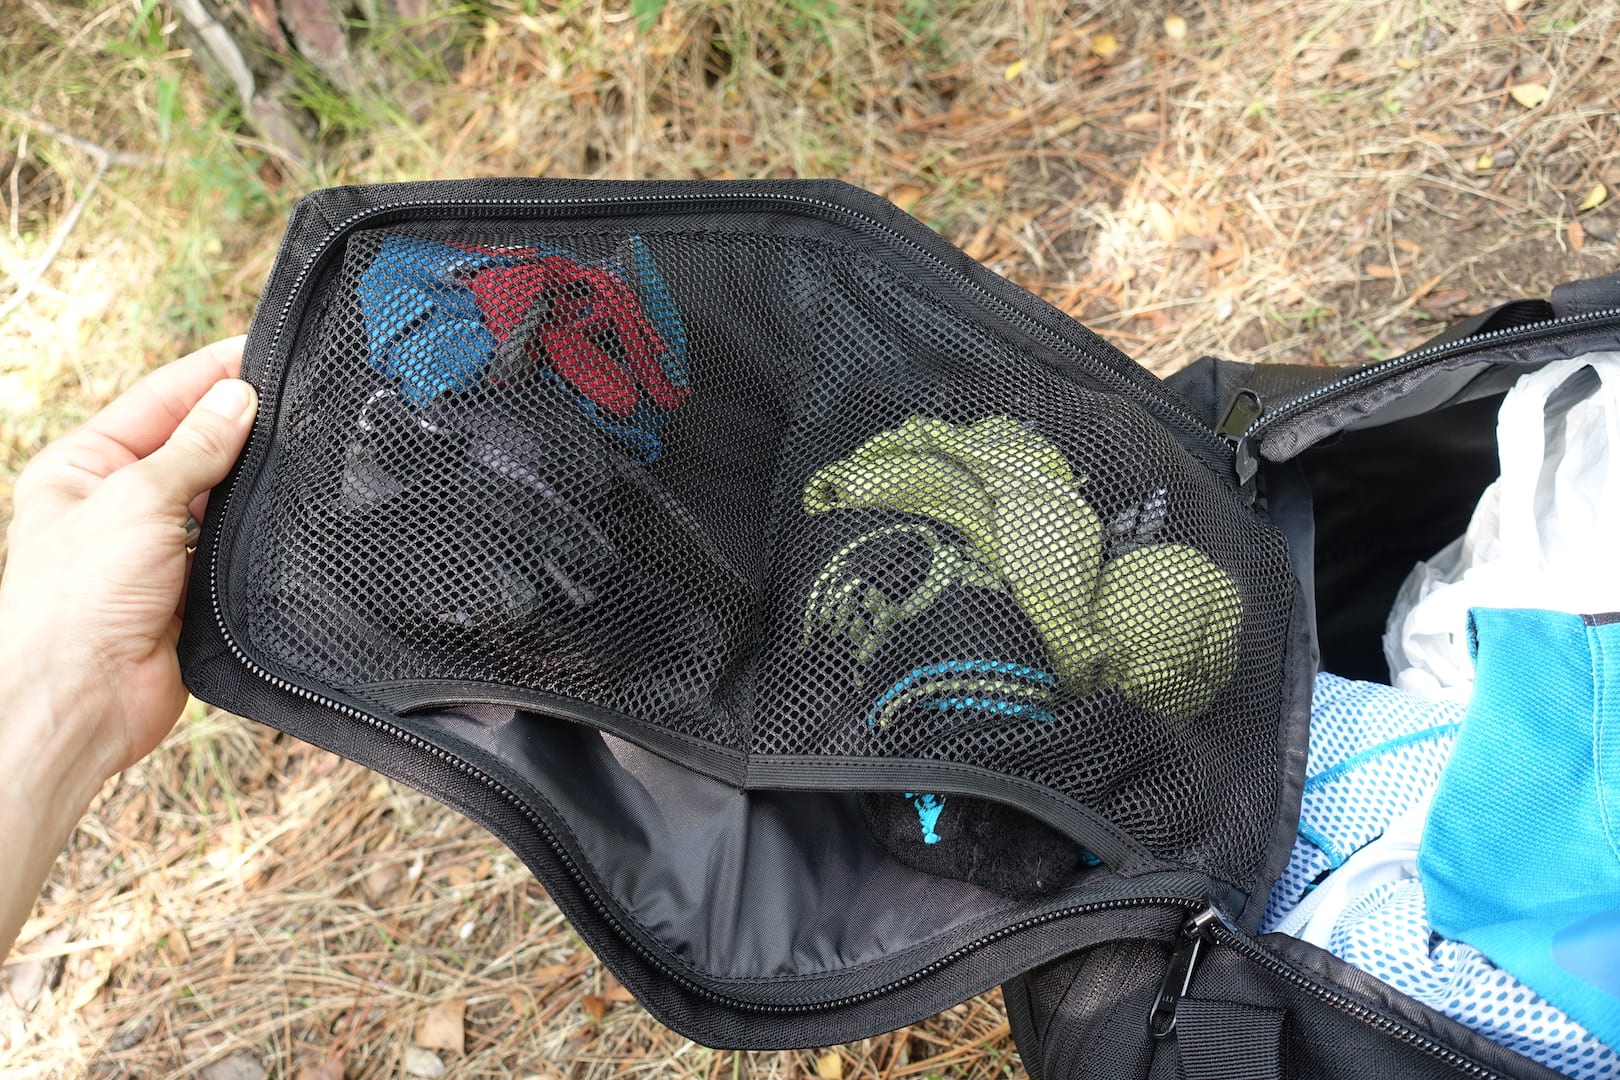
Any old duffle bag will suffice really, but there are a multitude of options for cycling kit bags on the market, and they’re generally a good idea in that they provide specific pockets and compartments for all those weird and wonderful things that we deem necessary to being prepared for an enjoyable riding experience.
In my case, I’ve been using the Dakine Descent Duffle bag, which has a huge 70L volume that’s swallowed up three sets of riding kit, shoes, a helmet, knee pads, wet weather gear, glasses, tools, spares, nutrition, and more. It’s made from tough but easily-collapsable Nylon fabric, and has a heap of different pockets and compartments designed specifically for riding gear, which have come in real handy for organising all my stuff.

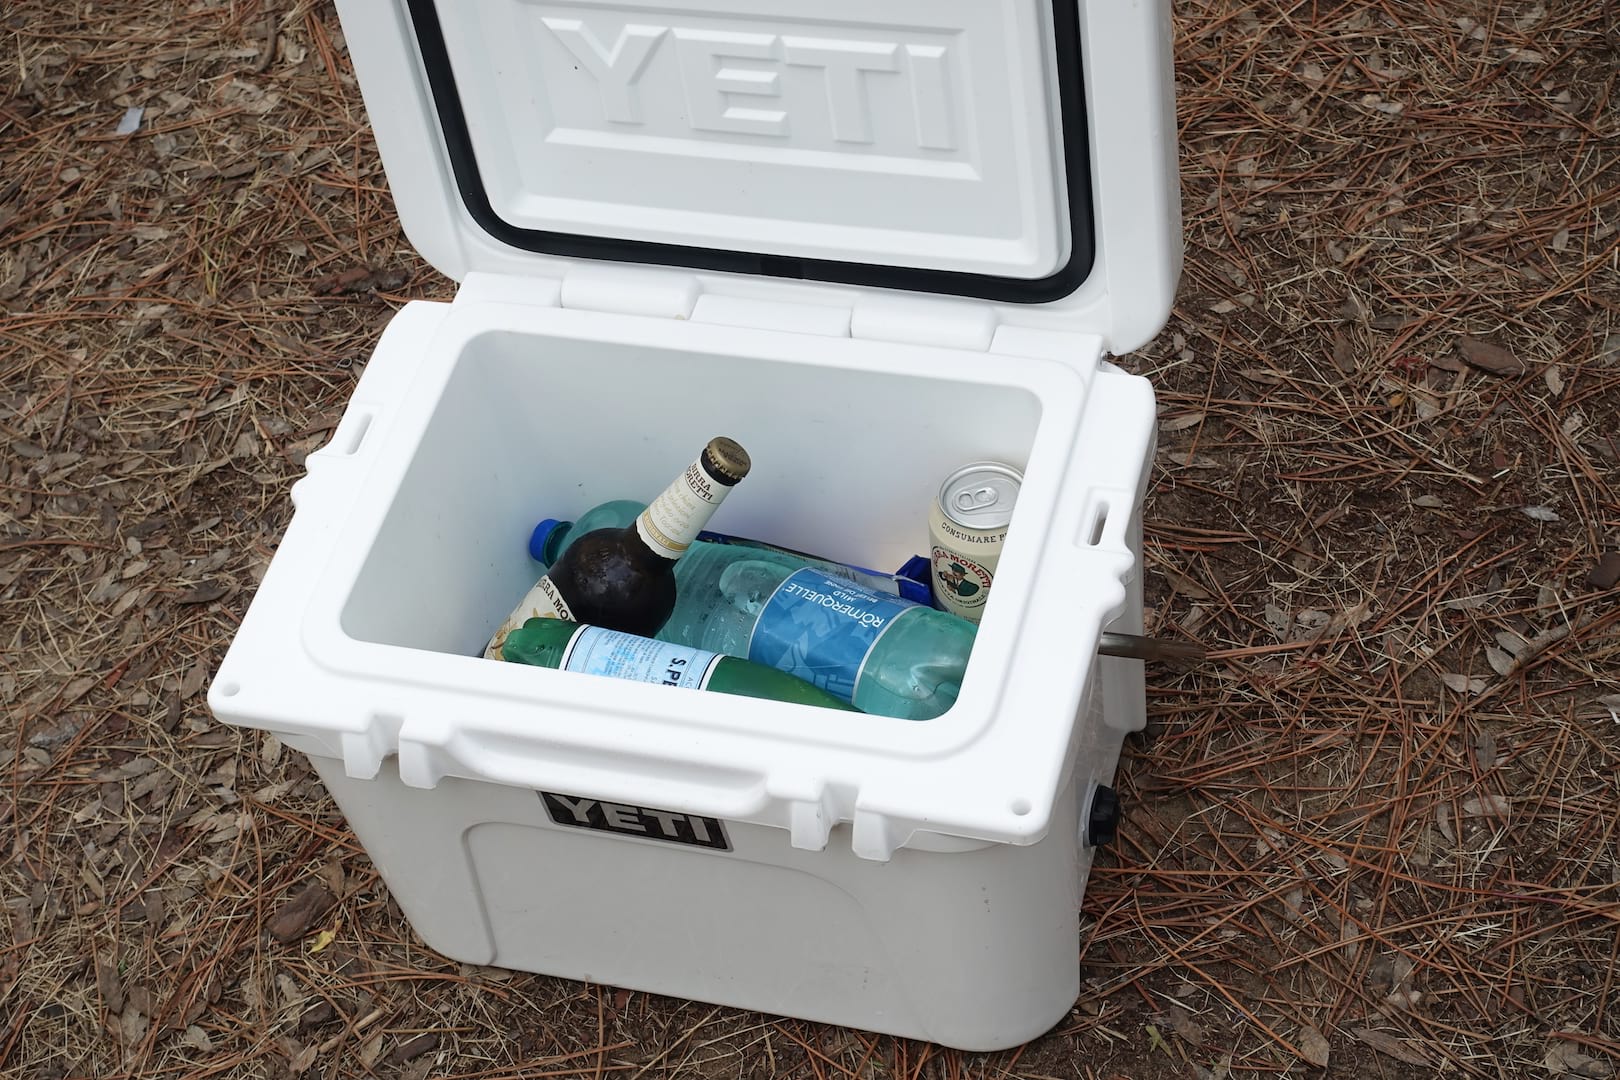
9. Get A Decent Cooler Box
Being an Aussie, I take Eskies (also known as ‘chilly bins’ or ‘cooler boxes’, depending where you’re from) very seriously. I’ve used a few over the years, with most being just OK, some being totally lousy, and just a couple being properly good. This Yeti Cooler goes into the latter category – it is the real deal.
I didn’t know much about Yeti Coolers, or the cult that surrounds them, until we were kindly given this one by Alex from SRAM. It’s the smallest Roadie 20 model, but it still features the same construction and features as the bigger Yeti coolers, and its insulation qualities are really impressive. Despite being at the tail end of a European summer, I put a bag of frozen ice blocks inside, and two days later there were still a couple of blocks left floating in the ice-cold water. When you’re camping for a long period, you soon realise the luxury of not having to repeatedly buy bags of ice. As far as I can tell, it’s also built to last a very long time, which might make the high price tag a little easier to swallow.
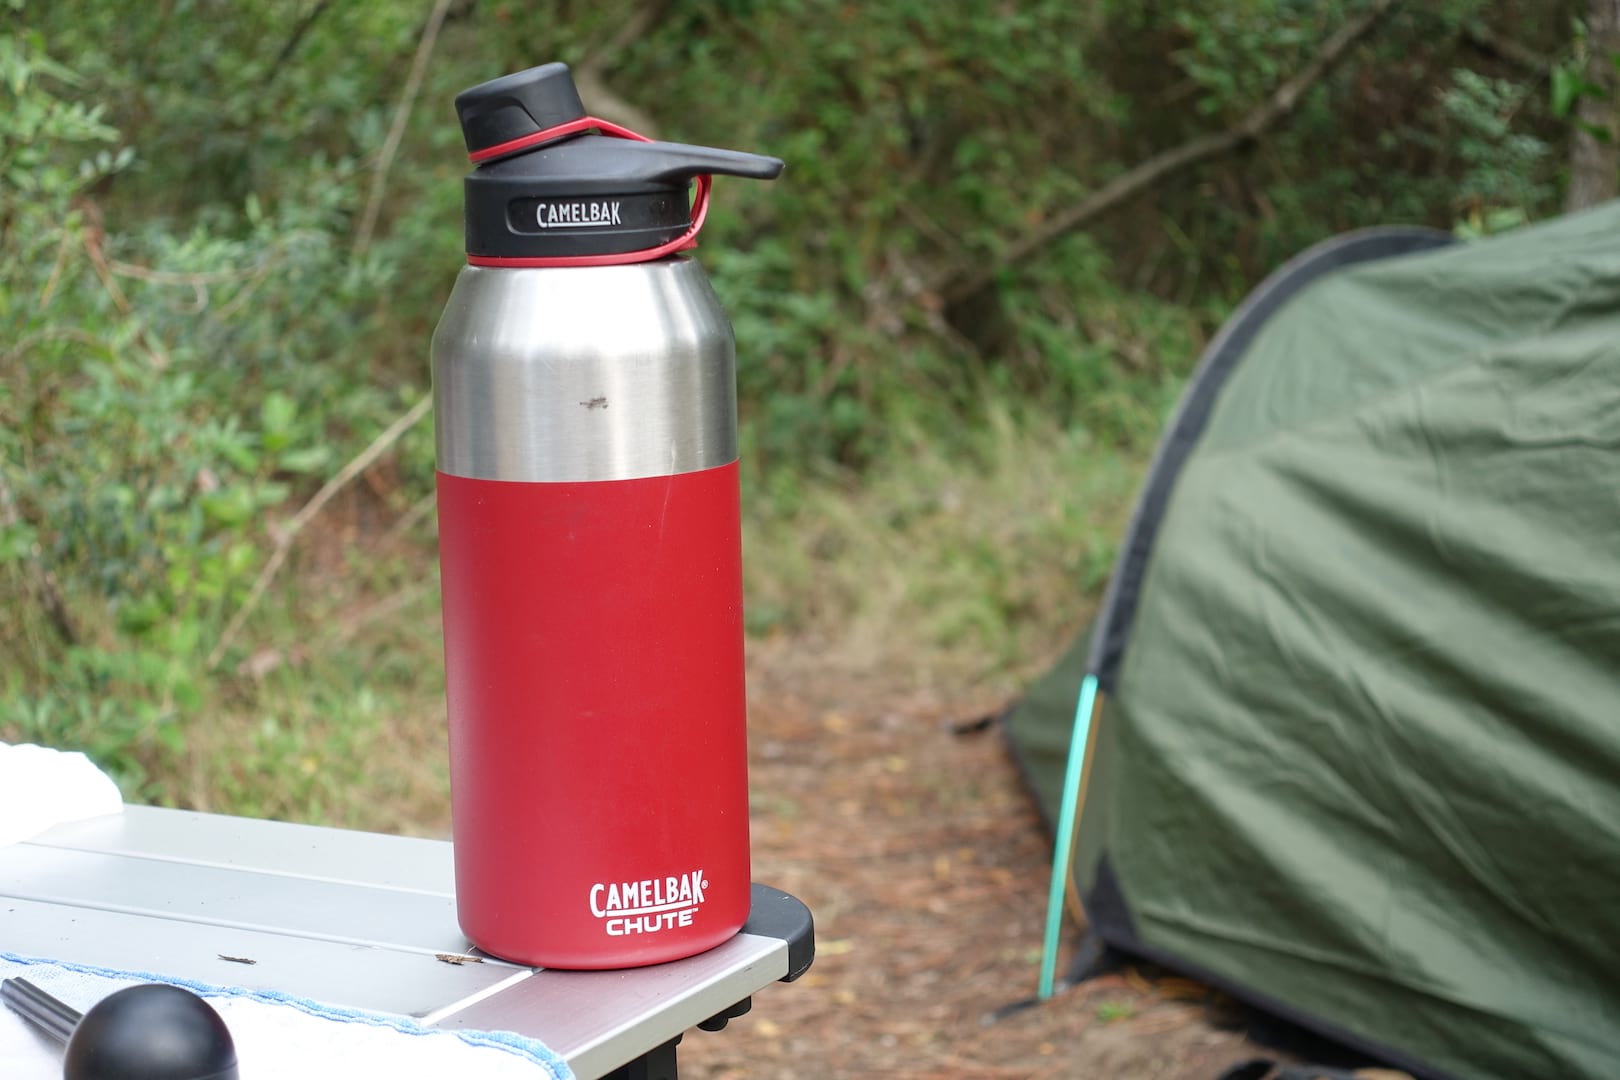
10. Insulate Your Water
We’ve owned this 1.2L Camelbak Chute bottle for a couple of years now, but it’s true worth was only made apparent while camping in Punta Ala, where we had multiple days of 30+ degrees in a row, with overnight lows rarely dipping below 23° C. This was particularly useful when we were camping and didn’t have access to ice to put in the cooler box. Thanks to the vacuum-sealed and insulated design, the Chute managed to keep water cold throughout the day, which just meant I was drinking water more regularly.
We now leave this in the car almost permanently, so it’s always there to top up the drink bottles when needed.
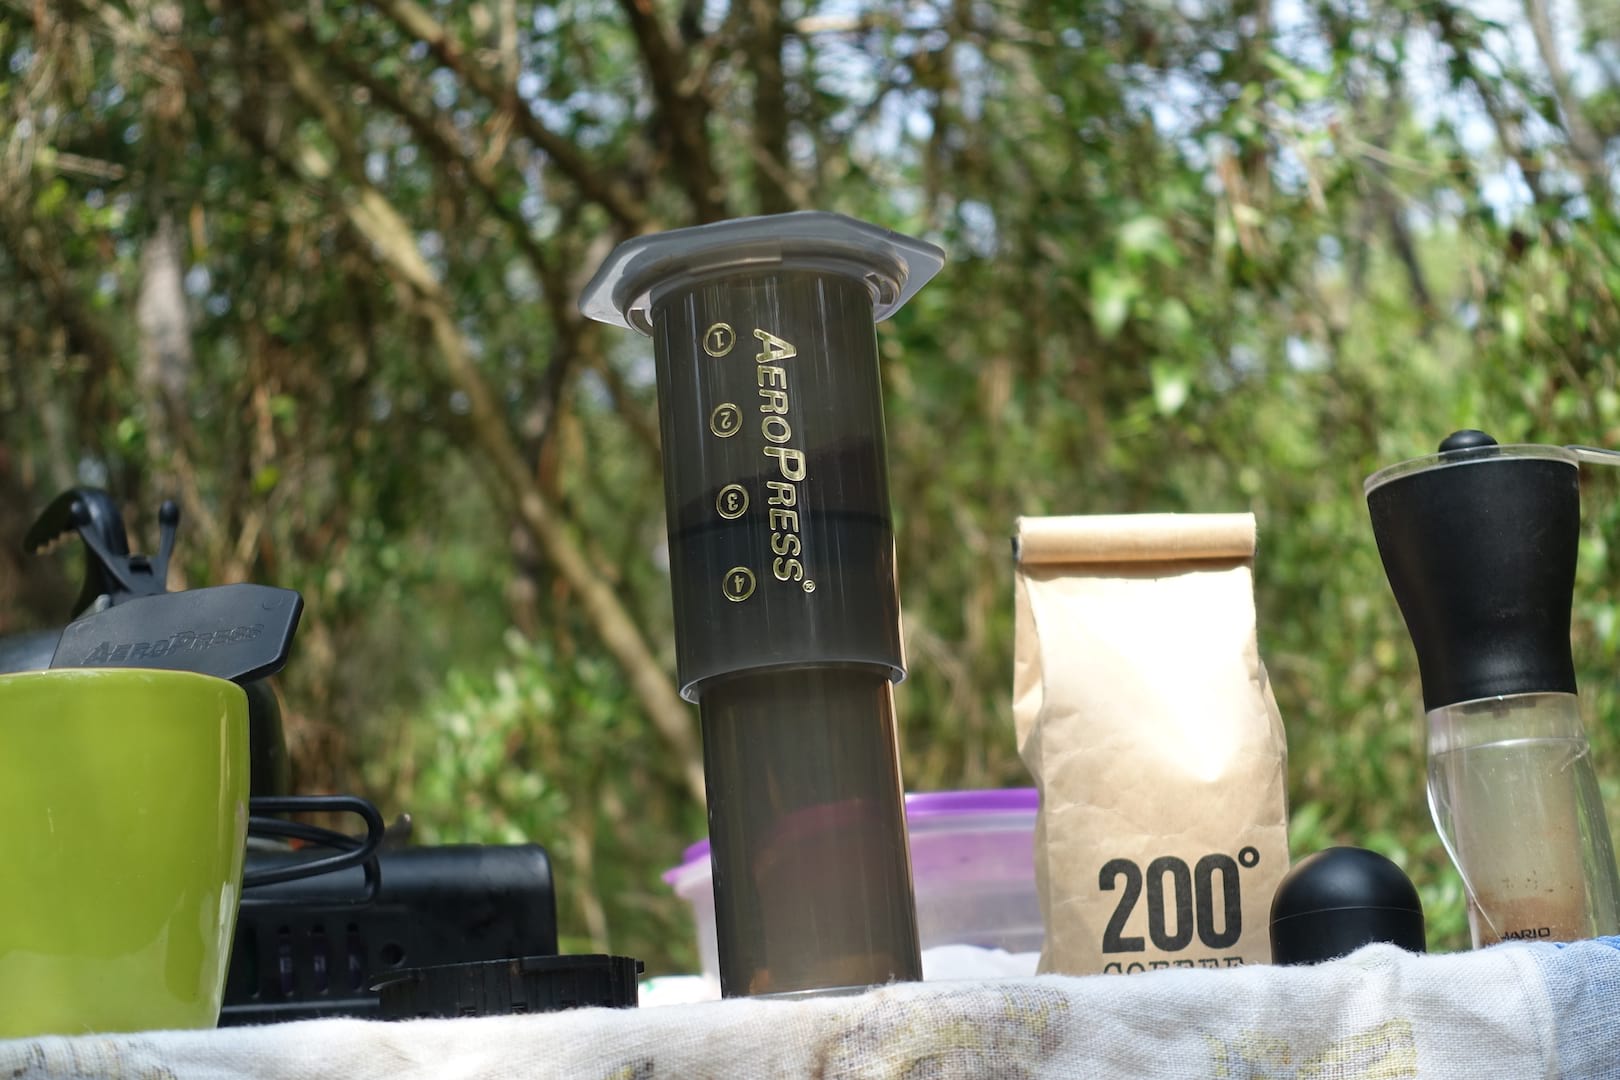
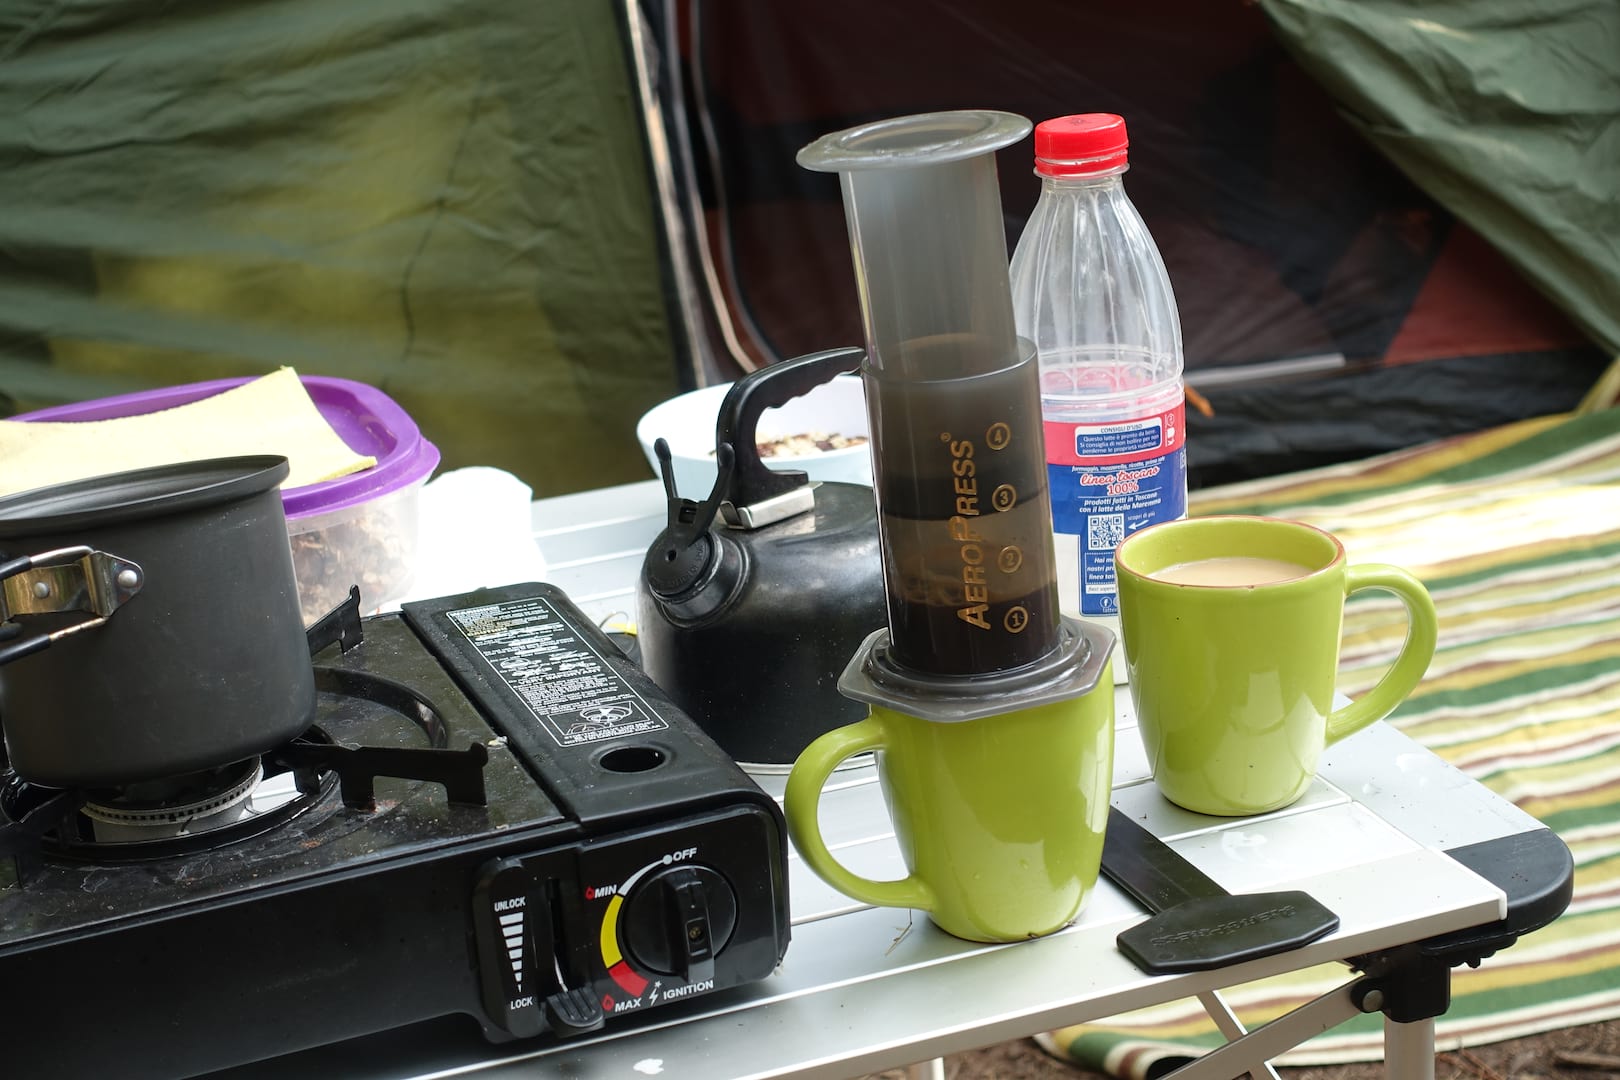
11. Make Good Coffee
Your caffeine requirements may differ from mine, but there is no way I’m going camping for nine weeks with no facility to make decent coffee. For me, decent coffee is the only way to properly start the day – whether you’re at work or on holiday.
I’ve owned an AeroPress for about 6 years now, and it’s been getting thrashed daily (often twice or thrice) since then. It’s relatively cheap (bought for $50 in Australia), and it’s both lightweight and compact, making it easy to stow with the camping kitchen essentials. The AeroPress is also really simple to use and clean, and it produces great coffee. Like any coffee-making device though, using quality beans and grinding them fresh makes all the difference. I’ve got a little Hario hand grinder that takes a couple of minutes to spin up, and the result is a decent brew every morning.
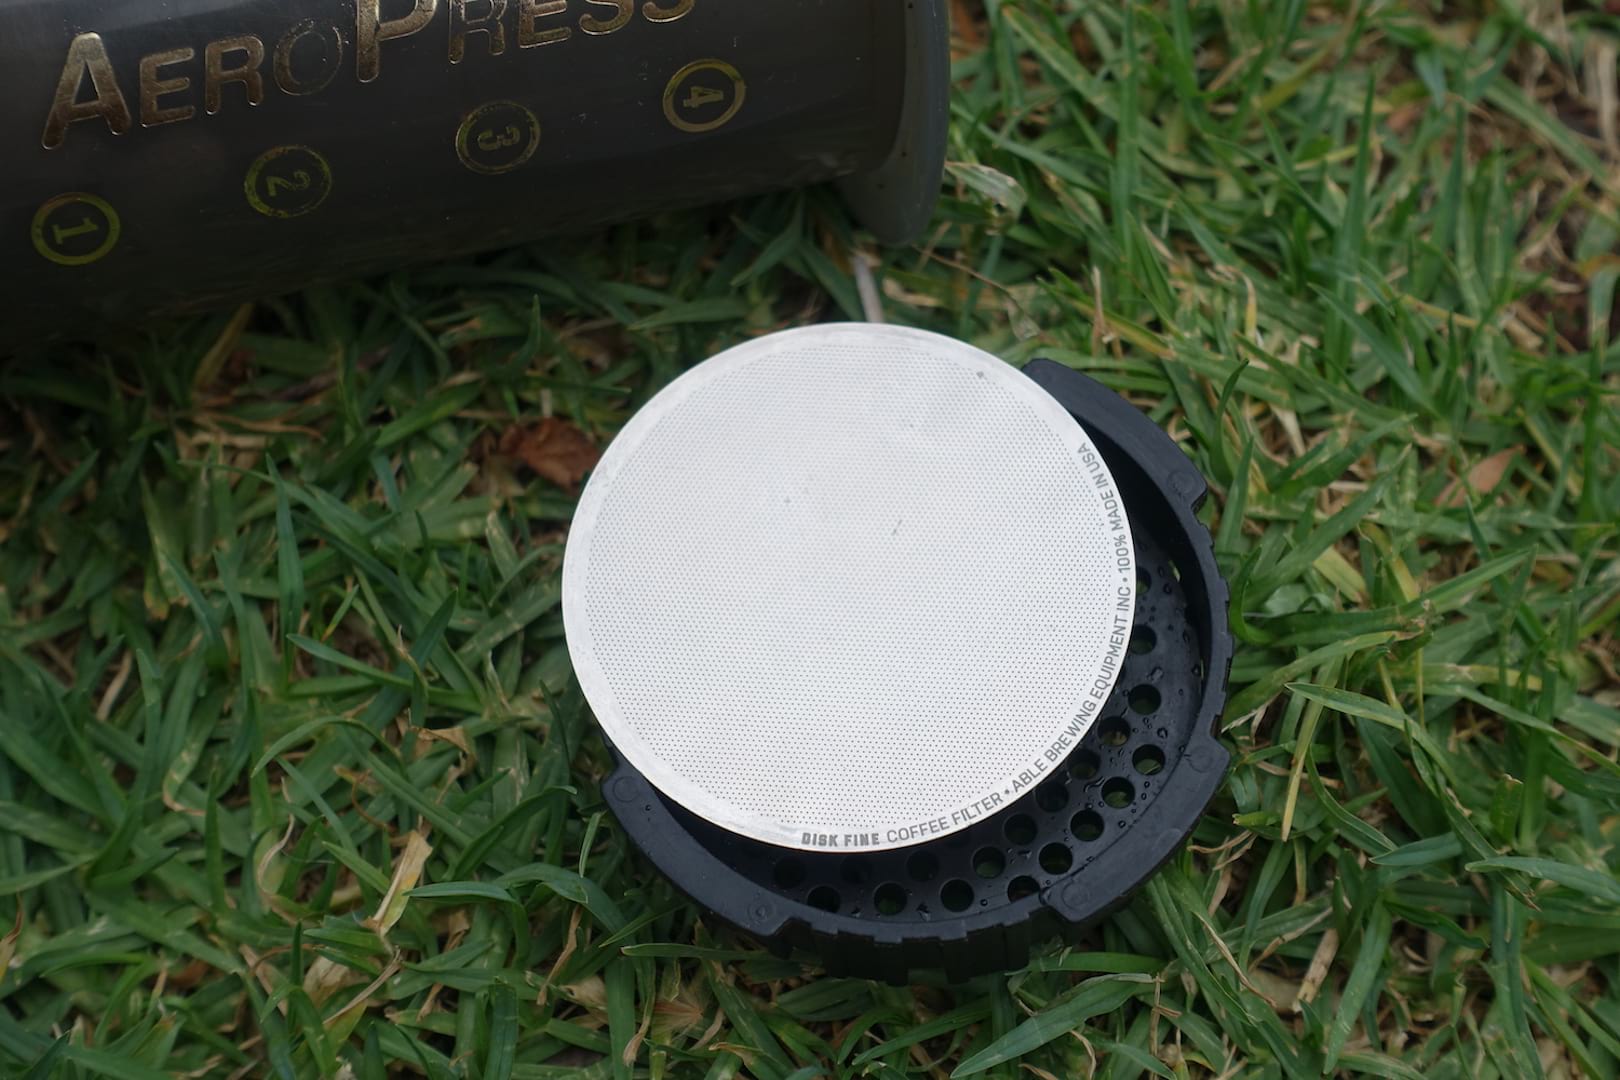
The other hot tip I’ve got for existing AeroPress fans is the metal filter upgrade, which replaces the paper filters that come in the box. The metal filter allows for more of the oils to come through when you’re pressing the plunger down, so the flavour is richer, and you can also rinse it and reuse it.
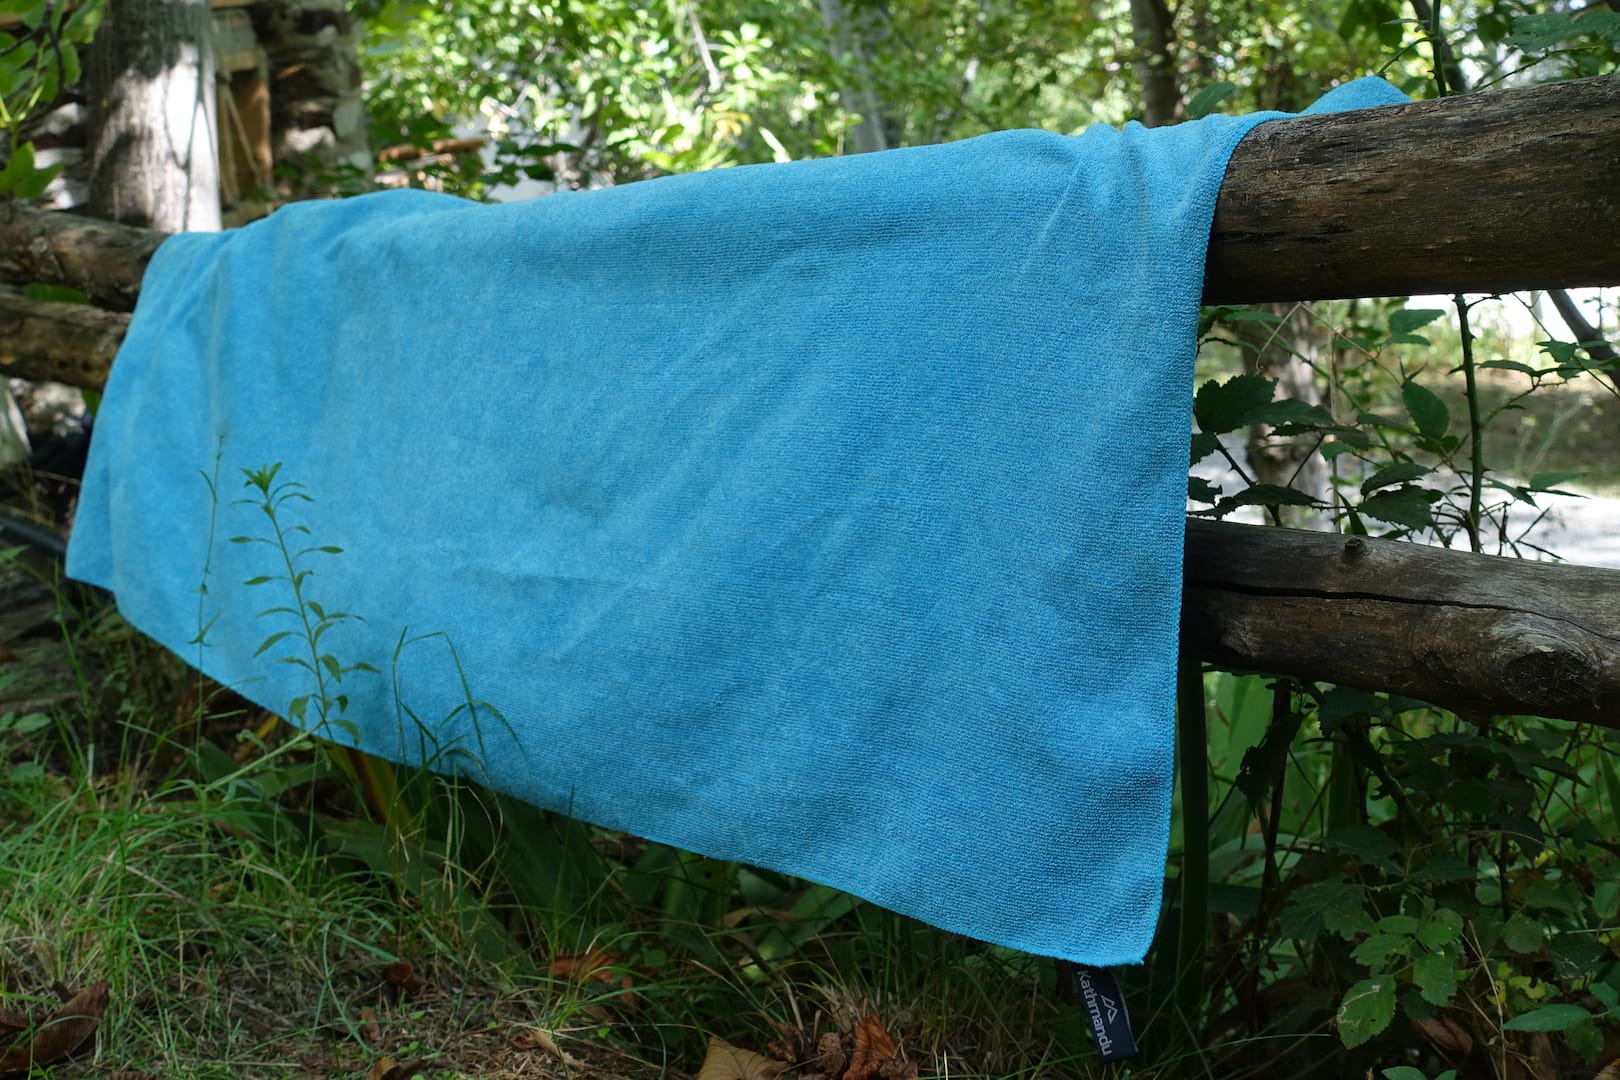
12. Travel With A Travel Towel
This might be another really obvious suggestion, but for those who are yet to get one of these microfibre travel towels, don’t put it off any longer – just get one. We’ve had this blue towel for years now (I can’t remember how much we bought it for, but it was probably $10-$20) and it comes with us on every camping trip away from home.
It’s one of the larger and heavier sizes, which isn’t a problem for car camping, but it does mean it absorbs more water. It also dries really quickly, which is good because we both use the one towel (hey, we’re allowed to – we’re camping!), and it doesn’t seem to get that stinky. Ideal if you don’t have washing facilities in more remote campsites.
It’s also really useful to have permanently stowed in the regular day-trip gear bag, particularly during the wetter months. There is literally nothing more comforting than the feeling of wiping off the mud and drying out a wet bum before jumping in a warm car seat to drive home.

13. Portable Battery Charger
This is another really simple addition for camping and travelling, but it proved to be invaluable on our trip. Suzie bought this portable battery online a few weeks before our trip (again, not sure how much this cost), and it was ideal for the multiple days where we were camping away from our car. Given I was using my phone for work emails as well as shooting and editing videos, I was heavily reliant on having enough juice in the battery to do so.
We would charge it while driving, via a little USB port that plugs into the car’s cigarette lighter (love that cars still have those!). It held enough juice to charge both of our phones several times over, which was really handy.
So there you go – those are a few of my tips and hints for a mountain biking road trip.
Looking back on it now, would I do anything differently? Well, I’d definitely get a vehicle that had air conditioning. We survived, as many before us have done, but I can’t say that driving down an Italian motorway at 120km/h with both windows wound down makes for the most relaxing time.
We could have also better taken advantage of the Kangoo’s vertical space in the back, with some kind of shelf to offer storage underneath and on top. Otherwise I was really happy with how functional the back of the car was, especially with the bike box and lock.
I think the only other thing we’d look at is some kind of solar panel to charge that little battery and my laptop. That would make us less reliant on charging via the car’s cigarette lighter, and scrounging for wall sockets in campsite laundromats.
What about you though? Are there any essential items that you couldn’t travel without on a camping road trip? Let us know what useful suggestions you’ve got in the comments section below!
[/wcm_restrict]
Travelling and riding over the colder months of the year? Then make sure you check out Amanda’s informative gear guide; ‘9 Creature Comforts To Make Winter Riding Better‘.