![]() You don't need to be an 'investor' to invest in Singletrack: 6 days left: 95% of target - Find out more
You don't need to be an 'investor' to invest in Singletrack: 6 days left: 95% of target - Find out more
Not been on here for a while, but wondered if anyone might be interested in this little project -- I've seen similar things being discussed on the forum, so thought maybe some people might find it useful. We had a small camper, we wanted a bigger one that would carry (and sleep) four and have space for bikes for all of us inside. Started with this:
[img] 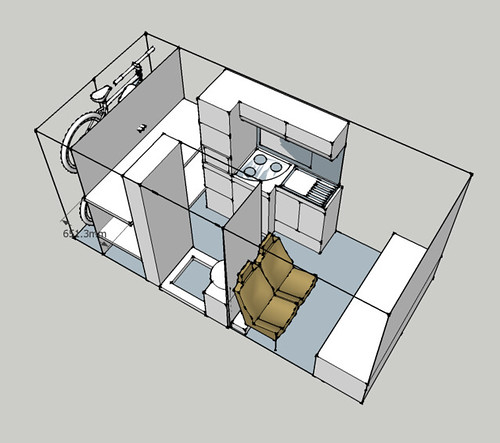 [/img]
And this:
[img] 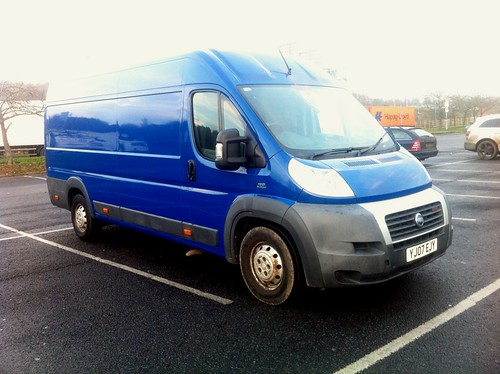 [/img]
That was the middle of December, much (possibly tedious) detail available if there's any interest 😉
you know the requirement: Pics and regular updates!
Brilliant idea. I had some ideas about doing similar around a LWB T4 with a bunk bed along the back for the nippers and a pop-up above for the grown ups.
Hell yeah, post more details!
The backstory: We'd had an SWB high-top T4 for six or seven years. It was ace, we had a lot of fun trips in it, but it was starting to feel a bit small. The kids are 8 and 4, one of each and increasingly not terribly good at sharing a small roof bed. The bikes had to go on a rack, which meant we usually took vaguely sacrificial (ie crap) ones that we didn't mind leaving on show if we went for a wander around town or something. We also wanted a decent sitting area inside that was unhindered by childrens' beds so they could go to sleep at one end and we could sit up at the other. Munging all these requirements together gave us the basic layout. There isn't anything quite like it available from proper motorhome companies, and if there was we wouldn't be able to afford it, so we decided to build our own.
Spent a lot of time looking for a suitable van. Having looked at all sorts, we settled on the current generation of Ducato/Boxer/Relay because they're wide enough to fit beds crossways, still fairly new and, well, dozens of pro converters can't be wrong. The next challenge was tracking one down that was within budget, not impossibly leggy, a private VAT-free sale and not too wantonly abused. Missed out on a couple and finally took a bit of a gamble by hitting the Buy It Now button on an '07 XLWB Fiat Ducato. Which came with this spendidly Clarksonesque bonnet badge:
[img] 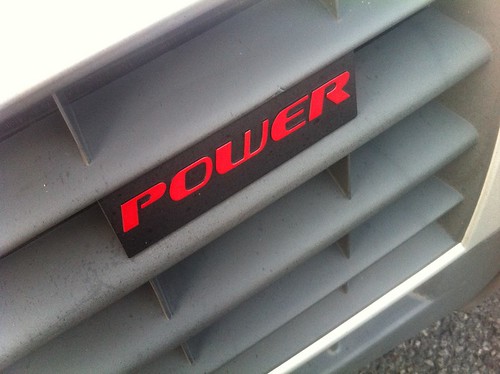 [/img]
It's a 3.0 turbodiesel, which didn't half get a shift on when empty. It's also the "Heavy" version, with uprated suspension and bigger wheels -- GVW is still only 3,500kg, but replating it to 4,000kg is just paperwork. No intention of doing that for insurance/ferry/other reasons, but it means I'm comfortable with it banging up against 3.5t in regular use. The empty van is a bit over 2t, so that's roughly 1,500kg to play with, which has to include us and all our kit.
As bought, the van was like this inside:
[img] 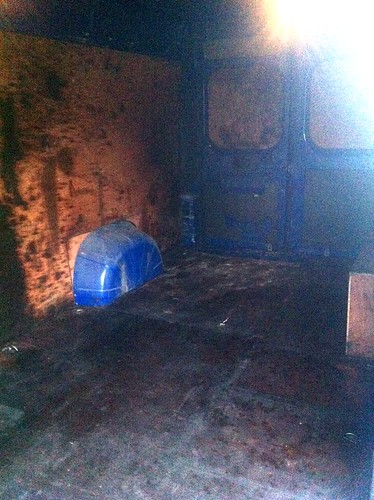 [/img]
Eeeuw. Previous owner was a heating engineer, so the interior was clad with a curious plywood/heating oil composite material. First job was to rip all that out and also remove this:
[img] 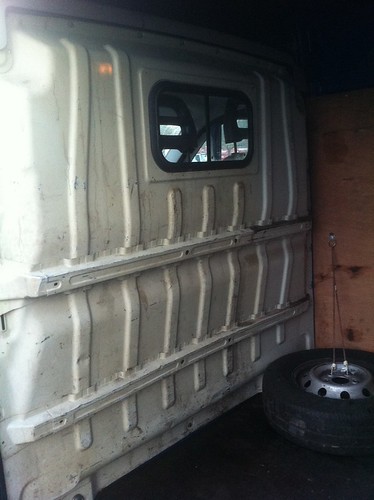 [/img]
which did not feature in our plans 🙂
An awful lot of this kind of thing came out:
[img]  [/img]
but we eventually got to the point where it was a bit more convivial and ready for the first of many trips to the timber merchant:
[img]  [/img]
Ooo very close to what I'm after.....currently trying to decide between quality of wildax Solaris the budget trigano tribute or diy/ part diy similar to yours.
V interested in what you are doing and price
Is the Solaris the one with the lengthways bunks in the back and a washroom in the rear corner? That's the closest we found to what we wanted. Still £40k, though, and you can't have bikes inside and people sleeping in the bunks at the same time. The plan was to bring this in for under £10k total, I think we've probably missed that by a bit. FWIW the bare van was just under £5k.
Ooh, insurance, I knew there was something I meant to mention. Insuring vans as private vehicles can be troublesome, the ins cos tend to assume that you're a builder really and charge accordingly. Our old van was insured with the Camping & Caravanning Club, they do a self-build policy that lets you insure a van as a camper on the understanding that you've got it to a suitably camper-y state within 120 days. Premium was £200, which seemed very reasonable. Other self-build policies are available 🙂
Yep Solaris has bunks the tribute has double size bunks across the back. Same problem with bikes though. We always take cheap bikes when away with the kids anyway so the garage bit looks good but not essential.
Sorry to hijack/jump ahead is the front bed going to be formed with the box/bench seat thing at the front meaning you can just use a standard van seat for the kid.
Mm. Part of the plan with this is to be able to take nicer bikes 🙂 If you've got the time/inclination, DIY is a big money saver. You could fit this layout into an LWB (rather than an XLWB) if you did without the garage.
We looked at the Solaris at a show (while nicking ideas, no intention to buy one 😉 ) -- it's pretty nice. The front end arrangement is quite versatile.
Yes -- the box/bench pulls/folds out (partially across the bases of the travel seats) to make a transverse double bed. The travel seats came out of a minibus and have integrated seat belts, I'll get onto those in a few updates' time 🙂
I will keep an eye on this then with much interest.
Seeing as my Transit has just failed the MoT as a result of tinwormitis, I'll be following this too.
Time for a new van, so what will it be?
We had a Ducato converted by Autohaus / Acare and it's 95% of what we wanted - we made a few spec errors because it was only our 2nd camper. It's absolutely great, excellent for 2 or 3, with a semi-permanent double bed in the back.
The truck itself is absolutely fine, bought new 4 years ago for about 15k, the same as a Fiesta !
The ducato/boxer is used by all the converters as they do a chassis cab version with essentially no roof so they are very easy to convert. Other vans don't have this option so are more work for the companies.
They're not bad vans but the engines on them (the smaller ones) aren't the most reliable so make sure the service history is perfect. My mates that he converted needed a new (second hand) engine at 73k after it failed spectacularly.
Certainly true of the coachbuilt outfits (although there a few Transits and others around). Not sure all the companies doing only panel van conversions are too bothered by the chassis cab option, though 🙂 That said, Fiat in particular clearly court the motorhome market. They do have certain other advantages, like the right-hand handbrake that's out of the way of seat swivels and a bit more interior width than most of the others.
I never did get around to doing anything with my Ducato (LH handbrake on LHD). I sold it recently after 15 years of reliable service having got no further than insulating the roof.
Someone on here did a similar conversion starting with a silver base Ducato. That was a stunning conversion. Iirc the rear bunks folded up so the bikes could be transported, but had to live outside when the bunks were occupied.
Can anyone find a link?
Edit: Here is the thread http://singletrackmag.com/forum/topic/anyone-gone-from-a-camper-to-a-van
Look at carloz' flickr page - amazing quality!
Heh "Munging"
That silver one's nicely done, but wouldn't fit our needs -- bike store needs to be useable at the same time as bunks. Can't see where the fridge or toilet are, either 😉 Also our layout means that you can still use the kitchen with the bed deployed. RIB bed is well smart, but out of budget...
Houns: It's all about the munge.
Based on our experience, consider a rock'n'roll bed as the back seats, and restrict your cooking to 2 rings, which will free lots of space.
Can you get a 2nd hand capsule loo-shower room from an old caravan?
Mike one quick question, how many bikes can you get in the garage bit? (ie can you get the kids bikes in as well?)
Are you going to take the bulkhead out and fit captains seats?
Moses: All the considering has been done, these pics are three months ago 🙂 There isn't space for a rock'n'roll, we need to have the bed transverse to have room. Also most R'n'Rs don't make great seats, and the ones that do are massive money. I wouldn't be happy using anything less than a properly crash-tested one, which would represent 60% of the conversion budget straight off 🙂 Two rings yes, and we're just building a washroom from scratch because then it can be made to fit the space rather than having to fit other things around it.
lastuphills: Garage will take four adult bikes. Either leave wheels in and twist stems, or take a wheel out and turn bars. Two at floor level, two on a shelf halfway up.
geoffj: Bulkhead out, been on ebay and long gone 🙂 Seats are (now) two singles, no swivels though. The transverse bed base makes swivel seats a bit pointless, having them would make more problems to solve, like raising the rear travel seats to the same level to make a sensible dinetts and working a bed in there somewhere. Also swivels are expensive, and we'd need lower seat bases to compensate for the extra height they introduce. Finally, leaving the cab essentially separate from the living area means you can dump stuff in it, and put a bit curtain across where the bulkhead was to keep things warm rather than faffing with silver screens and so on.
Mike_D - Member
...Also swivels are expensive, and we'd need lower seat bases to compensate for the extra height they introduce...
There's plenty dead Renault Espaces around. Many of them have have swivel seats in the front. You could probably pick up a set in leather quite cheaply.
I'll be following this with interest too.
My own plans wouldn't feature as featured a kitchen and might not have a shower, but I'm sure the rest will be relevant.
It's a shame there isn't enough room for 4 up front. Would make family vans much easier. There were a few bus-shaped-objects with 4 front seats in NZ, but not very practical for back lanes.
epicyclo: If we'd wanted front swivels, we'd probably have gone that way (or Galaxy seats, millions of those around too). But we didn't want them for the reasons mentioned 🙂 The other issue with the "half dinette" using cab seats is that only three of you are actually sitting at the table -- whoever's in the passenger seat is out on a limb. Rest assured that a lot of thought went into this -- the original plan did have spinny seats but once all the other constraints were in place (especially the main bed) they added nothing of use. If we'd got an extra-high-roof van we might have done a drop-down roof bed which could have worked with a half dinette, but they're all out of budget.
Alex: If you don't put a kitchen in it'll never officially be a motorhome, which has speed limit and insurance implications (not insurmountable, but worth thinking about). IKWYM about the shower, this is only having one because we wanted a toilet with reasonable privacy and once you've built a space for that you might as well have a shower. Also it's the sort of thing that any subsequent owners would expect to see.
Following this too as I want to do something similar in the next couple of years. If the front seats don't swivel round where do you sit? Or is the plan to have an awning on this side as 'living ' space
V interested in this . Keep posts/pics coming .
Alex: If you don't put a kitchen in it'll never officially be a motorhome, which has speed limit and insurance implications (not insurmountable, but worth thinking about)
For speed limites, I guess that depends if it's possible to keep the motorhome below 3.05 tonnes unladen weight as that's where the rules change. Should be doable.
Thanks for the response mike, I really like your design I can see it would work for us too. I also like the fact you are only paying for what you need by diy not some of the frippery and extras included in a proper motorhome.
My big choice would be garage at the back or smaller van? I keep going around in circles....smaller van easier to park etc...but we always take bikes on a rack making the van longer and around I go. 😀
Alex...not sure that is right, my t5 would be subject to reduced speed limits if it was a normal van. It's a kombi so registered as a diesel car which is why they do not apply to mine.
I think I'm confusing you - Motorhomes under 3.05 are same limits as cars.
Vans will have reduced limits (unless car-derived van).
So I think we're saying the same thing. Originally I was assuming that the OP's project would be over the 3.05 limit, but perhaps it wont be.
Just going from this. https://www.gov.uk/speed-limits
mark: seating is on the bench seat behind the cab seats.
lastuphills: Yes, the length is a trade-off. This one's 6.4m, a bit long for normal parking spaces but shorter than a 6m van with a bike rack on it. I think a ferry to France is about £30 more than a 6m van would be.
Alex: You're right, I was stuck in T4-land for speed limits. Van might be 3.05 unladen, but are the limits based on unladen or GVW?
Moses - any chance of posting some photos? We're thinking of doing the same thing
Cheers
My van is a shade under 6 metres, this is my first incarnation on the left then rebuilt it to that on the right. Although there is less floor space, the new layout is much better, the fixed bed is brilliant as it creates two separate spaces in the van, you don't need to move all the bedding and cushions twice a day, and you can chuck coats etc on it during the day.
Underneath the bed is space for two bikes in the big DHB soft bags, plus small BBQ, levelling ramps and a couple of boxes for bike stuff.
The table sits behind the passenger seat when travelling, but it has a double jointed leg so it can go anywhere from across the sliding door, to between the front seats right up against the dash.
Our kitchen is quite large as we have a compressor fridge and a full gas hob/oven, and also the water tank is under there as I needed to keep the weight forward to ensure we didn't go overweight on the rear axle with our very heavy trailer.
[img]  [/img]
Loads more pics, though many of them are of the first layout.
https://www.flickr.com/photos/ojr/sets/72157619846157047/
Nice. When the kids stop coming on holiday with us, it'll be fixed rear bed all the way 🙂
Anyway. The latter half of December was spent measuring and ordering parts. How people converted vans before the internet in general, and ebay in particular, was invented, I have no idea. Shortly after Christmas, some actual forward progress was made, starting with some lines on the floor:
[img] 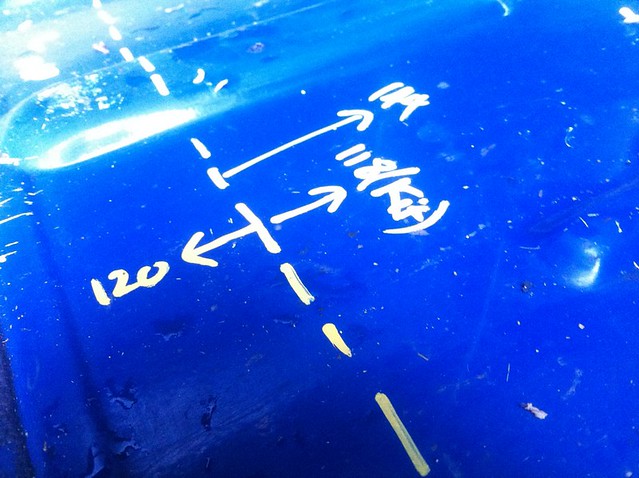 [/img]
Which we then promptly covered with a load of wood:
[img]  [/img]
25mm battens stuck to the floor with Sikaflex, which is fantastic (but also evil) stuff. The gaps in between got filled with 25mm Celotex insulation a bit later on. In the foreground you'll notice the corner of a seat, here they are mocked up in position:
[img] 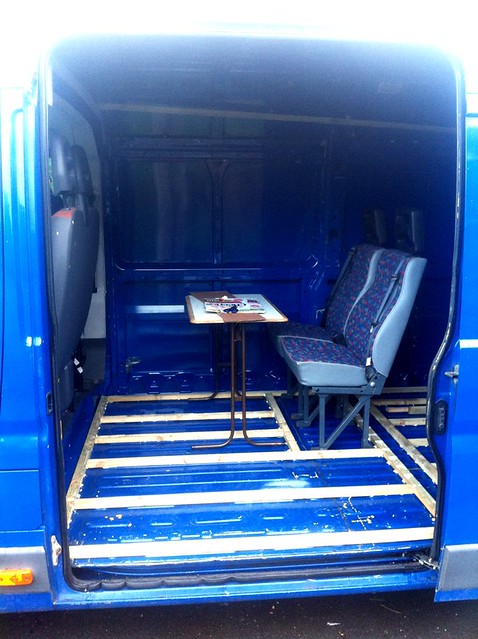 [/img]
I wanted the rear seats bolted directly to the floor, so the floor was put in around their final position. The rear seats came from an ex-council Mercedes minibus that a local bloke was converting into a camper -- he was in a wheelchair, the bus had a lift at the back but more seats than he needed. £60 for three seats was a bargain even though we only needed two -- they only had four sets of legs between the three, so it all needed taking apart and putting back together in a different order. Built-in seatbelts, not the nicest fabric but that can be sorted.
The other important bit of floor is this:
[img] 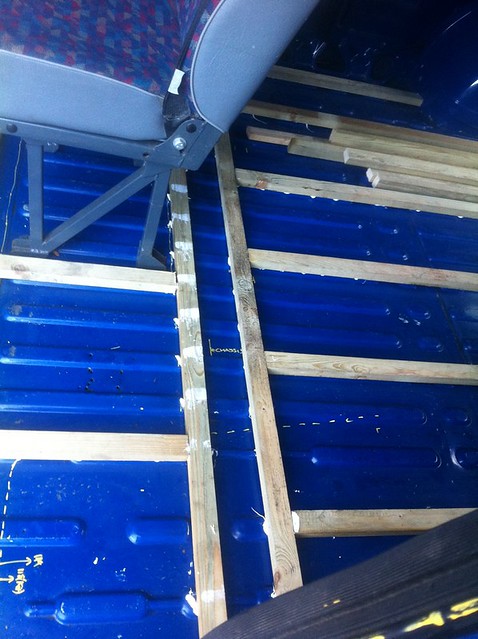 [/img]
which is where a load of pipes and cables cross the van. Water tanks are underneath, kitchen's one side and washroom the other, so the water needs to get from one side to the other. Similarly, the leisure batteries go under the rear seats and cables need to get to the kitchen side. If you're planning to convert a van and take just one thing from this thread, take the service trench 🙂
Then we needed to cut a load of plywood for the floor, which necessitated a bit of CAD:
[img]  [/img]
Yes, that's Cardboard Assisted Design. Bit surprised at the branded cereal packet, it's usually Sainsbury's own-brand round our way. Must have been an offer on. But I digress. A bit of circular and jigsaw action later:
[img] 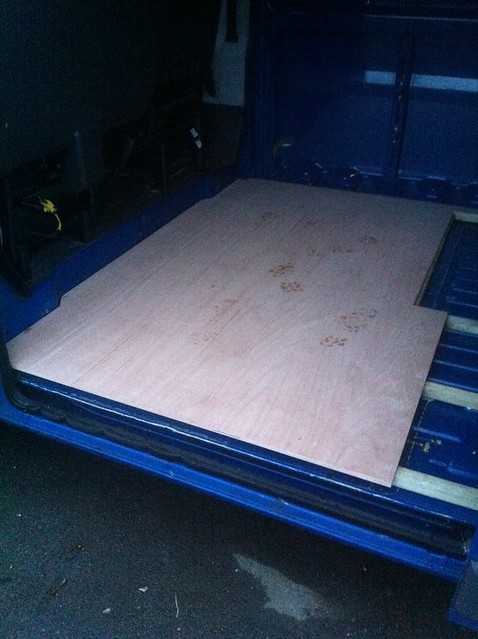 [/img]
Probably didn't need to be quite such a neat fit given that all the edges will be hidden by wall linings or furniture, but never mind. The rest of the floor continued in a similar vein.
Then the fun really started. A lot of measuring and even more masking tape:
[img] 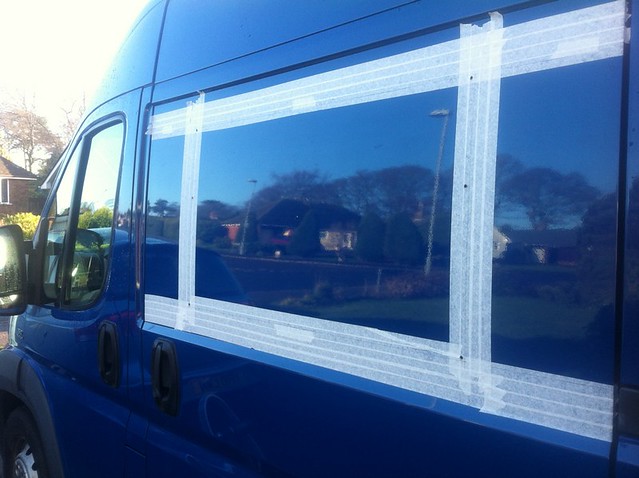 [/img]
ERMAGERD I GONE DONE DRILLED HOLES IN THE VAN!!11! AND THEN ATTACKED IT WITH A JIGSAW!
[img] 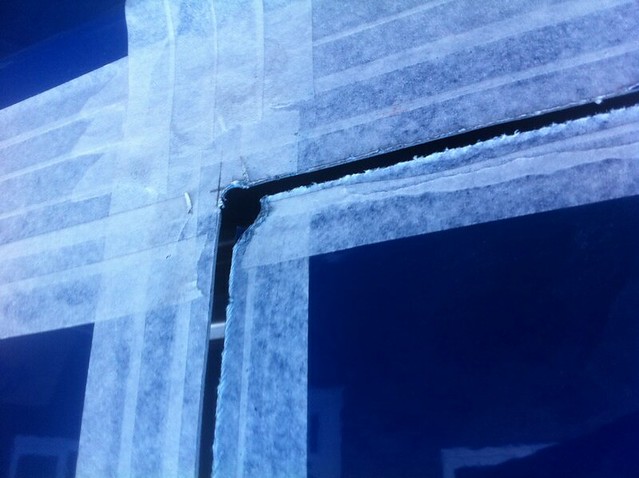 [/img]
Continue until this happens:
[img] 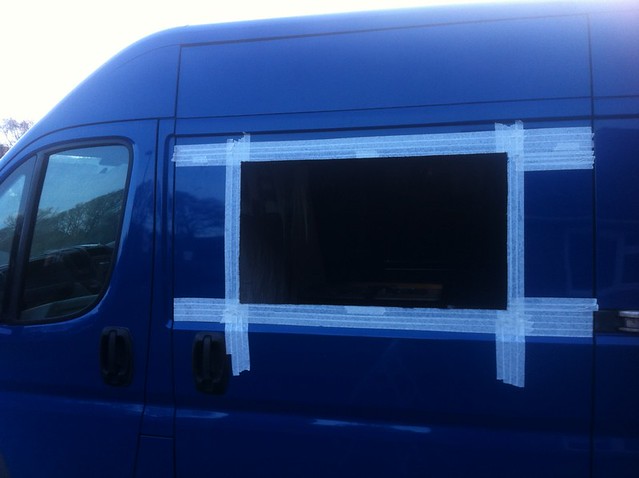 [/img]
Clean up the edges with a file, slap some paint on to cover the cut edges. Then stick some timber around the inside -- the Seitz windows we're using are designed for a minimum wall thickness of 25mm, which is a bit more than the 1ish mm of the van sides, so you need to make up the thickness:
[img] 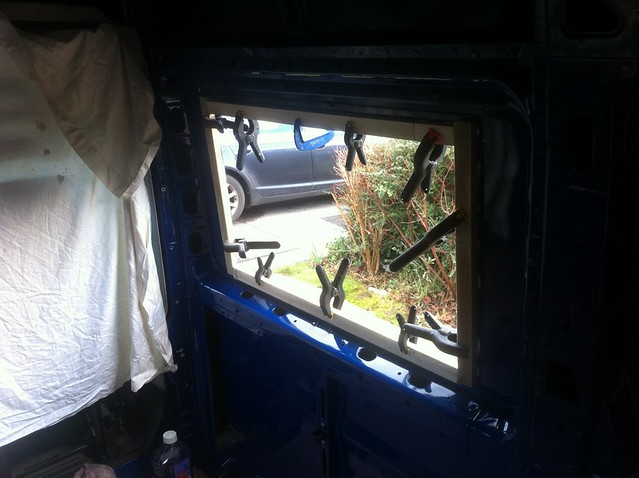 [/img]
(Yes, that's the other side of the van, forgot to take a picture of the sliding door side at this stage). The other nuance is that the windows are designed for completely flat sides, like a coachbuilt motorhome or caravan. The sides of this van are slightly curved, which gives two options. First, you can not worry about it, bosh the window in and let it pull the panel flat at the edges. It's OK unless you look pretty closely, but the distortion is more obvious on non-white vans. We went for the second option, which is to curve the face of the battens and only have the outer frame in close contact with the van sides in the middle. You have to do some extra sealant work on the outside, but you might want to do that anyway. Presto:
[img]  [/img]
Then do it all again on the opposite side, which involves taking out an anti-vibration strut across the panel:
[img] 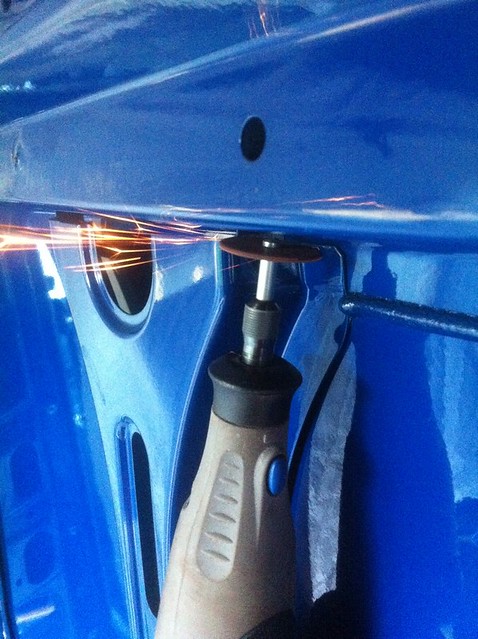 [/img]
Useful bit of weight saving:
[img] 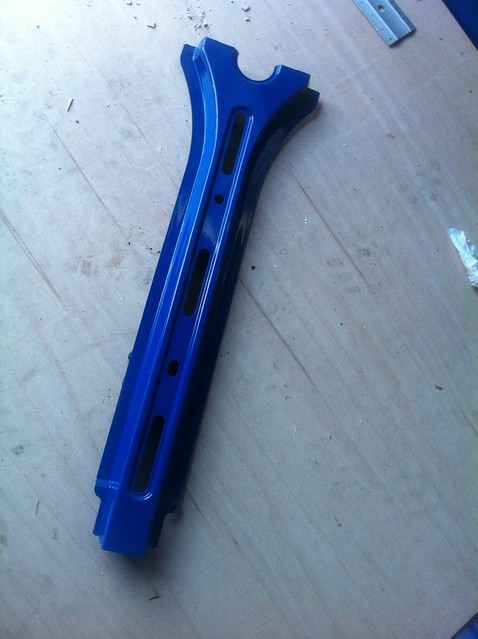 [/img]
I should point out that you can't just cut out random bits of steel on a whim, but these ones are OK to remove -- they're spot-welded top and bottom and seam-sealered to the thin panels to stop them drumming (a bit). The window and frame do the same job. Cut another hole:
[img] 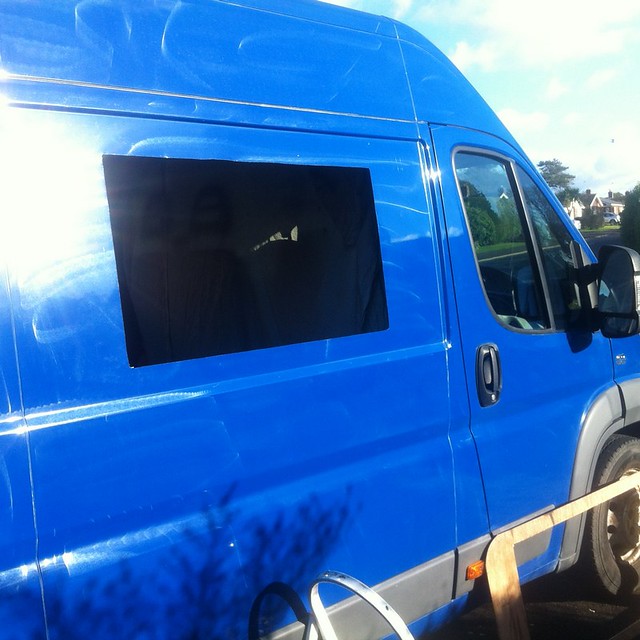 [/img]
Wood blah blah fit window:
[img] 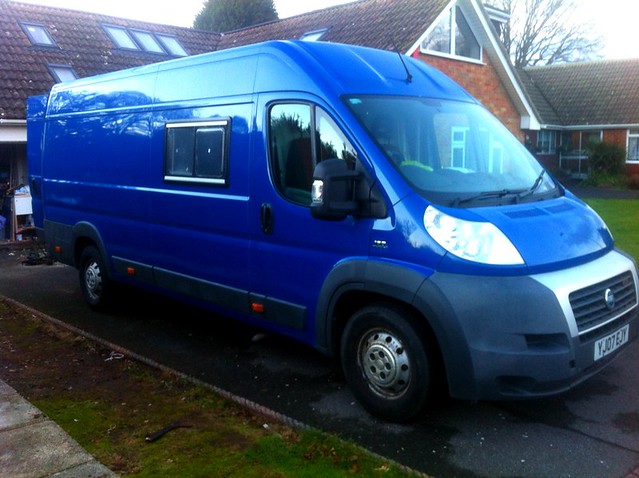 [/img]
Once more for luck:
[img]  [/img]
(Epic exposure fail in that one, sorry.) All of which left the inside looking like this as of the first week of January. Yes, a few showers may have possibly made things awkward:
[img] 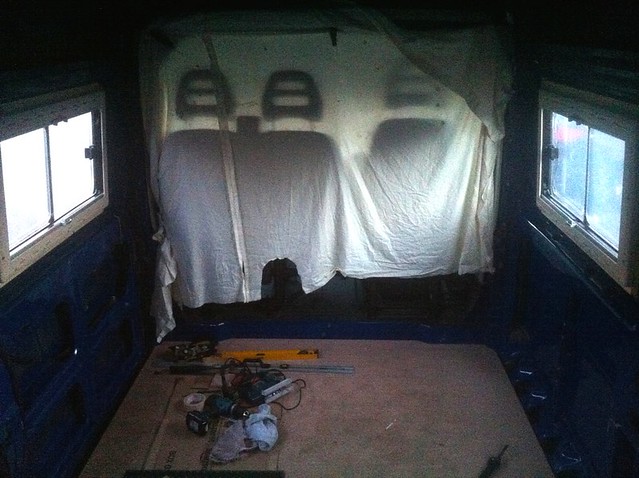 [/img]
More soon!
This is NOT helping my need to build a camper.
It's like Dexters 'dark passenger', but less the urge to kill, more the urged to build..
So..
Once you have a van, what are your estimated conversion costs? (Not including price of van)
DrP
Your seats (the frame at least) are almost identical to mine. They came out of some sort of taxi...I asked for the spreader plates etc and was handed a pile of washers and assorted bits of metal that looked like they had been collected from the floor of someones garage...incredible that they got away with such a shoddy install for a taxi! I went and bought some 5mm flat bar, 8.8 bolts and some box section to bring the seats up to the level of my insulated floor (which was already in due to it being a refit)
[img]  [/img]
[img]  [/img]
Well done on not using a hinged Seitz behind the sliding door, and for using Sika on the floor battens. I used expoxy and during the following few days of driving the floor unstuck itself and it took months for it to settle down and the creaking to stop!
I take it you have found and joined the SBMCC?
Nice work, looking good so far, and i like your layout. Déjà vu from when I did mine, some good memories, some not so good 😉
@ Spooky, the fixings supplied with Unwind tracking for seat fitting in taxi/minibuses are just M8 bolts with big washers. Doesn't seem enough, although I do have a tendency to over engineer in such situations.
DrP, my conversion cost was around £6k, but I bought almost everything new, the big items were best part of £1000-£1200 on three windows and two rooflights, £300 for spray foam insulation, £350 for underslung LPG tank (much cheaper to have a bottle if you have the space) £400 for a propex gas heater, £450 for a compressor fridge (much cheaper to have a 2/3 way gas/12v fridge) and £450 for a gas hob/oven, (much cheaper just to have a hob) £250 on a second hand gas water heater. Can't remember what I paid for the seats.
Parts only, fitted everything myself.
If I were to do it again I would be more cost concious, but then again things that seem OTT like the LPG tank make sense when you can just fill up in a petrol station for pennies and it doesn't take up any space inside, the oven gets used fairly regularly (including extra capacity for pigs in blankets and roast potatoes when the turkey hogs all the space in our normal oven at Christmas!) and you don't need to worry about switching the fridge onto gas every time you've parked the van up.
The final expenditures that I haven't yet justified are a solar panel (I can go for a lot of drives to charge the batteries for the price of a big panel) and I'd really like to get the van wrapped in silver vinyl as its getting a bit scruffy.
Loving it, Mike.
Looking forward to more.
Its scary how much the little bits add up, electic cable and fittings (12 and 240 volt), pipes and fittings, sikaflex, glue, screws, p-clips, etc, etc.
Mike_D: I'm really enjoying this thread. Thanks for sharing
Excellent walkthrough. Managing to follow it pretty well 🙂
Out of curiosity, why didn't you go for glazing the full window panel (like on factory combis/minibuses)?
Personally, because Seitz are double glazed, bigger opening, integral blackout blind and flyscreen, and much easier to make good on the inside. Bring ply lining up to a bonded window is much more fiddly to do neatly. Also in my case, the bonded windows were too low so would go below the height of the seat backrest, worktops etc. Not such an issue in fwd vans with a lower internal floor.
What spooky said -- bonded windows look good on the outside, but the actual aperture isn't all that large and you don't get much of an opening. Also they're single-glazed glass, which is heavy and not that well insulated. And you'd have to make blinds/curtains for the inside, while the Seitz ones have integrated blinds/flyscreens.
Costs: Original estimate was £5k, more likely to be £6k-ish. As others have said, it's a few big-ticket items plus millions of sundries that you don't really allow for 😉 Had a few ebay/used bargains (seats, water heater, toilet, roll-out awning) but a lot of bits are new. The cheapest approach is to get a donor caravan and use everything out of it -- the SBMCC reckon that £3k is about the baseline cost for something worthwhile.
I'm thinking of putting a password on this thread because if Madame sees "Mike-D" she will look in here. The vague idea of another "Wendy house on wheels" will then be added to my list of things to do. I'm safe for a few more weeks thanks to a carpal tunnel op'. Anyone got any ideas for something to do on a rainy day with just one hand?
Great project. I'm very envious but can't do anything like that here (Spain) as it's almost impossible to change a vehicle from original spec. The easiest way around is to build everything removable for the biannual "mot" ; you actually see people pulling out all the woodwork in the testing station carpark.
Mike can I ask what your background is? I'm reasonably handy but don't think I would have the confidence to cut holes in the van/ fix the seats in etc
Mike_D - MemberThe cheapest approach is to get a donor caravan and use everything out of it
Be warned, my neighbour did this, he ended up becoming a caravenner instead. We more or less had to take a half dismantled Convoy off his driveway with brushes and shovels. Then the original donor van turned out (unsurprisingly) to be rotten so he bought another one. Then he replaced his car so he could pull it better.
Well done , I'm rather enveious
I had a master lwb high top as my daily drive for two years while I failed to build it into a proper camper
I just never made my mind up on the layout so never started more than a very basic kitchen unit and fold out bed
lastuphills: I work at a desk typing stuff. But I've done a fair bit of house DIY and have a decent selection of tools. A lot of van stuff is regular carpentry/wiring/plumbing, it's only the metal stuff that's novel. The hole in the side you see above was the first hole I'd cut in a motor vehicle, unless you count bodging up rust holes in my old Escort 😉 There are plenty of resources on the net to point you in the right direction. None of it's that hard, but it is time consuming. The aforementioned Self Build Motorcaravan Club (www.sbmcc.org.uk) is a good place to start - £15 membership but you'll save that the first time you buy anything 🙂
Always do your first window in the sliding door...it may be a pain but you can always get a whole replacement door if you royally f-it up!
Its a simple process of measure 43 times, cut once. And don't be tempted to cut too tight as its a real pain trying to trim a few mm from a wobbly panel - didn't make the same mistake on the other windows! 🙂
Wise words 🙂
Having done all that on the sides, it was time to climb up on top and repeat the process for the rooflights. Nearly made a catastrophic blunder because I had the dimensions for the two big side windows stuck in my head -- the y dimension is the same as for the big rooflight, but the x is different. Managed to notice before I cut a hole 200mm too wide in the roof... Marked out the right size:
[img]  [/img]
The instructions call for a 12mm radius at the corners, I deemed 12.5mm from a 25mm holesaw to be close enough. Also the holesaw matches the van, which is nice:
[img]  [/img]
Then join the corners with the jigsaw. It's a bit awkward across the roof because it's corrugated:
[img]  [/img]
Look out below!:
[img]  [/img]
Lets a bit more light in. You'll also notice some floor insulation going in:
[img]  [/img]
Timber frame as per the side windows. Yes, it had got dark by this time, and a bit cold -- not ideal conditions for Sikaflex to cure, but it seemed to work:
[img]  [/img]
After a night with nothing but a sheet of thick polythene and some gaffer tape to keep the weather out, the rooflight went in:
[img]  [/img]
Not pictured is the almighty faff filling in all the corrugations to give the rooflight an effectively flat surface to sit on and seal against. After a couple of failed (ie leaky) attempts, success was found with pieces of rigid PVC from a building plastics place cut to fit the shape of the hollows and bedded on Sikaflex. Two layers of mastic-on-a-roll between that and the window seems to have done the trick.
Then repeat for the smaller rooflight over the bunks towards the back:
[img]  [/img]
[img]  [/img]
And if anyone's wondering what the lifespan of a cheap 25mm holesaw from Screwfix is, it's about eight holes. OK, seven, the eighth one was a bit slow:
[img]  [/img]
As if two rooflights isn't enough, there's a third one going over the washroom. Partially for ventilation, partially for light, partially so I can actually stand up in the shower -- the shower tray is a little higher than the floor and while the headroom is adequate in the rest of the van, a little more bonce space will be useful in the washroom. So the end result is this:
[img]  [/img]
Third week of January and it looks quite a lot like a camper. On the outside, at least... Around this time the original double passenger seat came out:
[img]  [/img]
New single seat base (sourced for a company called Cabmasters oop north, if anyone ever needs a single Ducato passenger seat...):
[img]  [/img]
And the seat itself:
[img]  [/img]
Had to work a little bodge with the seatbelt tensioners -- the double seat has two, the single has (naturally enough) one. However, the van electrickery expects there to be two and puts the airbag warning light on if there's only one. Apparently you can't persuade it otherwise by plugging in a laptop or anything, so I spoofed it with a 3.3ohm resistor across the cable to the missing connector.
While the double seat might have been occasionally useful, it wasn't the best seat -- it's fixed, with no adjustment of anything, and was set well back so it intruded into the accommodation space quite a lot. The single is much better, and leaves a nice big gap through which we can clamber into the back.
Looking very nice indeed!
So, fitting seats then. Quite a minefield, and there are an awful lot of hideous bodges out there. After lots of research, I found a handy VOSA document about minibus safety which had specs for bolted-in rear seats. Seats with built-in seatbelts have to be more strongly attached than thos with separate belts, because all the seatbelt loads are going through the seat mounts. If the seatbelt is separate then the seat mounts only have to hang on to the seat rather than having to deal with an occupant as well. Integrated belts are a lot easier, though, because you don't have to find somewhere to attach the belts to. The Ducato has provision for a belt on the offside C pillar, but inevitably it's not quite in the right place for where we want our seats and we need two belts anyway.
As previously mentioned, we sourced a pair of second-hand minibus seats. The VOSA spec calls for M10 8.8 grade bolts and minimum 75x75x4mm spreader plates, under the floor for the rear bolts and above the floor for the front ones -- if you decelerate suddenly, the seat's trying to pull itself out of the floor at the back and punch through it at the front.
First I had to work out where the bolts could go. Fortunately the legs can be shuffled sideways on the seats, because there's an awful lot of stuff to miss under the van:
[img]  [/img]
All those hatched areas (well, most of them -- some are in the wrong place :roll:) represent hollow chassis rails. No point drilling there, you won't be able to get a nut on the other end of the bolt.
Having identified places for the bolts to go, I shaped the front spreader plates a bit so they sit flat to the floor between corrugations. The plates were made up by a local fabricator from a usefully-sized offcut -- they're actually 6mm thick but this is one area where I don't mind a bit of overspeccing. They're also big enough that I'm comfortable with lopping the corners off with an angle grinder:
[img]  [/img]
so that they fit snugly like so:
[img]  [/img]
And yes, that's the driveway you can see through there. Repeat where necessary (a couple of them went in unmodified) and bolt the legs in:
[img]  [/img]
The rear bolts have plates underneath:
[img]  [/img]
That's the handbrake linkage in the foreground, one of not many things under the van -- it's front wheel drive, the exhaust comes out behind the driver's door so between the transverse silencer and the back axle there's nowt other than the handbrake linkage and some brake pipes and wires at the edges. This will come in handy later.
With the legs securely mounted, the actual seat frames can go on:
[img]  [/img]
And the bottom cushions:
[img]  [/img]
Handily, the cushions are held on with a single handwheel bolt under the front edge. The bench seat will be at the same height as these so everyone's sitting level, the travel seat bottom cushions can be quickly removed so the bed can pull out over the seat bases.
View looking forward:
[img]  [/img]
To give an idea of scale, the area behind the rear seats is as long as the entire interior of our old T4. Even with the seats in, it still took 8x4 sheets for a while, until the rear bulkhead went in...
Bravo!
There looks like acres of space between the back seats and the front. Is that going to be a double bed?
Yup, the bed makes up to 186cm long (basically the full width of the van) and 130cm wide, so 10cm narrower than a standard double. More importantly, 20cm wider than the bed in our previous van 🙂 The rear-facing bench is also split so you can pull out the bit by the sliding door by itself to make an L-shaped seat so you can sit six (comfortably) or seven (at a push) around the table. Or two people can both sit on it with their feet up 😉
The compromise is that the gap between rear seats and rear-facing bench comes out quite small, so if two adults sit opposite one another their feet end up overlapping. But there's enough room that knees don't collide, so that's OK.
Enjoying reading about this....keep up the cracking work, looks a great project.
I ruddy love this.
GOt my keen eye on a hi top LWB vivaro....
DrP
Small tip - maybe useful maybe not - about wot someone said earlier -if you fit LPG tank you cant use le shuttle. Fit refillable LPG tank (gaslow etc) and you can.
Eurotunnel is fine with fixed tanks up to 93l as long as they're for powering cookers and stuff rather than actually fuelling the vehicle. We're using an underslung 38l tank.
C'mon Mike ....... more photos of the conversion process pls
Go on then, a few more for lunchtime 🙂
While we're discussing LPG tanks, here's one:
[img]  [/img]
It's a vapour take-off tank, so not the same as the sort that LPG-fuelled cars use. In theory you can get this size with welded-on mounting lugs, but they were proving hard to get hold of at the time, so this is a regular one. Needs a coat of underbody paint before carting it around under a van:
[img]  [/img]
Then bolt the mounting frame to the underside:
[img]  [/img]
The tank's held on with steel straps. As standard, the frame comes with two, but that arrangement's intended for putting in a boot with the tank on top of the frame -- the straps just need to stop it moving. If it's actually hanging, the supplier recommends a second pair of straps. They're a right faff to fit, being adjustable for length by threading them through a buckle/bracket thing. Just like you might use for holding a tent to a bike rack, except made of steel :/ Also there's not much room around it. Eventually, though:
[img]  [/img]
Getting it up there was entertaining, involving a trolley jack, various bits of wood, and swearing. It sits up out of harm's way between the chassis rails -- the thing in the foreground is the exhaust silencer, the tank is higher than that and higher than the fuel tank, so should be OK.
Also under the van are the fresh and waste water tanks, shown here not under the van:
[img]  [/img]
Before fitting, I had to make holes:
[img]  [/img]
To fit the sender for the level gauge (an actual gauge for fresh, just a full-up warning for the waste):
[img]  [/img]
Then fill the hole with a screw-in hatch from the boat shop:
[img]  [/img]
They go up under the van too -- they're specifically made for these vans, so fit neatly around the various bits of chassis. They're supported by steel cradles hanging off J-bolts through holes in the chassis rails:
[img]  [/jpg]
What else? Bought a big pile of insulation:
[img]  [/img]
25mm for the floor, 40mm for the ceiling, 50mm for the walls. Cosy 🙂 Here's the insulated floor:
[img]  [/img]
Then the ply can go back down and we can mock up the washroom:
[img]  [/img]
and mark out where the kitchen's going:
[img]  [/img]
Around this time we also fitted a cheap ebay reversing camera:
[img]  [/img]
It's a fairly mad wide angle, you can actually see the top corners of the van in the screen, which is stuck to the windscreen pretending to be a mirror:
[img]  [/img]
Yes, the camera needs adjusting so the picture's actually level. Also it distorts quite a lot at the edges, my guttering's not that bad... Camera and screen are hooked into a spare switched live in the fusebox, so they're on all the time the ignition's on. You could piggyback off the reversing lights so they're only on when reversing, but I decided it's handy to be able to see behind when driving.
[img]
Oops, mucked up a pic link -- here are the water tanks underneath:
[img] [/img]
Vehicle electrics scare me
Fortunately I don't need to mess with them too much. Camera feed just involved sticking a spade connector into the front of the fusebox (where a fuse would normally go) and adding an in-line fuse holder to the wire. Then earth the -ve wire to a handy bit of bodywork. We'll gloss over the malfunctioning bypass relay in the towbar wiring that allows everything to work except one indicator -- it's currently unplugged pending further investigation.
Best thread ever... Its like being in an episode of The A-Team. Keep up the good work and posting pictures
dux - Member
Best thread ever..
+1,000,000,000
Wish I had the tools, skills, know-how and time to do something just like this
C'mon Mike, we're waiting for the next installment!
More coming when I get home to a proper computer 🙂
Time is the hard one. All the rest can be acquired as you go along 😉
Great project. I'm very envious but can't do anything like that here (Spain) as it's almost impossible to change a vehicle from original spec. The easiest way around is to build everything removable for the biannual "mot" ; you actually see people pulling out all the woodwork in the testing station carpark.
+1 on the great project, I love threads like this!
Spain - it doesn't look that complicated to pass the ITV (Spanish MOT) with a modified van, just (potentially) expensive and tedious.
... but the removing bits before heading to the ITV(MOT) is pretty common, I've seen it loads with motorbikes 🙂
Great project. I'm very envious but can't do anything like that here (Spain) as it's almost impossible to change a vehicle from original spec. The easiest way around is to build everything removable for the biannual "mot" ; you actually see people pulling out all the woodwork in the testing station carpark.
Thinking laterally, does it have to be original factory spec, or spec when registered in Spain? Could you get someone in France to modify a van then register it across the border once done?
Thinking laterally, does it have to be original factory spec, or spec when registered in Spain? Could you get someone in France to modify a van then register it across the border once done?
No - after 6 months you have to register the car in Spain, and at that point you have to pass the test - and that means having various bits of paperwork in order...
Not sure how they could tell if your car has been in Spain more than 6 months, though.
Edit: applies to vans / motorhomes, too!
Great thread, really interesting to read.
Mike, I like the way you make everything sound so easy. "yeah cut a hole over here ... put a bolt in there ... done!" 🙂
Glad I found this thread, have wondered about a conversion in the past, this is great inspiration!
jairaj: I'm skipping the parts about the hours of research, thinking, scribbling, measuring and staring at things with a mug of tea in hand because it's not that interesting 😉
Apologies for tardiness of updating, have been out and about and pesky Actual Paid Work keeps getting in the way. Will have more very soon, stay tuned 🙂
Right, finally, here we are again. This is, er, early March sometime, maybe. A while back, anyway. Van still capable of carrying big piles of Celotex:
[img]  [/img]
Which gradually got cut up and stuck to the sides:
[img]  [/img]
We used expanding PU foam out of a gun to stick it up, much more controllable than the aerosol stuff and you can also not use it for a few days and come back to it rather than having half a can you just have to chuck away.
Next up, the toilet. Got a second-hand cassette toilet out of a caravan, which I must say was impressively clean. Which is good, because the waste tank came out of the wrong side and had to be reversed by taking out various spouts and putting them back in each other's holes:
[img]  [/img]
Then position the loo against a mocked-up wall to see where the hatch needs to be:
[img]  [/img]
Although there aren't many options due to the structure of the van -- it has to go exactly here:
[img]  [/img]
So actually the exact position of the loo is governed by the location of the hatch rather than the other way around. The loo has to be raised off the floor slightly to avoid the hatch going through the actual sill. Pull the plastic panel off the outside (the hatch will slightly overlap this):
[img]  [/img]
Then it's pretty much like doing a window. Pilot hole from the inside so you can see where you are and mark out from there:
[img]  [/img]
Holesaw, jigsaw, you know the score:
[img]  [/img]
And from the inside -- not much margin for error (strayed slightly onto a double-skinned bit, but not a problem):
[img]  [/img]
Offer up the door:
[img]  [/img]
The waste tank can then be extracted from the van like so:
[img]  [/img]
Added a timber frame on the inside to give the screws something to hold on to. The various awkward shapes meant some rather fascinating bits of wood:
[img]  [/img]
You may be thinking that a slightly tatty, off-white door in a blue van is going to look a bit rubbish. And you'd be right. Fortunately you can take the door apart and remove the panel. Dig out a bit of handy blue-painted steel from a previous window hole:
[img]  [/img]
Draw around the white bit and cut out:
[img]  [/img]
Get some plastic primer and suitable paint and spray up the frame and surround:
[img]  [/img]
Put it all back together again:
[img]  [/img]
And put in the side of the van:
[img]  [/img]
To finish off, seal around the edge with Sikaflex, trim a bit off the top edge of the exterior trim panel and put that back on. BOSH:
[img]  [/img]
That was one of the last substantial holes in the side of the van. But not the very last...
Adds Mike_D to the list of folk on here who make me feel inadequate 😡
😀